1. Introducere
The CamScanner P1 Pro is a portable thermal printer designed for convenient, ink-free printing of documents up to US Letter size (8.5 x 11 inches). It offers versatile connectivity options, including Bluetooth for mobile devices and USB for computers, making it suitable for various environments such as home, office, and travel.
Key features include 300 dpi high-definition output for clear black-and-white prints, a 2600mAh built-in battery for extended use, and support for both roll and folded thermal paper. The printer operates without ink or toner, reducing ongoing costs and maintenance.
2. Ce se află în cutie
Verificați dacă toate următoarele articole sunt incluse în pachetul produsului dumneavoastră:
- 1x Portable Printer
- 1 x Geanta de depozitare a flanelelor
- 1x US Letter Size Thermal Roll Paper (inside the Printer)
- 1x cablu de încărcare USB-C
- 1x Manual de utilizare

Image: The package contents include the CamScanner P1 Pro printer, a flannel storage bag, a roll of thermal paper, a USB-C charging cable, and a user manual.
3. Configurare
3.1. Încărcarea hârtiei
The CamScanner P1 Pro supports both roll and folded thermal paper. Ensure you use CamScanner-certified thermal paper for optimal results.
Loading Roll Paper:
- Press the two open cover buttons located on the sides of the printer to open the top cover.
- Insert the thermal paper roll into the designated compartment, ensuring the printing side (usually the smoother side) faces upwards.
- Pull a small length of paper out through the output slot.
- Închideți capacul superior până când se fixează în siguranță în poziție cu un clic.

Image: The CamScanner P1 Pro printer with its top cover open, illustrating the correct placement of a thermal paper roll inside the compartment.
Loading Folded Paper:
- Ensure the printer's top cover is closed.
- Gently insert the first sheet of folded thermal paper into the paper entry slot at the back of the printer.
- The printer will automatically feed the paper once it detects it.

Image: The CamScanner P1 Pro printer with a stack of folded thermal paper being fed into the rear paper entry slot.
3.2. Pornire și încărcare
To power on the printer, press and hold the power button for approximately 3 seconds until the indicator light illuminates.
To charge the printer, connect the provided USB-C cable to the printer's charging port and the other end to a 5V/2A power adapter (not included). A full charge typically takes about 3 hours and provides power for up to 188 pages (at 12.5% coverage) or 24-hour standby.

Image: Close-up of the CamScanner P1 Pro printer highlighting the USB-C charging port and indicating a 2600mAh battery capacity, 3-hour full recharge time, and ability to print 200 sheets on a full charge.
3.3. Instalarea și conectarea aplicației
The CamScanner P1 Pro printer can be connected via Bluetooth to mobile devices (iOS and Android) or via USB to computers (Windows and macOS).
Pentru dispozitive mobile (Bluetooth):
- Download the CamScanner App from the App Store (iOS) or Google Play Store (Android).
- Asigurați-vă că Bluetooth este activat pe dispozitivul dvs. mobil.
- Open the CamScanner App, navigate to the printer connection section, and select your P1 Pro printer (CSTPA4300F) from the list of available devices to pair.

Image: The CamScanner P1 Pro printer wirelessly connected via Bluetooth to a smartphone displaying the CamScanner app, ready for printing.
Pentru computere (USB):
- Visit the CamScanner website (camscanner.com/download) to download and install the appropriate printer driver for your Windows or macOS operating system.
- Conectați imprimanta la computer utilizând cablul USB-C furnizat.
- Once the driver is installed and the printer is connected, it should appear as an available printer in your computer's print dialogue.
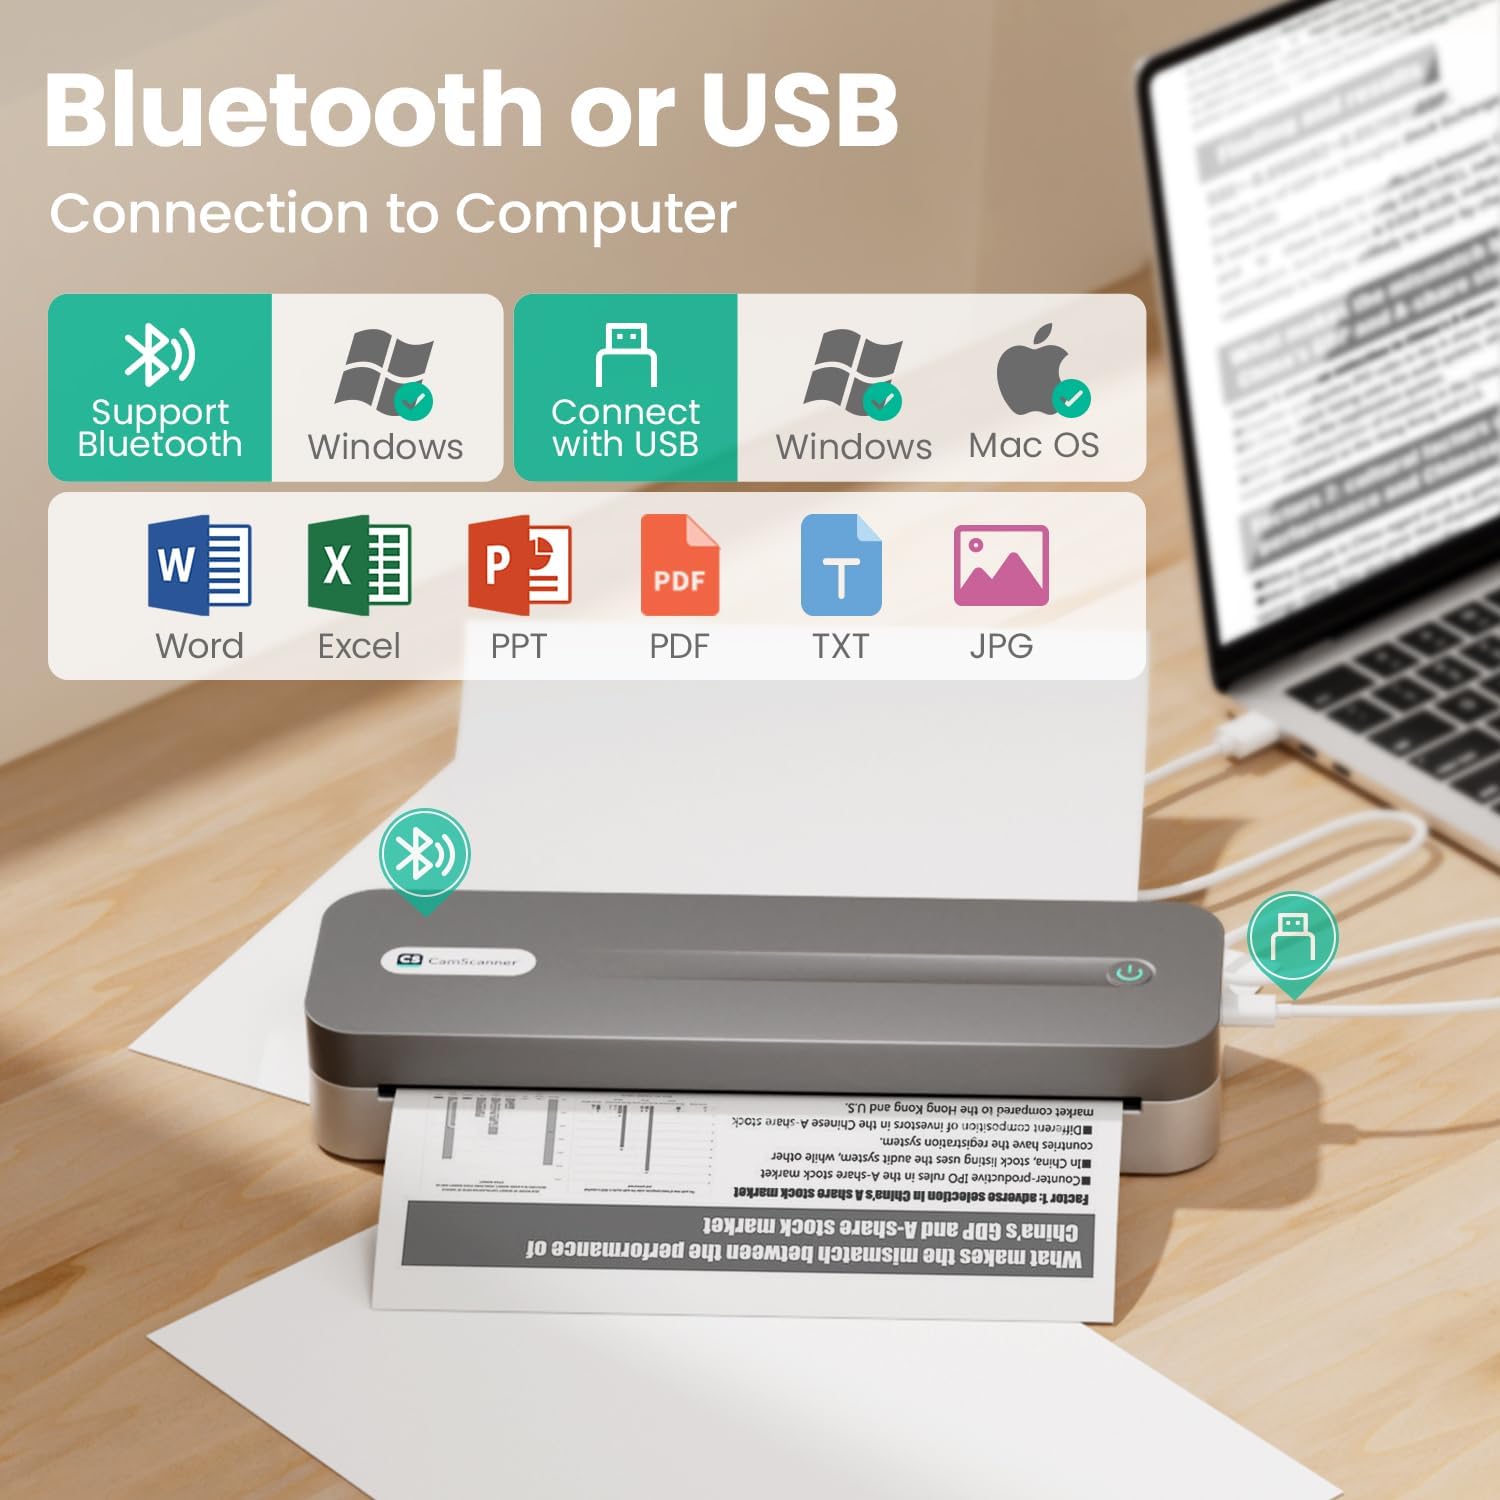
Image: The CamScanner P1 Pro printer connected via USB to a laptop, demonstrating its compatibility with various operating systems and document types.
4. Instrucțiuni de utilizare
4.1. Printing from Mobile Device
After successfully connecting your printer via Bluetooth to the CamScanner App:
- Open the CamScanner App and select the document or image you wish to print.
- Tap the 'Print' option within the app.
- Adjust print settings such as page range, number of copies, and print density (light, medium, heavy) as desired.
- Confirm your settings and tap 'Print' to send the job to the printer.
4.2. Printing from Computer
After successfully installing the driver and connecting your printer via USB to your computer:
- Deschideți documentul sau file doriți să imprimați pe computer.
- Mergi laFile' > 'Print' (or use the keyboard shortcut Ctrl+P/Cmd+P).
- In the print dialogue box, select 'CamScanner P1 Pro' (CSTPA4300F) as your printer.
- Adjust any necessary print preferences (e.g., page orientation, scaling) and click 'Print'.
4.3. Official Product Video: How to Print with CamScanner Printer
Video: This official CamScanner video demonstrates the process of printing using the CamScanner P1 Pro Thermal Printer, covering mobile and computer printing methods.
5. Întreținere
To ensure the longevity and optimal performance of your CamScanner P1 Pro Thermal Printer, follow these maintenance guidelines:
- curatenie: Regularly wipe the exterior of the printer with a soft, dry cloth. Avoid using harsh chemicals or abrasive materials.
- Îngrijirea capului de imprimare: If print quality degrades, gently clean the thermal print head with an alcohol swab. Ensure the printer is off and cooled down before cleaning.
- Depozitare hârtie: Store thermal paper in a cool, dry place away from direct sunlight and heat to prevent premature fading or damage.
- Îngrijirea bateriei: For optimal battery life, avoid fully discharging the printer frequently. Charge the device when the battery level is low.
6. Depanare
Iată soluții pentru problemele comune pe care le-ați putea întâmpina:
| Problemă | Soluţie |
|---|---|
| Poor Print Quality / Faint Prints | Adjust the print density setting in the CamScanner App (Light, Medium, Heavy). Ensure you are using CamScanner-certified thermal paper. Clean the print head if necessary. |
| Printer Not Connecting via Bluetooth | Ensure Bluetooth is enabled on your mobile device and the printer is powered on. Restart both the printer and your mobile device. Try re-pairing the device through the CamScanner App. |
| Printer Not Connecting via USB | Verify the USB cable is securely connected to both the printer and the computer. Ensure the correct printer driver is installed on your computer. Restart both the printer and the computer. |
| Blocaj de hârtie | Power off the printer. Open the top cover and carefully remove any jammed paper. Ensure paper is loaded correctly and is not wrinkled or torn. |
| Bateria nu se încarcă | Ensure you are using the original USB-C cable and a 5V/2A power adapter. Check if the charging port is clean and free of debris. If the indicator light does not turn on, charge for 1 hour and try again. |
7. Specificații
| Caracteristică | Caietul de sarcini |
|---|---|
| Numele modelului | CSTPA4300F |
| Marca | CamScanner |
| Tehnologia de imprimare | Termic |
| Tehnologia de conectivitate | Bluetooth, USB |
| Dimensiune maximă a suportului media | Scrisoare (8.5 x 11 inci) |
| Rezoluție maximă de imprimare alb-negru | 300 x 300 dpi |
| Capacitate maximă de intrare a foii | 22 (for roll paper) |
| Greutatea articolului | 1.6 lire sterline |
| Dimensiunile produsului | 10.35 x 1.81 x 3.07 inci |
| Baterie | 2600mAh (1 Nonstandard Battery included) |
| Ieșire imprimantă | Monocrom |
| Caracteristica specială | Portabil |
8. Garanție și asistență
The CamScanner P1 Pro Thermal Printer comes with a Limited Warranty. For specific terms and conditions, please refer to the warranty information provided with your product or contact CamScanner customer support.
If you require technical assistance, troubleshooting, or have questions regarding your product, please visit the official CamScanner website or contact their customer support team for further assistance.


