1. Introducere
This manual provides detailed instructions for the operation and maintenance of your KEPLUG MX9 Sunrise Alarm Clock. This device combines a digital alarm clock, a sunrise simulation wake-up light, a dimmable bedside night light, and a white noise machine with 30 soothing sounds. Please read this manual thoroughly before use to ensure proper functionality and safety.
2. Informații de siguranță
- Asigurați-vă că dispozitivul este așezat pe o suprafață stabilă, plană.
- Nu expuneți dispozitivul la apă sau umiditate excesivă.
- Folosiți doar adaptorul de alimentare și cablul furnizate.
- A nu se lăsa la îndemâna copiilor și a animalelor de companie.
- Nu încercați să dezasamblați sau să reparați dispozitivul singur. Contactați personal calificat pentru service.
- Deconectați dispozitivul în timpul furtunilor cu fulgere sau atunci când nu este utilizat pentru perioade lungi.
3. Conținutul pachetului
Verificați dacă toate articolele sunt prezente în colet:
- Ceas deșteptător KEPLUG MX9 cu răsărit de soare
- Adaptor de alimentare
- Cablu de alimentare
- Manual de utilizare (acest document)
4. Produs terminatview
Familiarize yourself with the main components and control buttons of your KEPLUG MX9 Sunrise Alarm Clock.

Imaginea 1: Față view of the KEPLUG MX9 Sunrise Alarm Clock, showing the main light dome, digital time display, and control buttons at the base.
The device features a large light dome, a digital time display, and several touch-sensitive buttons for control:
- Buton alarmă: Used to set and activate alarms.
- Butonul de timp: Used to set the current time and 12/24-hour format.
- Butonul Amânare/Luminare: Activates snooze during an alarm, or turns on/off and adjusts the night light.
- Butonul plus (+): Increases values (time, volume, brightness) or navigates options.
- Butonul minus (-): Decreases values (time, volume, brightness) or navigates options.
- Music Note Button: Selects soothing sounds or white noise.
5. Configurare
5.1 Conexiune la alimentare
- Connect the power cable to the DC input port on the back of the alarm clock.
- Conectați adaptorul de alimentare la o priză electrică standard.
- The digital display will illuminate, indicating the device is powered on.
5.2 Setarea orei curente
- Țineți apăsat butonul Butonul de timp for 3 seconds to enter time setting mode. The hour digits will flash.
- Utilizați Plus (+) or Minus (-) Buttons pentru a regla ora.
- Apăsați tasta Butonul de timp again to confirm the hour and move to minute setting. The minute digits will flash.
- Utilizați Plus (+) or Minus (-) Buttons pentru a regla minutul.
- Apăsați tasta Butonul de timp a third time to confirm the minutes and select 12-hour or 24-hour format.
- Utilizați Plus (+) or Minus (-) Buttons pentru a selecta formatul de timp preferat.
- Apăsați tasta Butonul de timp o ultimă dată pentru a ieși din modul de setare a orei.
6. Instrucțiuni de utilizare
6.1 Setting an Alarm (Sunrise Simulation & Sound)
The KEPLUG MX9 allows you to set multiple alarms with customizable sunrise simulation and sound options.
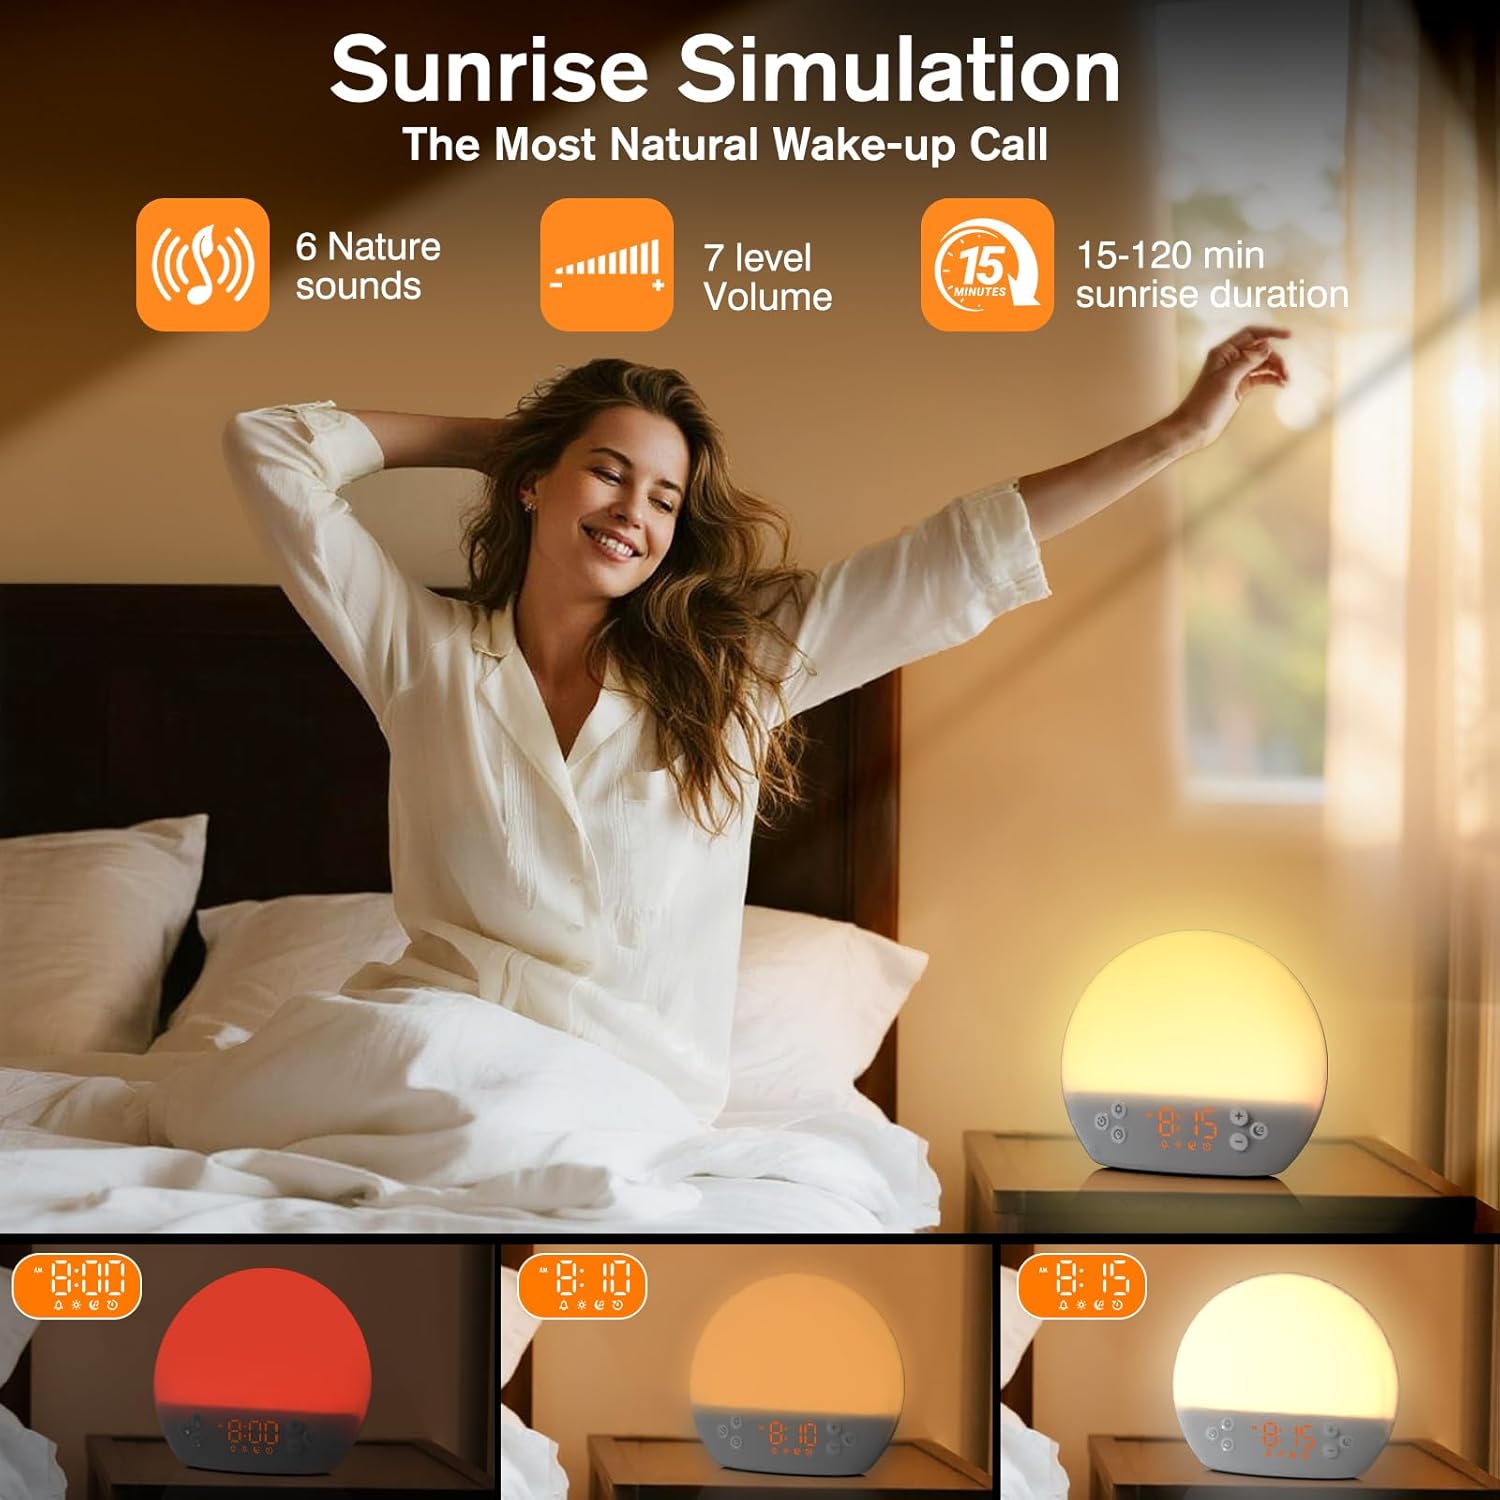
Image 2: Illustration of the sunrise simulation feature, where the light gradually brightens over a set period, mimicking a natural sunrise.
- Apăsați tasta Buton de alarmă to select an alarm slot (e.g., Alarm 1, Alarm 2).
- Țineți apăsat butonul Buton de alarmă for 3 seconds to enter alarm setting mode. The alarm hour digits will flash.
- Utilizați Plus (+) or Minus (-) Buttons pentru a seta ora de alarmă dorită.
- Apăsați tasta Buton de alarmă to confirm the hour and set the minutes.
- Utilizați Plus (+) or Minus (-) Buttons pentru a seta minutul de alarmă dorit.
- Apăsați tasta Buton de alarmă to confirm minutes and set the sunrise duration (15-120 minutes). This is the time before the alarm sound when the light will gradually brighten.
- Utilizați Plus (+) or Minus (-) Buttons to select the sunrise duration.
- Apăsați tasta Buton de alarmă to confirm duration and select the wake-up sound.
- Utilizați Plus (+) or Minus (-) Buttons to cycle through the available wake-up sounds (e.g., nature sounds, melodies).
- Apăsați tasta Buton de alarmă to confirm the sound and set the alarm volume.
- Utilizați Plus (+) or Minus (-) Buttons to adjust the alarm volume (7 levels).
- Apăsați tasta Buton de alarmă one last time to save the alarm settings and activate the alarm. An alarm icon will appear on the display.
6.2 Funcția Snooze
Când sună o alarmă, apăsați butonul Butonul Amânare/Luminare to activate the snooze function. The alarm will pause for 9 minutes and then sound again. You can snooze multiple times.
6.3 Turning Off an Alarm
To turn off a sounding alarm, press any button other than the Butonul Amânare/Luminare. To deactivate an alarm completely, press the Buton de alarmă until the alarm icon disappears from the display.
6.4 Night Light / Bedside Lamp Funcţie
The device can function as a dimmable night light with various colors.
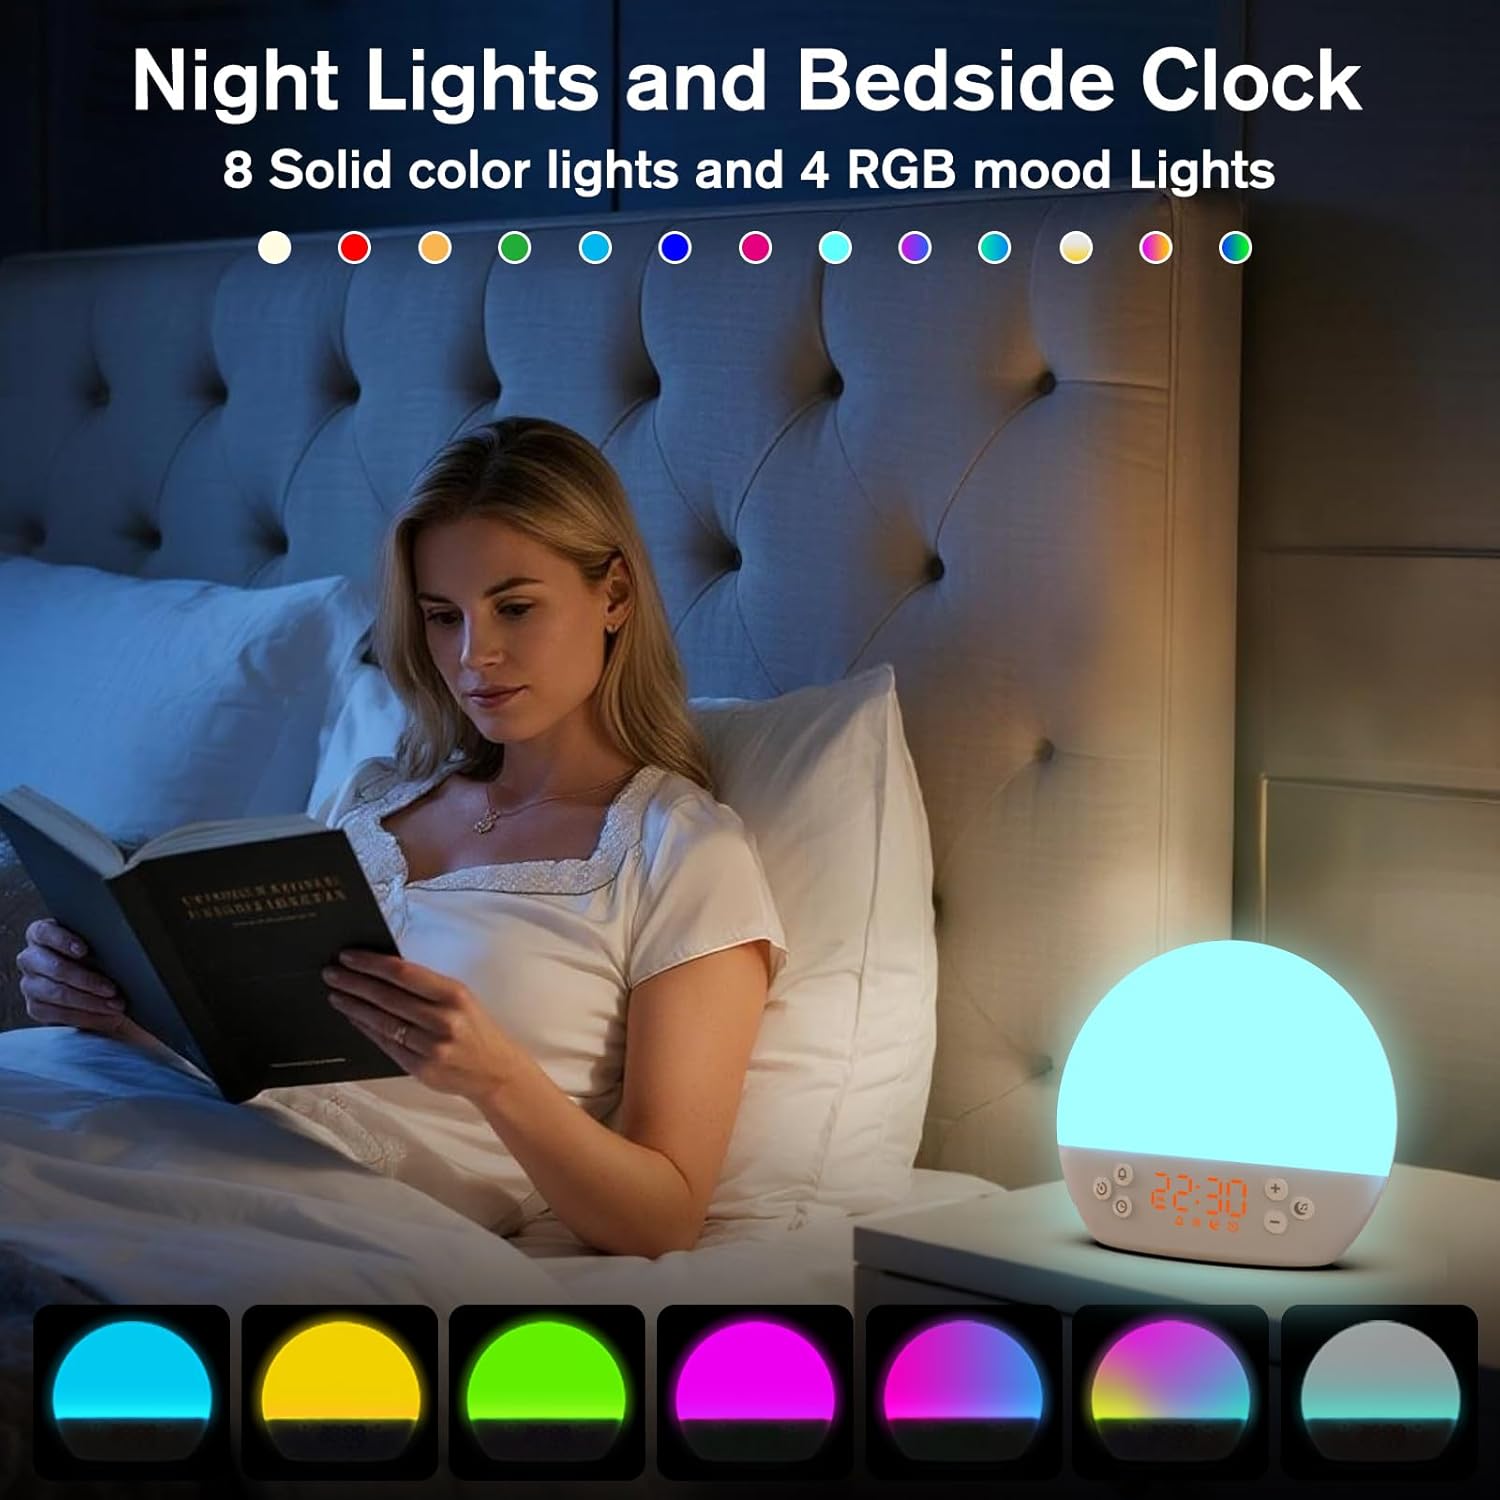
Image 3: The alarm clock used as a bedside lamp, displaying various solid colors and mood lighting options.
- Apăsați tasta Butonul Amânare/Luminare once to turn on the light.
- Apăsați tasta Butonul Amânare/Luminare repeatedly to cycle through different solid colors (8 options) and RGB mood lights (4 options).
- To adjust the brightness of the selected light, press and hold the Butonul Amânare/Luminare, apoi utilizați Plus (+) or Minus (-) Buttons to increase or decrease brightness. Release the Butonul Amânare/Luminare când este gata.
- Țineți apăsat butonul Butonul Amânare/Luminare din nou pentru a stinge lumina.
6.5 White Noise Machine & Soothing Sounds
The device offers 30 soothing sounds for relaxation or sleep aid.

Image 4: Visual representation of the 30 smooth sounds for sleep, including white noise, nature sounds, and lullabies.
- Apăsați tasta Music Note Button to turn on the sound machine. It will start playing the last selected sound.
- Apăsați tasta Music Note Button repeatedly to cycle through the 30 available sounds.
- Utilizați Plus (+) or Minus (-) Buttons pentru a regla volumul sunetului.
- To set a timer for the sound playback, press and hold the Music Note Button. The timer options (e.g., 15 min, 30 min, 60 min, continuous) will appear. Use the Plus (+) or Minus (-) Buttons to select a duration. The sound will automatically turn off after the selected time.
- Țineți apăsat butonul Music Note Button din nou pentru a opri aparatul de sunet.
6.6 Simulare apus de soare (ajutor pentru somn)
The sunset simulation feature gradually dims the light and can play soothing sounds to help you fall asleep.
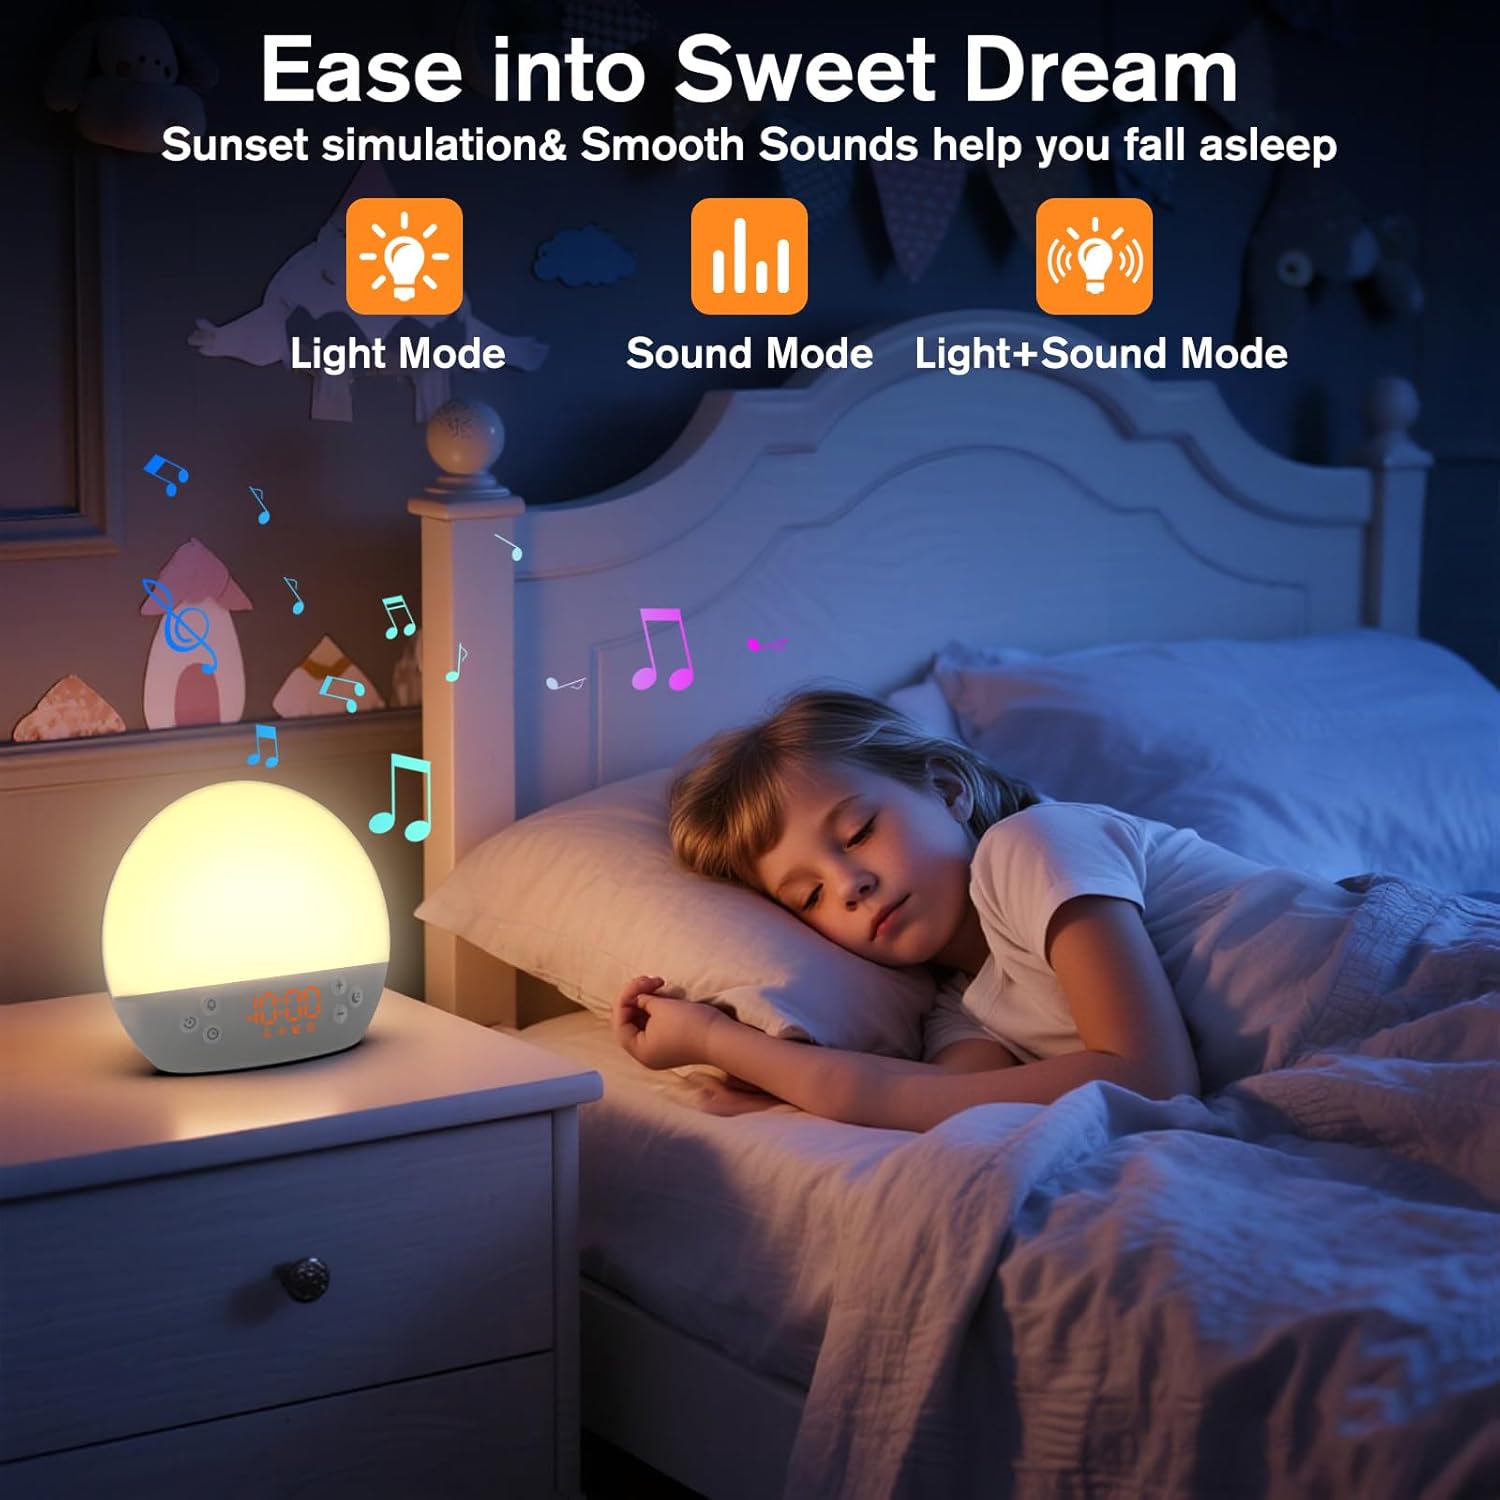
Image 5: The alarm clock in sunset simulation mode, providing a calming light and sound environment to aid sleep.
- To activate sunset simulation, press and hold the Butonul de timp until the sunset icon appears.
- Utilizați Plus (+) or Minus (-) Buttons to set the duration of the sunset simulation (e.g., 15, 30, 60 minutes).
- Apăsați tasta Butonul de timp to confirm the duration. You can then choose to have light only, sound only, or both light and sound.
- Utilizați Plus (+) or Minus (-) Buttons to select the desired mode (Light Mode, Sound Mode, Light+Sound Mode).
- If Light+Sound Mode is selected, you can choose a specific soothing sound and adjust its volume.
- Apăsați tasta Butonul de timp again to start the sunset simulation. The light will gradually dim, and sounds will fade out over the set duration.
6.7 Reglarea luminozității afișajului
The brightness of the digital time display can be adjusted to your preference.
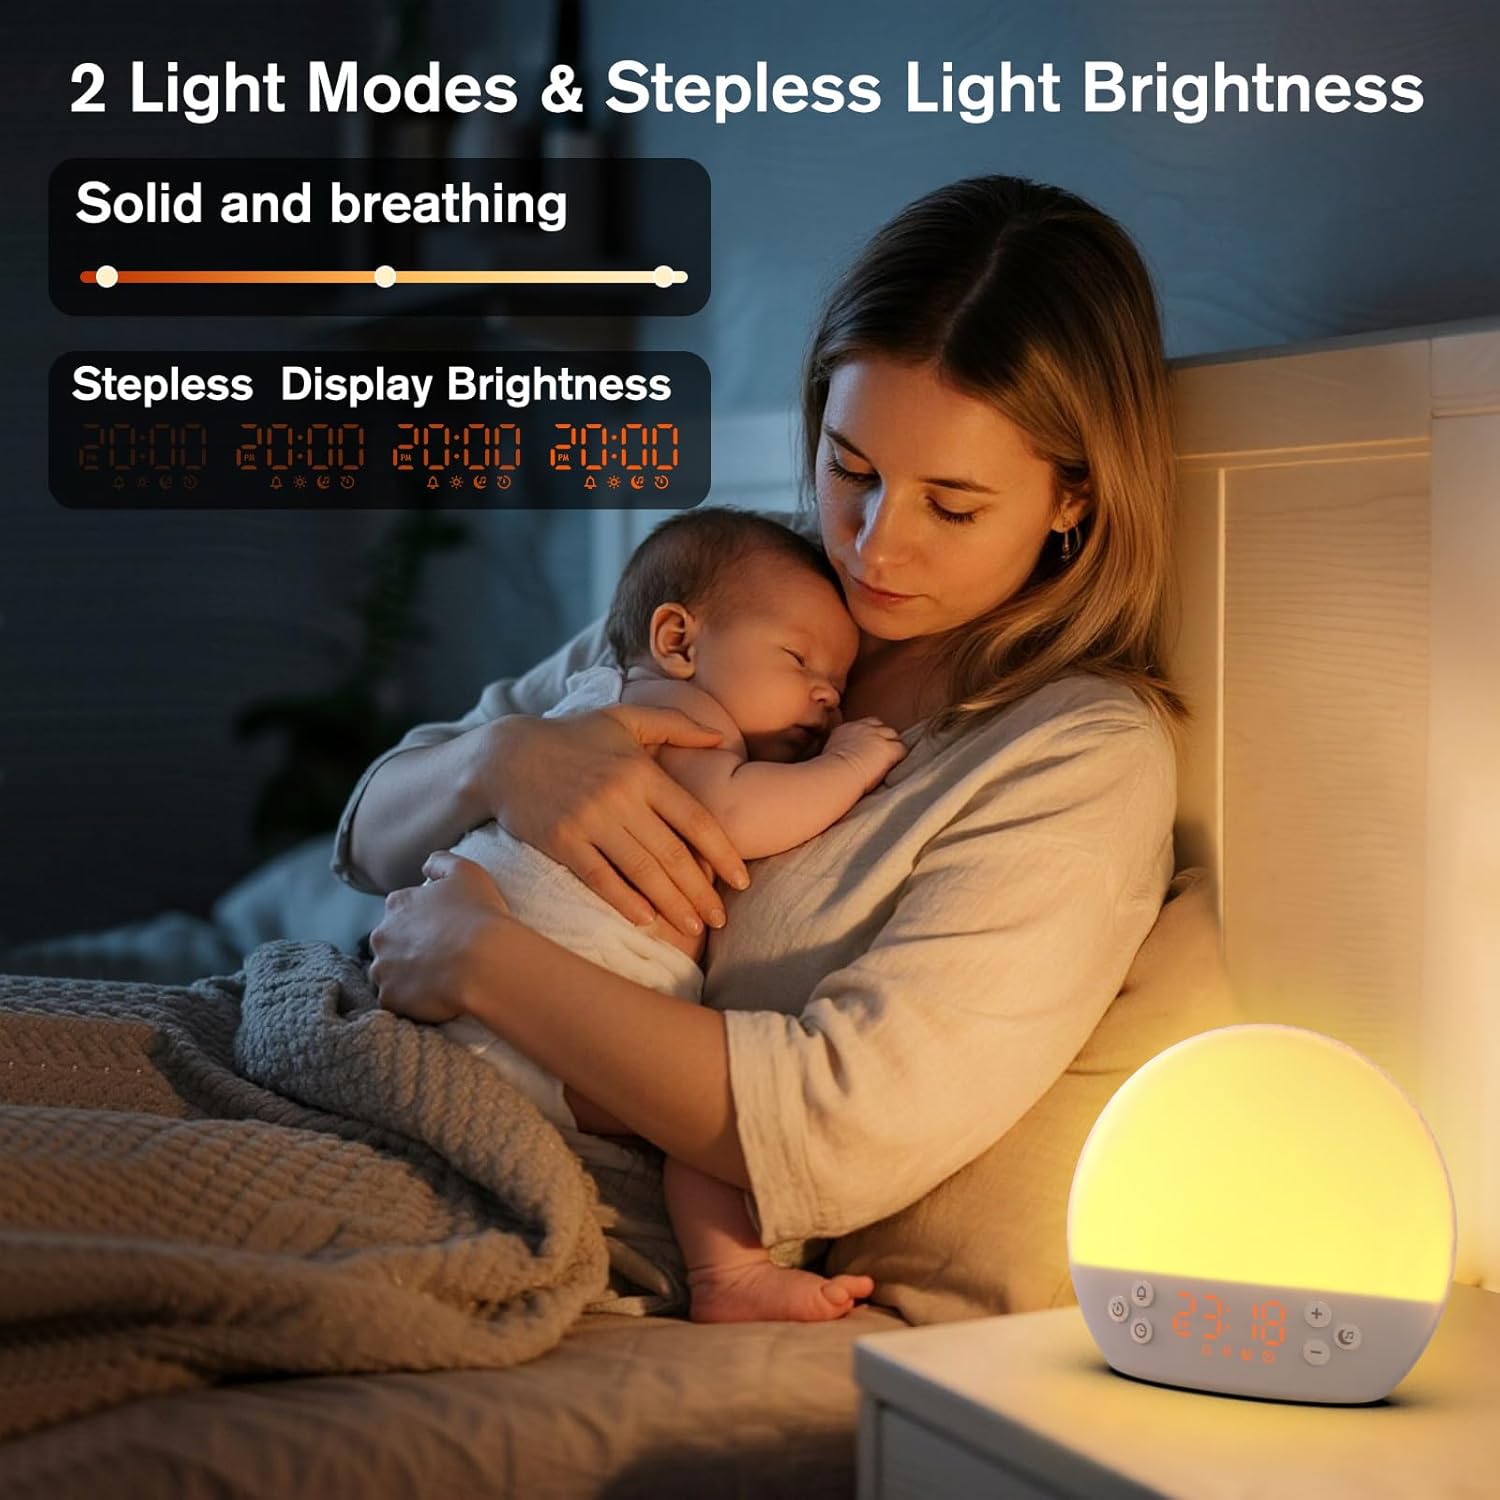
Image 6: The alarm clock demonstrating stepless display brightness adjustment, from very dim to bright.
Pentru a regla luminozitatea afișajului, apăsați scurt Butonul de timp (do not hold). Each press will cycle through different brightness levels (e.g., bright, medium, dim, off). Select the level that suits your environment.
7. Întreținere
- curatenie: Unplug the device before cleaning. Use a soft, dry cloth to wipe the surface. Do not use abrasive cleaners or solvents.
- Depozitare: Dacă nu este utilizat pentru o perioadă lungă de timp, deconectați dispozitivul și depozitați-l într-un loc răcoros și uscat.
8. Depanare
| Problemă | Cauza posibila | Soluţie |
|---|---|---|
| Dispozitivul nu pornește. | Cablul de alimentare nu este conectat corect sau priza este defectă. | Verificați conexiunea cablului de alimentare. Încercați o altă priză. |
| Alarma nu sună. | Alarm not activated or volume is too low. | Ensure the alarm icon is visible on the display. Increase alarm volume during setup. |
| Lumina nu se aprinde. | Light function is off or brightness is set to minimum. | Apăsați tasta Butonul Amânare/Luminare to turn on. Adjust brightness using Plus (+) or Minus (-) Buttons while holding the Butonul Amânare/Luminare. |
| Sounds are not playing. | Sound machine is off or volume is too low. | Apăsați tasta Music Note Button to turn on. Increase volume using Plus (+) Buton. |
| Time display is too bright/dim. | Setarea luminozității afișajului necesită ajustare. | Apăsați scurt pe Butonul de timp to cycle through display brightness levels. |
9. Specificații
| Caracteristică | Detaliu |
|---|---|
| Numele modelului | MX9 |
| Marca | KEPLUG |
| Material | Plastic |
| Culoare | Alb |
| Sursa de alimentare | Electric cu fir |
| Greutatea articolului | 258 de grame (9.1 uncii) |
| Dimensiunile produsului | 2.36 x 5.59 x 6.3 inchi (6 x 14.2 x 16 cm) |
| Numărul de surse de lumină | 2 |
| Caracteristica specială | Volum reglabil |
| Sunrise Simulation Duration | 15-120 minute |
| Sunete liniștitoare | 30 opțiuni |
| Niveluri de volum al alarmei | 7 nivele |
10. Garanție și asistență
Your KEPLUG MX9 Sunrise Alarm Clock is covered by a standard manufacturer's warranty. For specific warranty details, please refer to the product packaging or contact KEPLUG customer support. If you encounter any issues not covered in the troubleshooting section, or require further assistance, please reach out to our customer service team through the retailer where you purchased the product or visit the official KEPLUG website-ul pentru informații de contact pentru asistență.


