Introducere
This manual provides detailed instructions for the setup, operation, and maintenance of your Ratakee Digital Alarm Clock Radio H249. Please read this manual thoroughly before using the device to ensure proper functionality and to maximize your user experience. This device features a large LED display, dual alarms, AM/FM radio with presets, adjustable alarm volume, sleep timer, and display dimmer.

Imagine: față view of the Ratakee Digital Alarm Clock Radio H249, displaying the time 12:00 PM in blue LED digits.
Caracteristicile produsului S-au terminatview
- Afișaj LED mare: 6.6-inch screen with 1.6-inch blue LED numbers for clear visibility.
- Alarme duble: Set two independent alarms with options for beep or radio wake-up.
- Radio AM/FM: Digital tuning with frequency ranges FM 87.5-108MHz and AM 520-1710KHz.
- Presări ale stației: Save up to 20 AM and 20 FM stations for quick access.
- Volum reglabil al alarmei: Alarm volume can be set from levels 5 to 15.
- Temporizator de somn: Program the radio to turn off automatically after 10-90 minutes.
- Dimmer pentru afișaj: Four brightness levels for the LED display.
- Funcție de amânare: Provides an extra 9 minutes of sleep.
- Baterie de rezerva: 2 AAA batteries (not included) preserve time and alarm settings during power outages.
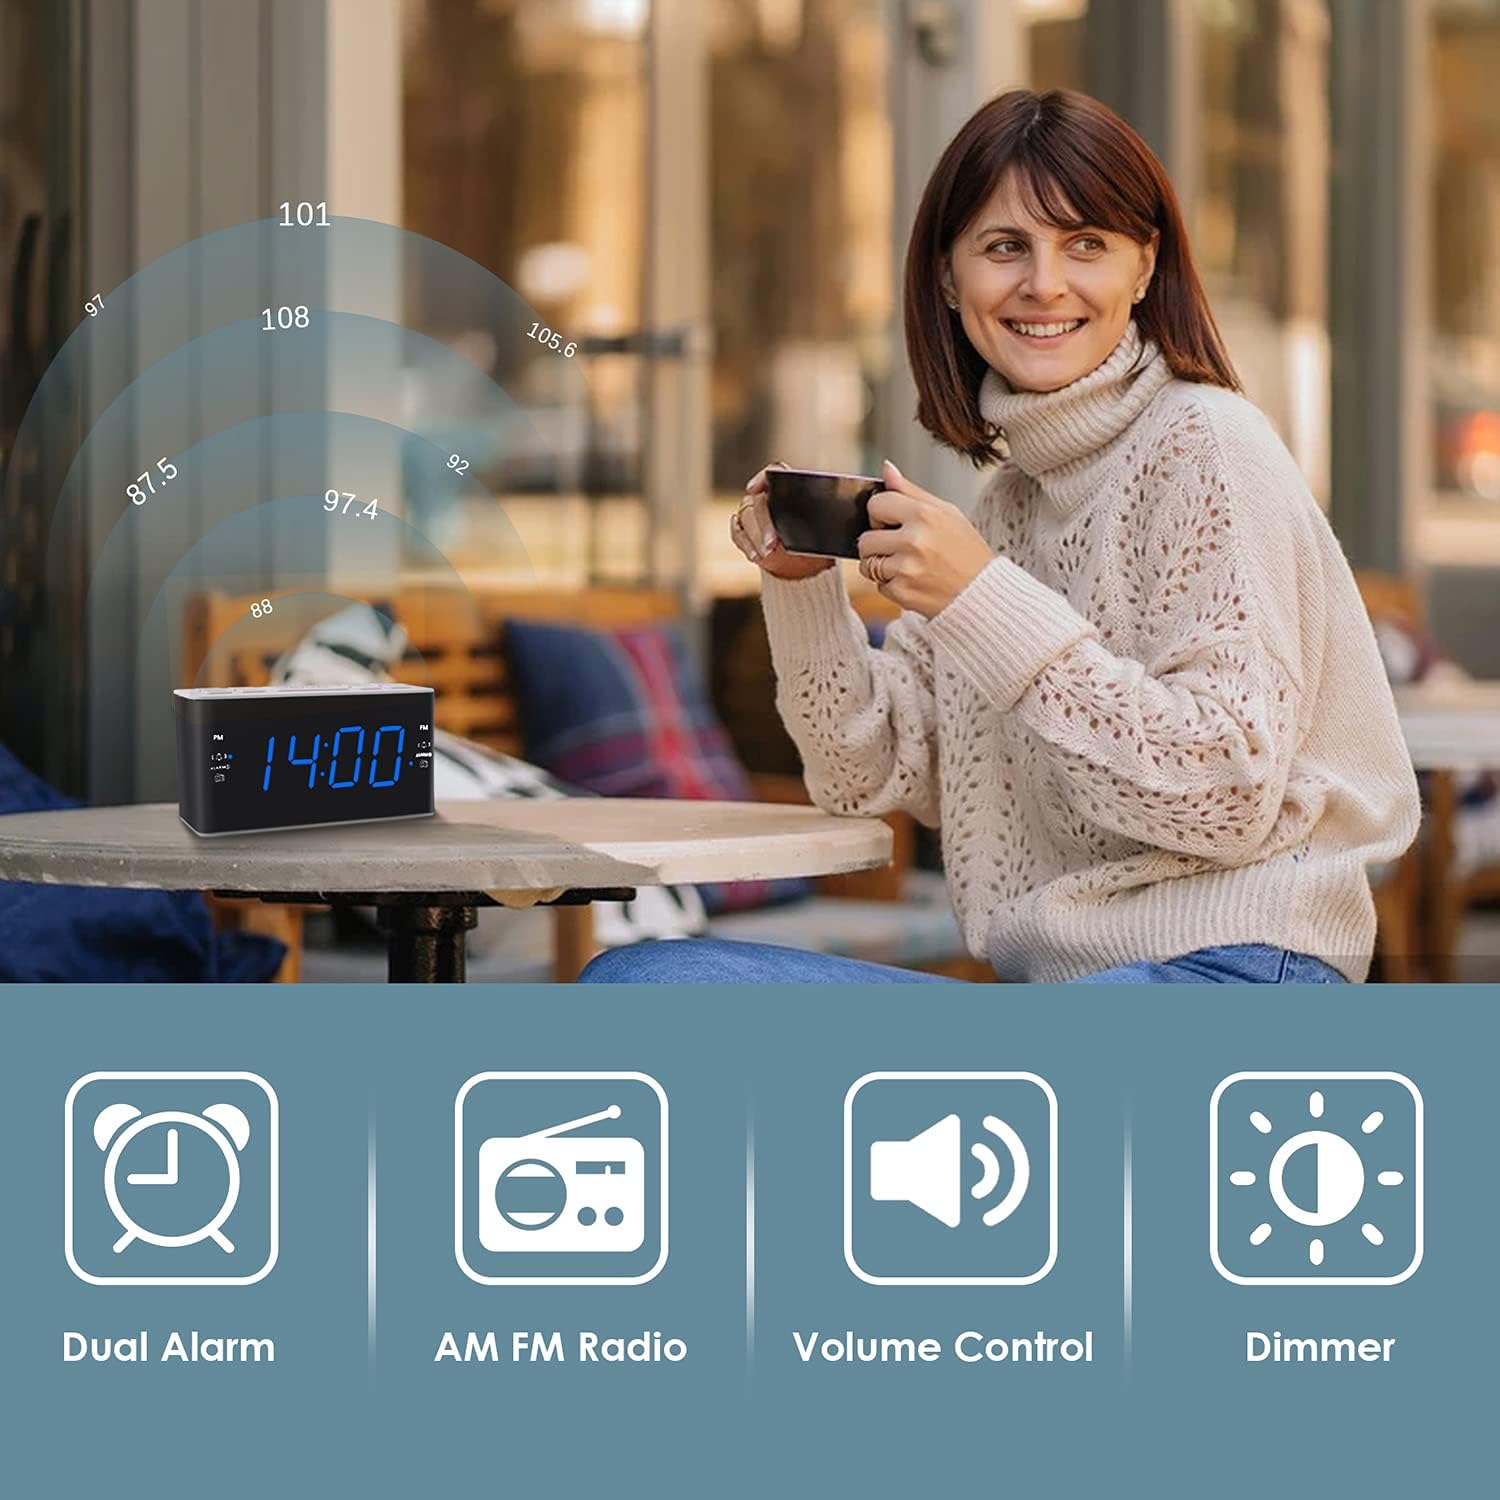
Image: Visual representation of the alarm clock's main features: Dual Alarm, AM FM Radio, Volume Control, and Dimmer, with a woman enjoying music in the background.
Înființat
1. Conexiune la alimentare
The Ratakee H249 operates on AC power. Connect the provided power cord to the clock radio and then plug it into a standard AC 120V 60Hz wall outlet. The display will illuminate once power is supplied.
2. Instalarea bateriei de rezervă
For battery backup, insert two (2) AAA batteries (not included) into the battery compartment located on the bottom of the unit. The battery backup maintains time and alarm settings during a power interruption but does not power the clock display or radio functions.
3. Setarea inițială a orei
- Țineți apăsat butonul REGLEAZA ORA Cifrele orei vor începe să clipească.
- Utilizați VOL+ or VOL- buttons to adjust the hour. Pay attention to the PM indicator if setting a PM time.
- Apăsați tasta REGLEAZA ORA Apăsați din nou butonul. Cifrele minutelor vor clipi.
- Utilizați VOL+ or VOL- butoane pentru reglarea minutelor.
- Apăsați tasta REGLEAZA ORA Apăsați butonul încă o dată pentru a confirma și a ieși din modul de setare a orei.
Instrucțiuni de operare
1. Setarea alarmelor (Alarma 1 și Alarma 2)
The clock radio features two independent alarms. The process is identical for both.
- Țineți apăsat butonul ALARM1 (sau ALARM2) button. The alarm hour digits will flash.
- Utilizați VOL+ or VOL- pentru a seta ora dorită a alarmei. Observați indicatorul PM.
- Apăsați tasta ALARM1 (sau ALARM2) button again. The alarm minute digits will flash.
- Utilizați VOL+ or VOL- butoane pentru a seta minutele dorite ale alarmei.
- Apăsați tasta ALARM1 (sau ALARM2) din nou pentru a selecta sursa alarmei:
- semnal sonor: A standard alarm tone.
- Radio: Wakes you up to the last tuned radio station.
- Apăsați tasta ALARM1 (sau ALARM2) button one more time to confirm and activate the alarm. An alarm icon will appear on the display.
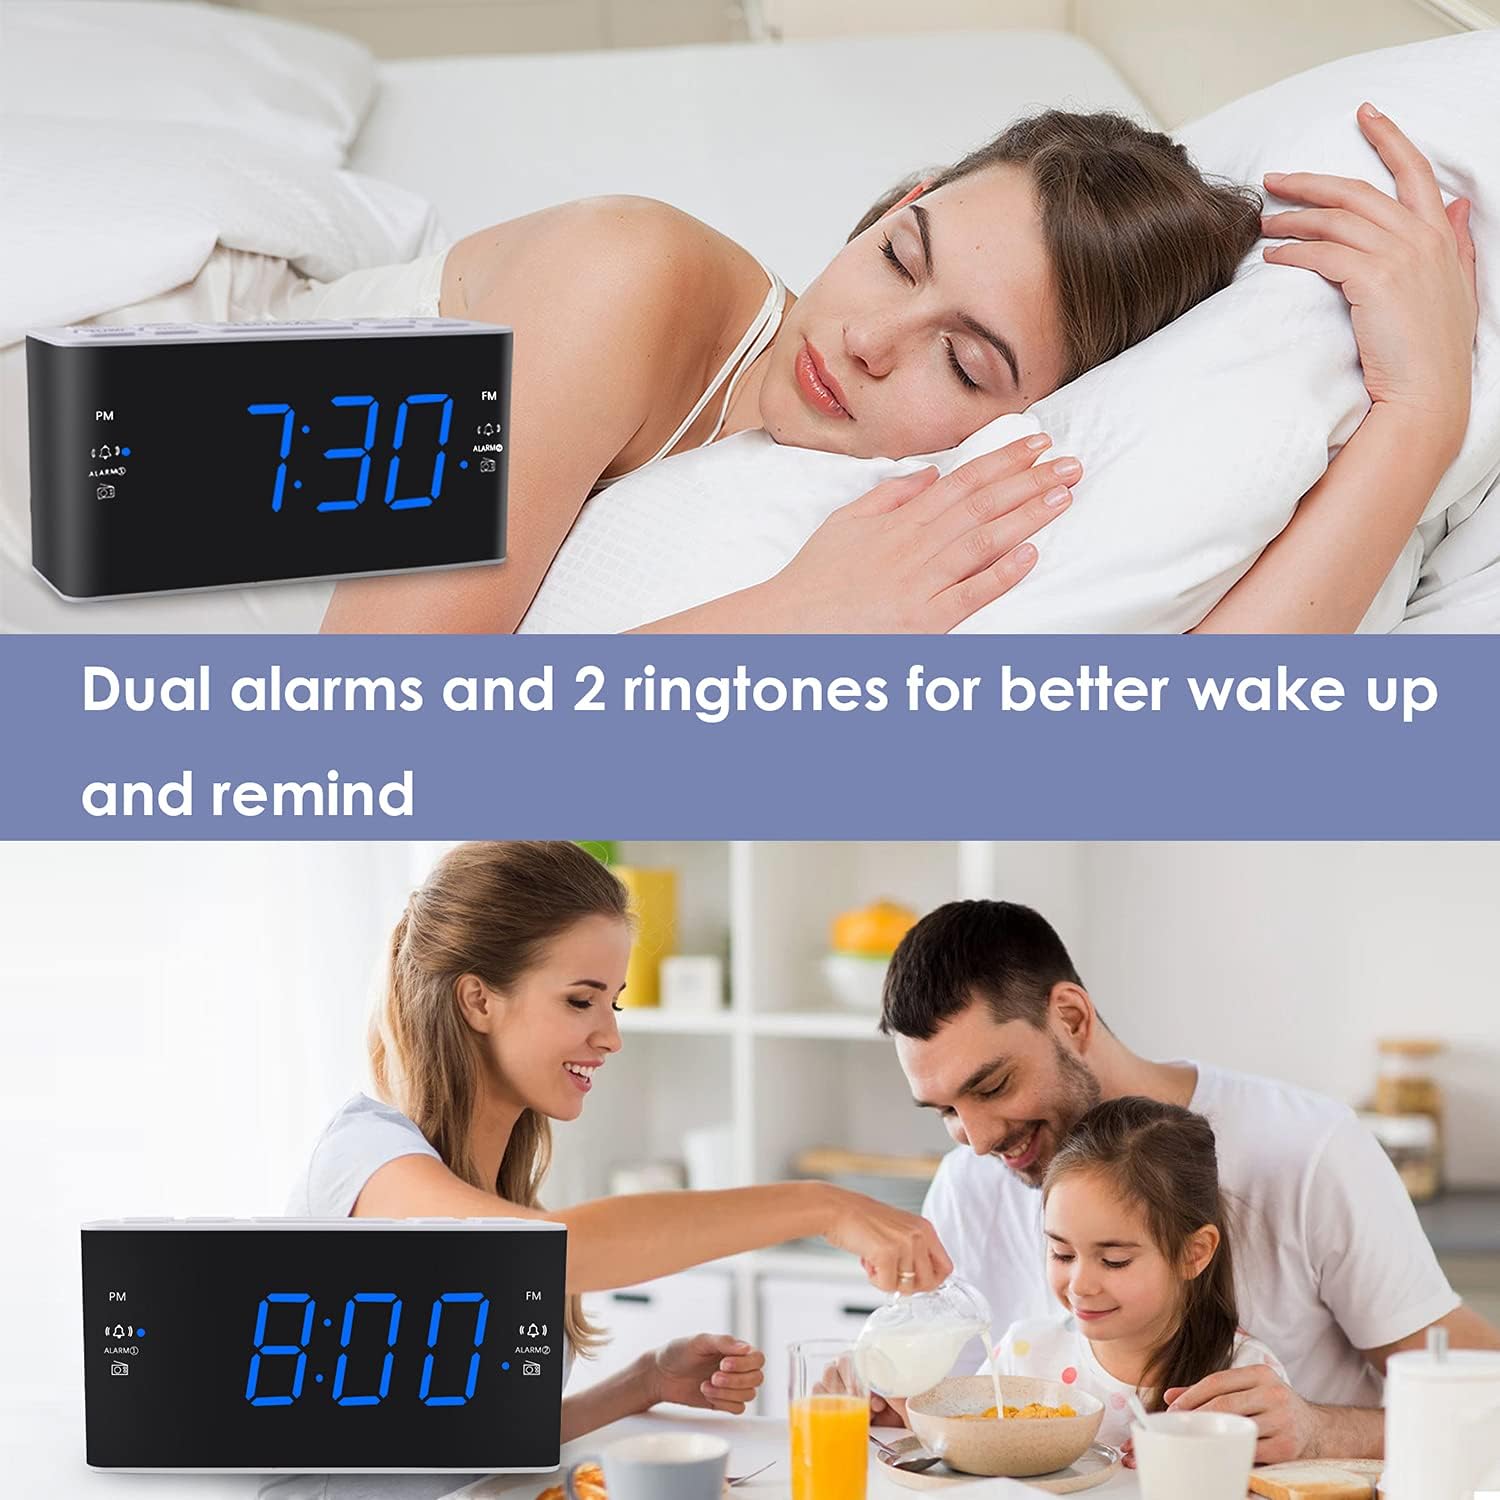
Image: The alarm clock displaying 7:30, with icons indicating dual alarms are set, positioned on a bedside table next to a person waking up.
2. Reglarea volumului alarmei
When an alarm is sounding, use the VOL+ or VOL- buttons to adjust the alarm volume between levels 5 and 15.
3. Funcția de amânare
Când sună o alarmă, apăsați butonul mare SNOOZE / DIMMER button to temporarily silence the alarm for 9 minutes. The alarm will sound again after 9 minutes. This can be repeated up to 5 times. To cancel the alarm completely, press any other button (e.g., ALARM1, ALARM2, RADIO).
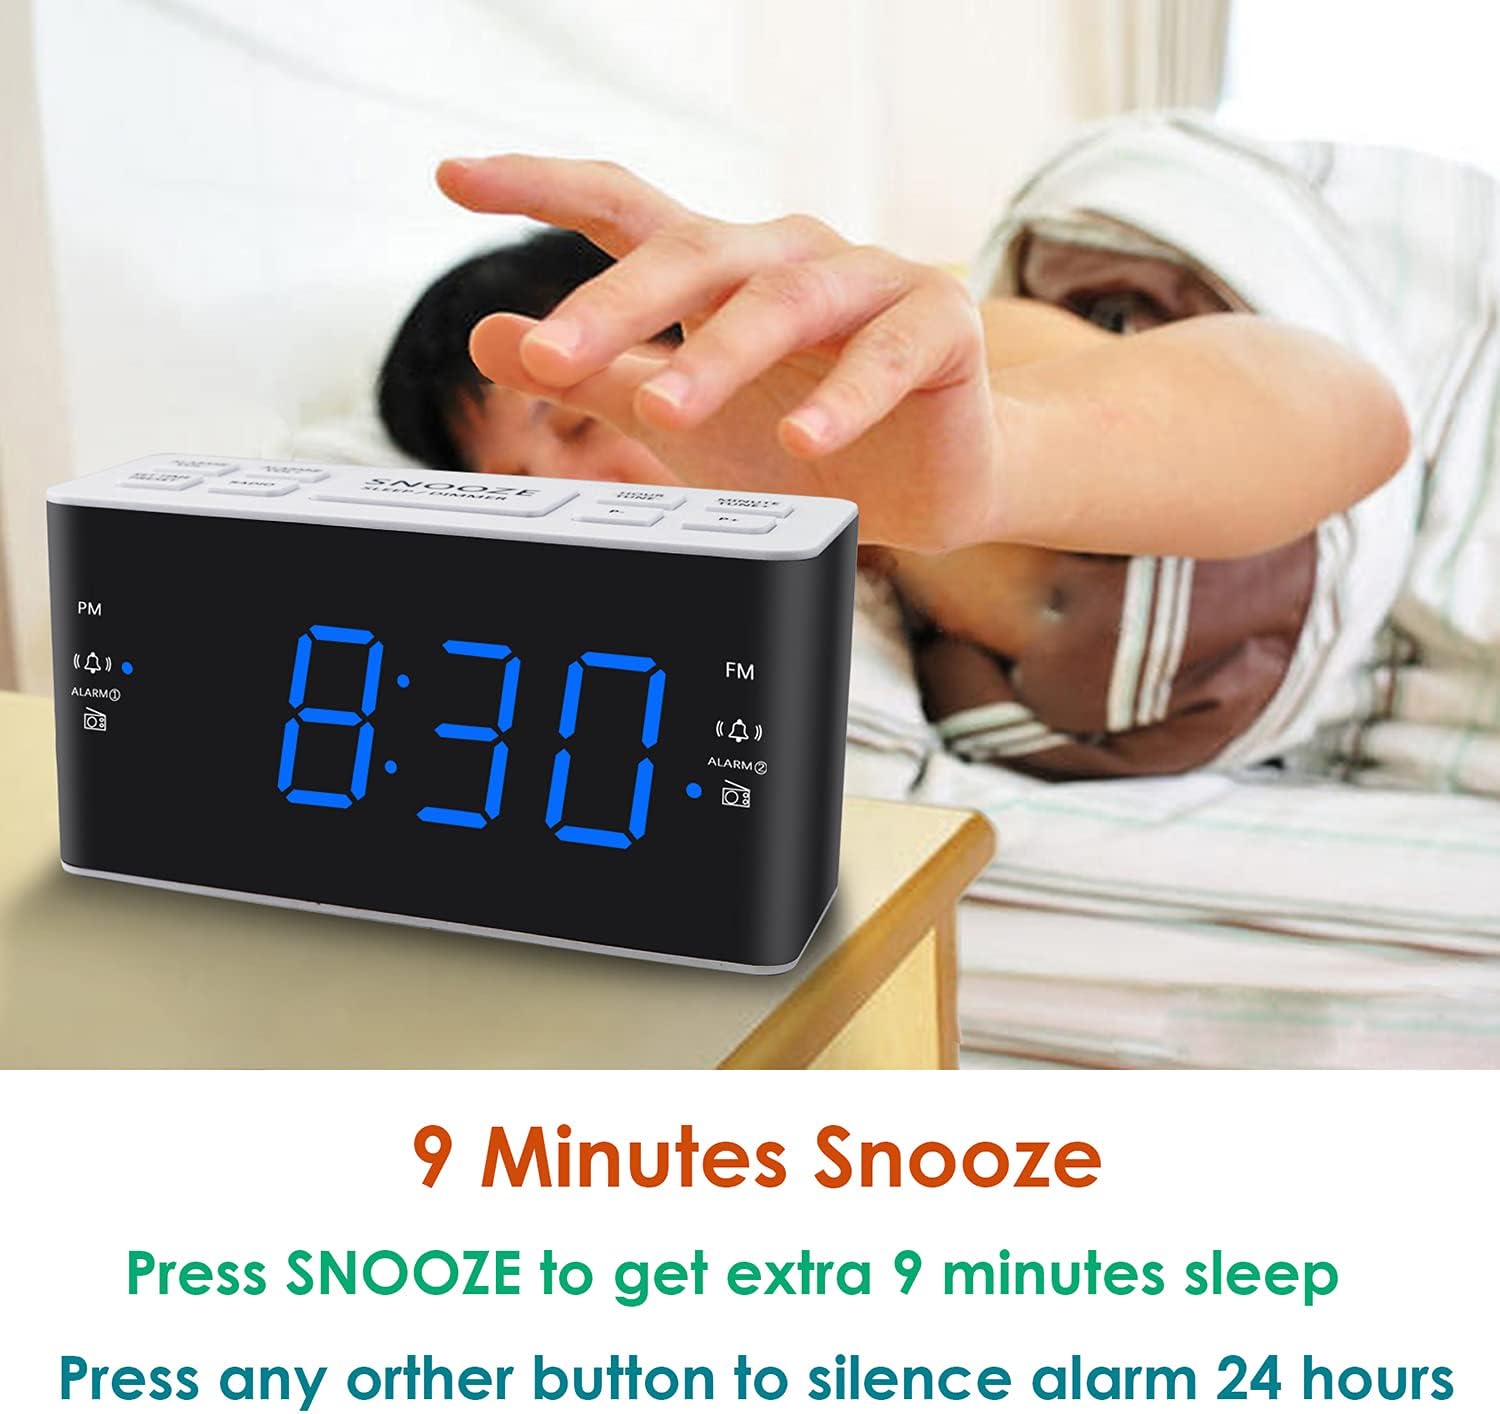
Image: A hand reaching to press the SNOOZE button on the alarm clock, which shows 8:30, illustrating the snooze function.
4. Funcționarea radioului AM/FM
- Apăsați tasta RADIO buton pentru a porni sau opri radioul.
- To tune, press the VOL+ or VOL- buttons to manually adjust the frequency. Press and hold these buttons for automatic scanning to the next available station.
- Setarea presetărilor: While listening to a desired station, press and hold the PRESETARE Numărul presetat va clipi. Folosiți butonul VOL+ or VOL- to select a preset slot (P01-P20 for AM/FM). Press PRESETARE din nou pentru a salva.
- Reamintirea presetărilor: Apăsați scurt pe PRESETARE pentru a parcurge posturile salvate.
- Adjusting Radio Volume: Utilizați VOL+ or VOL- buttons when the radio is on to adjust the listening volume.
5. Temporizator de somn
Temporizatorul de oprire permite radioului să redea muzică pentru o durată setată înainte de a se opri automat.
- În timp ce radioul este pornit, apăsați butonul DORMI button (if available, otherwise use a combination like SNOOZE + RADIO, or refer to specific button if different).
- Apăsați în mod repetat tasta DORMI button to cycle through available sleep times (e.g., 10, 20, 30, 60, 90 minutes).
- The radio will turn off automatically after the selected time.
6. Dimmer de afișare
Pentru a regla luminozitatea afișajului LED, apăsați butonul SNOOZE / DIMMER button (when the alarm is not sounding). Each press will cycle through the four available brightness levels (High, Medium, Low, Off).

Image: The alarm clock displaying 20:00 (8 PM) with a dimmed blue LED display, illustrating the dimmer function for nighttime use.
Întreţinere
1. Curatenie
To clean the clock radio, gently wipe the surface with a soft, dry cloth. Do not use abrasive cleaners, waxes, or solvents as these can damage the finish. Ensure the device is unplugged before cleaning.
2. Battery Replacement (Backup)
Dacă setările de oră și alarmă nu sunt păstrate în timpul unei întreruperi de curenttage, the AAA backup batteries may need to be replaced. Open the battery compartment, remove the old batteries, and insert two new AAA batteries, observing the correct polarity (+/-). Close the compartment securely.
Depanare
| Problemă | Cauza posibila | Soluţie |
|---|---|---|
| Afișajul ceasului este oprit sau nu funcționează. | Fără alimentare CA; se dă de curenttage; display dimmer set to 'Off'. | Ensure the power cord is securely plugged into a live outlet. Check for power outages. Press the SNOOZE / DIMMER button to adjust display brightness. |
| Time/Alarm settings are lost after a power outage. | Bateriile de rezervă sunt descărcate sau nu sunt instalate. | Install two fresh AAA batteries or replace existing ones in the battery compartment. |
| Alarma nu sună. | Alarma nu este activată; volumul alarmei este prea mic; oră de alarmă incorectă. | Ensure the alarm icon is visible on the display. Re-check alarm time and source. Adjust alarm volume (levels 5-15). |
| Recepție radio slabă. | Antenna not extended; interference; weak signal. | Fully extend the FM wire antenna. Reposition the clock radio to improve reception. Avoid placing near electronic devices that may cause interference. |
| Radio presets are not saved. | Incorrect saving procedure; power interruption without backup. | Asigurați-vă că apăsați și țineți apăsat butonul PRESETARE button to save, then press again to confirm. Ensure backup batteries are installed and functional to retain settings during power loss. |
Specificații
| Caracteristică | Detaliu |
|---|---|
| Marca | Ratakee |
| Numărul de model | H249 |
| Tip de afișare | LED digital (albastru) |
| Sursa de alimentare | Corded Electric (AC 120V 60Hz) |
| Bateria de rezervă | 2 AAA batteries (not included) for settings retention |
| Dimensiunile produsului | 6.14" lățime x 3.15" înălțime x 2.17" adâncime |
| Greutatea articolului | 4 uncii (0.25 lire) |
| Radio Frequency (FM) | 87.5-108 MHz |
| Radio Frequency (AM) | 520-1710 KHz |
| Caracteristici speciale | Adjustable Brightness, Adjustable Volume, Dual Alarms, Radio, Sleep Timer |
| Material | Plastic |

Image: Dimensional drawing of the alarm clock, indicating its width (6.14in), height (3.15in), and depth (2.17in).
Garanție și suport
Informații despre garanție
This Ratakee Digital Alarm Clock Radio H249 comes with a Garanție limitată de 1 an de la data achiziției. În plus, un Garanție de rambursare a banilor de 90 de zile is offered. This warranty covers manufacturing defects and malfunctions under normal use. It does not cover damage caused by misuse, accidents, unauthorized modifications, or external factors.
Asistență pentru clienți
For technical assistance, troubleshooting not covered in this manual, or warranty claims, please contact Ratakee customer support through the retailer's platform or the contact information provided with your purchase. Please have your model number (H249) and purchase date available when contacting support.


