1. Introducere
The DOOMAY H75 Wireless Weather Station is designed to provide accurate indoor and outdoor temperature and humidity readings, along with barometric pressure and weather forecasts. This device features a vibrant display and supports multiple remote sensors for comprehensive environmental monitoring.
Caracteristicile cheie includ:
- Accurate indoor and outdoor temperature and humidity monitoring.
- Wide temperature measurement range from -40℃ to 60℃ (-40℉ to 140℉) and humidity range from 10% to 99%.
- Display of time (12/24 hour format), date, barometric pressure (mmHg, inHg, hPa), and weather icons.
- Maximum/minimum value viewing and resetting for pressure, temperature, and humidity.
- Support for up to 8 remote thermo-hygrometer sensors (one included).
- Adjustable backlight with 3 levels of brightness.
- Alarm with 5-minute snooze function.
- Manual calibration function for temperature and humidity.
2. Ce se află în cutie
La deschiderea ambalajului, vă rugăm să verificați dacă toate componentele sunt prezente și în stare bună:
- DOOMAY Weather Station Display Console
- Remote Thermo-Hygrometer Sensor (1 unit)
- Adaptor de alimentare 5V-1A
- Cablu USB
- AAA Batteries (for backup power and remote sensor)
- Manual de utilizare
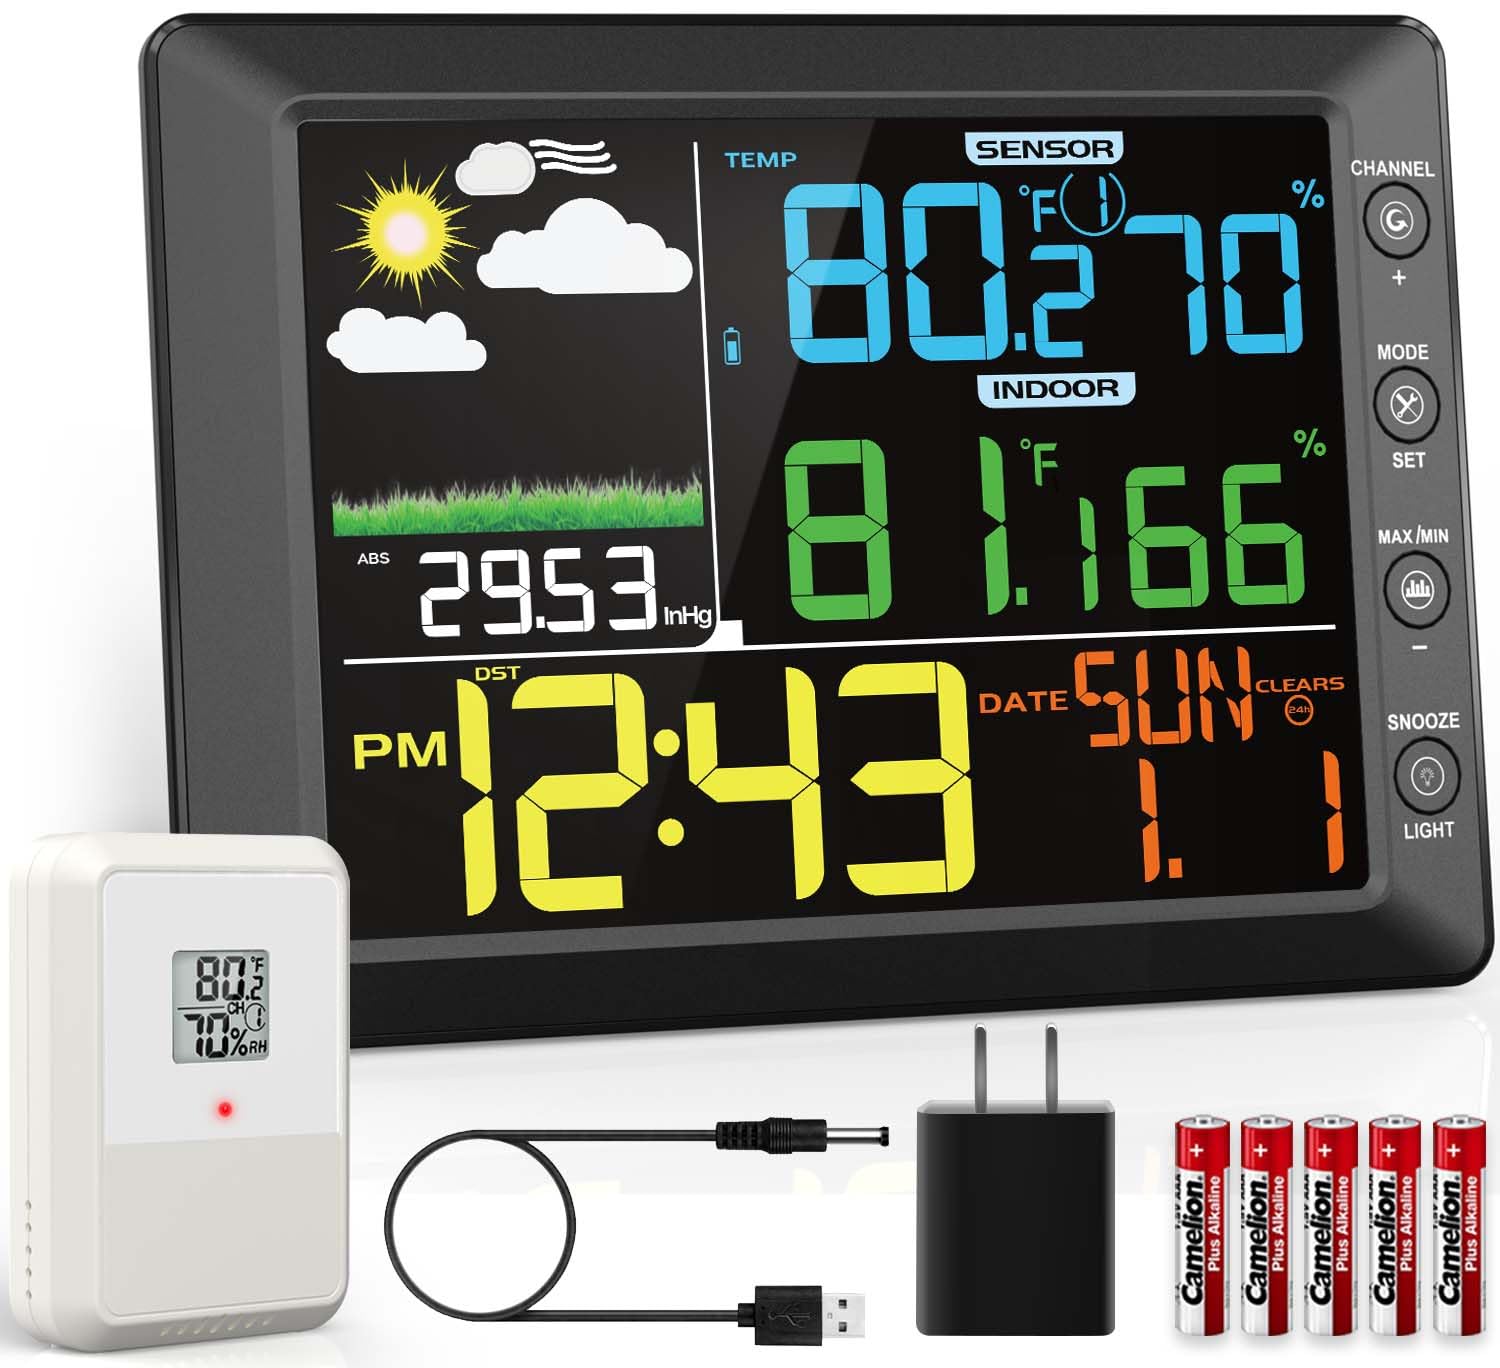
Figure 2.1: Contents of the DOOMAY Weather Station package.

Figure 2.2: Product parameter details and included components.
3. Configurare
Follow these steps to set up your DOOMAY Weather Station for optimal performance:
3.1 Alimentarea consolei de afișare
- Connect the provided 5V-1A power adapter to the display console.
- For backup power, insert 3 AAA alkaline or lithium batteries into the battery compartment. The screen automatically turns off in battery mode to save energy.
Video 3.1: Demonstrates the initial setup and operation of the DOOMAY Weather Station, including powering the display and setting up the remote sensor.
3.2 Setting Up the Remote Sensor
- Insert 2 AAA alkaline or lithium batteries into the remote sensor.
- Use the dip-switch inside the battery compartment to select a channel (1-8). Ensure the display console is set to the same channel for communication.
- The system is designed to automatically scan and connect to sensors. If a signal is lost, use the sensor search mode on the display console to re-acquire it.
3.3 Amplasarea senzorilor exteriori
Proper placement of the outdoor sensor is crucial for accurate readings:
- Locaţie: Choose a shady spot, ideally north-facing, to avoid direct sunlight.
- Evita: Direct sun and heat sources, which can skew temperature readings.
- Protecţie: Place the sensor under an eave or in a sheltered spot to protect it from direct rain and extreme weather conditions.
- Raza wireless: The wireless transmission range is up to 100m (330ft) in open air. Avoid electromagnetic and radio-frequency interference.

Figure 3.1: The weather station supports up to 8 wireless sensor channels, allowing for monitoring in various locations.

Figure 3.2: The display console can be wall-mounted or placed on a tabletop using its integrated stand.
4. Instrucțiuni de utilizare
The display console provides comprehensive information and customizable settings:
4.1 Setări de oră și dată
- Apăsați tasta MOD button to cycle through time, date, and alarm settings.
- Utilizați SET button to enter setting mode for each parameter.
- Ajustați valorile folosind + şi - butoane.
- Switch between 12/24 hour format as desired.
4.2 Funcția de alarmă
- To set the alarm, hold the SET button for 3 seconds until the alarm icon appears.
- Adjust the alarm time using the + şi - butoane.
- The console also offers a 5-minute snooze function.

Figure 4.1: Setting and using the alarm and snooze features.
4.3 Temperature and Pressure Units
- Easily switch between Fahrenheit (℉) and Celsius (℃) for temperature readings.
- Barometric pressure can be displayed in mmHg, inHg, or hPa.
4.4 Înregistrări MAX/MIN
- The weather station tracks maximum and minimum temperature and humidity values.
- View records for the last 24 hours or all-time.

Figure 4.2: Accessing maximum and minimum temperature and humidity records.
4.5 Prognoza meteo
- The weather station provides an informative weather forecast based on barometric pressure trends.
- For initial use, manually set the current weather status to calibrate the forecast.
- You can also set weather-related thresholds like pressure and storm thresholds for personalized predictions.

Figure 4.3: Weather forecast icons based on barometric pressure trends.
Videoclipul 4.1: Terminatview of the DOOMAY Weather Station's features, including real-time weather updates and time display.
Video 4.2: Demonstrates various operational aspects of the weather station, such as setting the alarm, adjusting brightness, and tracking high/low records.
5. Întreținere
To ensure the longevity and accuracy of your DOOMAY Weather Station, follow these maintenance guidelines:
- curatenie: Wipe the display console and remote sensor with a soft, damp Evitați utilizarea de produse de curățare abrazive sau solvenți.
- Înlocuire baterie: Replace batteries in both the display console (for backup) and the remote sensor when the low battery indicator appears. Use only AAA alkaline or lithium batteries.
- Protecția senzorului: Periodically check the outdoor sensor's placement to ensure it remains protected from direct sunlight and heavy precipitation.
- Calibrare: The device supports manual calibration for temperature and humidity to meet stricter accuracy standards. Refer to the operating instructions for details on performing calibration.
6. Depanare
If you encounter issues with your weather station, try the following common troubleshooting steps:
- Nu se permite lectura în aer liber:
- Ensure the remote sensor batteries are correctly installed and not depleted.
- Verify the remote sensor and display console are set to the same channel.
- Check the distance between the sensor and console; it should be within 100m (330ft) in open air.
- Relocate the sensor or console to avoid potential sources of interference (e.g., large metal objects, other wireless devices).
- Initiate sensor search mode on the display console.
- Citiri inexacte:
- Asigurați-vă că senzorul exterior nu este expus la lumina directă a soarelui sau în apropierea surselor de căldură.
- Perform manual calibration for temperature and humidity if readings consistently deviate.
- Afișajul nu funcționează:
- Check if the power adapter is securely connected.
- If using battery power, ensure batteries are fresh and correctly inserted. Remember the screen automatically turns off in battery mode to save energy.
7. Specificații
| Caracteristică | Detaliu |
|---|---|
| Numărul de model al articolului | H75 |
| Producător | DOOMAY |
| Dimensiuni pachet | 12.09 x 8.03 x 2.01 inci; 1.72 lire sterline |
| Interval de temperatură (exterior) | -40 ℃ până la 60 ℃ (de la -40 ℉ la 140 ℉) |
| Intervalul de umiditate | 10% până la 99% |
| Precizia temperaturii | +/-1℃ (+/-2℉) |
| Precizia umidității | +/-5% (between 20%-90%) |
| Raza de transmisie wireless | Până la 100 m (330 ft) în aer liber |
| Sursă de alimentare (afișaj) | 5V-1A power adapter (included) or 3 AAA batteries (included for backup) |
| Sursă de alimentare (senzor) | 2 AAA alkaline or lithium batteries (included) |
| Caracteristica specială | Large Display, Adjustable Backlight |
| Țara de origine | China |
8. Garanție și asistență
DOOMAY products are manufactured to the highest quality standards. This product comes with a manufacturer's warranty against defects in materials and workmanship.
For warranty claims, technical support, or any questions regarding your DOOMAY Weather Station, please contact our customer service team. Refer to the contact information provided in the packaging or visit the official DOOMAY website-ul pentru cele mai recente detalii de asistență.
We are committed to providing excellent customer service and ensuring your satisfaction with our products.


