1. Introducere
This manual provides detailed instructions for the installation, operation, and maintenance of your Xigmatek Aqua V AIR Arctic Mid-Tower PC Case. Please read this manual thoroughly before beginning any installation to ensure proper setup and safe operation. Retain this manual for future reference.
2. Informații de siguranță
Respectați următoarele măsuri de siguranță în timpul instalării și utilizării:
- Deconectați întotdeauna sursa de alimentare de la priza de perete înainte de a instala sau demonta orice componente.
- Purtați o curea antistatică la încheietura mâinii pentru a preveni deteriorarea componentelor sensibile prin descărcare electrostatică (ESD).
- Handle components carefully. Avoid touching pins or circuit boards directly.
- Asigurați o ventilație adecvată în jurul carcasei PC-ului pentru a preveni supraîncălzirea.
- Păstrați piesele și uneltele mici departe de copii.
- Do not attempt to modify the case or its components, as this may void your warranty and pose safety risks.
3. Conținutul pachetului
Verificați dacă toate articolele sunt prezente în colet:
- Xigmatek Aqua V AIR Arctic Mid-Tower PC Case
- Kit accesorii (șuruburi, distanțiere, coliere de cablu)
- Manual de utilizare (acest document)
If any items are missing or damaged, contact your retailer or Xigmatek support.
4. Produs terminatview
The Xigmatek Aqua V AIR Arctic is a mid-tower PC case designed for high-performance gaming configurations. It features tempered glass panels for component visibility and optimized airflow with pre-installed ARGB fans.

Figura 4.1: Față-stânga view of the Xigmatek Aqua V AIR Arctic PC case, showcasing the tempered glass front and side panels, and the pre-installed ARGB fans.

Figura 4.2: Spate view of the PC case, showing the I/O shield cutout, expansion slots, and rear fan mount.
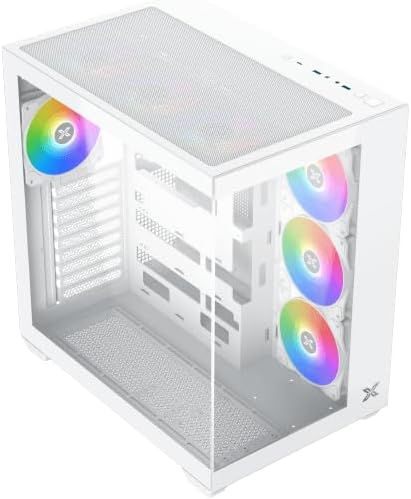
Figura 4.3: Înclinat de sus în jos view, highlighting the top mesh panel for additional cooling and the internal layout.
5. Configurare și instalare
Follow these steps to install your PC components into the Xigmatek Aqua V AIR Arctic case.
5.1. Pregătirea cazului
- Așezați carcasa pe o suprafață plană și stabilă.
- Remove the tempered glass side panel by unscrewing the thumb screws at the rear and carefully sliding it off. Place it on a soft, non-abrasive surface to prevent scratches.
- Remove the opposite steel side panel by unscrewing the thumb screws and sliding it off.
5.2. Instalarea plăcii de bază
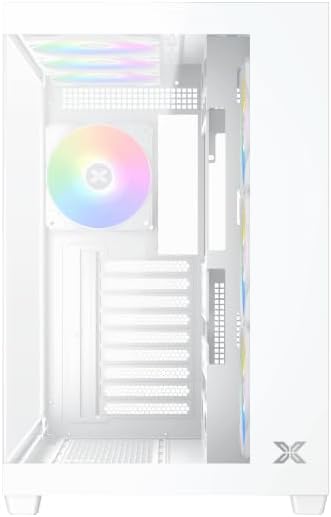
Figura 5.1: Interior view of the case, illustrating the motherboard mounting area and cable routing cutouts.
- Instalați ecranul I/O în decupajul din spatele carcasei.
- Align your motherboard with the pre-installed standoffs. Ensure the standoffs match your motherboard's form factor (ATX, Micro ATX).
- Secure the motherboard using the provided screws from the accessory kit. Do not overtighten.
5.3. Instalarea unității de alimentare (PSU)
- Locate the PSU mounting bracket at the bottom rear of the case.
- Introduceți sursa de alimentare în compartimentul prevăzut din spatele carcasei.
- Secure the PSU to the case using the screws provided with your power supply.
5.4. Instalarea unității de stocare
The case supports multiple storage drives:
- SSD-uri de 2.5": Mount directly to the SSD trays located behind the motherboard tray. Secure with screws.
- HDD-uri de 3.5": Install into the drive cage located beneath the PSU shroud. Slide the drive into the tray and secure with screws.
5.5. Instalarea plăcii grafice (GPU) și a plăcii de extensie
- Scoateți capacele sloturilor de expansiune necesare din spatele carcasei.
- Introduceți placa grafică sau alte plăci de expansiune în sloturile PCIe corespunzătoare de pe placa de bază.
- Secure the cards with the provided screws.
5.6. Gestionarea cablurilor

Figura 5.2: View behind the motherboard tray, illustrating the ample space and tie-down points for effective cable management.
Folosește decupajele pentru rutarea cablurilor și punctele de fixare din spatele tăvii plăcii de bază pentru a organiza cablurile. Acest lucru îmbunătățește circulația aerului și aspectul estetic.
- Connect all necessary power cables from the PSU to the motherboard, GPU, and storage drives.
- Connect front panel cables (USB, audio, power/reset switches, LED indicators) to the corresponding headers on your motherboard. Refer to your motherboard manual for specific header locations.
- Connect the ARGB fan cables to the integrated fan controller or directly to your motherboard's ARGB headers if available.
5.7. Suport pentru ventilator și radiator
The Xigmatek Aqua V AIR Arctic comes with 7 pre-installed 120mm ARGB fans. Additional cooling options are available:
- Faţă: Supports up to 3 x 120mm or 2 x 140mm fans / 240mm, 280mm, 360mm radiators.
- Top: Supports up to 3 x 120mm or 2 x 140mm fans / 240mm, 280mm, 360mm radiators.
- Spate: Supports 1 x 120mm fan.
- Fund: Supports up to 3 x 120mm fans.
Ensure proper fan orientation for optimal airflow (intake at front/bottom, exhaust at rear/top).
6. Operare
Once all components are installed and cables are connected, replace the side panels. Connect your monitor, keyboard, mouse, and power cable. Press the power button on the front panel to start your system.
The pre-installed ARGB fans can be controlled via the integrated controller (if present) or through compatible motherboard software, allowing customization of lighting effects and fan speeds.
7. Întreținere
Întreținerea regulată ajută la asigurarea performanței optime și a longevității componentelor PC-ului.
- Curățare de praf: Periodically clean dust filters (top, front, bottom) to maintain good airflow. Use compressed air to remove dust from inside the case and components.
- Curatenie exterioara: Ștergeți suprafețele exterioare cu un material moale, damp Evitați utilizarea de produse de curățare abrazive sau solvenți.
- Verificarea gestionării cablurilor: Occasionally check cable routing to ensure no cables are obstructing fans or airflow.
8. Depanare
Dacă întâmpinați probleme, consultați următorii pași comuni de depanare:
- Sistemul nu pornește:
- Asigurați-vă că sursa de alimentare este pornită și conectată corect la priza de perete.
- Verify all power cables (24-pin ATX, 8-pin CPU, PCIe, SATA) are securely connected.
- Verificați conexiunile comutatorului de alimentare de pe panoul frontal la placa de bază.
- Nicio ieșire de afișare:
- Ensure the monitor cable is connected to the graphics card (not the motherboard I/O if using a dedicated GPU).
- Reinstalați placa grafică și modulele RAM.
- Fans not spinning or ARGB not working:
- Verificați conexiunile de alimentare ale ventilatorului la placa de bază sau la controlerul ventilatorului.
- Verify ARGB connections to the controller or motherboard headers.
- Ensure any fan control software or BIOS settings are correctly configured.
For more complex issues, consult your component manuals or contact Xigmatek technical support.
9. Specificații
| Caracteristică | Detaliu |
|---|---|
| Numele modelului | Aqua V AIR Arctic |
| Numărul de model | EN45837 |
| Tipul cazului | Turnul Mijlociu |
| Compatibilitate cu placa de baza | ATX, Micro ATX |
| Material | Steel Alloy, Tempered Glass |
| Culoare | Alb |
| Ventilatoare preinstalate | 7 ventilatoare ARGB de 120 mm |
| Lungimea maximă a GPU | 410 mm |
| Porturi USB | 3 |
| Greutate | 8.8 kilograme |
10. Garanție și asistență
Xigmatek products are manufactured to high quality standards. For warranty information, please refer to the warranty card included with your product or visit the official Xigmatek website. For technical support or inquiries, please contact Xigmatek customer service through their official channels.
Oficial Website: www.xigmatek.com


