1. Introducere
Mulțumesc pentru achizițieasing the BLOW PRMX 4-Channel USB Audio Mixer. This compact analog mixer is designed for versatile audio applications, including live stage performances, recording studios, and DJ setups. It offers a range of features such as a USB input for MP3 playback, an integrated echo effect, and multiple input/output options. This manual provides comprehensive instructions to help you set up, operate, and maintain your mixer for optimal performance.
2. Produs terminatview
The BLOW PRMX 4 is a low-noise, four-channel analog mixer housed in a durable metal casing. It features a user-friendly interface with essential controls for each channel and master output.
Caracteristici cheie:
- Four-channel analog mixer
- USB input for MP3 file redare
- Integrated echo effect with repeat and delay options
- Jack socket for external effect processors
- Two XLR microphone inputs and two 6.3mm Jack/RCA inputs
- +48V Phantom power for condenser microphones and DI boxes
- 3-band equalization, AUX send, pan display, and FX effect on each channel
- Stereo line output (6.3mm Jack) and RCA output
- Headphone output with independent volume control
- INSERT slots on channels 1 and 2
- Metal robust casing
Identificarea componentelor:

Figura 2.1: Sus view of the BLOW PRMX 4 mixer. This image displays the overall layout of the mixer, including all channels, controls, and the USB player section.
Refer to Figure 2.1 for a visual guide to the mixer's controls and connections. Each channel features GAIN, HIGH, MID, LOW (EQ), AUX, EFF, and PAN controls, along with a volume fader. The master section includes controls for DELAY, REP (Repeat), PHONES, AUX SEND, EFF SEND, and the MAIN output fader. The USB player section has a digital display and control buttons.

Figure 2.2: Close-up of the input and output connections. This image highlights the various ports for microphones, line inputs, main outputs, and auxiliary connections.
Figure 2.2 shows a detailed view of the input and output jacks. Channels 1 and 2 feature XLR microphone inputs and 6.3mm LINE inputs with INSERT points. Channels 3/4 offer 6.3mm LINE inputs and RCA inputs. The main output section includes REC (RCA), MAIN OUT (6.3mm Jack), AUX, and PHONES outputs.
3. Configurare
Follow these steps to set up your BLOW PRMX 4 mixer:
- Conexiune de alimentare: Ensure the mixer's power switch is in the OFF position. Connect the provided power cable to the mixer's power input and then to a suitable electrical outlet (240VAC / 50-60Hz).
- Conexiuni microfon:
- For dynamic microphones, connect them to the XLR inputs (MIC 1, MIC 2).
- For condenser microphones, connect them to the XLR inputs and activate the +48V Phantom Power switch located in the master section. Ensure all channel gains are turned down before activating phantom power to prevent damage to equipment.
- Line Input Connections:
- Connect instruments or line-level devices (e.g., keyboards, CD players) to the 6.3mm LINE inputs on channels 1-4 or the RCA inputs on channels 3/4.
- Conexiune principală de ieșire: Conectați-vă amplifier, powered speakers, or recording device to the MAIN OUT (6.3mm Jack) or REC (RCA) outputs.
- Conexiune căști: Plug your headphones into the PHONES jack for monitoring.
- External Effects Processor (Optional): If using an external effects unit, connect its input to the AUX SEND and its output to the FX RETURN (if available, or an unused line input).
- Dispozitiv USB: Introduceți o unitate USB care conține MP3 files în portul USB pentru redare.
- Pornire: Once all connections are secure, switch the mixer's power ON.
4. Instrucțiuni de utilizare
This section details the operation of the BLOW PRMX 4 mixer's various controls.
4.1 Comenzi canale (Canalele 1-4)
- CÂŞTIG: Adjusts the input sensitivity for the connected microphone or line source. Start with this control at its minimum and gradually increase until a healthy signal level is achieved without clipping (PEAK LED).
- HIGH, MID, LOW (EQ): These knobs control the treble, midrange, and bass frequencies for each channel. Use them to shape the tone of your audio source.
- AUX: Sends a portion of the channel's signal to the AUX output, typically used for monitor mixes or external effects.
- EFF: Sends a portion of the channel's signal to the internal echo effect or an external effects processor connected to the FX return.
- TIGAIE: Adjusts the stereo position of the channel's signal, moving it between the left and right main outputs.
- Canal Fader: Controls the overall volume level of the individual channel sent to the main mix.
- LED PEAK: Illuminates when the input signal is too high, indicating potential clipping. Reduce the GAIN control if this LED lights up frequently.
4.2 Comenzile secțiunii principale
- Alimentare fantomă +48V: Activates phantom power for condenser microphones connected to XLR inputs.
- ÎNTÂRZIERE: Adjusts the delay time of the integrated echo effect.
- REP (Repetare): Controls the number of repetitions for the echo effect.
- TELEFONURI: Adjusts the volume level for the headphone output.
- AUX SEND: Controls the overall level of the signal sent to the AUX output.
- EFF SEND: Controls the overall level of the signal sent to the internal echo effect or external effects.
- Fader principal: Controls the overall volume level of the stereo main output.
- Indicator de nivel: Displays the output level of the main mix. Aim for levels that are strong but do not consistently peak into the red.
4.3 USB MP3 Player Operation
The integrated USB player allows you to play MP3 fileeste direct de pe o unitate flash USB.
- Introduceți o unitate USB care conține MP3 files în portul USB.
- Use the control buttons (Play/Pause, Next, Previous, Mode) to navigate and play tracks. The digital display will show track information.
- Adjust the volume of the USB player using its dedicated level control or by routing it through an available channel.
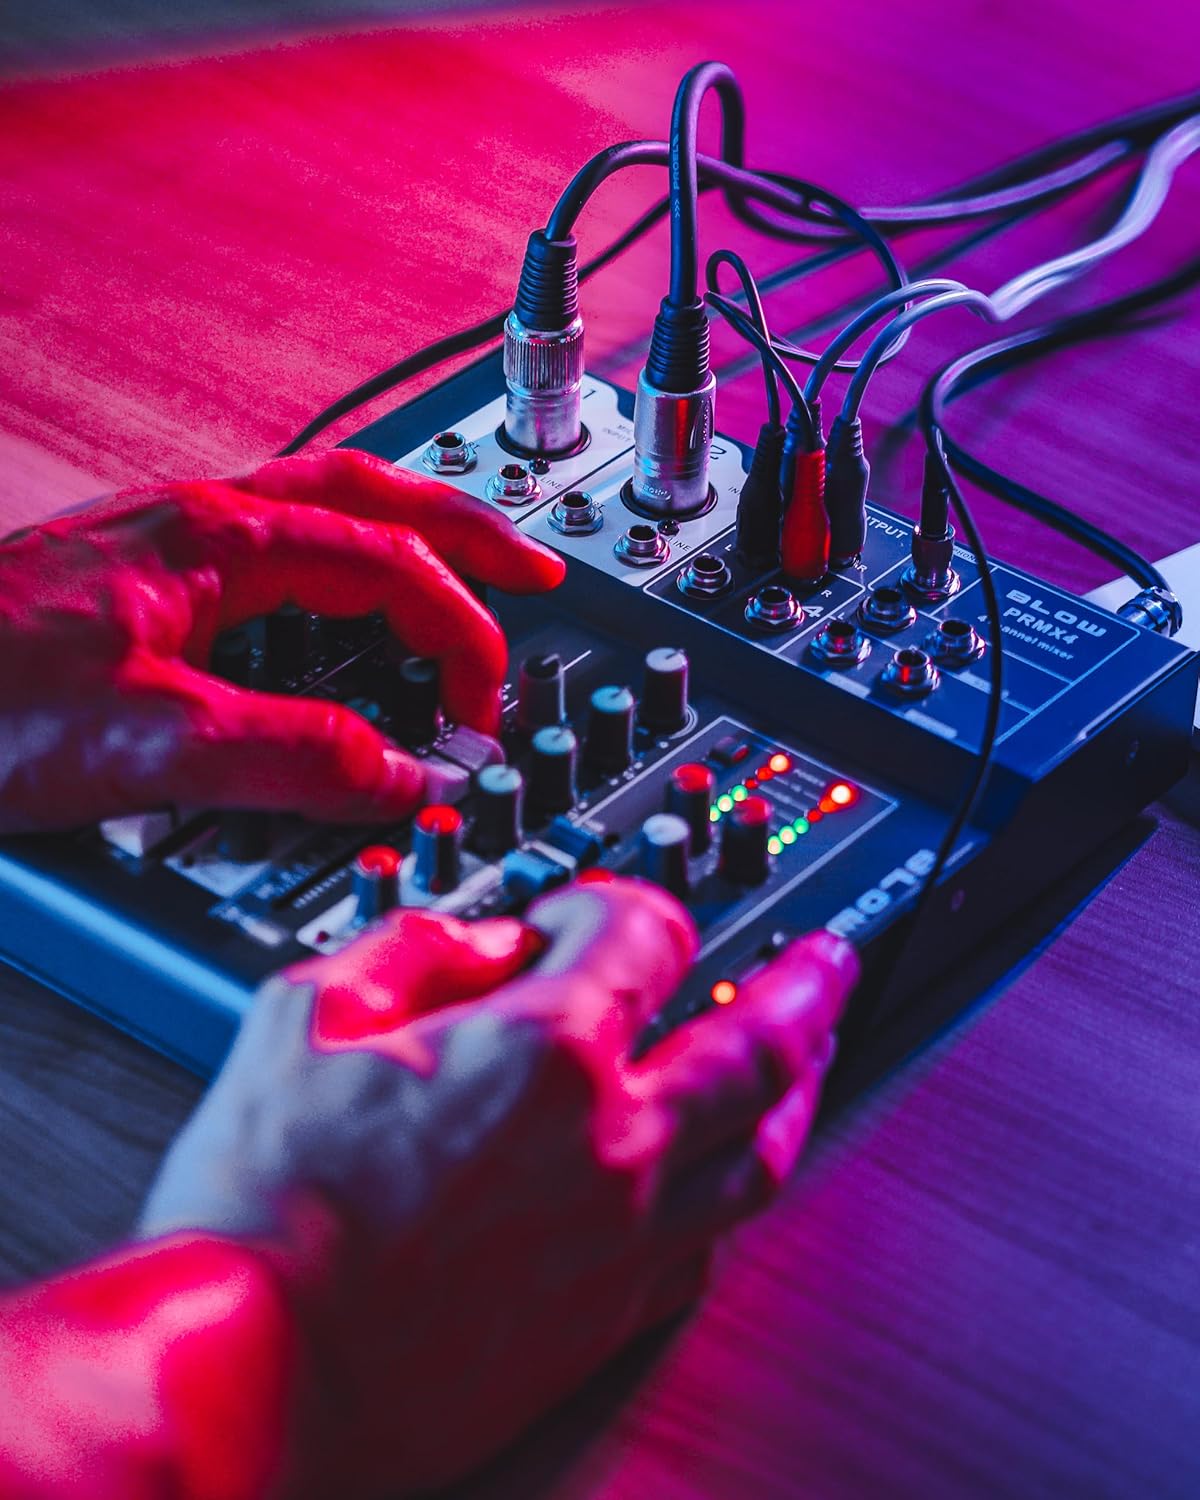
Figure 4.1: User interacting with the mixer controls. This image demonstrates a user adjusting the various knobs and faders on the mixer during operation.

Figure 4.2: Mixer with headphones for monitoring. This image shows the mixer connected to headphones, illustrating its use for private audio monitoring.
5. Întreținere
Întreținerea corespunzătoare asigură longevitatea și performanța optimă a mixerului dumneavoastră.
- curatenie: Folosiți o lavetă moale și uscată pentru a curăța exteriorul mixerului. Pentru murdăria persistentă, ștergeți ușor.amp Se poate folosi o lavetă, urmată de o lavetă uscată. Evitați substanțele de curățare abrazive sau solvenții.
- Protecție împotriva prafului: Păstrați mixerul acoperit atunci când nu îl utilizați pentru a preveni acumularea de praf, în special pe fadere și butoane.
- Depozitare: Depozitați mixerul într-un loc răcoros și uscat, ferit de lumina directă a soarelui și de temperaturi extreme.
- Organizare de cabluri: Ensure all cables are neatly organized and not under strain to prevent damage to connectors and ports.
6. Depanare
If you encounter issues with your BLOW PRMX 4 mixer, refer to the following common problems and solutions:
| Problemă | Cauza posibila | Soluţie |
|---|---|---|
| Fără ieșire de sunet |
|
|
| Sunet distorsionat |
|
|
| Microfonul nu funcționează |
|
|
| USB player not working |
|
|
7. Specificații
Detailed technical specifications for the BLOW PRMX 4-Channel USB Audio Mixer:
- Tip: Four-channel analog mixer
- Frequency Response (Headphones): 20Hz - 20kHz
- Distorsiunea armonică totală (THD): <0.01%
- Raport semnal-zgomot (SNR): >110dB
- Nivel de ieșire: +/- 1 V
- Sensibilitate de intrare de linie: +/- 150 mV
- Sensibilitate intrare microfon: +/- 1.5 mV
- Cerințe de alimentare: 240VAC / 50-60Hz
- Dimensiuni (L x l x H): 210 x 245 x 55 mm (8.27 x 9.65 x 2.17 inchi)
- Tehnologie de conectivitate: Auxiliar, USB
- Intrare audio: Jack 6.3mm, XLR, RCA
- Locuinta: Metal
8. Garanție și asistență
This product is manufactured by BLOW. For specific warranty information, please refer to the documentation provided at the time of purchase or contact your retailer. General support inquiries can be directed to the BLOW customer service channels.
Please note that specific details regarding warranty duration and terms are not available in this manual. Keep your proof of purchase for any warranty claims.

Figure 8.1: Product packaging for the BLOW PRMX 4 mixer. This image shows the retail box, which may contain additional warranty or support information.


