1. Introducere
This manual provides essential information for setting up, operating, maintaining, and troubleshooting your HP Pro Mini 400 G9 MFF Mini PC. Please read this manual thoroughly before using your device to ensure proper functionality and longevity.
2. Ce se află în cutie
Verificați dacă toate articolele sunt prezente în ambalaj:
- HP Pro Mini 400 G9 MFF Mini PC
- Adaptor de alimentare (90W)
- Tastatură HP Wired Desktop 320K
- Mouse cu fir HP 125
- Vertical Stand (optional, may vary by region)
- Documentație (Ghid de pornire rapidă, Informații despre garanție)
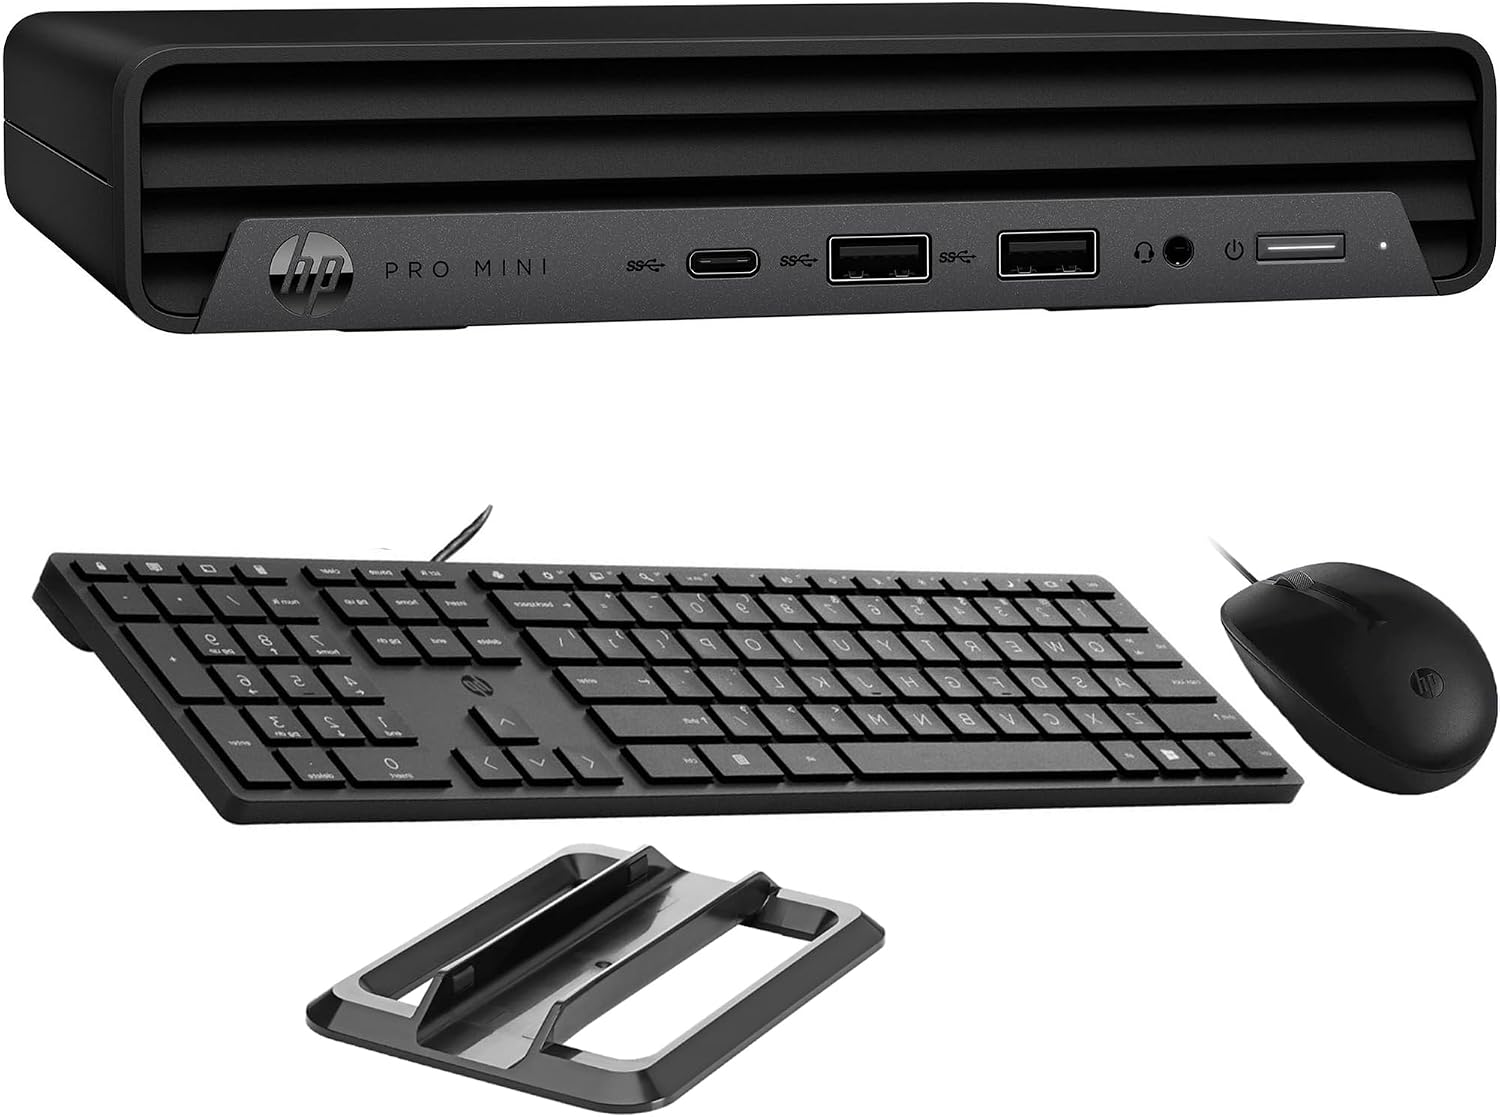
Image: HP Pro Mini 400 G9 Mini PC shown with its wired keyboard, wired mouse, and a vertical stand.
3. Suprasolicitare fizicăview
3.1 Panoul frontal
The front panel provides easily accessible ports for common peripherals and power control.
- Buton de alimentare: To turn the PC on or off.
- Mufă combinată pentru căști/microfon: Pentru intrarea și ieșirea audio.
- SuperSpeed USB Type-A 10Gbps (Charging): For high-speed data transfer and charging devices.
- SuperSpeed USB Type-A 10Gbps: Pentru transfer de date de mare viteză.
- SuperSpeed USB Type-C 20Gbps: For ultra-high-speed data transfer and display output.

Imagine: față view of the HP Pro Mini 400 G9, highlighting the power button, USB Type-A ports, USB Type-C port, and headphone/microphone combo jack.
3.2 Panoul din spate
The rear panel contains ports for display, network, and additional USB devices.
- Stecher: Connects to the external power adapter.
- Port RJ-45 (Ethernet): Pentru conexiune la rețea prin cablu.
- SuperSpeed USB Type-A 10Gbps: Pentru transfer de date de mare viteză.
- SuperSpeed USB Type-A 5Gbps (x2): For standard data transfer.
- DisplayPort 1.4 (x2): Pentru conectarea afișajelor externe.
- HDMI2.1: Pentru conectarea afișajelor externe.

Imagine: Spate view of the HP Pro Mini 400 G9, detailing the power connector, RJ-45 Ethernet port, various USB Type-A ports, two DisplayPort 1.4 ports, and one HDMI 2.1 port.
3.3 Diagrama portului
A comprehensive diagram illustrating all available ports on the HP Pro Mini 400 G9.
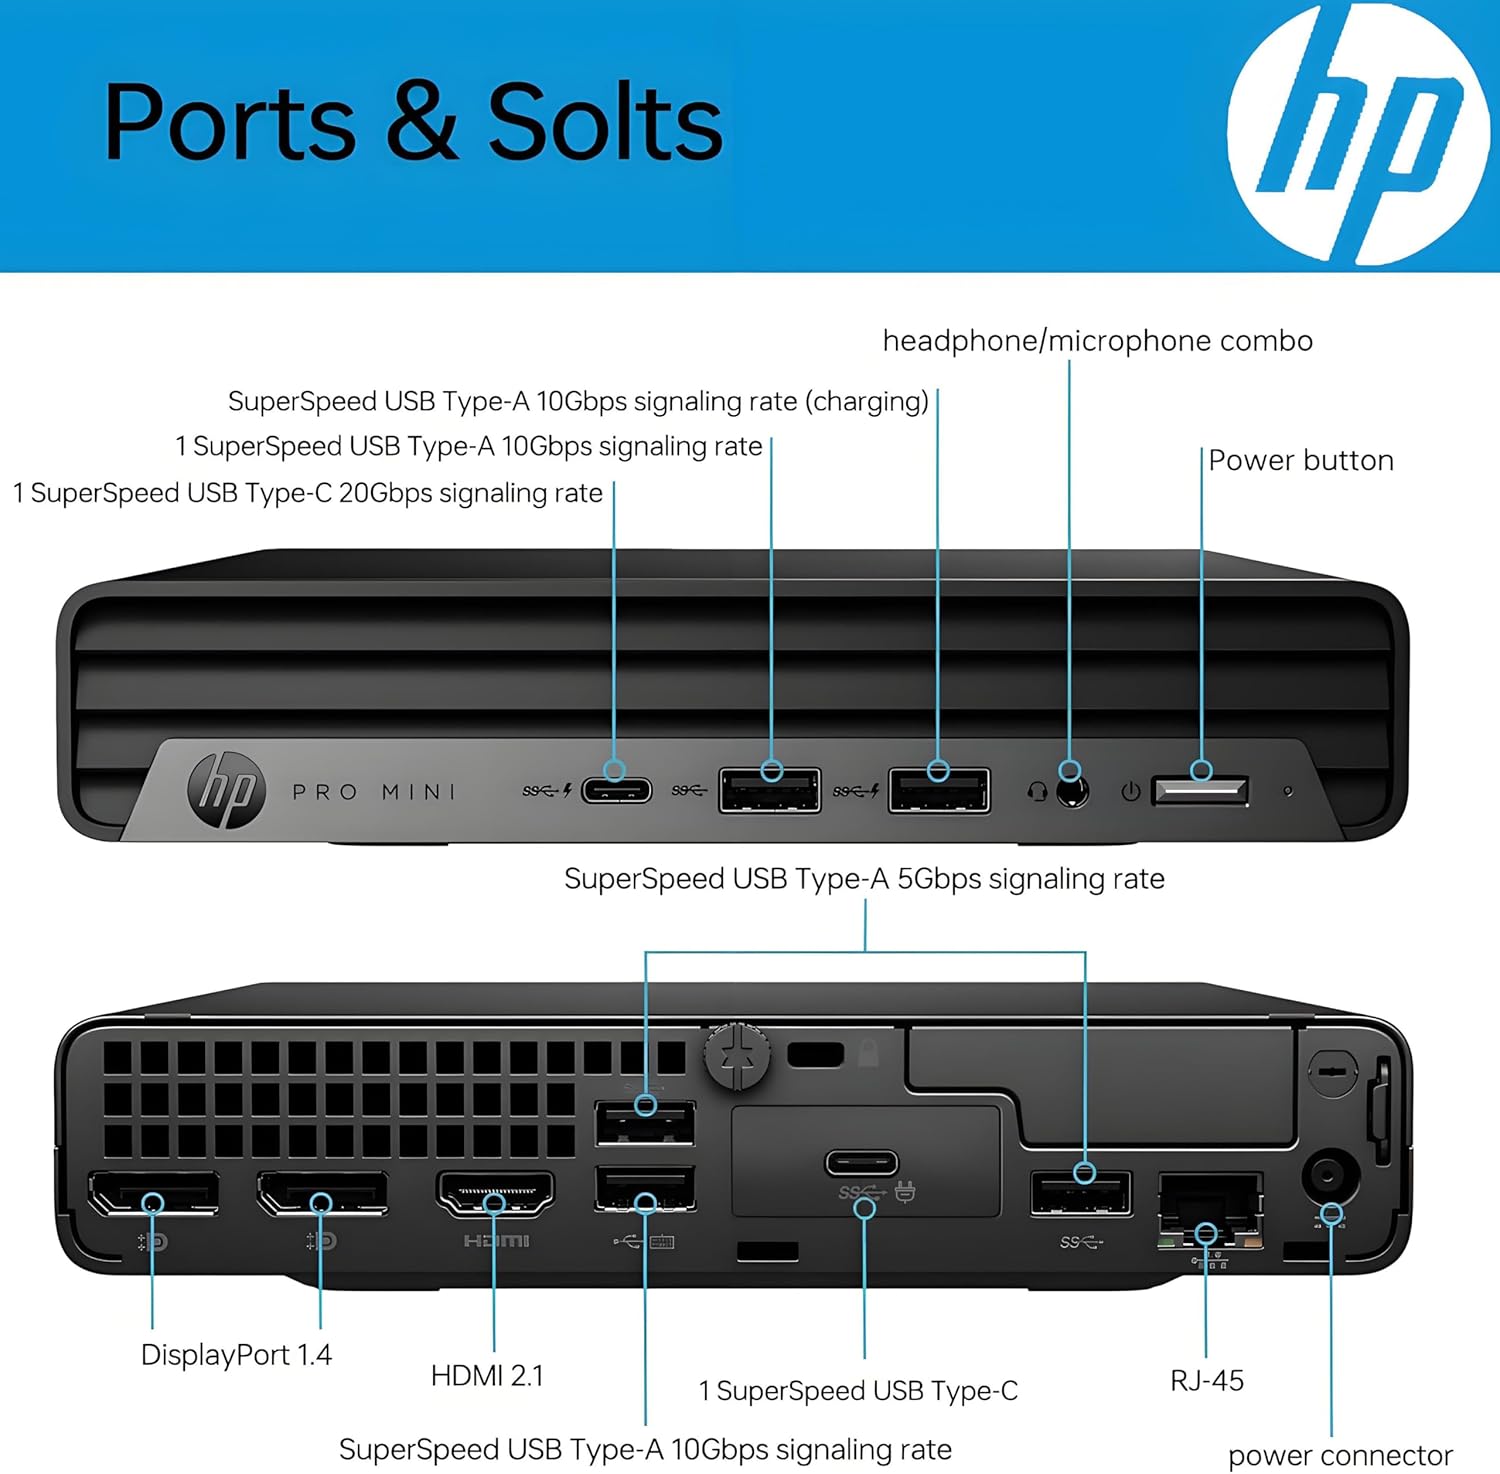
Image: Detailed diagram labeling each port on both the front and rear panels of the HP Pro Mini 400 G9 for easy identification.
3.4 Dimensiuni și greutate
The HP Pro Mini 400 G9 is designed for a compact footprint.
- Dimensiuni (L x A x H): 6.97 x 6.89 x 1.34 inchi (17.7 x 17.5 x 3.4 cm)
- Greutate: Aproximativ 3.13 lbs (1.42 kg)

Image: The HP Pro Mini 400 G9 with its physical dimensions (width, depth, height) and weight clearly indicated.
4. Configurare inițială
Follow these steps to set up your HP Pro Mini 400 G9:
- Despachetați PC-ul: Carefully remove the Mini PC and all accessories from the packaging.
- Conectați periferice:
- Connect the wired keyboard and mouse to any available USB Type-A ports on the front or rear panel.
- Connect your monitor(s) to the DisplayPort or HDMI ports on the rear panel.
- Conectare la rețea (opțional):
- For a wired connection, connect an Ethernet cable from your router/modem to the RJ-45 port on the rear panel.
- For wireless (Wi-Fi), the PC will prompt you to connect during Windows setup.
- Conectare alimentare: Connect the power adapter cable to the power connector on the rear panel of the PC, then plug the power adapter into a wall outlet.
- Prima pornire: Press the power button on the front panel. The PC will start, and you will be guided through the Windows 11 Pro initial setup process.
5. Instrucțiuni de utilizare
5.1 Pornire/Oprire
- Pentru a porni: Apăsați butonul de pornire de pe panoul frontal.
- A închide: Faceți clic pe butonul Start din Windows, apoi selectați Alimentare > Oprire.
- Pentru a reporni: Faceți clic pe butonul Start din Windows, apoi selectați Alimentare > Repornire.
- A dormi: Faceți clic pe butonul Start din Windows, apoi selectați Alimentare > Repaus.
5.2 Connecting to a Wireless Network (Wi-Fi)
- Faceți clic pe pictograma Wi-Fi din bara de sistem (colțul din dreapta jos al ecranului).
- Selectați rețeaua Wi-Fi dorită din listă.
- Faceți clic pe „Conectare” și introduceți cheia de securitate a rețelei (parola) dacă vi se solicită.
5.3 Using USB and Display Ports
- Porturi USB: Connect USB devices such as external hard drives, flash drives, printers, or other peripherals. The USB Type-C port supports data transfer and can also be used for display output with an appropriate adapter (sold separately).
- Display Ports (HDMI, DisplayPort): Connect up to three external monitors simultaneously for extended desktop or mirrored display configurations.
6. Întreținere
Regular maintenance helps ensure optimal performance and extends the life of your Mini PC.
- curatenie: Use a soft, dry cloth to clean the exterior of the PC. For dust accumulation in vents, use compressed air. Ensure the PC is powered off and unplugged before cleaning.
- Actualizări de software: Regularly check for and install Windows updates and HP driver updates to maintain system security and performance.
- Backup de date: Faceți periodic copii de rezervă ale datelor importante pe o unitate externă sau într-un spațiu de stocare în cloud pentru a preveni pierderea datelor.
- Ventilare: Ensure the PC's vents are not obstructed to allow for proper airflow and prevent overheating.
7. Depanare
Această secțiune abordează problemele frecvente pe care le-ați putea întâmpina.
| Problemă | Soluție posibilă |
|---|---|
| PC-ul nu pornește | Ensure the power adapter is securely connected to both the PC and a working power outlet. Test the outlet with another device. |
| Nicio afișare pe monitor | Check that the monitor is powered on and the video cable (HDMI/DisplayPort) is securely connected to both the PC and the monitor. Try a different video port or cable if available. |
| Fără conexiune la internet | For wired connection, check the Ethernet cable and router/modem status. For Wi-Fi, ensure Wi-Fi is enabled and you are connected to the correct network with the correct password. Restart your router/modem. |
| Keyboard or mouse not responding | Ensure the USB cables for the keyboard and mouse are securely plugged into the PC. Try different USB ports. |
| Sistemul este lent sau nu răspunde | Close unnecessary applications. Check Task Manager for high resource usage. Ensure Windows and drivers are up to date. Restart the PC. |
8. Specificatii tehnice
Key technical specifications for the HP Pro Mini 400 G9 MFF Mini PC (configuration may vary).
| Caracteristică | Caietul de sarcini |
|---|---|
| Sistem de operare | Windows 11 Pro |
| Procesor | Intel 6-Core i5-12500T (up to 4.20 GHz) |
| Grafică | Grafică Intel UHD 770 integrată |
| RAM | 8 GB RAM DDR4 (extensibilă) |
| Depozitare | 256GB PCIe NVMe TLC SSD (M.2) |
| Conectivitate wireless | Intel AX201 Wi-Fi 6 (2x2) and Bluetooth 5.2 combo |
| Porturi frontale | 1x Headphone/Microphone combo, 1x SuperSpeed USB Type-A 10Gbps (charging), 1x SuperSpeed USB Type-A 10Gbps, 1x SuperSpeed USB Type-C 20Gbps |
| Porturi spate | 1x Power connector, 1x RJ-45, 1x SuperSpeed USB Type-A 10Gbps, 2x SuperSpeed USB Type-A 5Gbps, 2x DisplayPort 1.4, 1x HDMI 2.1 |
| Alimentare electrică | 90 W external power adapter |
| Dimensiuni (L x A x H) | 6.97 x 6.89 x 1.34 inchi (17.7 x 17.5 x 3.4 cm) |
| Greutate | Aproximativ. 3.13 lbs (1.42 kg) |
9. Garanție și asistență
Your HP Pro Mini 400 G9 MFF Mini PC comes with a standard limited warranty. Please refer to the warranty documentation included in your product packaging for specific terms and conditions.
For technical support, driver downloads, and additional product information, please visit the official HP support website:
You may also find helpful resources and community forums on the HP website-ul.