1. Introducere
This manual provides detailed instructions for the setup, operation, and maintenance of your DANFI AUDIO DF TE-103 Vinyl Record Player. This versatile audio system features a 3-speed turntable, Bluetooth input, USB/SD card playback and recording, FM radio, and auxiliary input/output options. Please read this manual thoroughly before use to ensure proper function and longevity of your device.
2. Informații de siguranță
- Nu expuneți unitatea la ploaie sau umezeală.
- Nu blocați orificiile de ventilație.
- Asigurați-vă că cablul de alimentare nu este ciupit sau călcat pe el.
- Deconectați unitatea în timpul furtunilor cu descărcări electrice sau când nu este utilizată pentru perioade lungi de timp.
- Pentru toate lucrările de întreținere, adresați personalului de service calificat.
- Nu expuneți unitatea la lumina directă a soarelui, la surse de căldură și la câmpuri magnetice puternice.
3. Conținutul pachetului
Verificați dacă toate articolele enumerate mai jos sunt incluse în pachetul dumneavoastră:
- DANFI AUDIO DF TE-103 Vinyl Record Player
- Unitate de alimentare
- Adaptor 45 RPM
- Slipmat
- Backup Needle
4. Produs terminatview
Familiarize yourself with the main components and controls of your record player.

Figura 4.1: Față view of the DANFI AUDIO DF TE-103 Vinyl Record Player.
4.1 Controale și conexiuni pe panoul frontal

Figura 4.2: Detaliat view of the front panel with USB, AUX IN, LED Display, and Mode Switch key.
- Display LED: Afișează modul curent, informații despre piesă sau frecvența FM.
- Tasta de comutare de mod: Toggles between Turntable, Bluetooth, USB/SD, FM Radio, and AUX modes.
- Port USB: For USB flash drives for playback and recording.
- AUX IN: Intrare de 3.5 mm pentru conectarea dispozitivelor audio externe.
- Controlul volumului: Reglează volumul de ieșire.
- Buton EQ: Selects sound equalizer presets (Jazz, Pop, Classical, Rock, Vocal).
4.2 Conexiuni la panoul din spate

Figure 4.3: Rear panel with RCA Line Out connections.
- Ieșire linie RCA: Connects to external ampsuflante sau difuzoare alimentate.
- Putere de intrare: Se conectează la adaptorul de alimentare furnizat.
5. Configurare
- Despachetarea: Carefully remove the record player and all accessories from the packaging. Retain packaging for future transport or storage.
- Plasare: Așezați unitatea pe o suprafață stabilă și plană, ferită de lumina directă a soarelui, surse de căldură și praf excesiv.
- Capac de praf: Atașați capacul de praf la balamalele din spatele unității.
- Conexiune de alimentare: Connect the power unit to the DC input on the rear of the record player, then plug the power adapter into a wall outlet.
- Pornire inițială: Press the power button to turn on the unit. The LED display will illuminate.
6. Instrucțiuni de utilizare
6.1 Redarea discurilor de vinil

Figure 6.1: The turntable supports 3 speeds for various record types.
- Asigurați-vă că unitatea este pornită.
- Ridicați capacul de praf.
- Place a vinyl record on the platter. If playing a 45 RPM single, use the included 45 RPM adaptor.
- Selectați viteza corespunzătoare (33, 45 sau 78 RPM) folosind comutatorul de selectare a vitezei.
- Gently move the tonearm to the desired position on the record. The platter will begin to spin automatically.
- Reglați volumul după preferințele dvs.
- The AUTO STOP function will automatically stop the turntable when the record finishes playing.
6.2 Bluetooth Connection (Input Only)
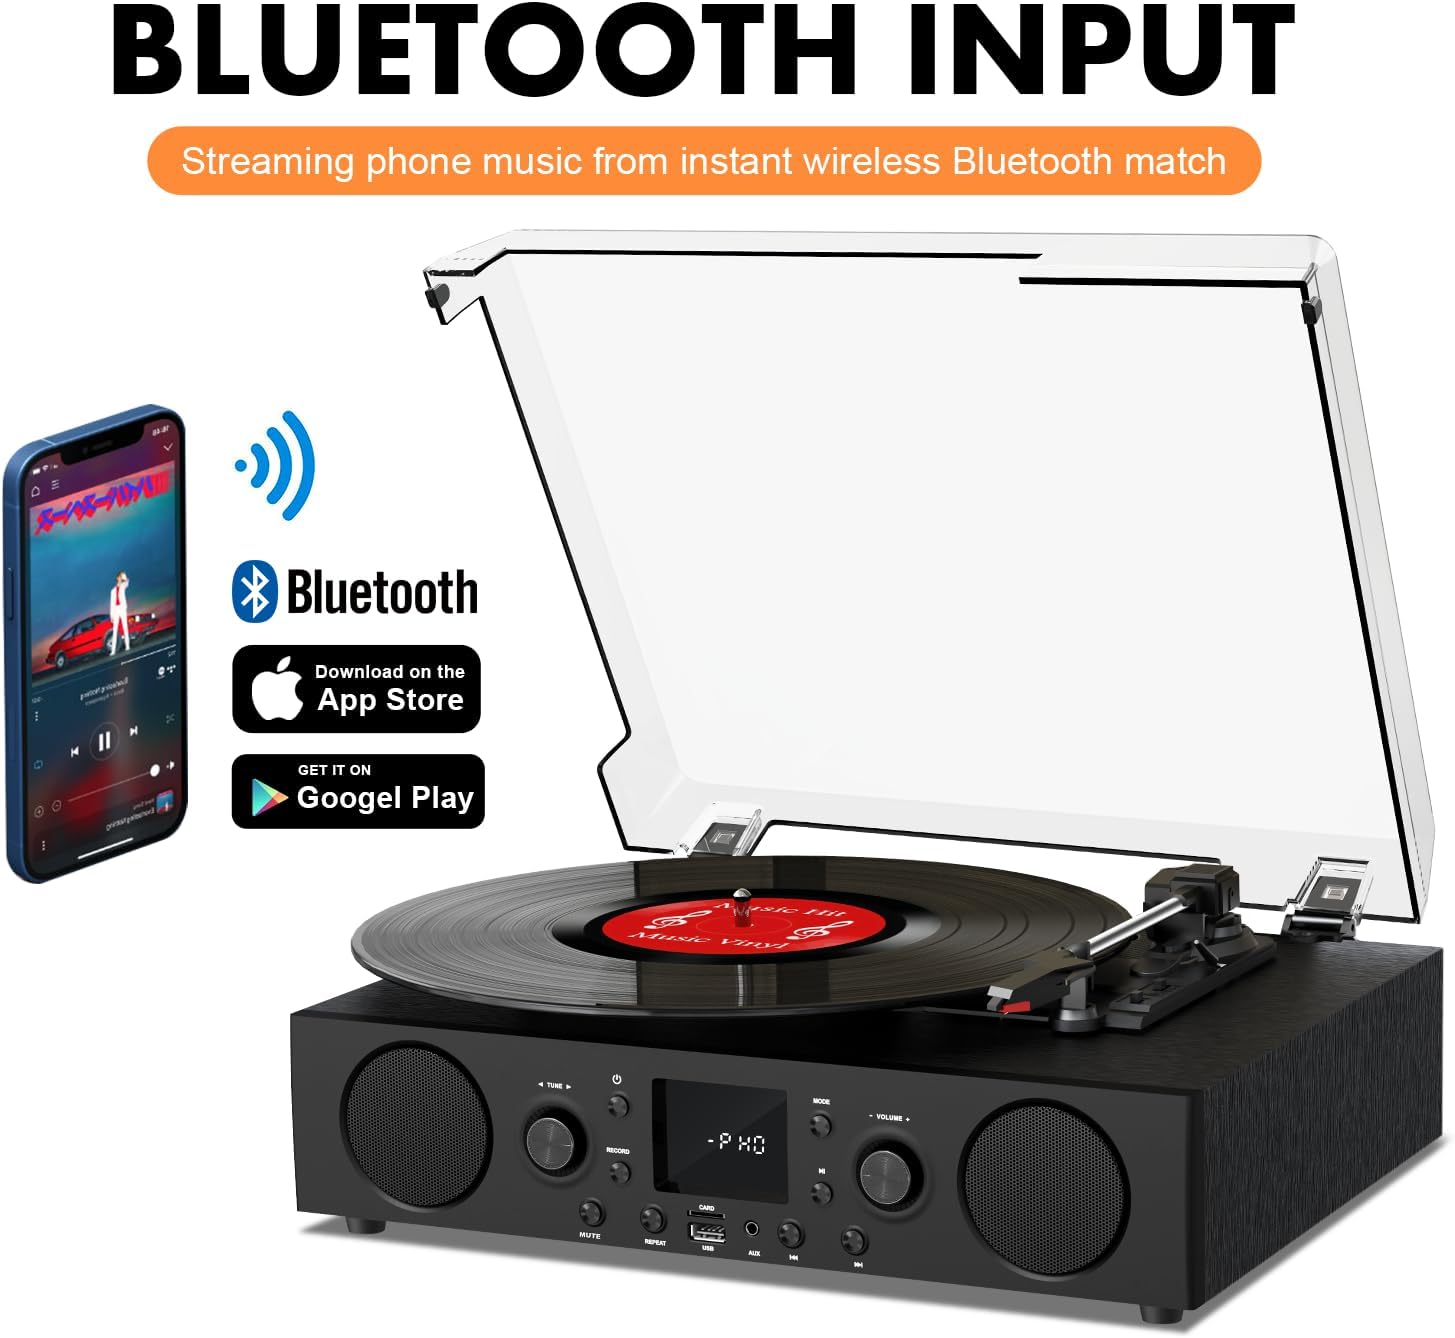
Figure 6.2: Connecting a smartphone via Bluetooth to the turntable.
- Apăsați tasta Modul button until "Bluetooth" or a similar indicator appears on the LED display. The unit will enter pairing mode.
- Pe smartphone, tabletă sau computer, activați Bluetooth și căutați dispozitivele disponibile.
- Select "DANFI AUDIO DF TE-103" (or similar name) from the list of devices to pair.
- Once paired, you can stream audio wirelessly from your device to the record player.
- Nota: This turntable supports Bluetooth input only and cannot transmit audio to Bluetooth headphones or speakers.
6.3 USB/SD Input and MP3 Encoding

Figure 6.3: Vinyl to MP3 encoding process using a USB flash drive.
- Redare USB/SD: Insert a USB flash drive or SD card into the respective port. Press the Modul button to select USB/SD mode. The unit will automatically play compatible audio files.
- Vinyl to MP3 Encoding:
- Insert a USB flash drive or SD card into the port.
- Start playing a vinyl record.
- Apăsați tasta Înregistra button. The LED display will indicate recording is in progress.
- Apăsați tasta Înregistra button again to stop recording. The recorded audio will be saved as an MP3/WAV file on the USB drive/SD card.
6.4 Radio FM
- Apăsați tasta Modul button to select FM Radio mode. The current frequency will appear on the LED display.
- Use the tuning controls (often the Skip/Search buttons) to scan for radio stations.
- The unit can store approximately 20 stations.
6.5 RCA Line Out and AUX Input

Figure 6.4: Connecting to external speakers using RCA Line Out.
- Ieșire linie RCA: Connect RCA cables from the rear of the record player to the audio input of an external amplifier or powered speakers. This allows for boosted volume and playback through a larger sound system. The turntable's internal speakers will not be muted automatically when using RCA output.
- Intrare AUX: Connect an external audio source (e.g., MP3 player, smartphone) to the 3.5mm AUX IN port on the front panel using an audio cable. Press the Modul pentru a selecta modul AUX și a reda sunetul de la dispozitivul conectat.
6.6 Egalizator (EQ)

Figure 6.5: Available equalizer presets for audio customization.
Apăsați tasta EQ button to cycle through the available sound equalizer presets: Jazz, Pop, Classical, Rock, and Vocal. Select the preset that best suits your audio preference.
7. Întreținere
- curatenie: Use a soft, dry cloth to clean the exterior of the unit. For the dust cover, use a slightly damp cloth and then dry thoroughly. Avoid abrasive cleaners.
- Îngrijirea stylusului: Periodically check the stylus (needle) for wear or damage. A worn stylus can damage records and degrade sound quality. Replace the stylus with a compatible backup needle when necessary.
- Îngrijirea înregistrărilor: Keep your vinyl records clean and stored vertically in their sleeves to prevent dust accumulation and warping.
8. Depanare
| Problemă | Cauza posibila | Soluţie |
|---|---|---|
| Fără putere | Cablul de alimentare nu este conectat; Priza de alimentare nu este activă | Asigurați-vă că cablul de alimentare este conectat corect; Testați priza cu un alt dispozitiv |
| Nici un sunet | Volume too low; Incorrect mode selected; External speakers not connected/powered | Increase volume; Press Mode button to select correct source; Check RCA connections and external speaker power |
| Placa turnantă nu se învârte | Unit not powered on; Tonearm not moved over record | Ensure power is on; Gently move tonearm over the record to activate platter |
| Bluetooth nu se conectează | Not in Bluetooth mode; Device too far; Already paired with another device | Select Bluetooth mode; Move device closer; Disconnect from other devices and try pairing again |
| Calitate slabă a sunetului de la vinil | Disc murdar; Stylus uzat; Viteză selectată incorect | Clean record; Replace stylus; Select correct RPM speed |
9. Specificații
| Caracteristică | Detaliu |
|---|---|
| Numele modelului | TE-103 |
| Marca | DANFI AUDIO DF |
| Dimensiunile produsului | 14.37 x 10.82 x 5.28 inci |
| Greutatea articolului | 6.2 lire sterline |
| Material | Acrylic, Engineered Wood |
| Viteze de plată | 33 1/3, 45, 78 RPM |
| Componente incluse | Power unit, 45 rpm adaptor, Slipmat, Backup needle |
| Caracteristici speciale | Equalizer (EQ), FM Radio, USB Input, USB/SD Card Recording, Bluetooth Input |
| Conectivitate | Bluetooth (Input only), USB, SD Card, AUX Input, RCA Line Out |
| Dispozitive compatibile | Headphones, MP3 Players, Personal Computers, Smartphones, Speakers, Tablets |
| Consum de energie (mod pornit) | 5 wați |
10. Garanție și asistență
For warranty information or technical support, please refer to the documentation provided with your purchase or contact DANFI AUDIO DF customer service through their official channels. Keep your purchase receipt as proof of purchase for warranty claims.


