Introducere
Thank you for choosing the Sharp Digital Alarm Clock. This manual provides detailed instructions for setting up, operating, and maintaining your new alarm clock. Designed for clarity and convenience, this clock features an easy-to-read LCD display with an optional always-on backlight, dual alarm settings, and a USB charging port for your devices. Please read this manual thoroughly before use to ensure optimal performance and longevity of your product.

Faţă view of the Sharp Digital Alarm Clock, displaying time, month, date, day, and temperature on its colorful LCD screen.
Informații de siguranță
Please observe the following safety precautions to prevent damage to the unit or personal injury:
- Nu expuneți unitatea la temperaturi extreme, la lumina directă a soarelui sau la umiditate ridicată.
- Evitați să scăpați unitatea sau să o supuneți la impacturi puternice.
- Nu amestecați baterii vechi cu noi sau diferite tipuri de baterii.
- Scoateți bateriile dacă unitatea nu va fi utilizată pentru o perioadă lungă de timp, pentru a preveni scurgerile.
- Țineți unitatea departe de apă și alte lichide.
- Nu încercați să dezasamblați sau să reparați unitatea singur. Apelați la personal calificat pentru toate lucrările de service.
Conținutul pachetului
Verificați dacă toate articolele sunt prezente în colet:
- Sharp Digital Alarm Clock (Model SPC5028AMZ)
- Manual de utilizare (acest document)
Note: 3 x AAA batteries are required and not included.
Produs terminatview
Afișaj frontal

Diagram illustrating key features of the alarm clock, including atomic accuracy, 1.5-inch tall time display, on/off display nightlight, indoor temperature display, calendar display, bright color display, wall mountable or tabletop viewing, and battery operation (3x AAA batteries).
The front of the clock features a clear LCD display that shows the time, month, date, day of the week, and indoor temperature. The main time display is approximately 1.5 inches tall for easy readability.
Panoul din spate și comenzile

Detaliat view of the clock's rear panel, showing the location of the battery compartment, various control buttons (Calendar, Time, Alarm, 12/24, Up, °C/°F, Down, Wave), the ON/OFF switch for the nightlight, and the backstand for tabletop viewing. Dimensions (6.45"W x 5"H) are also indicated.
- CALENDAR Set Button: Used to set the date and year.
- TIME Set Button: Used to set the time manually.
- ALARM Set & ON/OFF Button: Used to set and activate/deactivate alarms.
- Buton 12/24: Comută între formatul de oră de 12 ore și cel de 24 de ore.
- Buton SUS: Adjusts settings upwards.
- Butonul °C/°F: Comută afișarea temperaturii între grade Celsius și Fahrenheit.
- Buton JOS: Adjusts settings downwards.
- WAVE (Atomic Search) Button: Initiates a manual search for the atomic time signal.
- ON/OFF Switch (Nightlight): Controls the always-on backlight feature.
- Compartiment baterie: Funcționează cu 3 baterii AAA.
- Backstand: For tabletop viewing.
- Wall Mount Hole: For hanging the clock on a wall.
Înființat
Instalarea bateriei
- Deschideți capacul compartimentului bateriilor din spatele ceasului.
- Introduceți 3 baterii AAA noi, asigurându-vă că polaritatea este corectă (+ și -).
- Închideți bine capacul compartimentului bateriei.
Pornirea inițială
Upon battery installation, the clock will power on and attempt to synchronize with the atomic time signal.
Sincronizarea timpului atomic (WWVB)
The Sharp Digital Alarm Clock is designed to automatically synchronize with the WWVB atomic time signal broadcast from Fort Collins, Colorado, ensuring precise timekeeping.

Map of the United States showing the WWVB radio broadcast signal originating from Fort Collins, Colorado, which the atomic clock uses for synchronization.
- The clock will automatically attempt to receive the signal daily, typically overnight when electronic interference is minimal.
- For optimal reception, place the clock near a window and orient its front or rear panel towards Fort Collins, Colorado.
- A signal strength indicator (antenna icon) on the display will show the reception status.
- To manually initiate a signal search, press the VAL butonul de pe panoul din spate.

Graphic depicting a full moon, with text 'LESS ELECTRONIC INTERFERENCE AT NIGHT SET BY MORNING', indicating optimal atomic clock synchronization occurs during nighttime hours.
Setarea fusului orar
Even with atomic synchronization, you must manually select your local time zone for the correct hourly time display.
- Țineți apăsat butonul TIMP button until the time zone indicator flashes.
- Utilizați UP or JOS buttons to select your desired time zone (e.g., PST, MST, CST, EST).
- Apăsați tasta TIMP butonul din nou pentru a confirma și a ieși.
Manual Time and Date Setting
If atomic synchronization is not desired or available, you can set the time and date manually.
- Pentru a seta ora: Țineți apăsat butonul TIMP button until the hour flashes. Use UP/JOS to adjust. Press TIMP to move to minutes, then adjust. Press TIMP din nou pentru a salva.
- Pentru a seta data: Țineți apăsat butonul CALENDAR button until the year flashes. Use UP/JOS to adjust. Press CALENDAR to move to month, then day, adjusting each. Press CALENDAR din nou pentru a salva.
- Format 12/24 de ore: Apăsați tasta 12/24 pentru a comuta între formatul de 12 ore (cu indicator AM/PM) și cel de 24 de ore.
Instrucțiuni de operare
Adjusting Display Brightness and Backlight
The clock features an optional always-on backlight with adjustable brightness for optimal viewin diverse conditii de iluminare.
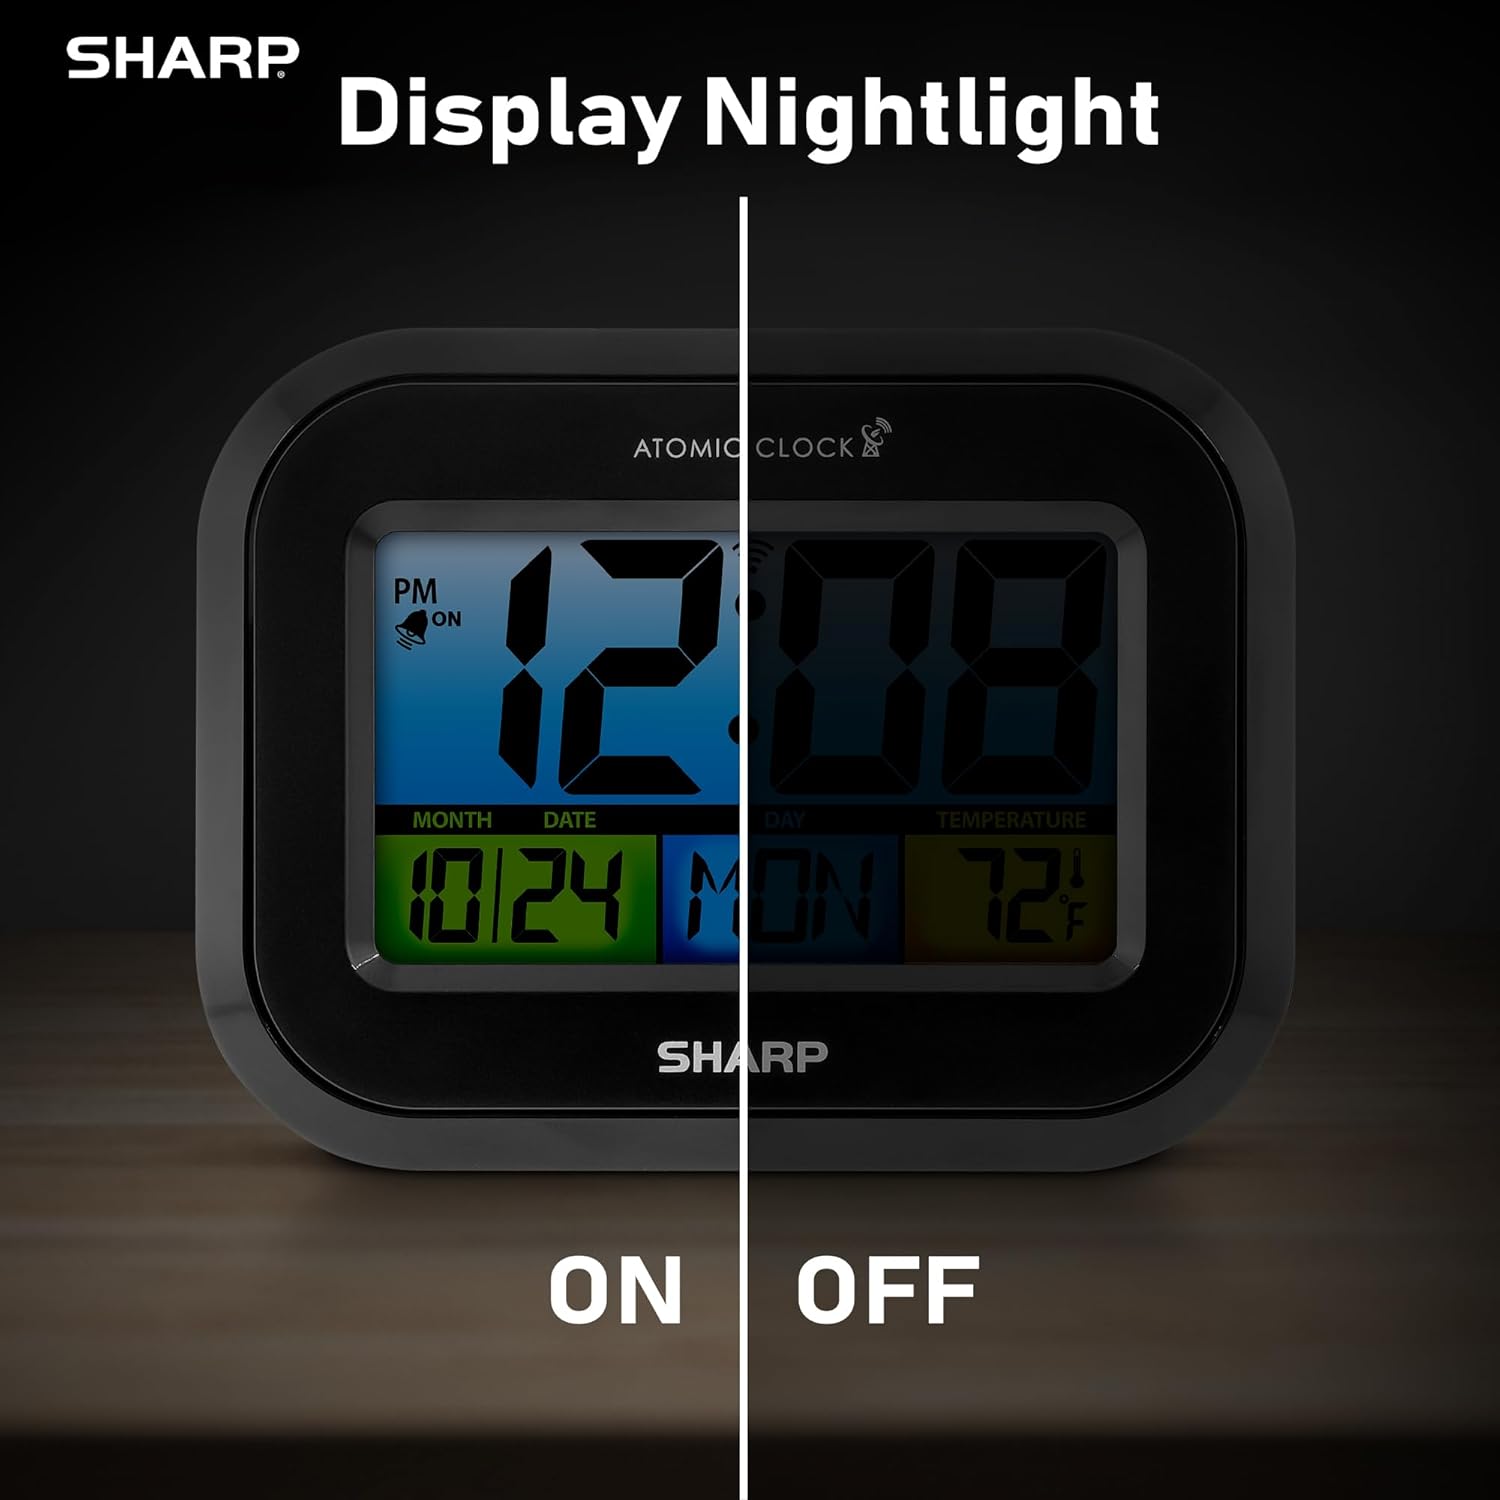
Comparison image showing the clock's display with the nightlight off (dim) and on (illuminated) in both day and night settings.
- Always-On Backlight: Utilizați Comutator ON/OFF on the rear panel to activate or deactivate the continuous backlight. When ON, the display will have a soft glow.
- Iluminare de fundal la cerere: Even if the always-on backlight is OFF, you can momentarily illuminate the display by pressing the ILUMINARE DE SPAZUL button (usually located on the top edge, though not explicitly labeled in the provided image, it's a common feature). This provides a brighter illumination for a few seconds.

Image highlighting the physical ON/OFF switch on the rear of the clock for controlling the display nightlight, indicating its function for soft glowing backlight in the dark.
Setting Dual Alarms
The clock supports two independent alarm settings.
- Apăsați tasta ALARMA button once to select Alarm 1. Press again for Alarm 2.
- În timp ce este afișată ora alarmei, apăsați și mențineți apăsat butonul ALARMA apăsați butonul până când ora clipește.
- Utilizați UP or JOS Apăsați butoanele pentru a regla ora. ALARMA to move to minutes, then adjust.
- Presa ALARMA din nou pentru a salva ora alarmei.
- Pentru a activa/dezactiva o alarmă, apăsați butonul ALARMA button repeatedly until the alarm icon (bell) appears/disappears for the desired alarm.
Folosind portul de încărcare USB
The clock includes a USB charging port for convenient charging of small electronic devices. Locate the USB port on the side or rear of the unit (specific location not detailed in provided images, but implied by feature bullets). Connect your device's USB cable to this port to begin charging.
Temperature Display (°C/°F)
The clock displays the indoor temperature. To switch between Celsius and Fahrenheit, press the ° C / ° F butonul de pe panoul din spate.
Viewing Angle Optimization
Like most LCD screens, this display is best viewed from the front or slightly above. Visibility may appear reduced at sharp side or low angles. For the best viewing experience, use the built-in kickstand to position the clock to face you.

Illustration demonstrating the optimal viewing angle for the LCD display, showing that the clock is best viewed from above or straight on, with a built-in kickstand to position it.
Wall Mounting and Tabletop Use
The clock is designed for versatile placement. Use the integrated backstand for tabletop viewing or the wall mount hole on the rear for hanging it on a wall.

The Sharp Digital Alarm Clock displayed in a home office setting, showing its versatility for both wall mounting and tabletop placement.
Întreţinere
Curatenie
Ștergeți ceasul cu o cârpă moale și uscată. Nu folosiți produse de curățare abrazive sau solvenți, deoarece acestea pot deteriora suprafața.
Înlocuirea bateriei
When the display becomes dim or the clock stops functioning, it's time to replace the batteries. Follow the battery installation steps in the Setup section. It is recommended to replace all three AAA batteries at the same time with new ones.
Depanare
| Problemă | Soluție posibilă |
|---|---|
| Afișajul este întunecat sau gol. | Check battery polarity and ensure batteries are fresh. Replace all 3 AAA batteries. Ensure the backlight ON/OFF switch is in the 'ON' position if continuous illumination is desired. |
| Timpul atomic nu se sincronizează. | Ensure the clock is placed near a window and oriented towards Fort Collins, Colorado. Avoid placing near electronic devices that may cause interference. Try initiating a manual search by pressing the WAVE button. Synchronization is often best overnight. |
| Time or date is incorrect after battery change. | Manually set the time zone. Allow time for atomic synchronization, or manually set the time and date using the TIME and CALENDAR buttons. |
| Display is hard to read from certain angles. | This is a characteristic of LCD technology. Adjust the clock's position using the kickstand to ensure it is viewed straight-on or from slightly above eye level. |
| Alarma nu sună. | Ensure the alarm is set and activated (bell icon visible). Check battery level. |
Specificații
| Proprietate | Valoare |
|---|---|
| Marca | Ascuțit |
| Numărul de model | SPC5028AMZ |
| Tip de afișare | LCD |
| Culoare | Negru |
| Dimensiunile produsului | 6.45 cm lățime x 5 cm înălțime |
| Greutatea articolului | 10.8 uncii (0.31 kilograme) |
| Sursa de alimentare | Alimentat cu baterii (3 x AAA, nu sunt incluse) |
| Modul de operare | Atomic |
| Caracteristici speciale | Cordless, Dual Alarm, USB Charging Port, Indoor Temperature Display, Always-On Backlight |
| Tip de montare | Suport de perete, de masă |
| Material cadru | Plastic |
Garanție și suport
Sharp products are manufactured to the highest quality standards. For warranty information or technical support, please refer to the documentation included with your purchase or visit the official Sharp webPăstrați bonul fiscal ca dovadă a achiziției pentru reclamații în garanție.

Sharp Time Solutions


