Introducere
This manual provides detailed instructions for the setup, operation, and maintenance of your ClocTeck Transparent Digital Alarm Clock. Please read this manual thoroughly before using the product to ensure proper function and longevity.
Informații de siguranță
- Nu expuneți dispozitivul la temperaturi extreme, la lumina directă a soarelui sau la umiditate ridicată.
- Evitați scăderea sau supunerea dispozitivului la impacturi puternice.
- Țineți aparatul departe de apă și alte lichide.
- Nu încercați să dezasamblați sau să reparați dispozitivul singur. Contactați personal calificat pentru service.
- Use only the specified Type-C charging cable for power.
Conținutul pachetului
Vă rugăm să verificați conținutul pachetului la despachetare:
- ClocTeck Transparent Digital Alarm Clock (Gold)
- Cablu de încărcare USB de tip C
- Manual de utilizare (acest document)
Produs terminatview
The ClocTeck Transparent Digital Alarm Clock features a clear LCD display that shows time, date, day of the week, temperature, humidity, and a weather icon. It is designed with a sleek aluminum alloy case.
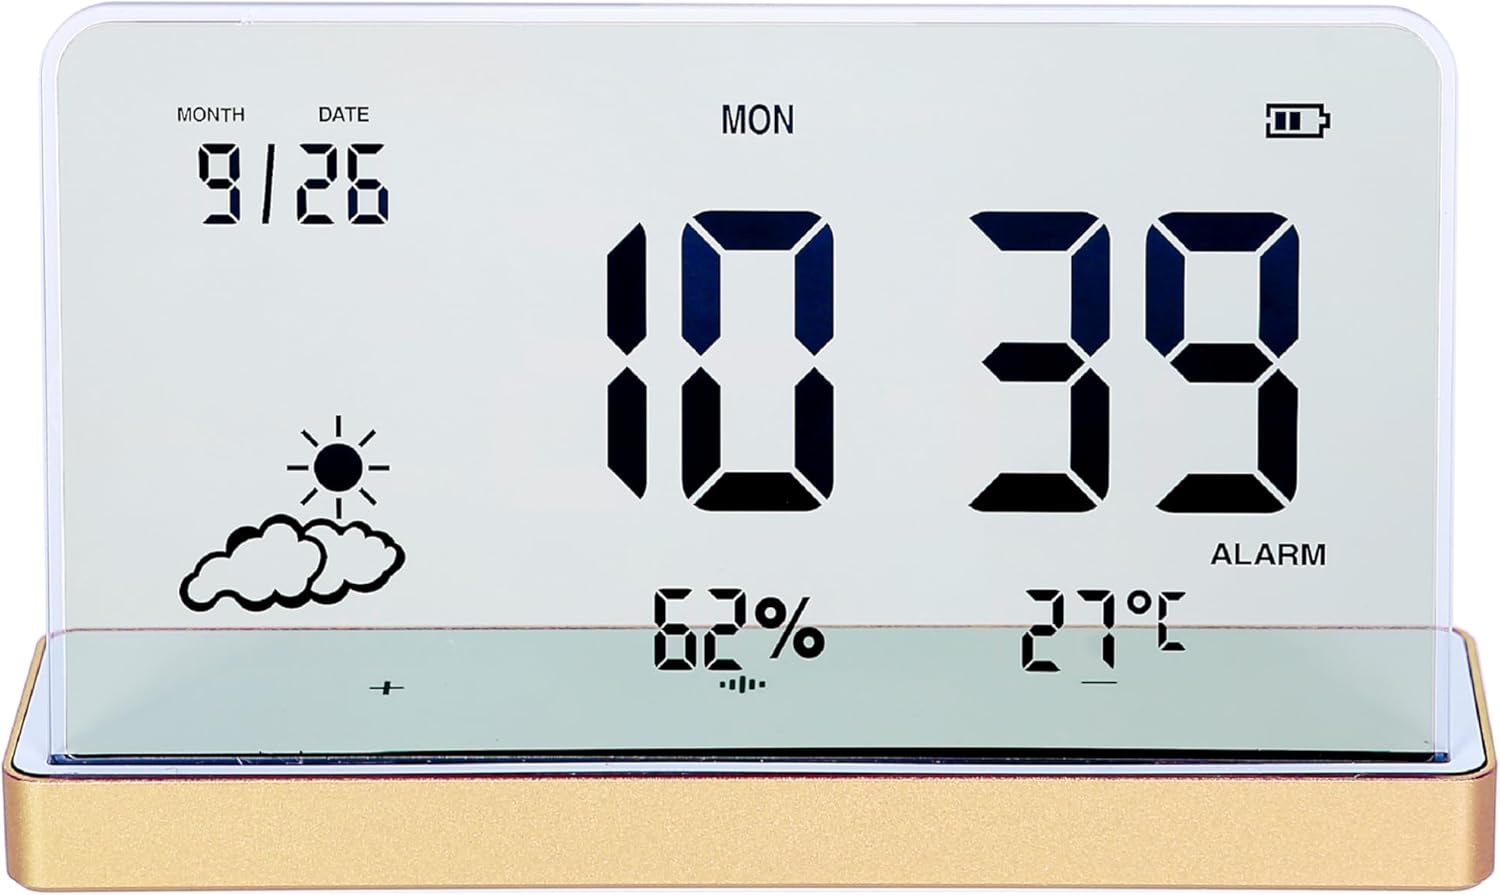
Figura 1: Față view of the ClocTeck Transparent Digital Alarm Clock. The display shows the current time (10:39), date (9/26), day (MON), humidity (62%), temperature (27°C), and a partly cloudy weather icon. A battery indicator is visible in the top right corner.
Caracteristici cheie:
- Transparent LCD Display
- Time, Date, and Day Display
- Indoor Temperature and Humidity Monitoring
- Up to 3 Programmable Alarms
- Rechargeable Battery with long standby time
- Durable Aluminum Alloy Case
Înființat
1. Pornire și încărcare
The clock is powered by a built-in rechargeable battery. Before first use, or if the battery indicator is low, connect the provided Type-C USB charging cable to the charging port on the back or side of the clock and plug the other end into a standard USB power adapter (not included).
- A full charge provides approximately 75 days of operation.
- Indicatorul bateriei de pe afișaj va afișa starea de încărcare.
2. Plasamentul inițial
Place the clock on a stable, flat surface. For accurate temperature and humidity readings, avoid placing it near heat sources, direct sunlight, or in areas with extreme drafts.
Instrucțiuni de operare
The clock features several buttons, typically located on the back or bottom, for setting time, alarms, and other functions. Refer to the specific button labels on your device.
1. Setarea orei și datei
- Apăsați tasta SET butonul pentru a intra în modul de setare a orei.
- Utilizați UP şi JOS Apăsați butoanele pentru a regla ora. SET pentru a confirma și a trece la minute.
- Repetați pentru minute, an, lună și dată.
- Presa SET din nou pentru a ieși din modul de setare.
2. Setarea alarmelor
The clock supports up to 3 independent alarms.
- Apăsați tasta ALARMA button to cycle through Alarm 1, Alarm 2, Alarm 3, and alarm off modes.
- When an alarm is selected, press and hold the ALARMA button to enter alarm setting mode for that specific alarm.
- Utilizați UP şi JOS buttons to set the alarm hour and minutes. Press ALARMA to confirm each step.
- After setting the time, you may be prompted to set the alarm's activation days (e.g., weekdays, weekends, daily). Use UP/JOS şi ALARMA pentru a selecta.
- Pentru a activa sau dezactiva o alarmă, apăsați scurt butonul ALARMA button until the alarm icon appears or disappears next to the corresponding alarm number on the display.
3. Afișajul temperaturii și umidității
The clock continuously displays indoor temperature and humidity. The temperature range is -20°C to 65°C, and the humidity range is 10% to 99%.
- Temperature is displayed in Celsius (°C).
- Humidity is displayed as a percentage (%).
4. Funcția de amânare
When an alarm sounds, press any button (other than the alarm off button, if present) to activate the snooze function. The alarm will sound again after a short interval (typically 5-10 minutes).
5. Reglarea luminozității afișajului
The clock may feature automatic brightness adjustment or manual control. Consult the device's physical buttons for a dedicated brightness control button or a combination of buttons to adjust display intensity.
Întreţinere
- To clean the display and casinFolosiți o cârpă moale și uscată. Nu utilizați substanțe de curățare abrazive sau solvenți.
- Asigurați-vă că portul de încărcare este lipsit de praf și resturi.
- Depozitați ceasul într-un loc răcoros și uscat atunci când nu îl utilizați pentru perioade lungi de timp.
Depanare
| Problemă | Cauza posibila | Soluţie |
|---|---|---|
| Afișajul este gol sau întunecat. | Low battery or power saving mode. | Charge the device using the Type-C cable. Check brightness settings. |
| Alarma nu sună. | Alarma nu este activată sau volumul este prea scăzut. | Ensure the alarm is set and activated (alarm icon visible). Check if there's a volume setting. |
| Citiri incorecte ale temperaturii/umidității. | Device placed in an unsuitable environment. | Relocate the clock away from direct heat, cold, or high drafts. Allow time for readings to stabilize. |
| Butoanele nu răspund. | Eroare temporară de software sau baterie descărcată. | Recharge the device. If issue persists, try a soft reset (refer to manual for reset procedure, if available, or let battery drain and recharge). |
Specificații
- Model: ClocTeck-CL01
- Dimensiuni: Approximately 12.5 cm (Width) × 3.2 cm (Depth) × 8 cm (Height)
- Greutate corporală: Aproximativ 0.13 kg
- Material carcasa: Aliaj de aluminiu
- Tip de afișare: Transparent LCD Digital Display
- Interval de temperatură: -20°C până la 65°C
- Gama de umiditate: 10% până la 99%
- Sursa de alimentare: Baterie reîncărcabilă (încărcare USB de tip C)
- Durata de viață a bateriei: Aproximativ 75 de zile cu o încărcare completă
- Alarme: 3 de alarme programabile

Figure 2: Dimensions of the ClocTeck Transparent Digital Alarm Clock. The image shows the clock with labels indicating a height of 8cm and a width of 12.5cm.
Garanție și suport
ClocTeck provides a 12-month refund and exchange guarantee de la data achiziției. Această garanție acoperă defectele de fabricație și problemele care apar în urma utilizării normale.
If you encounter any problems or have questions regarding your ClocTeck Transparent Digital Alarm Clock, please do not hesitate to contact our customer support team. We are committed to providing assistance and ensuring your satisfaction.
For support, please refer to the contact information provided on the product packaging or the seller's page where you purchased the item.


