1. Introducere
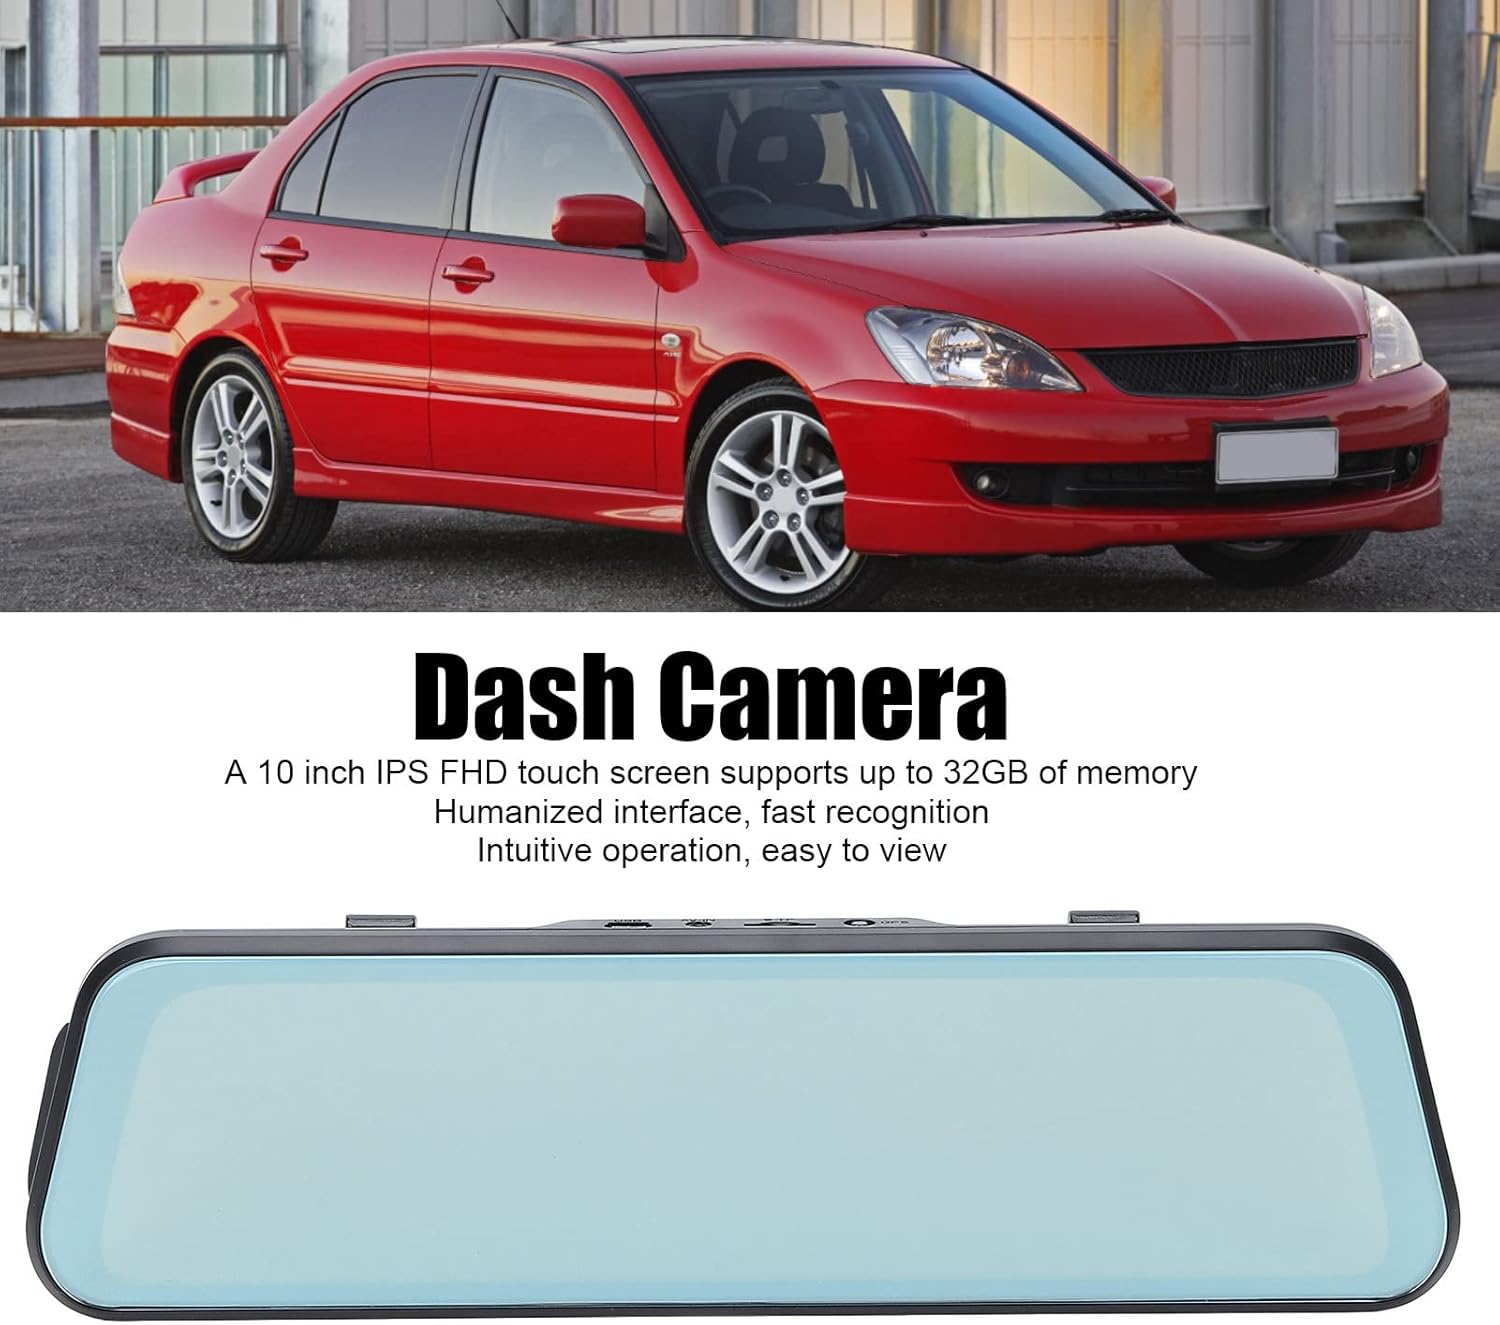
This manual provides detailed instructions for the installation, operation, and maintenance of your Bewinner 1080p Car Dash Cam. Please read this manual thoroughly before using the device to ensure proper functionality and safety. This dash cam features a 10-inch IPS touchscreen and dual front and rear cameras for comprehensive vehicle recording.
2. Informații de siguranță
- Asigurați-vă că camera de bord este montată în siguranță și nu obstrucționează vederea șoferului. view sau interferează cu comenzile vehiculului.
- Nu utilizați dispozitivul în timp ce conduceți. Reglați setările numai atunci când vehiculul este parcat în siguranță.
- Use only the provided power adapter to prevent damage to the device and vehicle.
- Evitați expunerea dispozitivului la temperaturi extreme, la lumina directă a soarelui pentru perioade lungi de timp sau la umiditate excesivă.
- Keep the lens clean for optimal recording quality.
- Regularly back up important video filepentru a preveni pierderea.
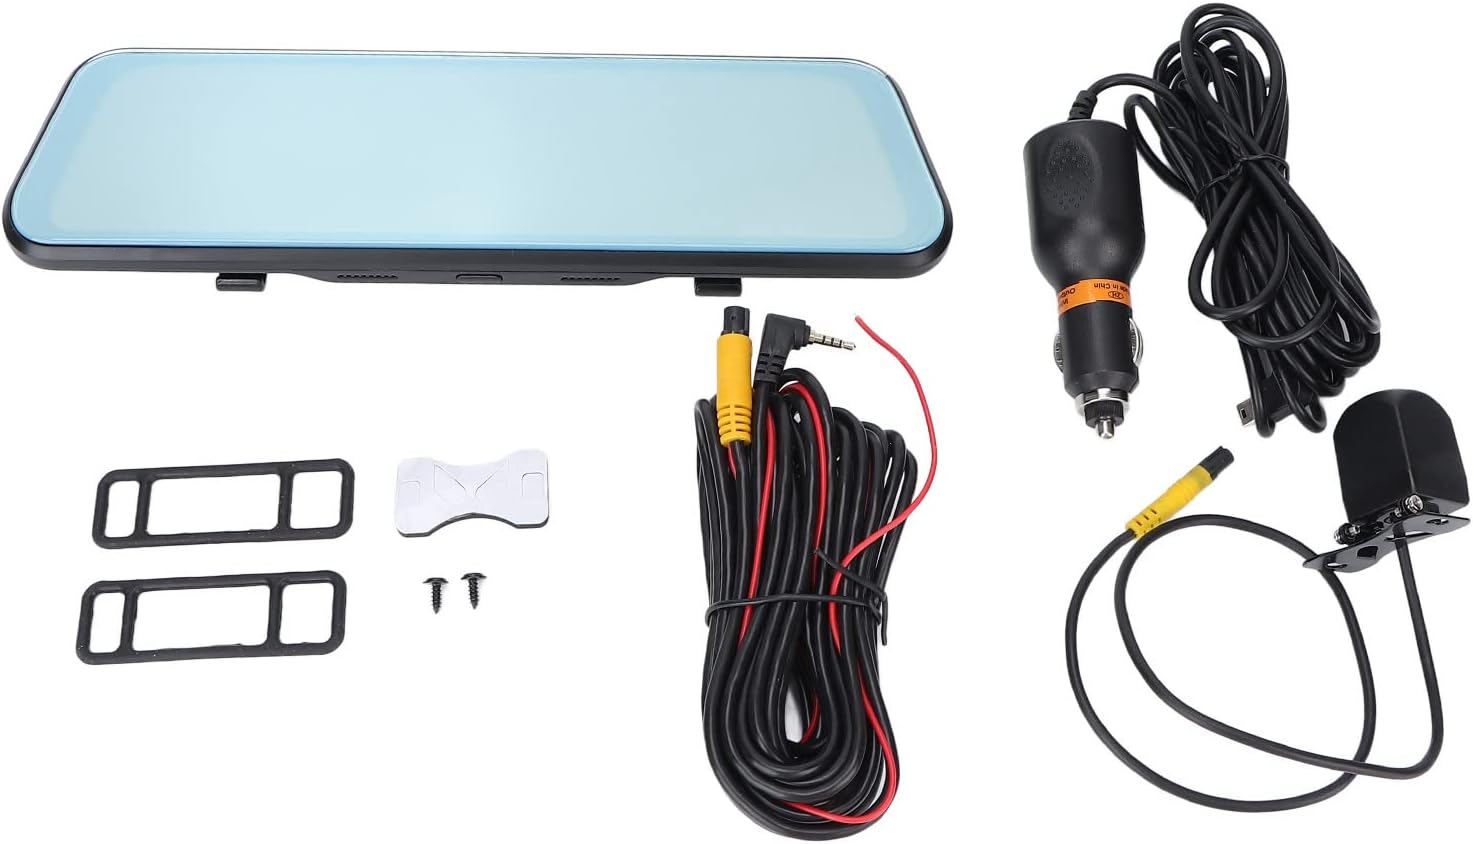
3. Conținutul pachetului
Verificați dacă toate articolele enumerate mai jos sunt incluse în pachetul dumneavoastră:
- Bewinner 1080p Car Dash Cam (Main Unit)
- Camera spate
- 2 x Power Cords (Car Charger)
- Manual de utilizare
- Double-sided Adhesive Tape
- 2 x șuruburi
- 2 x Mounting Accessories (Rubber Straps)
4. Produs terminatview
The Bewinner Dash Cam is designed to provide reliable video recording for your vehicle. It features a large touchscreen display and dual cameras for comprehensive coverage.
4.1 Main Dash Cam Unit

The main unit integrates a 10-inch IPS touchscreen display and the front camera. It is designed to be mounted over your existing rearview oglindă.

4.2 Cameră din spate

The rear camera provides a wide-angle view of the area behind your vehicle, enhancing safety and recording capabilities.
5. Configurare și instalare
5.1 Introducerea unui card Micro SD
Before installation, insert a Class 10 or higher Micro SD card (up to 32GB, not included) into the dash cam's card slot. Ensure the card is inserted correctly until it clicks into place.
5.2 Mounting the Main Dash Cam Unit
- Attach the two rubber straps (mounting accessories) to the back of the main dash cam unit.
- Securely fasten the dash cam over your vehicle's existing rearview mirror using the rubber straps. Ensure it is stable and does not vibrate.
- Adjust the front camera lens angle to capture the desired view a drumului din fata.

5.3 Instalarea camerei din spate
- Choose a suitable location at the rear of your vehicle, typically above the license plate, for the rear camera.
- Use the provided double-sided adhesive tape and screws to securely mount the rear camera.
- Route the rear camera cable to the main dash cam unit. Connect the cable to the designated rear camera input port on the main unit.
- If applicable, connect the red wire of the rear camera cable to your vehicle's reverse light power source for automatic reverse display functionality.
5.4 Conexiune la alimentare
- Connect one end of the car charger (power cord) to the dash cam's power input port.
- Conectați celălalt capăt al încărcătorului auto la priza brichetei vehiculului.
- The dash cam will automatically power on and begin recording when the vehicle engine starts, and power off when the engine is turned off.

6. Instrucțiuni de utilizare
6.1 Pornire/Oprire
- Automat: The device powers on and off automatically with the vehicle's ignition.
- Manual: Press and hold the power button (if available) to manually turn the device on or off.
6.2 Operarea ecranului tactil
The 10-inch IPS touchscreen allows for intuitive navigation and control. Tap icons to select functions, swipe to navigate menus or switch camera views.
6.3 Moduri de înregistrare
- Înregistrare în buclă: Videoclipurile sunt înregistrate în segmente (de exemplu, 1, 3 sau 5 minute). Când cardul de memorie este plin, cea mai veche înregistrare deblocată files sunt suprascrise.
- Înregistrare de urgență (senzor G): The built-in G-sensor detects sudden impacts or collisions and automatically locks the current video file pentru a preveni suprascrierea acestuia.
- Monitor de parcare: When enabled, the dash cam will automatically start recording if it detects a collision or vibration while the vehicle is parked. This feature typically requires a hardwire kit (not included) for continuous power.
6.4 Comutarea camerei Views
On the touchscreen, you can typically swipe left or right, or tap a specific icon, to switch between front camera view, camera spate view, or a picture-in-picture display showing both simultaneously.

6.5 Setări meniu
Access the settings menu via the touchscreen to configure various options:
- Rezoluție video: Set recording resolution (e.g., 1080p for both front and rear).
- Durata înregistrării în buclă: Adjust segment length (e.g., 1/3/5 minutes).
- Sensibilitatea senzorului G: Adjust the sensitivity of impact detection.
- Monitor de parcare: Activați sau dezactivați această funcție.
- Data/Ora: Setați data și ora corecte pentru ora exactăamps pe înregistrări.
- Limbă: Select your preferred language (supports Chinese, English, French, Italian, Korean, Russian, Spanish, German, Japanese, etc.).
- Formatează cardul SD: Format the Micro SD card to ensure optimal performance and clear old data.
7. Întreținere
- curatenie: Use a soft, dry cloth to clean the dash cam screen and lens. Do not use abrasive cleaners or solvents.
- Întreținerea cardului SD: Formatați cardul Micro SD în mod regulat (de exemplu, o dată pe lună) pentru a preveni coruperea datelor și a asigura o înregistrare fără probleme. Faceți copii de rezervă ale tuturor informațiilor importante files înainte de formatare.
- Depozitare: If storing the device for an extended period, remove it from the vehicle and store it in a cool, dry place.
8. Depanare
| Problemă | Soluție posibilă |
|---|---|
| Camera de bord nu pornește. |
|
| Înregistrarea se oprește sau se blochează. |
|
| Calitate video slabă. |
|
| Camera din spate nu afișează. |
|
9. Specificații
| Caracteristică | Detaliu |
|---|---|
| Numărul de model | Dpofirs37z42emfyt9349 |
| Ecran de afișare | Ecran tactil IPS de 10 inchi |
| Rezoluția camerei frontale | 1920 x 1080p @ 30fps |
| Rezoluția camerei din spate | 1920 x 1080p @ 30fps (or 1920 x 720p @ 30fps) |
| Unghiul lentilei frontale | Unghi larg de 170° |
| Unghiul lentilei din spate | Unghi larg de 140° |
| Suport de stocare | Micro SD Card up to 32GB (Class 10 or higher recommended) |
| Capacitatea bateriei | 450 mAh Lithium Battery (built-in) |
| Caracteristici speciale | Night Vision, Touch Screen, Loop Recording, G-Sensor, Parking Monitor, Time-lapse Recording |
| Limbi acceptate | Chinese, English, French, Italian, Korean, Russian, Spanish, German, Japanese, etc. |
10. Garanție și asistență
Bewinner products are designed for reliability and performance. For specific warranty details, please refer to the warranty card included with your purchase or contact Bewinner customer support. If you encounter any issues not covered in this manual, please reach out to our customer service team for assistance.
For further support, visit the official Bewinner website-ul sau contactați comerciantul dvs.
