1. Introducere
Thank you for choosing the VITCOCO 5 Megapixel 1920P HD Otoscope Ear Cleaner. This device is designed to provide a clear visual inspection of the ear canal and assist in ear cleaning. This manual provides essential information for the safe and effective use of your otoscope. Please read it thoroughly before operation and retain it for future reference.

Image 1.1: VITCOCO Otoscope connected to a smartphone, showing a clear view a canalului urechii.
2. Informații de siguranță
- This device is intended for visual inspection and gentle ear cleaning. It is not a medical device for diagnosis or treatment of ear conditions. Consult a medical professional for any ear health concerns.
- Exercise extreme caution when inserting the otoscope into the ear canal. Avoid excessive force or deep insertion to prevent injury to the eardrum or ear canal.
- Always use the provided silicone ear tips to protect the ear canal. A protective ring is integrated to safeguard sensitive areas, especially when used on children.
- The otoscope features an intelligent temperature control system to maintain a safe temperature during use (ear spoon 20-25°C, handle 30-34°C). If the device feels uncomfortably warm, discontinue use immediately.
- The lens of the otoscope is IP67 waterproof and can be rinsed with water or alcohol. The main body of the otoscope is not waterproof; do not immerse it in liquids.
- Keep out of reach of children. Adult supervision is required if used on children.

Image 2.1: The otoscope in use, demonstrating its application for visual ear inspection. Note the emphasis on gentle use, especially for sensitive users.
3. Conținutul pachetului
Verificați dacă toate articolele sunt prezente în colet:
- VITCOCO Otoscope
- Cablu de încărcare USB-C
- Box with 5 Silicone Ear Tips
- Manual de instructiuni
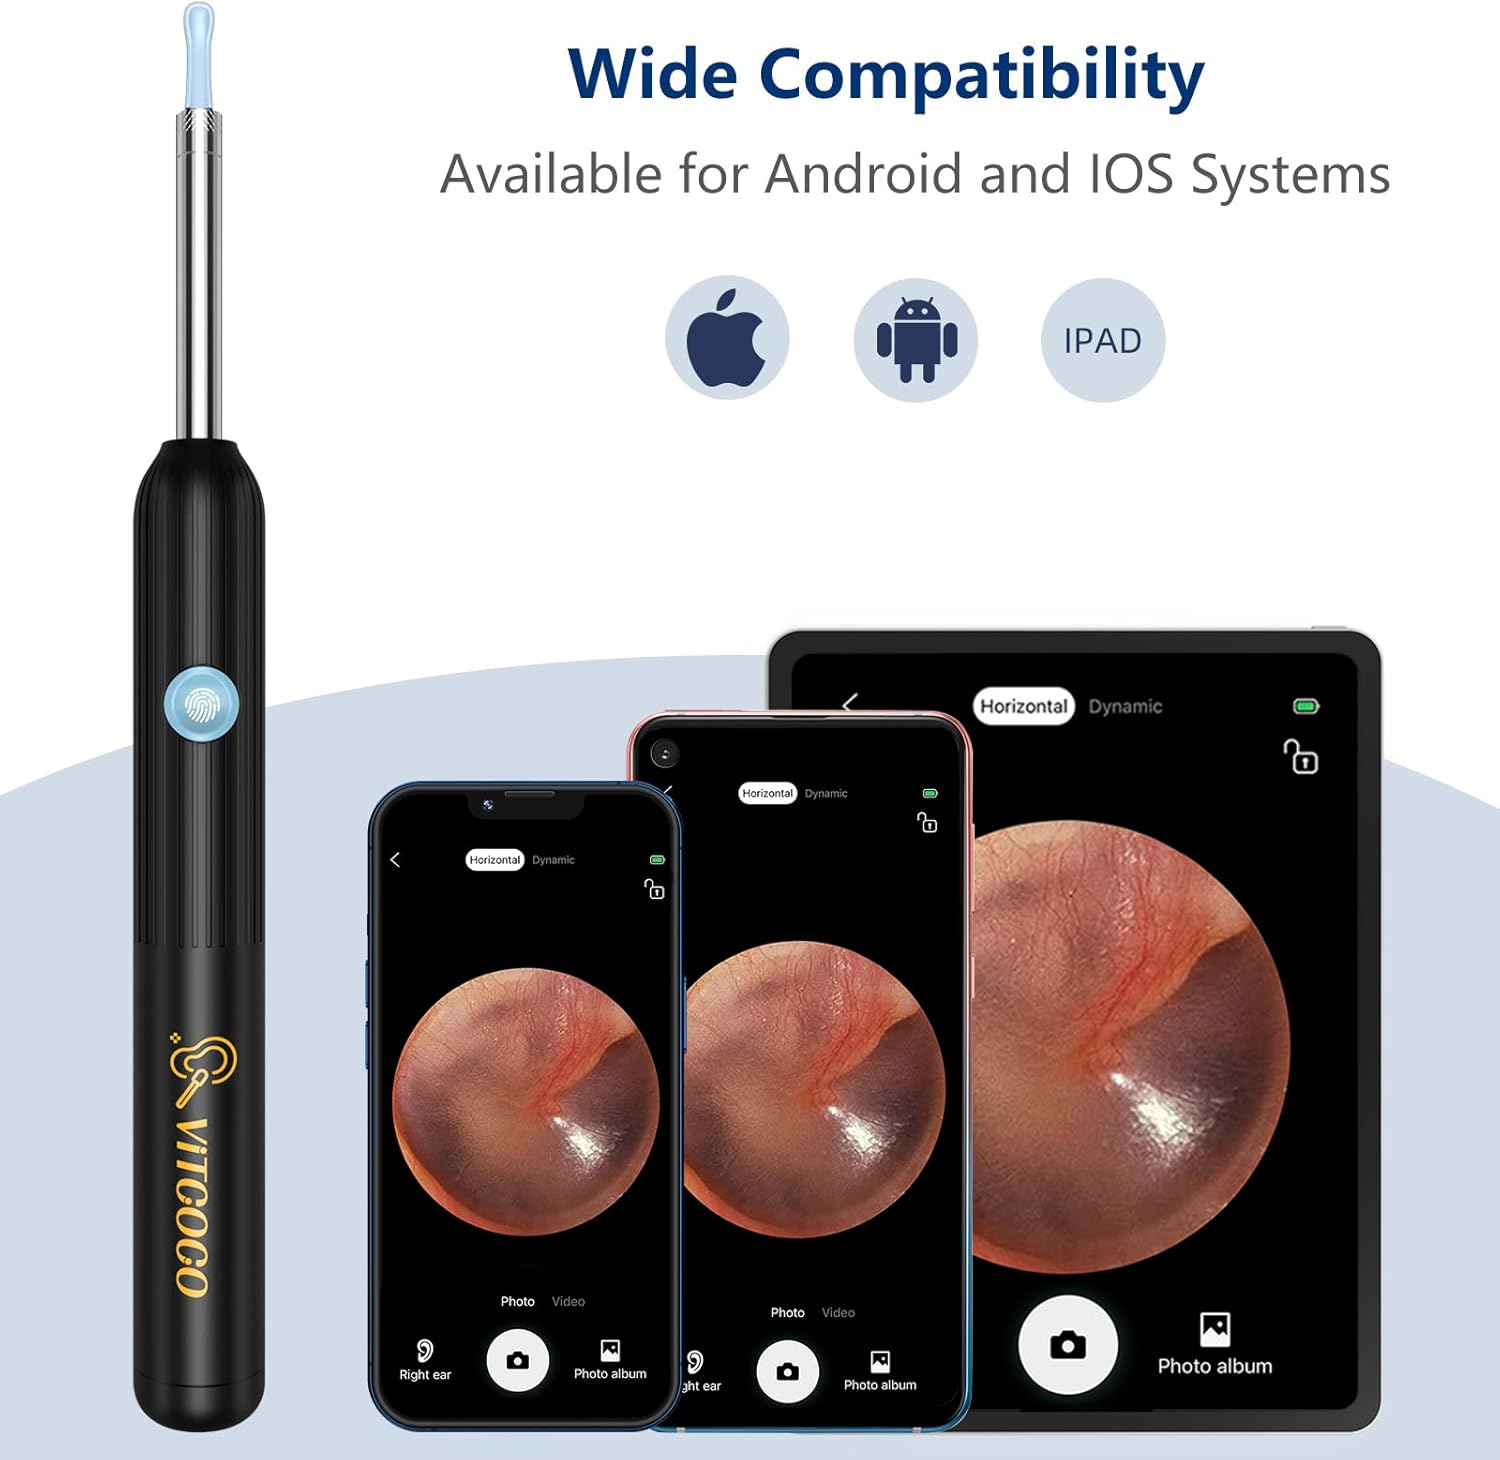
Image 3.1: All components included in the VITCOCO Otoscope package.
4. Produs terminatview
The VITCOCO Otoscope features advanced technology for clear and safe ear inspection:
- Cameră de înaltă rezoluție: 5 Megapixel, 1920P HD camera for detailed images and videos.
- Iluminare: Equipped with 6 powerful LED lights to illuminate the ear canal.
- Design compact: Ultra-small 3.9mm lens diameter for comfortable insertion.
- Stabil Viewing: 6-axis gyroscope and 360° wide-angle lens ensure a stable image regardless of rotation.
- Control inteligent al temperaturii: Maintains optimal temperatures for user comfort and safety.
- Conectivitate wireless: Fast 2.4GHz WiFi chip for seamless image transmission to your smartphone or tablet.
- Durată lungă de viață a bateriei: 350mAh battery provides approximately 90 minutes of continuous use.
- Lentila impermeabila: IP67 rated lens for easy cleaning.

Imaginea 4.1: Detaliată view of the otoscope's camera system, including the 5 Megapixel HD camera and 6 LED lights.

Image 4.2: The 6-axis gyroscope ensures a stable, non-deviating image angle during use.

Image 4.3: Key components and intelligent temperature control design of the otoscope.
5. Configurare
Follow these steps to set up your VITCOCO Otoscope:
- Descărcați aplicația: Scanați codul QR de mai jos sau vizitați http://qr19.cn/CRUIhc to download the "Suear" application from the App Store (iOS) or Google Play Store (Android). The app is compatible with Android 4.4+ and iOS 9.0+ devices.
- Pornire: Press and hold the power button on the otoscope for approximately 5 seconds until the indicator light turns on.
- Conectați-vă la Wi-Fi: On your smartphone or tablet, go to your Wi-Fi settings and connect to the network named "Suear-X7-XXXX" (the last four characters will vary).
- Deschide aplicatia: Return to the "Suear" app and click the home icon to enter the device interface. You should now see a live view from the otoscope camera.

Imaginea 5.1: Ghid vizual pentru procesul de configurare în patru pași.

Image 5.2: The integrated Smart WiFi Chip ensures fast and smooth image transmission.
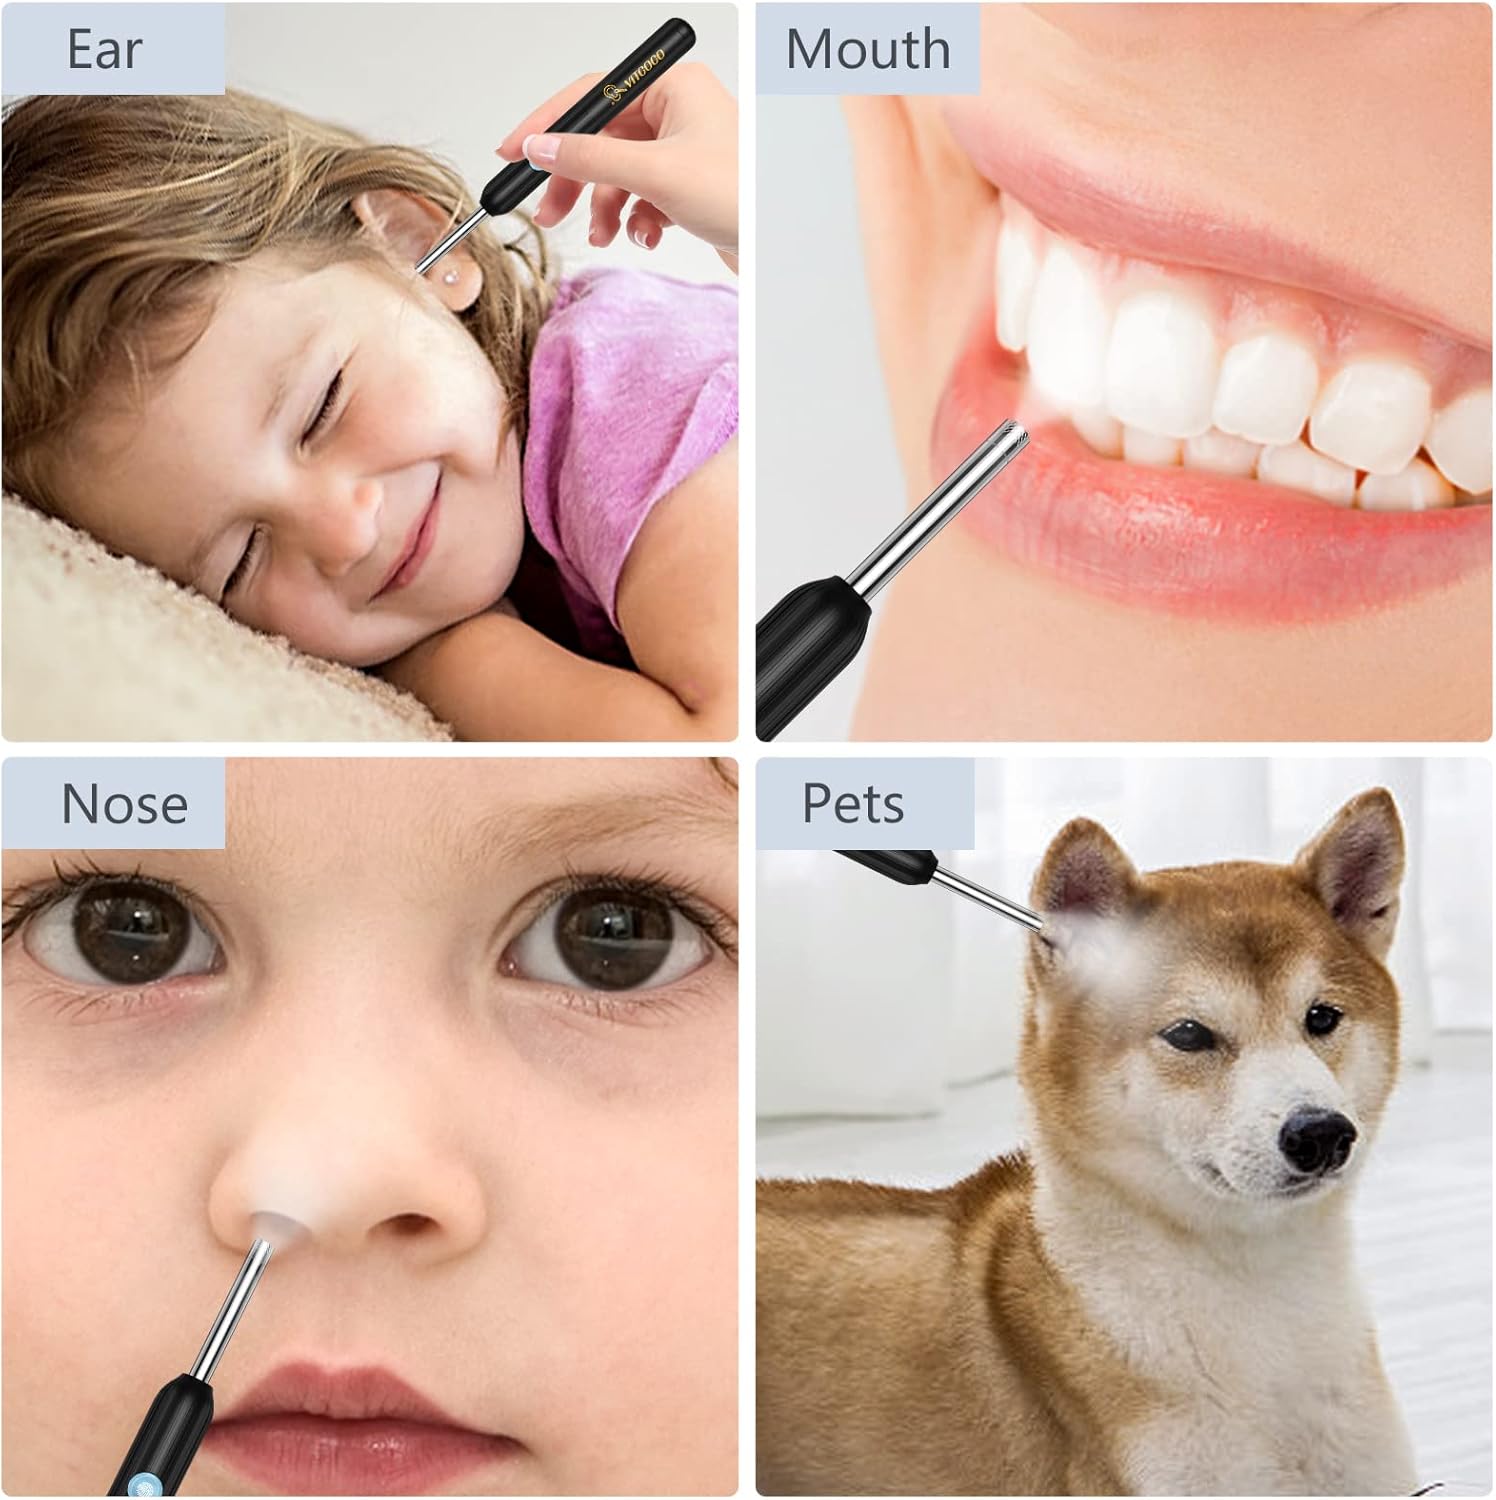
Image 5.3: The otoscope offers wide compatibility with various mobile operating systems.
6. Instrucțiuni de utilizare
Before use, ensure the otoscope is fully charged and connected to your device via the "Suear" app.
- Atașați dopul pentru ureche: Select a suitable silicone ear tip and gently screw it onto the otoscope's camera head. Ensure it is securely fastened.
- Pozitionare: Carefully insert the otoscope into the ear canal while observing the live feed on your connected device. Adjust the angle slowly to get a clear view.
- Funcțiile aplicației: The "Suear" app provides various functions:
- Foto/Video: Capture images or record videos of the ear canal.
- Lens Mode: Comutați între diferite viewmoduri de ing.
- Afișaj baterie: Monitor the remaining battery life.
- Blocare/Deblocare: Stabilize the image.
- Landscape/Portrait: Adjust screen orientation.
- Left/Right Ear: Optimize the camera's orientation for the respective ear.
- curatenie: Use the ear tip to gently remove visible earwax. Do not push earwax deeper into the canal. If resistance is met, stop immediately.
- Utilizare multifuncțională: The otoscope can also be used for visual inspection of other areas such as the mouth, nose, or even for pets, always with appropriate caution.

Image 6.1: Proper attachment of the silicone ear tip and the compact size of the otoscope.

Imaginea 6.2: Examples of the otoscope's application for various visual inspections.
7. Întreținere
- Curățarea lentilei: After each use, gently remove the silicone ear tip. The camera lens (IP67 waterproof) can be cleaned by rinsing with water or wiping with an alcohol swab. Ensure the lens is dry before storing. Do not immerse the main body of the otoscope.
- Sfaturi pentru curățarea urechilor: The silicone ear tips can be washed with soap and water or disinfected with alcohol. Ensure they are completely dry before reuse or storage.
- Încărcare: Connect the provided USB-C cable to the charging port on the otoscope and to a standard USB power adapter (not included). A full charge provides approximately 90 minutes of continuous operation or 120 days of standby time.
- Depozitare: Store the otoscope and its accessories in a clean, dry place away from direct sunlight and extreme temperatures.

Image 7.1: Information on the IP67 waterproof lens for cleaning and the dual thermostat system.
8. Depanare
- No Image on App:
- Ensure the otoscope is powered on (long press the button).
- Verify your phone/tablet is connected to the otoscope's Wi-Fi network ("Suear-X7-XXXX").
- Close and reopen the "Suear" app.
- Restart both the otoscope and your device.
- Calitate slabă a imaginii:
- Curățați obiectivul camerei conform descrierii din secțiunea Întreținere.
- Ensure there is sufficient light from the otoscope's LEDs.
- Check for any obstructions on the lens or ear tip.
- Dispozitivul nu se încarcă:
- Ensure the USB-C cable is securely connected to both the otoscope and the power source.
- Încercați un alt cablu USB-C sau un adaptor de alimentare.
- Verificați dacă portul de încărcare este curat și fără resturi.
- Supraîncălzirea dispozitivului:
- The otoscope has intelligent temperature control. If it feels excessively hot, discontinue use immediately and allow it to cool down.
- Asigurați o ventilație adecvată în timpul utilizării.
9. Specificații
| Marca | VITCOCO |
| Numărul de model | 001 |
| Rezoluția camerei | 5 Megapixel, 1920P HD |
| Lumini LED | 6 |
| Diametrul lentilei | 3.9mm |
| Capacitatea bateriei | 350mAh |
| Timp de lucru | Aproximativ. 90 minute |
| Timp de așteptare | Aproximativ. 120 zile |
| Port de încărcare | USB-C |
| Conectivitate wireless | Wi-Fi de 2.4 GHz |
| Compatibilitate | Android 4.4+, iOS 9.0+ |
| Evaluare rezistentă la apă | IP67 (doar obiectivul) |
| Dimensiunile produsului | 17.5 x 6.5 x 1.9 cm |
| Greutatea produsului | 50 de grame |
10. Garanție și asistență
For warranty information and customer support, please refer to the documentation included with your product packaging or contact VITCOCO customer service through their official website. Please have your model number (001) and purchase details available when seeking support.


