Produs terminatview
The Hugolog Keyless Entry Door Lock provides convenient and secure access to your home or office. This manual outlines the installation, operation, maintenance, and troubleshooting for your device.

Imagine: Față și verso view of the Hugolog Keyless Entry Door Lock, showcasing the keypad on one side and the interior assembly on the other.
Conținutul pachetului
Înainte de a începe instalarea, vă rugăm să verificați dacă toate componentele sunt prezente în pachet:

Image: All components included in the Hugolog Keyless Entry Door Lock package, laid out on a white surface. This includes the exterior keypad assembly, interior assembly, latch, strike plate, mounting plate, screws, backup keys, and installation guide.
- Ansamblu exterior al tastaturii
- Asamblare interioara
- Zăvor
- Placa de montare
- Mâner
- Cilindru de blocare
- Backup Key(s)
- Instrumentul de resetare
- Placă de grevă
- Various Screws (Latch Screws, Mounting Screws, Interior Assembly Screws)
- Installation Guide / Programming Instruction
- Drilling Drawing (if needed for new installations)
Configurare și instalare
Follow these steps carefully to install your Hugolog Keyless Entry Door Lock. For visual guidance, please refer to the installation video provided below.
Verificări înainte de instalare
- Asigurați-vă că grosimea ușii este între 35-50 mm.
- Verify the backset of your door (distance from door edge to center of bore hole) is compatible. The latch is self-adjusting for bolt side distance.
- If drilling is required for a new door, refer to the drilling drawing provided in the package.

Image: Diagram showing door dimensions and lock measurements, including backset and bore hole diameter, to ensure compatibility.
Etape de instalare
- Instalați zăvorul: Insert the latch into the door edge. Ensure the angle of the latch faces the door jamb. Adjust the backset if necessary, making sure the hole is in the horizontal position.
- Instalați placa de blocare: Secure the strike plate onto the door jamb using the provided screws. Ensure the latch angle faces the door jamb.
- Instalați ansamblul exterior: Slide the shaft of the exterior assembly smoothly through the hole in the latch. Ensure the notch of the lock cylinder is facing away from the door frame. The cable must go through the door hole above the latch.
- Poziționați placa de montare: Route the cable and connector through the hole in the mounting plate. Position the mounting plate against the door.
- Secure Assemblies: Secure both the exterior assembly and the mounting plate using the mounting screws.
- Instalați ansamblul interior: Route the cable and connector through the cable hole on the interior assembly. Connect the cable. It is recommended to insert the PCB wire into the door hole after connection. Install the interior assembly and secure it using flat head screws.
- Instalați mânerul: Push the lever into the base until the catch pin is engaged. Ensure the tip of the handle points down.
- Load Batteries and Reset: Install 4x AA batteries into the interior assembly.
- Instalați capacul bateriei: Put back the lid of the battery pack.
Ghid video de instalare
Video: A detailed step-by-step guide on how to install the Hugolog Keyless Entry Door Lock. This video covers all physical installation aspects from preparing the door to securing the lock components.
Initial Programming - Change Master Code
The default master code is 12345678. It is required that you change it to a code of your own before programming other features.
- Presa Hugolog button twice, then enter the default master code (12345678), and press Hugolog button again. Wait for a long green light flash.
- Presa 1. Wait for a green light flash.
- Enter your new master code, then press Hugolog button. Succeed green light flash.
- Enter the new master code again, then press Hugolog button. Succeed green light flash.
Instrucțiuni de operare
Deblocare și blocare
Your Hugolog lock offers multiple ways to unlock and lock for your convenience:
- tastatură: Introduceți codul de utilizator pe tastatură.
- Cheie fizică: Use the provided backup key for manual unlocking.
- Întoarcerea degetului mare: Rotate the interior thumb turn to manually lock or unlock the door from the inside.
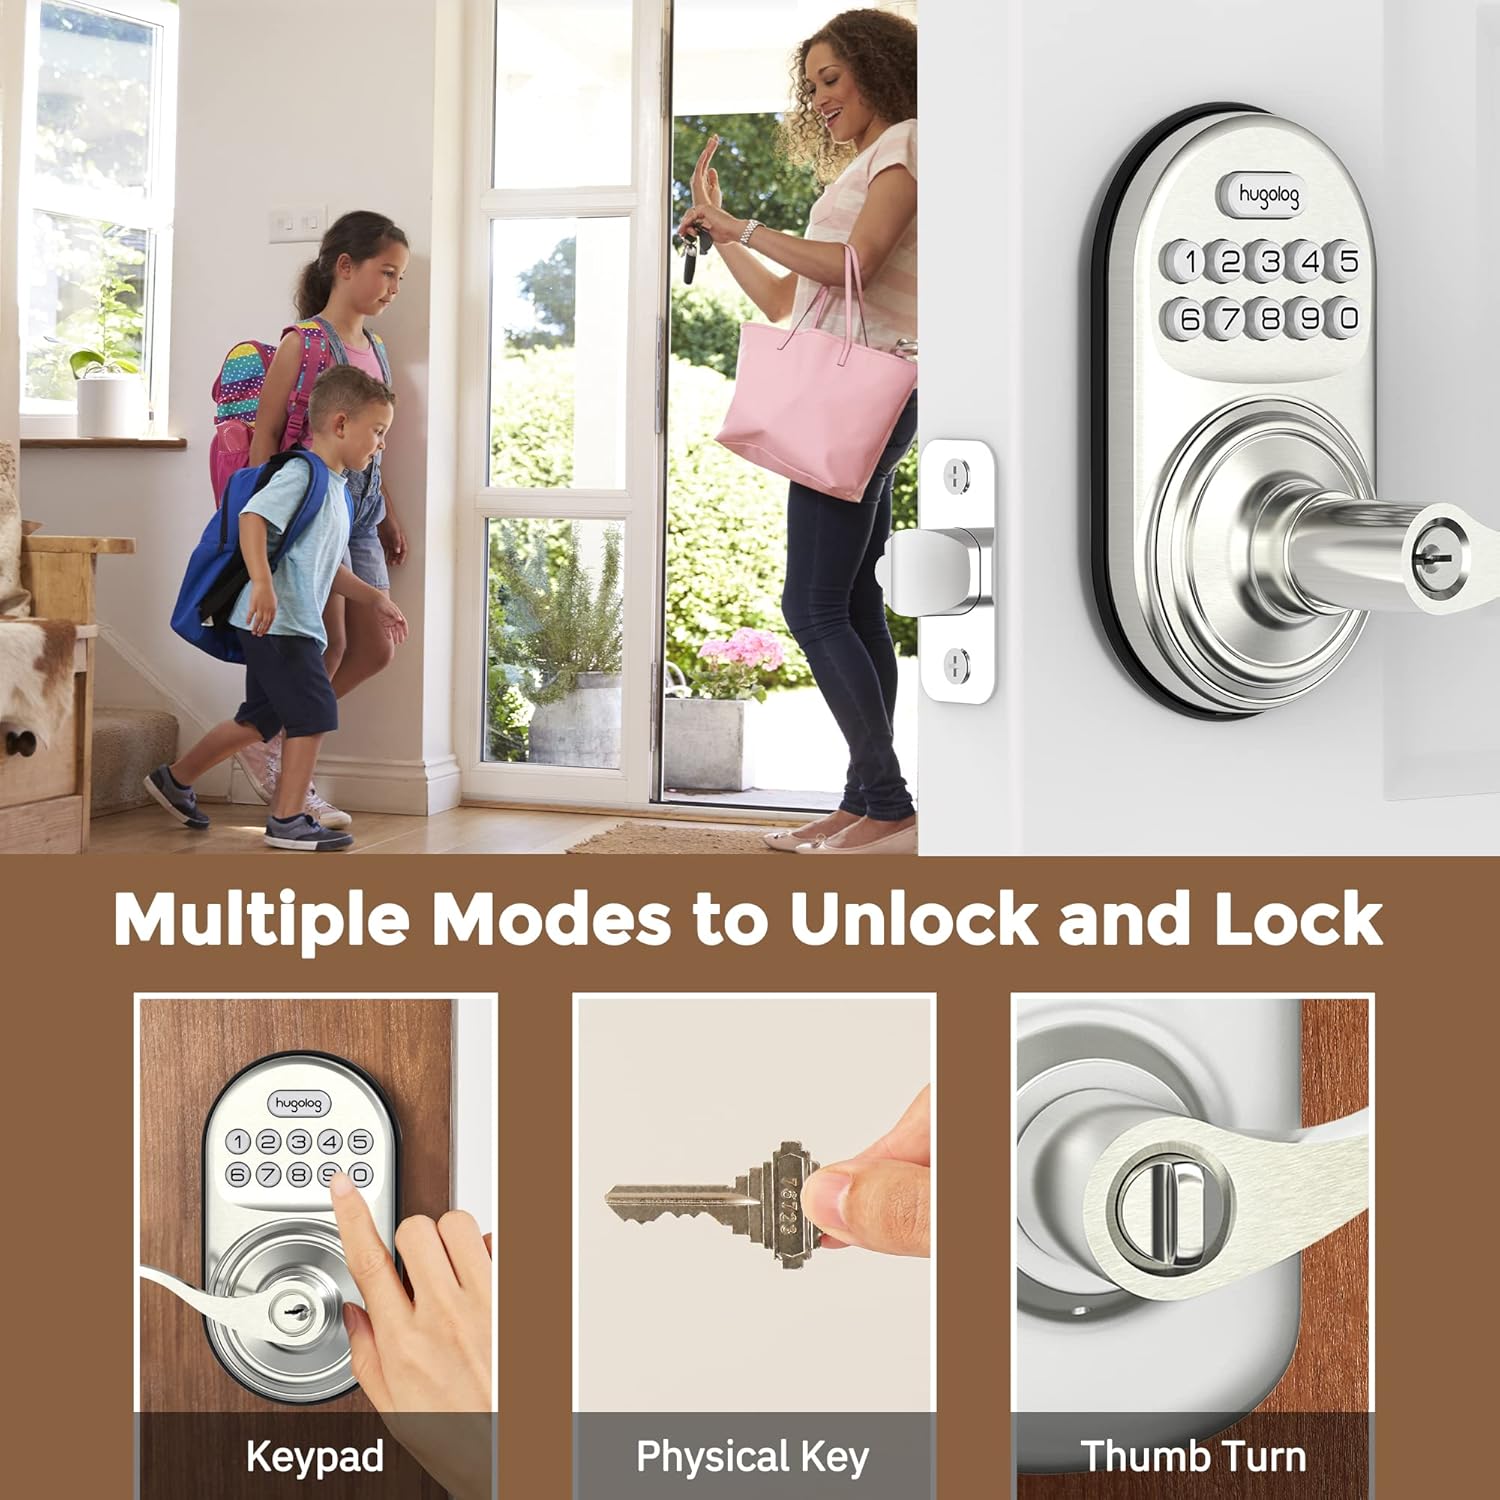
Image: Illustrates three methods of unlocking the door: using the keypad, a physical key, and the interior thumb turn.

Image: Diagram showing how to rotate the interior knob to manually lock or unlock the door, indicating ON and OFF positions.
Adăugarea codurilor de utilizator
You can add up to 20 user codes for family members or guests.
- Presa Hugolog button twice, then enter your master code, and press Hugolog button again. Wait for a green light flash.
- Presa 2. Wait for a green light flash.
- Enter the new user code, then press Hugolog button. Succeed green light flash.
- Enter the new user code again, then press Hugolog button. Succeed green light flash.

Image: Depicts two individuals communicating about setting one-time codes for friend visits, highlighting the ability to set up to 20 temporary codes.
Ștergerea codurilor de utilizator
Pentru a elimina un cod de utilizator nedorit:
- Presa Hugolog button twice, then enter your master code, and press Hugolog button again. Wait for a green light flash.
- Presa 3. Wait for a green light flash.
- Enter the unwanted user code, then press Hugolog button. Succeed green light flash.
Funcția de blocare automată
The auto-lock feature automatically locks the door after a set period (10-99 seconds) for added peace of mind.

Image: Shows the auto-lock feature, indicating it allows for a delay from 10 to 99 seconds before automatically locking the door.
Activați Blocarea automată
- Presa Hugolog button twice, then enter your master code, and press Hugolog button again. Wait for a green light flash.
- Presa 5. Wait for a green light flash.
- Presa 1, apoi apăsați Hugolog button. Succeed green light flash.
Dezactivați blocarea automată
- Presa Hugolog button twice, then enter your master code, and press Hugolog button again. Wait for a green light flash.
- Presa 5. Wait for a green light flash.
- Presa 2, apoi apăsați Hugolog button. Succeed green light flash.
Setați întârzierea blocării automate
- Presa Hugolog button twice, then enter your master code, and press Hugolog button again. Wait for a green light flash.
- Presa 8. Wait for a green light flash.
- Enter the new duration time (10-99 seconds), then press Hugolog button. Succeed green light flash.
Anti-Peep Password
The anti-peep feature allows you to enter random digits before or after your actual code to prevent others from guessing your code by observing your hand movements.

Image: Illustrates the Anti-Peep Password feature, showing how random digits can be entered before or after the correct code to safeguard against prying eyes.
Modul Silențios
Enable silent mode to disable keypad beeps for quiet operation.
Activați modul silențios
- Presa Hugolog button twice, then enter your master code, and press Hugolog button again. Wait for a green light flash.
- Presa 4. Wait for a green light flash.
- Presa 2, apoi apăsați Hugolog button. Succeed green light flash.
Dezactivați modul silențios
- Presa Hugolog button twice, then enter your master code, and press Hugolog button again. Wait for a green light flash.
- Presa 4. Wait for a green light flash.
- Presa 1, apoi apăsați Hugolog button. Succeed green light flash.
Modul vacanță
Vacation mode disables all user codes, allowing entry only with the master code or physical key. This is useful for extended absences.
Activați modul vacanță
- Presa Hugolog button twice, then enter your master code, and press Hugolog button again. Wait for a green light flash.
- Presa 6. Wait for a green light flash.
- Presa 1, apoi apăsați Hugolog button. Succeed green light flash.
Dezactivați modul vacanță
- Presa Hugolog button twice, then enter your master code, and press Hugolog button again. Wait for a green light flash.
- Presa 6. Wait for a green light flash.
- Presa 2, apoi apăsați Hugolog button. Succeed green light flash.
Adăugați un cod unic
Create a temporary code that can be used only once.
- Presa Hugolog button twice, then enter your master code, and press Hugolog button again. Wait for a green light flash.
- Presa 7. Wait for a green light flash.
- Enter the new user code, then press Hugolog button. Succeed green light flash.
- Enter the new user code again, then press Hugolog button. Succeed green light flash.
Întreţinere
Înlocuirea bateriei
The lock requires 4x AA batteries. When the battery level is low, the lock will indicate this with a visual or audible alert. Replace all four batteries simultaneously to ensure optimal performance.
Image: Close-up of the lock's keypad showing a low battery indicator, reminding users to replace the 4x AA batteries for a 1-year battery life.
Pentru a înlocui bateriile:
- Scoateți capacul bateriei de pe ansamblul interior.
- Scoateți bateriile vechi.
- Insert new 4x AA batteries, ensuring correct polarity (+/-).
- Înlocuiți capacul bateriei.
Nota: Always use new, high-quality alkaline batteries for best performance and longevity.
Depanare
If you encounter issues with your Hugolog Keyless Entry Door Lock, please refer to the common problems and solutions below:
| Problemă | Cauza posibila | Soluţie |
|---|---|---|
| Încuietoarea nu răspunde la introducerea comenzilor de la tastatură. | Low batteries or incorrect code entry. | Replace batteries. Ensure correct master code or user code is entered. Check for silent mode if no sound. |
| Funcția de blocare automată nu funcționează. | Auto-lock is disabled or time delay is set too long. | Enable auto-lock via programming. Adjust auto-lock time delay. |
| Lock is stuck or not engaging properly. | Improper installation or door alignment issues. | Re-check installation steps, especially latch and strike plate alignment. Ensure door frame is not warped. |
| Keypad lights up but lock doesn't operate. | Internal mechanism issue or cable connection problem. | Verify internal cable connection. If issue persists, contact customer support. |
| Cannot change master code or add user codes. | Incorrect master code entered or incorrect programming sequence. | Ensure you are using the correct master code. Follow programming steps precisely. |
Specificații
| Caracteristică | Detaliu |
|---|---|
| Marca | Hugolog |
| Numărul de model | 192728012011 |
| Tip blocare | Tastatura |
| Material | Metal |
| Caracteristica specială | Parolă anti-spionaj |
| Utilizări recomandate | Uşă |
| Coduri utilizator | Up to 20 user codes, plus one-time temporary codes. |
| Auto-Lock Timer | Programmable from 10-99 seconds. |
| Sursa de alimentare | 4x baterii AA (neincluse) |
| Compatibilitatea grosimii ușii | 35-50 mm |
| Protocol de conectivitate | Wi-Fi (for potential future smart home integration, based on product data) |
Garanție și suport
Hugolog provides technical support for hassle-free ownership. For any questions, issues, or warranty claims, please contact Hugolog customer service through their official channels. Please refer to the product packaging or the official Hugolog website-ul pentru cele mai recente informații de contact și detalii despre garanție.


