1. Introducere
Thank you for choosing the Oasser P2A Portable Tyre Inflator. This cordless air compressor is designed for convenient and efficient inflation of tyres for cars, motorcycles, and bicycles, as well as other inflatable items. Featuring a digital pressure gauge and a 2000mAh lithium battery, it provides reliable performance for your inflation needs.

Figura 1.1: The Oasser P2A Portable Tyre Inflator shown with its complete set of accessories, including various nozzles, charging cable, and storage bag.
2. Informații de siguranță
Please read all safety warnings and instructions carefully before using this product to avoid electric shock, fire, and serious injury.
- Keep the inflator away from children.
- Nu utilizați umflatorul în condiții de umiditate sau în apropierea lichidelor sau gazelor inflamabile.
- Ensure the correct pressure setting for the item being inflated to prevent over-inflation and potential damage or injury. Refer to the item's manufacturer specifications for recommended pressure.
- Nu lăsați umflatorul nesupravegheat în timpul funcționării.
- Allow the inflator to cool down after prolonged use to prevent overheating.
- Use only the provided charging cable and a compatible USB power source for charging.
- Depozitați inflatorul într-un loc uscat și răcoros atunci când nu îl utilizați.
3. Componente și caracteristici ale produsului
The Oasser P2A inflator comes with several components designed for versatile use.

Figura 3.1: Key features of the Oasser P2A inflator, highlighting the LED light, digital LCD display, and the integrated 2000mAh lithium battery.
- Unitate principală: Portable air compressor with integrated digital display and controls.
- Baterie litiu 2000mAh: Oferă funcționare fără fir.
- Digital Backlit LCD Display: Shows current and target pressure clearly.
- Lumina LED: Pentru iluminare în condiții de lumină slabă.
- Furtunuri de aer: Includes both a short and a long air hose for different applications.
- Adaptoare pentru duze:
- Adaptor de supapă Presta
- Air Nozzle (for inflatables)
- Acul bilei
- Cablu de încărcare USB: Pentru reîncărcarea dispozitivului.
- Geanta de depozitare: For convenient storage and transport of the inflator and accessories.

Figura 3.2: All accessories included with the Oasser P2A Tyre Inflator, laid out for clear identification.
4. Configurare și încărcare
4.1 Taxa inițială
Before first use, fully charge the Oasser P2A inflator. It is recommended to charge the battery to full capacity within 3 days after every use to maintain battery health.
- Connect the provided USB charging cable to the charging port on the inflator.
- Connect the other end of the USB cable to a compatible USB power adapter (e.g., phone charger, computer USB port).
- The charging indicator on the inflator will show the charging status. Charge until the battery indicator shows full.

Figura 4.1: The inflator connected to a USB power source for charging, illustrating its home charging capability.
4.2 Atașarea furtunului de aer
Select the appropriate air hose (short or long) and screw it firmly onto the inflator's air outlet. Ensure a tight seal to prevent air leakage during inflation.
5. Instrucțiuni de utilizare
5.1 Pași de bază pentru inflație
- Porniți: Press the middle button on the unit to power it on. The digital display will illuminate.
- Conectați furtunul de aer: Screw the air hose onto the tyre valve. For different items, attach the appropriate nozzle adapter (e.g., Presta valve adapter for bicycles, ball needle for sports balls).
- Setați presiunea dorită: Use the "+" and "-" buttons to adjust the target pressure. The display will flash four times to confirm the setting.
- Începe inflația: Press the start button (trigger) to begin inflation. The inflator will automatically stop when the preset pressure is reached.
- Deconecta: Once inflation is complete, disconnect the air hose from the valve.

Figura 5.1: Visual guide for the inflation process, from powering on to automatic shut-off.
5.2 Digital Display and LED Light
The digital backlit LCD display provides clear readings of pressure. The integrated LED light can be activated to assist with inflation in dark environments, such as at night or in dimly lit garages.

Figura 5.2: The clear digital display for precise pressure monitoring.

Figura 5.3: The LED light in operation, providing visibility for nighttime use.
5.3 Inflation Capacity
The 2000mAh lithium battery provides sufficient power for multiple inflations on a single charge. For example, it can inflate approximately:
- Up to 4 car tyres (size 185/70R14)
- Up to 10 motorcycle tyres
- Up to 25 bicycle tyres
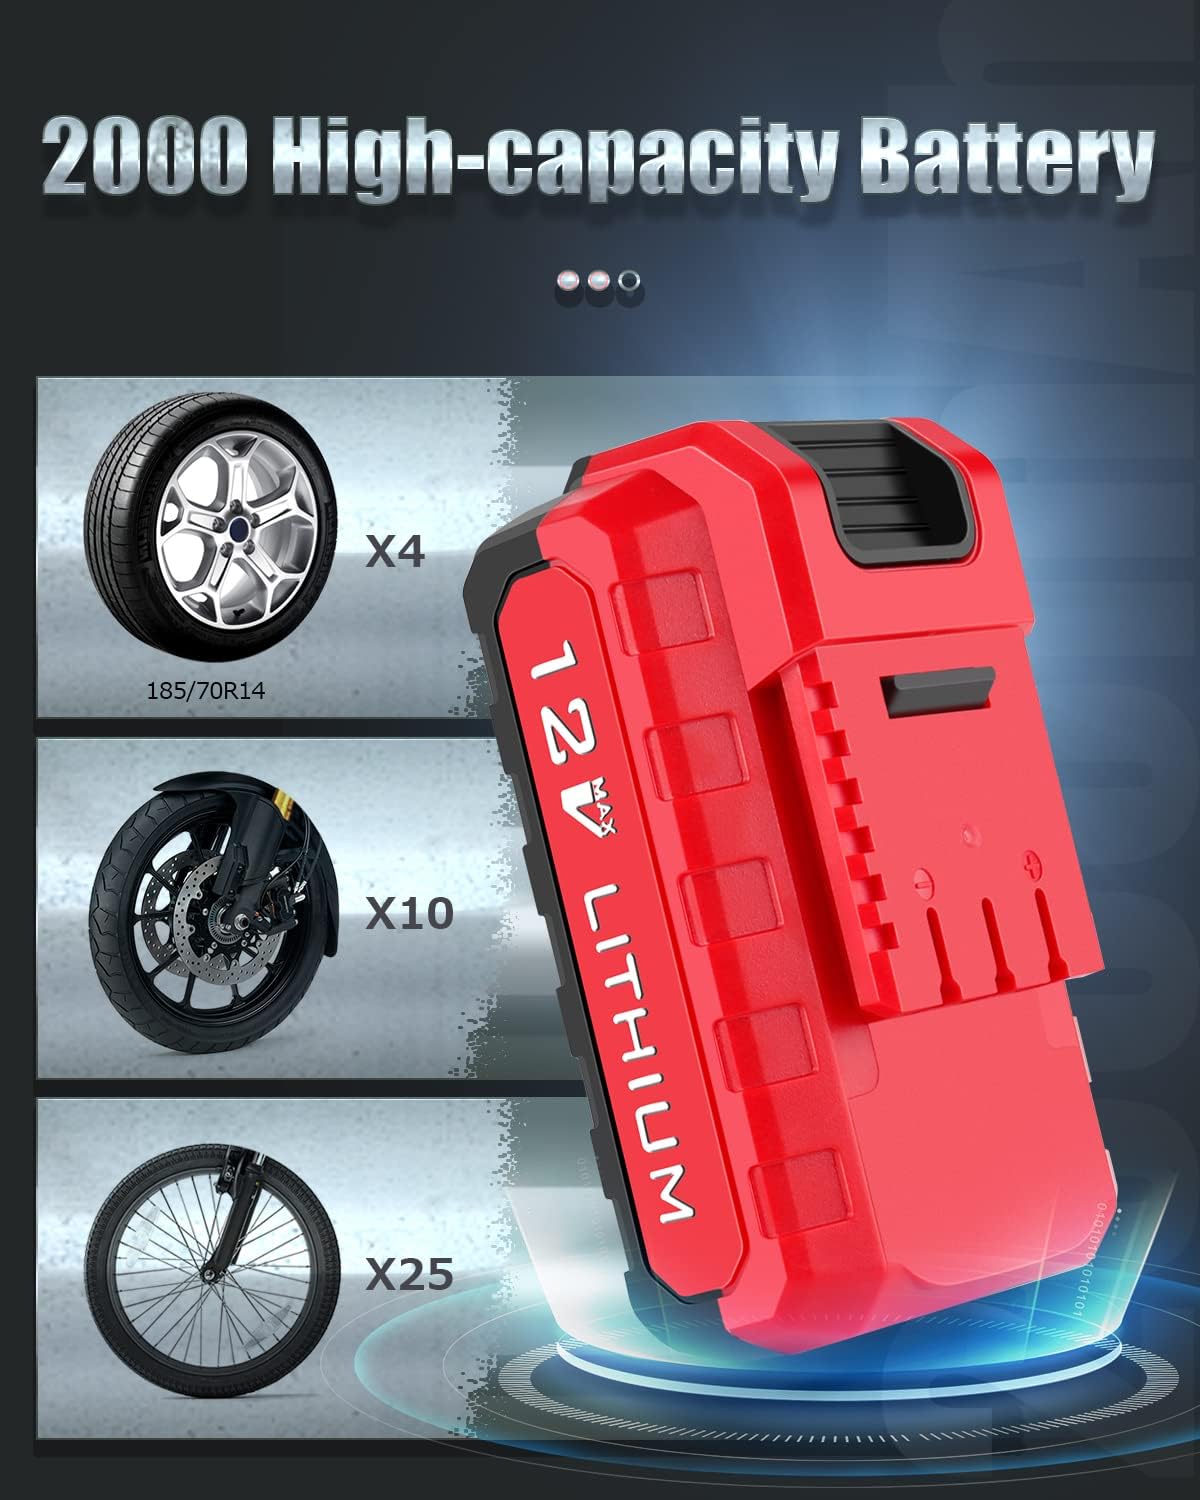
Figura 5.4: Battery capacity and estimated inflation counts for various vehicle types.
5.4 Fast Inflation
The Oasser P2A is equipped with a powerful engine capable of fast inflation. For instance, it can inflate a 165/70 R14 car tyre from 15 PSI to 35 PSI in approximately 3 minutes.

Figura 5.5: The inflator in action, demonstrating its fast inflation capability and key operational features.
6. Întreținere
- curatenie: Ștergeți exteriorul dispozitivului de umflare cu o lavetă moale și damp pânză. Nu utilizați substanțe chimice dure sau produse de curățare abrazive.
- Depozitare: Depozitați inflatorul și accesoriile sale în geanta de depozitare furnizată, într-un loc răcoros și uscat, ferit de lumina directă a soarelui și de temperaturi extreme.
- Îngrijirea bateriei: As noted in the operating instructions, charge the battery fully within 3 days after each use to prolong its lifespan. Avoid completely draining the battery before recharging.
- Inspecția furtunului și a duzei: Regularly check the air hoses and nozzle adapters for any signs of wear, cracks, or damage. Replace if necessary to ensure proper function and prevent air leaks.
7. Depanare
| Problemă | Cauza posibila | Soluţie |
|---|---|---|
| Umflatorul nu pornește. | Bateria este epuizată. | Încărcați complet inflatorul. |
| Umflatorul funcționează, dar nu iese aer sau presiunea este scăzută. | Air hose or nozzle not securely attached; Air hose or nozzle is blocked or damaged. | Ensure all connections are tight. Check for obstructions or damage in the hose/nozzle. |
| Umflatorul se oprește înainte de a atinge presiunea presetată. | Bateria este descărcată; Protecția la supraîncălzire este activată. | Recharge the battery. Allow the unit to cool down before resuming operation. |
| Citire inexactă a presiunii. | Improper connection to valve; Sensor malfunction. | Ensure the hose is securely connected to the valve. If problem persists, contact customer support. |
8. Specificații
| Marca | Oasser |
| Model | TT-Tuk15 (P2A) |
| Capacitatea bateriei | Baterie cu litiu de 2000 mAh |
| Presiune maximă | 120 PSI |
| Intrare de încărcare | USB (5V) |
| Greutatea articolului | 1.03 kg |
| Dimensiuni pachet | 26.1 x 16.8 x 8.7 cm |
9. Garanție și asistență
Oasser products are designed for reliability and performance. For warranty information or technical support, please refer to the contact details provided in the original product packaging or visit the official Oasser website. Vă rugăm să păstrați dovada achiziției pentru reclamații în garanție.
Nota: Some customer reviews mention a positive experience with Oasser's support regarding product issues, indicating a willingness to assist with replacements or solutions.


