1. Introducere
Mulțumesc pentru achizițieasing the SENCOR SWS 3000 W Weather Station. This device provides accurate indoor and outdoor temperature and humidity readings, along with time and date display. Please read this manual carefully before operating the device to ensure proper use and to maximize its lifespan.
2. Informații de siguranță
- Do not expose the main unit or sensor to extreme temperatures, direct sunlight, or moisture.
- Evitați să scăpați dispozitivul sau să îl supuneți la impacturi puternice.
- Nu încercați să dezasamblați sau să reparați unitatea singur. Apelați la personal calificat pentru toate lucrările de service.
- Aruncați bateriile uzate în mod responsabil, conform reglementărilor locale.
- Nu lăsați dispozitivul la îndemâna copiilor.
3. Conținutul pachetului
Vă rugăm să verificați conținutul pachetului pentru a vă asigura că toate articolele sunt prezente:
- SENCOR SWS 3000 W Main Unit (Weather Station)
- Senzor exterior fără fir
- Manual de utilizare (acest document)
4. Produs terminatview

Figure 4.1: The SENCOR SWS 3000 W Weather Station main unit (left) and its accompanying wireless outdoor sensor (right).

Figura 4.2: Înclinat view of the SENCOR SWS 3000 W main unit, showcasinafișajul și butoanele de control.
The SENCOR SWS 3000 W Weather Station consists of a main display unit and a wireless outdoor sensor. The main unit features a clear LCD display with white backlight, showing indoor and outdoor temperature, humidity, time, and date. The wireless sensor transmits outdoor data to the main unit.

Figura 4.3: Prim-plan view of the wireless outdoor sensor, which transmits temperature and humidity data to the main unit.

Figura 4.4: Spate view of the main unit, showing the battery compartment and the integrated stand for tabletop placement.
5. Configurare
5.1 Instalarea bateriei
The SENCOR SWS 3000 W Weather Station is battery-powered. Ensure you have the correct battery types as specified in the specifications section.
- Unitate principală: Open the battery compartment cover on the back of the main unit (refer to Figure 4.4). Insert the required AAA batteries, observing the correct polarity (+/-). Close the cover securely.
- Senzor wireless: Open the battery compartment cover on the back of the wireless sensor (refer to Figure 4.3). Insert the required batteries (typically AAA), observing the correct polarity (+/-). Close the cover securely.
5.2 Plasarea senzorului
Proper placement of the wireless sensor is crucial for accurate outdoor readings.
- Plasați senzorul într-o zonă umbrită pentru a evita lumina directă a soarelui, care poate duce la citiri inexacte ale temperaturii.
- Ensure the sensor is protected from direct rain or snow.
- Position the sensor within the effective transmission range (up to 30 meters in open air) of the main unit. Walls and other obstacles can reduce this range.
- Evitați amplasarea senzorului în apropierea obiectelor metalice mari sau a aparatelor electrice care pot interfera cu semnalul wireless.

Figura 5.1: Example placement of the main unit indoors and the wireless sensor outdoors for optimal performance.
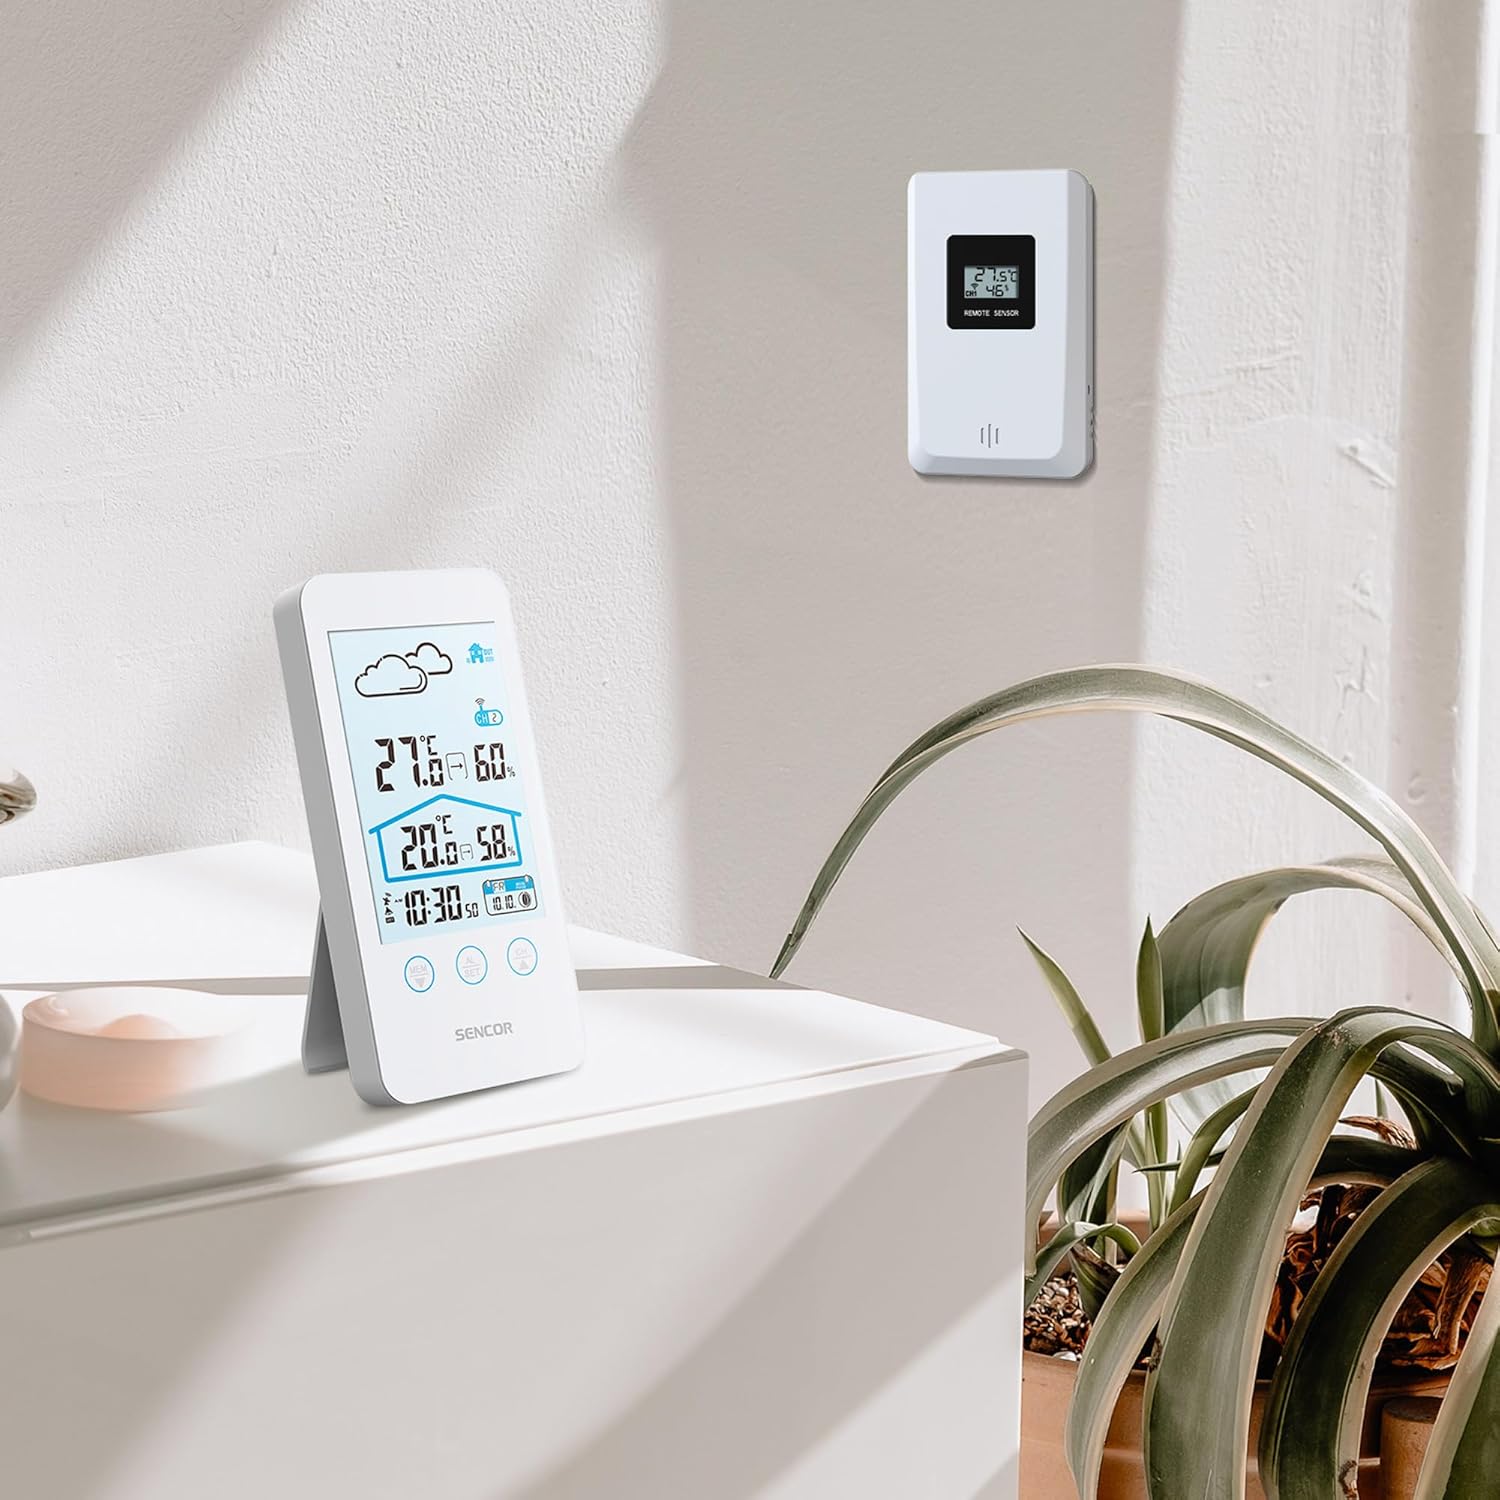
Figure 5.2: The main unit can be placed on a flat surface, while the sensor is mounted on a wall or suitable outdoor location.
5.3 Pornirea inițială și asocierea
After installing batteries in both units, the main unit will automatically search for the wireless sensor. This process may take a few minutes.
- Place the main unit and the sensor close to each other during the initial pairing process.
- Once connected, the outdoor temperature and humidity will appear on the main unit's display.
- If the connection is not established, remove and reinsert the batteries from both units, then try again.
6. Instrucțiuni de utilizare
6.1 Afișează informații
The LCD display provides various information at a glance:
- Temperatura și umiditatea exterioară: Displayed prominently at the top.
- Temperatura și umiditatea interioară: Displayed below the outdoor readings.
- Ora și data: Situat în partea de jos a afișajului.
- Weather Forecast Icon: An icon indicating predicted weather conditions (e.g., sunny, cloudy, rainy).
- Indicator de canal: Shows which sensor channel is currently displayed (if multiple sensors are used).
- Indicator baterie: Alerts when batteries are low for either unit.

Figura 6.1: Detaliat view of the SENCOR SWS 3000 W display, highlighting various information segments.
6.2 Setarea orei și datei
To set the time and date on your weather station:
- Press and hold the "AL/SET" button (usually located below the display) for a few seconds until the time digits start flashing.
- Use the "CH" or "MEM" buttons to adjust the flashing value (e.g., hour, minute).
- Press "AL/SET" again to confirm the setting and move to the next adjustable item (e.g., minute, year, month, day).
- Repeat until all settings are configured. Press "AL/SET" one last time to exit the setting mode.
6.3 Selectarea unității de temperatură (°C/°F)
Pentru a comuta între Celsius (°C) și Fahrenheit (°F):
- Locate the °C/°F button, usually on the back or side of the main unit, or sometimes integrated with another button (e.g., "MEM" or "CH" with a short press).
- Press this button to toggle between the two temperature units. The display will update accordingly.
6.4 Channel Selection (for multiple sensors)
If you have multiple wireless sensors (up to 3 supported by SWS 3000 W), you can switch between their readings:
- Press the "CH" button (Channel) on the main unit.
- Each press will cycle through the available channels (CH1, CH2, CH3) or an auto-cycle mode.
- Ensure each sensor is set to a different channel using its internal switch (if available).
6.5 Memory Function (Min/Max Readings)
The weather station records the minimum and maximum temperature and humidity readings over a period.
- Press the "MEM" button (Memory) to view the maximum recorded values.
- Press "MEM" again to view valorile minime înregistrate.
- Press "MEM" a third time to return to current readings.
- To clear the recorded Min/Max values, press and hold the "MEM" button while viewstingându-le.
7. Întreținere
- curatenie: Ștergeți unitatea principală și senzorul cu o lavetă moale șiamp pânză. Nu utilizați agenți de curățare abrazivi sau solvenți.
- Înlocuire baterie: Înlocuiți bateriile când pe afișaj apare indicatorul de baterie descărcată. Înlocuiți întotdeauna toate bateriile dintr-o unitate în același timp.
- Depozitare: Dacă depozitați dispozitivul pentru o perioadă lungă de timp, scoateți toate bateriile pentru a preveni scurgerile. Depozitați într-un loc răcoros și uscat.
8. Depanare
| Problemă | Cauza posibila | Soluţie |
|---|---|---|
| Nu apare afișaj pe unitatea principală. | Bateriile sunt descărcate sau introduse incorect. | Verificați polaritatea bateriilor și înlocuiți-le cu baterii noi. |
| Outdoor reading not displayed or flashing. | Senzor în afara razei de acțiune, baterie descărcată a senzorului sau interferențe. | Move sensor closer to main unit. Replace sensor batteries. Relocate units away from interference sources. Re-pair units if necessary. |
| Citiri inexacte ale temperaturii/umidității. | Sensor exposed to direct sunlight or moisture. | Relocate sensor to a shaded, protected area. |
| Ora/data sunt incorecte. | Not set correctly or batteries removed. | Follow instructions in Section 6.2 to set time and date. |
9. Specificații
| Caracteristică | Detaliu |
|---|---|
| Numărul de model | SWS 3000 W |
| Marca | SENCOR |
| Dimensiuni unitate principală (L x l x Î) | 80 x 161 x 23 mm |
| Greutatea unității principale | 165 g |
| Gama de temperatură interioară | 0 °C până la 60 °C |
| Gama de temperatură exterioară | 0 °C până la 60 °C |
| Precizia temperaturii | ±1 °C |
| Intervalul de umiditate | 20% până la 95% RH |
| Frecvență fără fir | 433 MHz |
| Interval de transmisie | Până la 30 de metri (în aer liber) |
| Sursă de alimentare (unitate principală) | Baterii AAA (nu sunt incluse) |
| Sursă de alimentare (senzor) | Baterii AAA (nu sunt incluse) |
| Caracteristica specială | Design ușor |
| Culoare | Alb |
Note: Specifications are subject to change without notice. Battery quantities are typical and should be confirmed with product packaging.
10. Garanție și asistență
SENCOR products are designed and manufactured to the highest quality standards. For warranty information, please refer to the warranty card included with your product or visit the official SENCOR webPentru asistență tehnică sau solicitări de service, vă rugăm să contactați serviciul clienți SENCOR prin canalele lor oficiale.
Păstrați bonul fiscal ca dovadă a achiziției în scopul garanției.


