1. Introducere
This manual provides detailed instructions for the safe and effective use of your CZC AUTO Digital Tire Inflator Pressure Gauge. This device combines the functions of testing tire pressure, deflating, and inflating tires, making it a versatile tool for maintaining optimal tire pressure for various vehicles.

Figure 1: CZC AUTO Digital Tire Inflator Pressure Gauge. This image shows the complete assembly of the digital tire inflator pressure gauge, including the digital display, handle, hose, and chuck.
2. Caracteristicile produsului
- Funcționalitate 3 în 1: Capable of testing tire pressure, deflating tires, and inflating tires when connected to an air pump or compressor.
- Ecran digital: Large blue backlit LED screen for clear readings.
- Unități de presiune multiple: Supports PSI, kg/cm², BAR, and KPA with 0.1 display resolution.
- Precizie ridicată: Calibrated to ANSI B40.1 Grade B (2%) international accuracy standard.
- Construcție durabilă: Features an aluminum handle, brass air bleeder button, and a 13-inch heavy-duty rubber hose.
- Lock-on Chuck: Straight brass lock-on chuck for secure connection to tire valves.
- Funcții automate: LED screen auto-on upon connection to tire valve, auto-off after 20 seconds of inactivity.

Figure 2: Key components of the CZC AUTO Digital Tire Inflator Pressure Gauge. This image highlights various parts such as the brass air bleeder button, chrome-plated iron thumb trigger, surface frosted aluminum gun handle, 1/4" FNPT connector, 13" long rubber hose, large blue backlit LED screen, gear-style rubber protector, brass straight chuck with lock-on clip, and leak-free air valve core.

Figure 3: Digital display and available pressure units. This image illustrates the "ON/UNITS/OFF" button, "LIGHT UP/LIGHT OFF" button, and the four measurement ranges: 0-250 PSI, 0-17 BAR, 0-1700 KPA, and 0-17 KG/CM².
3. Configurare
3.1 Instalarea bateriei
The digital display requires 2 AAA batteries (not included). To install:
- Locate the battery cover on the back of the digital gauge head.
- Scoateți capacul bateriei.
- Introduceți 2 baterii AAA, asigurându-vă că polaritatea este corectă (+/-).
- Puneți bine capacul bateriei.

Figure 4: Battery compartment. This image shows the location of the battery cover and where to insert the 2 AAA batteries (not included).
3.2 Connecting to Air Source
To use the inflation function, connect the gauge to an air pump or compressor:
- Ensure your air pump or compressor is equipped with a 1/4" NPT fitting.
- Attach the included 1/4" MNPT fitting to the bottom of the inflator handle.
- Connect the inflator gauge to your air pump or compressor's hose.
4. Instrucțiuni de utilizare
4.1 Checking Tire Pressure
For accurate readings, check tire pressure when tires are cold, especially before long-distance travel.
- Remove the valve cap from the tire.
- Press the straight brass lock-on chuck firmly onto the tire valve stem. The digital display will automatically turn on and show the current tire pressure.
- Read the pressure displayed on the LED screen.
- Press the "ON/UNITS/OFF" button to cycle through pressure units (PSI, kg/cm², BAR, KPA) if desired.
- Press the "LIGHT UP/LIGHT OFF" button to toggle the backlight.
- Remove the chuck from the valve stem. The display will auto-off after 20 seconds of inactivity.
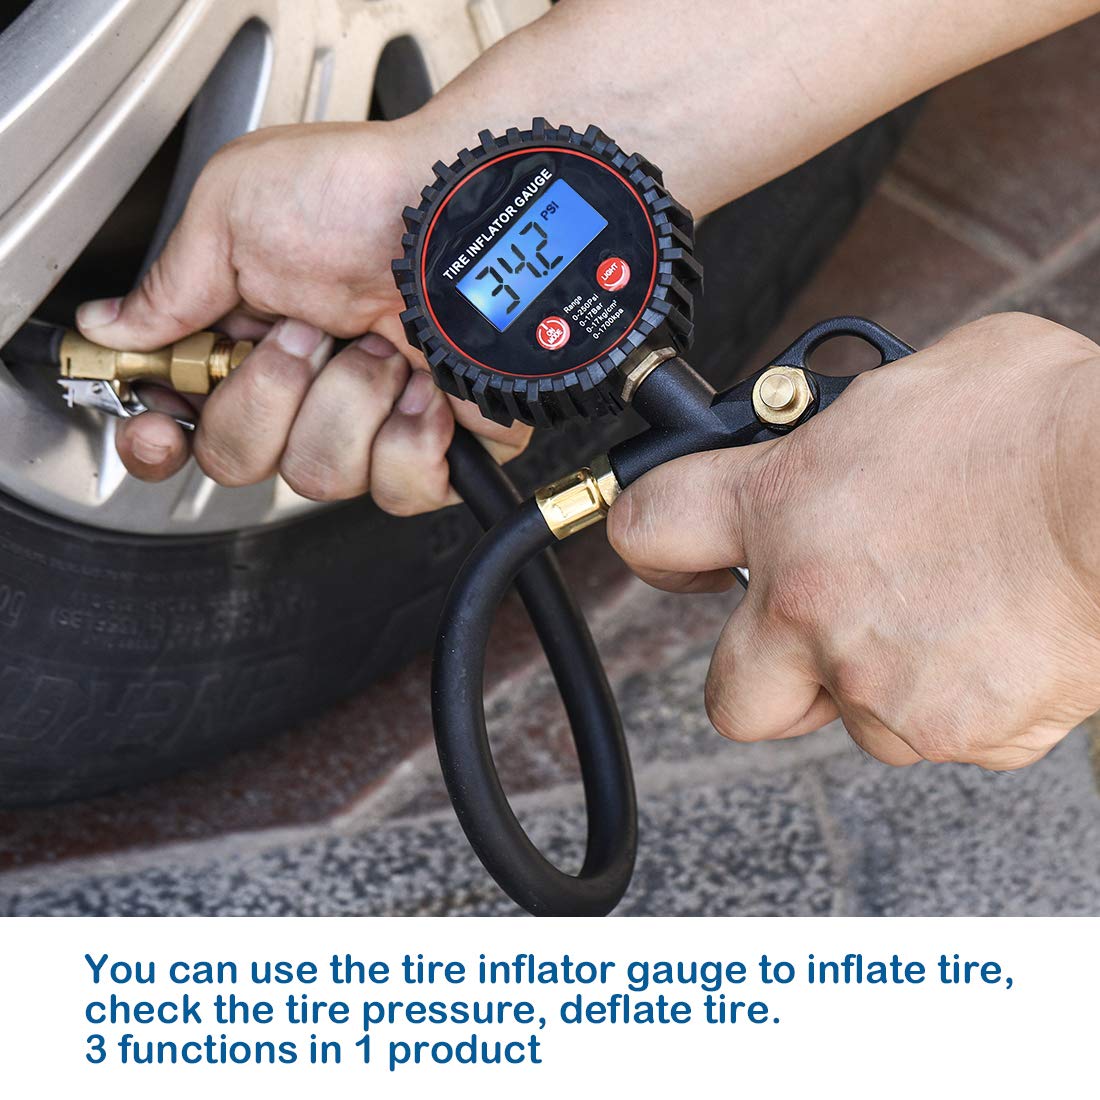
Figure 5: Checking tire pressure with the gauge. This image demonstrates how to connect the gauge's chuck to a tire valve to read the pressure on the digital display.
4.2 Inflating Tires
Ensure the gauge is connected to an air pump or compressor as described in Section 3.2.
- Connect the straight brass lock-on chuck firmly onto the tire valve stem.
- Press the chrome-plated iron thumb trigger to begin inflating the tire. Monitor the pressure on the digital display.
- Release the thumb trigger once the desired pressure is reached.
- Scoateți mandrina de pe tija supapei.
4.3 Deflating Tires
The gauge can deflate tires whether connected to an air pump or not.
- Connect the straight brass lock-on chuck firmly onto the tire valve stem. The current pressure will be displayed.
- Press the brass air bleeder button to release air from the tire. Monitor the pressure on the digital display as air is released.
- Release the air bleeder button once the desired pressure is reached.
- Scoateți mandrina de pe tija supapei.

Figure 6: Wide range of vehicle compatibility. This image shows the tire inflator gauge is suitable for various vehicles including trucks, buses, cars, SUVs, RVs, ATVs, bikes (with Schrader valve), and motorcycles.
5. Întreținere
- curatenie: Ștergeți manometrul cu o cârpă moale și uscată. Nu utilizați produse de curățare abrazive și nu scufundați unitatea în apă.
- Depozitare: Depozitați manometrul într-un loc răcoros și uscat, ferit de lumina directă a soarelui și de temperaturi extreme.
- Înlocuire baterie: Replace batteries when the display becomes dim or does not turn on. Remove batteries if storing for extended periods to prevent leakage.
- Hose and Chuck Inspection: Periodically inspect the rubber hose and brass chuck for any signs of wear, cracks, or damage. Replace if necessary to ensure accurate readings and safe operation.
6. Depanare
| Problemă | Cauza posibila | Soluţie |
|---|---|---|
| Afișajul nu se aprinde. | Baterii descărcate sau instalate incorect. | Verificați polaritatea bateriilor sau înlocuiți-le cu baterii AAA noi. |
| Citire inexactă a presiunii. | Chuck not fully seated on valve stem; gauge needs calibration. | Ensure chuck is pressed firmly onto the valve stem. If issues persist, contact customer support. |
| Air leaks when inflating/deflating. | Loose connection; damaged hose/chuck; faulty valve core. | Ensure all connections are tight. Inspect hose and chuck for damage. Check tire valve core for leaks. |
| Cannot inflate tire. | No air supply from compressor; trigger not pressed. | Verify compressor is on and connected. Ensure thumb trigger is fully pressed. |
7. Specificații
| Numărul de model | 102027 |
| Interval de presiune | Până la 250 PSI |
| Precizie | ANSI B40.1 grad B (2%) |
| Unități de presiune | PSI, kg/cm², BAR, KPA |
| Rezoluția afișajului | 0.1 |
| Lungimea furtunului | 13 inci |
| Sursa de alimentare | 2 x baterii AAA (nu sunt incluse) |
| Materiale | Aluminum, Brass, Rubber |
| Greutatea articolului | 14.4 uncii |
| Dimensiuni pachet | 10.75 x 5.67 x 1.85 inci |

Figure 7: Product dimensions. This image provides a diagram with measurements, showing the gauge head is approximately 3 inches wide, the total height from the bottom of the handle to the top of the gauge is 9-1/4 inches, and the hose length from the gauge to the chuck is 15-1/2 inches.
8. Garanție și asistență
For any problems encountered when receiving or using our products, please feel free to contact us. Our client support team is always available to assist you.
Producător: CZC AUTO
Data primului disponibil: 15 aprilie 2019


