1. Introducere
This manual provides detailed instructions for the installation, operation, and maintenance of your Lowrance AUTO-STBY Button Metal. Please read this manual thoroughly before use to ensure proper function and longevity of the product. This button is designed to integrate with compatible Lowrance marine electronic devices, enabling a convenient way to manage their standby state.
2. Informații de siguranță
Always observe the following safety precautions to prevent injury or damage to the product or other equipment:
- Deconectați alimentarea: Always disconnect power to the marine electronic system before attempting any installation, wiring, or maintenance.
- Cablajul adecvat: Ensure all wiring connections are secure and correctly polarized (positive to positive, negative to negative/ground) to prevent electrical shorts or damage.
- Protecția mediului: While designed for marine environments, ensure the button is installed in a location that minimizes exposure to direct water spray or submersion unless explicitly rated for such conditions.
- Instalare profesionala: If you are unsure about any part of the installation process, consult a qualified marine electronics technician.
3. Produs terminatview
The Lowrance AUTO-STBY Button Metal is a robust, momentary push-button switch designed for integration with Lowrance marine electronics. It features a durable metal construction and pre-attached wiring for straightforward connection to your device's AUTO-STBY input.

Figura 3.1: Față view of the Lowrance AUTO-STBY Button Metal, showing the polished metal button and its attached black cable, terminating in red and black spade connectors.
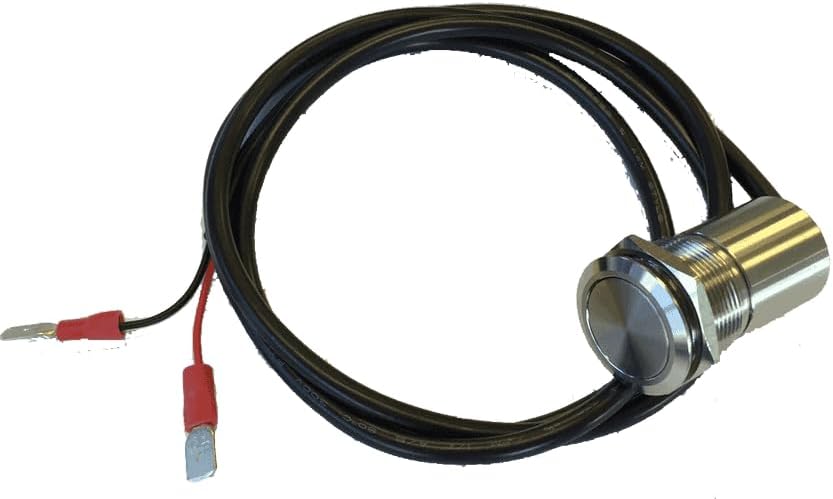
Figura 3.2: Înclinat view of the Lowrance AUTO-STBY Button Metal, highlighting the threaded body and securing nut, indicating its panel-mount design.
4. Configurare și instalare
Follow these steps for proper installation of your AUTO-STBY Button Metal:
- Alegeți locația de montare: Select a suitable location on your boat's dashboard or panel that is easily accessible and provides adequate protection from direct water exposure. Ensure there is sufficient space behind the panel for the button's body and wiring.
- Pregătiți orificiul de montare: Drill a hole of the appropriate diameter (refer to specifications for exact size) in the chosen mounting surface. Deburr the edges of the hole to prevent damage to the wiring.
- Mount the Button: Insert the threaded body of the button through the drilled hole. Secure it in place using the provided nut on the backside of the panel. Tighten firmly but do not overtighten.
- Conexiuni cablare:
- Identify the AUTO-STBY input on your Lowrance marine electronic device. Consult your device's specific user manual for the correct wiring diagram and pinout.
- Conectați fir roșu from the AUTO-STBY button to the positive (+) input terminal designated for the AUTO-STBY function on your Lowrance device.
- Conectați fir negru from the AUTO-STBY button to the negative (-) or ground terminal designated for the AUTO-STBY function on your Lowrance device.
- Asigurați-vă că toate conexiunile sunt sigure și izolate pentru a preveni scurtcircuite.
- Funcționalitate de testare: Once installed and wired, reconnect power to your marine electronic system. Test the button by pressing it and observing if your Lowrance device enters or exits standby mode as expected.
5. Instrucțiuni de utilizare
The AUTO-STBY Button Metal functions as a momentary switch. Its primary purpose is to toggle the standby mode of compatible Lowrance marine electronic devices. The exact behavior (e.g., whether it puts the device into standby or wakes it up) depends on the specific Lowrance device it is connected to and its current state.
- To Activate/Deactivate Standby: Simply press and release the AUTO-STBY button.
- Device Specific Behavior: Refer to the user manual of your specific Lowrance fish finder, chartplotter, or other marine electronic device for detailed information on how it interprets the AUTO-STBY input and what functions are associated with it.
6. Întreținere
The AUTO-STBY Button Metal is designed for durability and requires minimal maintenance. However, regular inspection and cleaning will ensure its longevity and reliable operation:
- curatenie: Wipe the button surface with a soft, damp cloth to remove salt residue, dirt, or grime. Do not use abrasive cleaners, solvents, or harsh chemicals, as these may damage the metal finish or internal components.
- Inspecţie: Periodically inspect the button and its wiring for any signs of wear, corrosion, fraying, or damage. Pay close attention to the connections at the back of the panel.
- Prevenirea coroziunii: In highly corrosive marine environments, consider applying a thin layer of dielectric grease to exposed electrical connections to prevent corrosion.
7. Depanare
If your AUTO-STBY Button Metal is not functioning as expected, consider the following:
| Problemă | Cauza posibila | Soluţie |
|---|---|---|
| Butonul nu răspunde. | No power to the connected device. Cablare incorectă. Conexiuni slăbite sau corodate. Dispozitiv incompatibil. | Ensure the Lowrance device is powered on. Verify wiring against your device's manual. Check all connections for tightness and cleanliness. Confirm your Lowrance device supports an AUTO-STBY input. |
| Button feels sticky or sluggish. | Dirt or salt buildup around the button mechanism. | Clean the button surface and edges with a damp cloth. Avoid forcing the button. |
| Funcție intermitentă. | Conexiunea cablajului slab. Partial corrosion. | Inspect and re-secure all wiring connections. Clean any signs of corrosion. |
If the problem persists after attempting these solutions, it may indicate an internal fault with the button or the connected device. In such cases, it is recommended to contact Lowrance customer support or a qualified marine electronics technician.
8. Specificații
| Atribut | Detaliu |
|---|---|
| Nume de marcă | Lowrance |
| Numele modelului | AUTO-STBY BUTTON METAL |
| Numărul piesei | 000-13703-001 |
| Material | Metal (specific alloy not specified) |
| Producător | Navico |
| Data primului disponibil | 14 ianuarie 2019 |
| Componente incluse | C-MAP MAX-N+ L: LIVERPOOL TO SWANSEA (Note: This component listing appears to be an error in the original product data and is not physically included with the button.) |
9. Garanție și asistență
Warranty information for the Lowrance AUTO-STBY Button Metal is currently unknown. For product support, technical assistance, or to inquire about warranty details, please contact Lowrance customer service directly or visit their official store.
You can find more information and contact options by visiting the Lowrance Store on Amazon.


