Introducere
This manual provides detailed instructions for the setup, operation, and maintenance of your Supersonic SC371 Digital Projection Alarm Clock with AM/FM Radio. Please read this manual thoroughly before using the device to ensure proper function and to maximize your user experience.
Informații de siguranță
- Nu expuneți aparatul la temperaturi extreme, lumina directă a soarelui, praf sau umiditate.
- Ensure the power adapter is compatible with your local power supply (AC 120V, 60Hz).
- Nu încercați să dezasamblați sau să modificați unitatea. Apelați la personal calificat pentru orice service.
- Țineți unitatea departe de apă sau alte lichide.
- Use only the specified battery type for backup (9V, not included).
Conținutul pachetului
Vă rugăm să verificați dacă toate articolele sunt prezente în colet:
- Supersonic SC371 Digital Projection Alarm Clock with Radio
- Adaptor de curent alternativ
- Manual de utilizare (acest document)
Produs terminatview
The Supersonic SC371 is a versatile digital alarm clock featuring a clear LED display, built-in time projection, and an integrated AM/FM radio. It includes an alarm with sleep/snooze timers and a 3.5mm audio input for external devices.
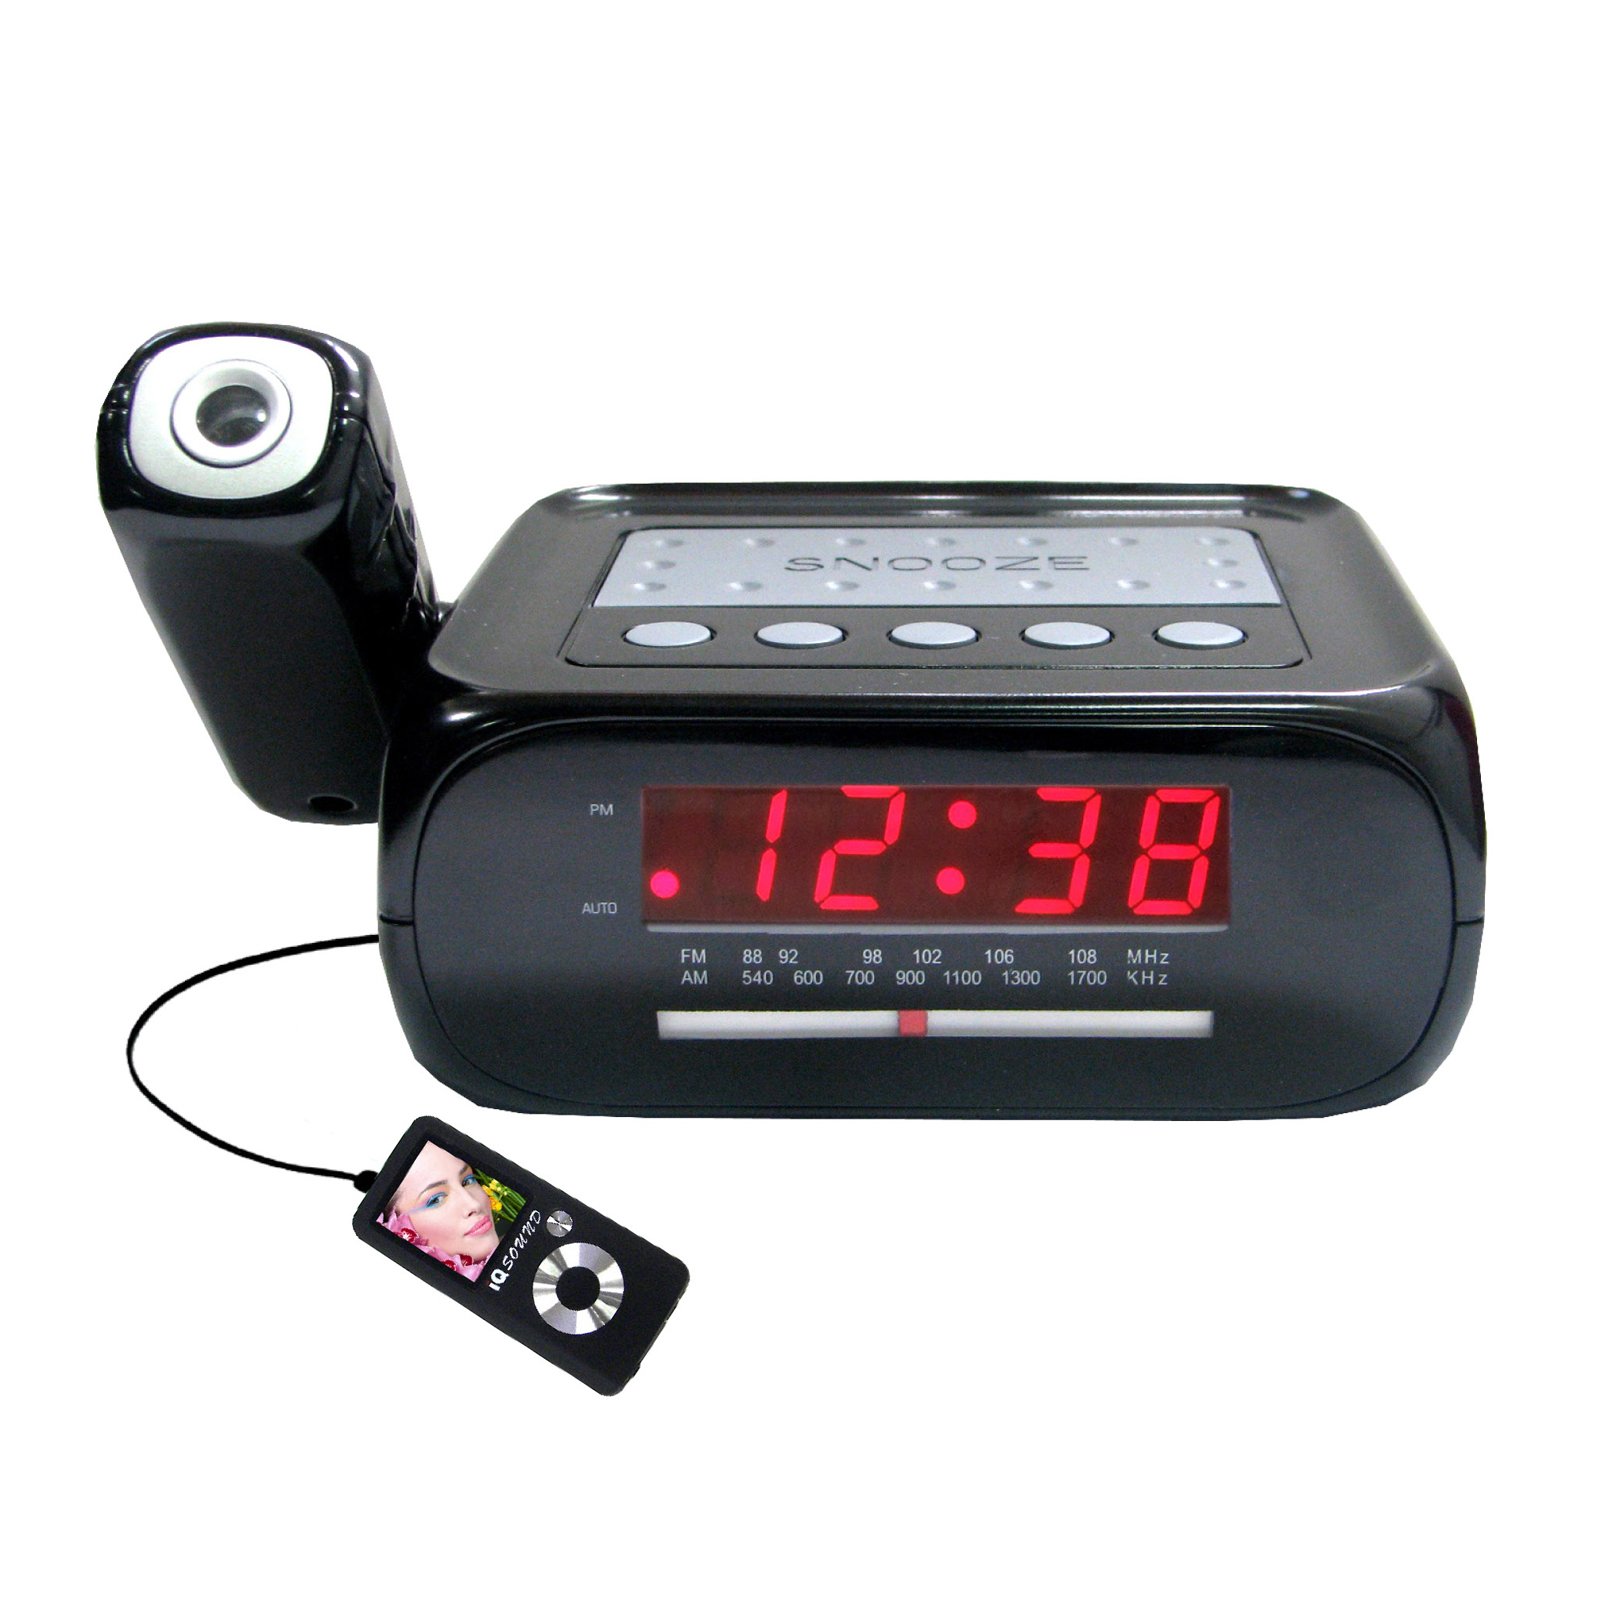
Imagine: față view of the Supersonic SC371 Digital Projection Alarm Clock, showing the LED display and control buttons.
Caracteristici cheie:
- Digital Clock with LED Display
- Built-in Time Projection
- Tuner radio AM/FM
- Alarm Clock with Sleep/Snooze Timers
- Wake Up to Music or Buzzer
- 3.5mm Audio Input Jack for Portable Audio Players
Înființat
1. Conexiune la alimentare
Connect the AC power adapter to the DC IN jack on the back of the unit, then plug the adapter into a standard AC 120V, 60Hz wall outlet. The unit will power on and the LED display will illuminate.
2. Baterie de rezervă (opțional)
For battery backup functionality, insert one 9V battery (not included) into the battery compartment located on the bottom of the unit. This battery will preserve time and alarm settings during a power outage, but the display and projection will not operate.
Instrucțiuni de operare
Setarea orei
- Țineți apăsat butonul SETAREA OREI Cifrele orei vor începe să clipească.
- Utilizați ORĂ pentru a regla ora.
- Utilizați MINUT pentru a regla minutul.
- Presa SETAREA OREI din nou pentru a confirma și a ieși din modul de setare a orei.
Setarea alarmei
- Țineți apăsat butonul SET ALARMĂ Cifrele orei alarmei vor clipi.
- Utilizați ORĂ pentru a seta ora dorită a alarmei.
- Utilizați MINUT pentru a seta minutul de alarmă dorit.
- Presa SET ALARMĂ din nou pentru a confirma ora alarmei.
- Apăsați tasta ALARM ON / OFF button to activate or deactivate the alarm. An indicator will appear on the display when the alarm is active.
Funcția de amânare
Când alarma sună, apăsați tasta PUI DE SOMN pentru a dezactiva temporar alarma timp de aproximativ 9 minute. Alarma va suna din nou după perioada de amânare.
Operare radio (AM/FM)
- Apăsați tasta RADIO ON/OFF butonul pentru a porni radioul.
- Apăsați tasta BANDĂ buton pentru a comuta între benzile AM și FM.
- Utilizați TUNING knob or buttons (if available) to select your desired station.
- Reglați volumul folosind VOLUM butonul.
- Pentru a opri radioul, apăsați tasta RADIO ON/OFF butonul din nou.
Proiecția timpului
The unit features a built-in projector to display the time on a wall or ceiling. Locate the PROIECȚIE button or switch. Press or slide it to activate the projection. You may be able to adjust the focus and angle of the projection using dedicated controls on the unit.
Folosind intrarea Aux
Connect an external audio device (e.g., MP3 player, smartphone) to the 3.5mm Audio Input Jack using a standard 3.5mm audio cable (not included). The unit will automatically switch to AUX mode, allowing you to play audio from your connected device through the clock's speaker.
Întreţinere
Curatenie
To clean the unit, gently wipe the surfaces with a soft, dry cloth. Do not use abrasive cleaners, waxes, or solvents, as these can damage the finish. Ensure the unit is unplugged before cleaning.
Înlocuirea bateriei
If the battery backup feature is used, replace the 9V battery annually or when the unit fails to retain settings during a power interruption.
Depanare
| Problemă | Cauza posibila | Soluţie |
|---|---|---|
| Unitatea nu pornește. | Adaptorul de alimentare nu este conectat sau este defect. | Asigurați-vă că adaptorul de curent alternativ este conectat corect la unitate și la o priză de perete funcțională. |
| Projection does not work or is dim. | Projection feature not activated; unit too far from surface; projector lens obstructed. | Activate the projection feature. Adjust the unit's distance from the projection surface. Clean the projector lens if necessary. |
| Radio static or poor reception. | Semnal slab; antena nu este extinsă. | Extindeți complet antena FM cu fir. Repoziționați unitatea pentru o recepție mai bună. |
| Alarma nu sună. | Alarma nu este setată sau dezactivată; volumul este prea scăzut. | Ensure the alarm is set and activated (check display indicator). Increase the volume. |
Specificații
| Caracteristică | Caietul de sarcini |
|---|---|
| Numărul de model | SC371 |
| Tip de afișare | LED digital |
| Sursa de alimentare | AC 120V, 60Hz (Corded Electric) |
| Bateria de rezervă | 1 x 9V (nu este inclus) |
| Caracteristici speciale | Alarm, Audio Input, Projection Clock, Radio, Snooze |
| Dimensiuni (Lxlxh) | 18.52 x 9.42 x 8.71 cm (7.29 x 3.71 x 3.43 țoli) |
| Greutatea articolului | 517 g (1.14 lbs) |
| Tip de montare | Blat de masă |
Garanție și suport
Supersonic products are designed for reliability and performance. For warranty information or technical support, please refer to the warranty card included with your purchase or visit the official Supersonic webPăstrați bonul fiscal ca dovadă a achiziției pentru orice reclamații în garanție.


