
1. Introducere
Thank you for choosing the Aigostar Gx-5555 Ceiling Fan with Light. This product combines a powerful ceiling fan with an integrated LED light, offering both comfort and illumination for your living space. It features a silent DC motor, five durable ABS blades, and a sleek black metal design. The light offers adjustable color temperature and brightness, while the fan provides six speed settings and a convenient timer function. This manual provides essential information for safe installation, operation, and maintenance of your new ceiling fan.
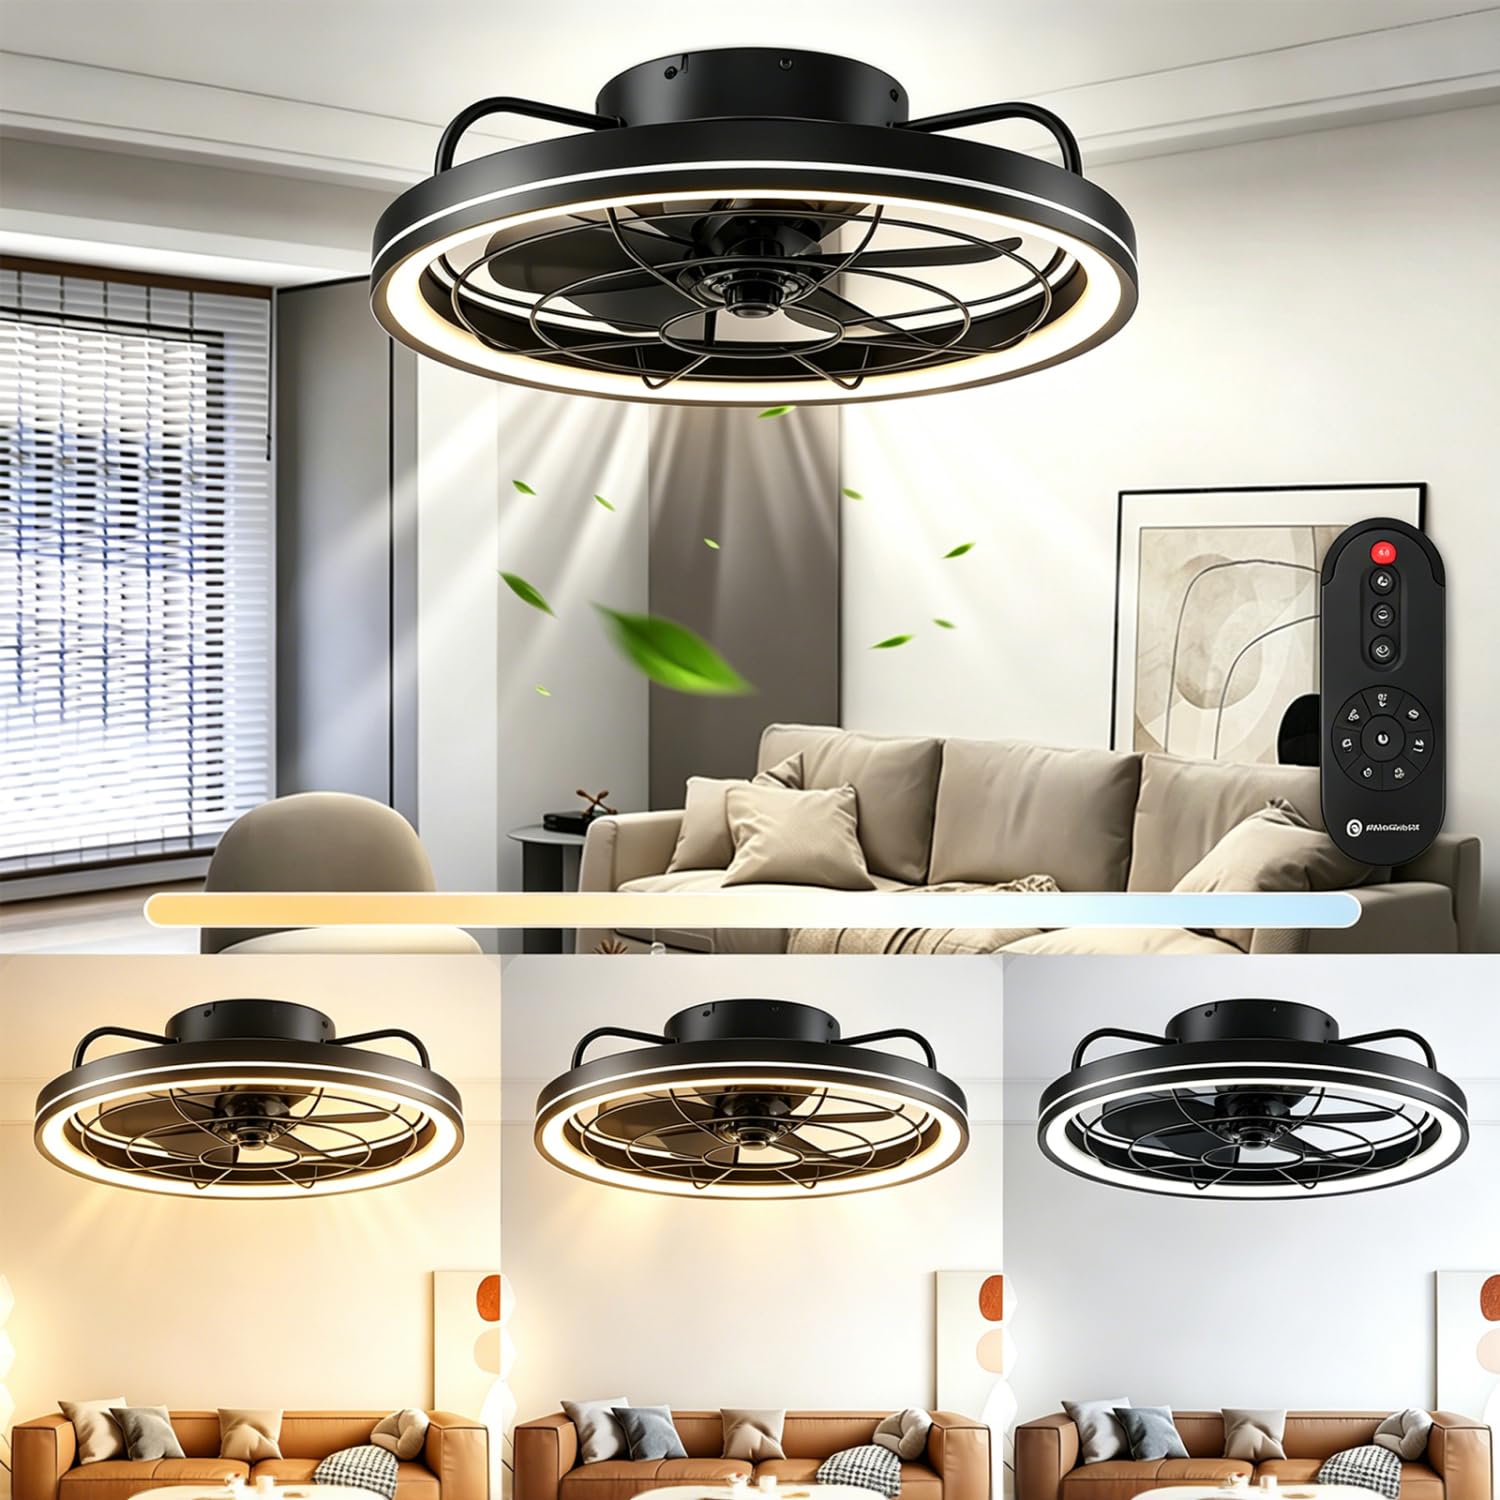
Figura 1: Pesteview of the Aigostar Gx-5555 Ceiling Fan with Light.
2. Instrucțiuni de siguranță
Vă rugăm să citiți cu atenție toate instrucțiunile de siguranță înainte de instalare și utilizare. Păstrați acest manual pentru referințe ulterioare.
- Asigurați-vă că sursa de alimentare este deconectată înainte de instalare, curățare sau întreținere.
- Instalarea trebuie efectuată de către un electrician calificat, în conformitate cu reglementările locale privind cablarea.
- Structura de montare trebuie să fie capabilă să susțină greutatea ventilatorului (aproximativ 4.05 kg).
- Nu introduceți obiecte în palele ventilatorului în timp ce acesta funcționează.
- Nu lăsați copiii la îndemâna ventilatorului în timpul funcționării.
- Nu folosiți ventilatorul în damp sau locații umede.
- Only use the provided remote control for operation.
3. Conținutul pachetului
Verificați la despachetare dacă toate componentele sunt prezente și nedeteriorate.
- Aigostar Ceiling Fan Unit
- Telecomanda
- Manual de instructiuni
4. Specificații
| Caracteristică | Caietul de sarcini |
|---|---|
| Numărul de model | Gx-5555 |
| Dimensiuni (L x l x H) | 48 x 48 x 15.5 cm |
| Greutate | 4.05 kg |
| Putere (Lumină) | 40W |
| Putere (ventilator) | 20W |
| Flux luminos | 4400LM |
| Temperatura de culoare | 2700K-6500K (reglabil) |
| Luminozitate | 10-100% (Adjustable) |
| Vitezele ventilatorului | 6 niveluri |
| Funcția de cronometru | 1 Ore |
| Tip motor | DC Motor (Silent) |
| Lame | 5 lame ABS |
| Voltage | 230 V (ca) |
| Metoda de control | Telecomanda |
| Tip de montare | Montare pe tavan |
| Certificari | CE, RoHS |
5. Configurare și instalare
Installation should only be performed by a qualified professional to ensure safety and proper functionality. Always disconnect power at the circuit breaker before beginning any installation work.
5.1 Despachetarea
Carefully remove all components from the packaging. Inspect for any damage during transit. Retain packaging for future transport or returns.
5.2 Locul de montare
Choose a ceiling location that can safely support the fan's weight and allows for adequate clearance around the blades. The fan has a diameter of 480mm and a height of 155mm.

Figura 2: Dimensiunile produsului pentru planificarea instalării.
5.3 Cablare și asamblare
Follow the detailed wiring diagrams and assembly instructions provided in the separate installation guide included with your product. Ensure all electrical connections are secure and comply with local electrical codes. After wiring, securely attach the fan unit to the ceiling mount.
6. Instrucțiuni de utilizare
The Aigostar Gx-5555 Ceiling Fan with Light is operated using the included remote control. Ensure batteries are correctly inserted into the remote.
6.1 Funcții de iluminare
Use the remote control to adjust the light settings:
- Reglarea temperaturii culorii: Cycle through warm white (2700K), neutral white (4500K), and cool white (6500K) to suit your preference.
- Reglarea luminozității: Reglați intensitatea luminii de la 10% la 100%.
- The light features a memory function, retaining the last setting when turned off and on again.

Figure 3: Adjustable color temperature and brightness settings.
6.2 Funcțiile ventilatorului
Control the fan speed and direction with the remote:
- Reglarea vitezei: Select from 6 fan speeds. Lower speeds (1-2) are ideal for sleeping, medium speeds (3-4) for daily activities, and higher speeds (5-6) for increased air circulation.

Figure 4: Fan speed settings for various comfort levels.
- Funcționare silențioasă: The DC motor ensures quiet operation, minimizing disturbance, especially during sleep.

Figure 5: The fan's quiet operation for undisturbed rest.
- Rotire inversă: The fan can rotate clockwise for downward airflow (ideal for cooling in summer) or counter-clockwise for upward airflow (to circulate warm air in winter). Refer to the remote control for the specific button to change rotation direction.
6.3 Funcția de cronometru
Set the fan and/or light to automatically turn off after a specified period:
- Press the timer button on the remote to select 1, 2, or 4 hours.
- Note: Pressing any other button after setting the timer will cancel the timer function.

Figure 6: Remote control displaying the timer function.
7. Întreținere
Întreținerea regulată asigură performanța optimă și durata de viață a ventilatorului de tavan.
- curatenie: Deconectați întotdeauna alimentarea cu energie electrică înainte de curățare. Folosiți o lavetă moale,amp cloth to wipe down the fan housing and blades. Do not use abrasive cleaners or solvents.
- Inspecția lamei: Verificați periodic palele ventilatorului pentru a depista eventuale acumulări de praf sau deteriorări.
- Etanşeitate: Ensure all screws and connections remain tight.
8. Depanare
Dacă întâmpinați probleme, consultați următoarele probleme și soluții comune:
| Problemă | Cauza posibila | Soluţie |
|---|---|---|
| Ventilatorul nu funcționează | No power supply; Remote control battery low/dead; Incorrect wiring. | Check circuit breaker; Replace remote batteries; Consult a qualified electrician to check wiring. |
| Lumina nu se aprinde | No power supply; Light component fault. | Check circuit breaker; Contact customer support if light component is faulty. |
| Telecomanda nu funcționează | Batteries incorrectly inserted or dead; Remote not paired (if applicable). | Check battery orientation and replace if necessary; Refer to remote pairing instructions in the full manual. |
| Ventilatorul se clătină | Șuruburi de montare slăbite; Lame dezechilibrate. | Ensure all mounting screws are tight; Check for balanced blades and re-tighten if necessary. |
If the problem persists after attempting these solutions, please contact Aigostar customer support.
9. Garanție și asistență
Aigostar products are designed and manufactured to the highest quality standards. This product comes with a standard manufacturer's warranty. For detailed warranty information, please refer to the warranty card included in your package or visit the official Aigostar website-ul.
For technical support, replacement parts, or any other inquiries, please contact Aigostar customer service through the contact information provided on our website or in your product documentation. Please have your model number (Gx-5555) and purchase date ready when contacting support.