
1. Introducere
The Next Cine800S GoogleTV Projector is designed to provide a versatile and immersive home entertainment experience. This manual offers essential information for the safe and efficient setup, operation, and maintenance of your projector. Please read this manual thoroughly before using the device.
2. Informații de siguranță
- Alimentare electrică: Use only the specified power adapter. Ensure the power cord is not damaged or pinched.
- Ventilare: Do not block ventilation openings. Maintain adequate space around the projector for proper airflow to prevent overheating.
- Plasare: Așezați proiectorul pe o suprafață stabilă și plană. Evitați să îl expuneți direct la lumina soarelui, în apropierea surselor de căldură sau în medii cu umiditate ridicată sau praf.
- curatenie: Deconectați alimentarea înainte de curățare. Folosiți o cârpă moale și uscată. Nu utilizați agenți de curățare lichizi sau cu aerosoli.
- Îngrijirea lentilelor: Avoid touching the projector lens directly. Use a soft, lint-free cloth specifically designed for optical lenses if cleaning is necessary.
- Service: Nu încercați să reparați singur proiectorul. Apelați la personal calificat pentru orice service.
3. Produs terminatview
The Next Cine800S is a Full HD LED projector featuring Google TV. Below are key components and features.

Figura 3.1: Față view of the Next Cine800S GoogleTV Projector, highlighting its design and key features like 800 ANSI Lumens and Google TV integration.
3.1. Caracteristici cheie
- Rezoluția afișajului: Full HD 1920x1080, supporting screen sizes from 40 to 200 inches.
- Luminozitate: 800 ANSI Lumens.
- Procesare video: Supports 4Kx2K @ 60fps encode/decode.
- Focus & Keystone: Automatic or Manual Focus, Automatic Keystone Correction.
- Sistem de operare: Google TV with Android 14.
- Servicii de streaming: Netflix L1, Prime Video, YouTube, Disney+ with L1 DRM Certification.
- Conectivitate wireless: Wi-Fi 802.11 a/b/g/n/ac (2.4G & 5G) and Bluetooth 5.0.
- Memorie: 2GB LPDDR4 RAM / 8GB eMMC Storage.
- Audio: Integrated 12W (4W) Speaker.
- Sistem optic: Dust-Sealed Optical Mechanism.
- Oglindirea ecranului: Air Screen and Google Cast for iOS & Android devices.
3.2. Porturi și conexiuni
Identify the various input and output ports on your projector.
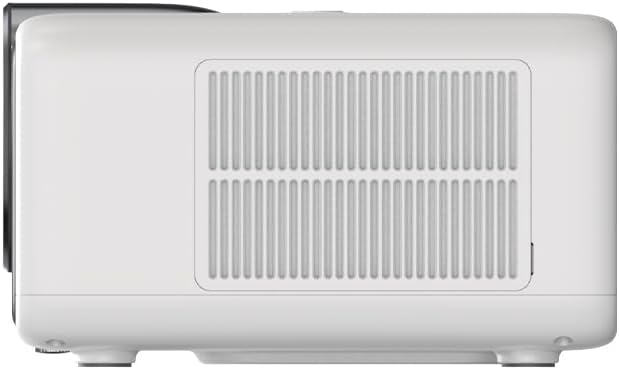
Figure 3.2: Rear panel of the projector, displaying available ports. Note: Actual ports may vary slightly by region or production batch. This model typically includes HDMI, USB, and a 2.5mm Audio Jack.
- HDMI: Connect to external video sources such as Blu-ray players, gaming consoles, or computers.
- USB: Pentru conectarea dispozitivelor de stocare USB pentru redarea de conținut media files.
- Mufă audio de 2.5 mm: Pentru conectarea dispozitivelor audio externe, cum ar fi căști sau difuzoare.
4. Configurare
4.1. Despachetarea și inspecția inițială
- Scoateți cu grijă proiectorul și toate accesoriile din ambalaj.
- Check for any signs of damage during transit. If damage is found, contact your retailer immediately.
- Asigurați-vă că sunt prezente toate accesoriile enumerate.
4.2. Amplasarea proiectorului
Plasarea optimă este crucială pentru cele mai bune rezultate viewexperiență.

Figura 4.1: Example of projector placement and adjustable screen sizes (40" to 200").
- Distanţă: Position the projector at a suitable distance from the screen or wall to achieve your desired screen size (40 to 200 inches).
- Înălţime: Place the projector on a stable surface or mount it to project the image at the desired height.
- Montare: The projector includes a mounting point on its base. Ensure any tripod or mount used is compatible with the projector's screw size and weight. Note that some standard tripod screws may not fit.
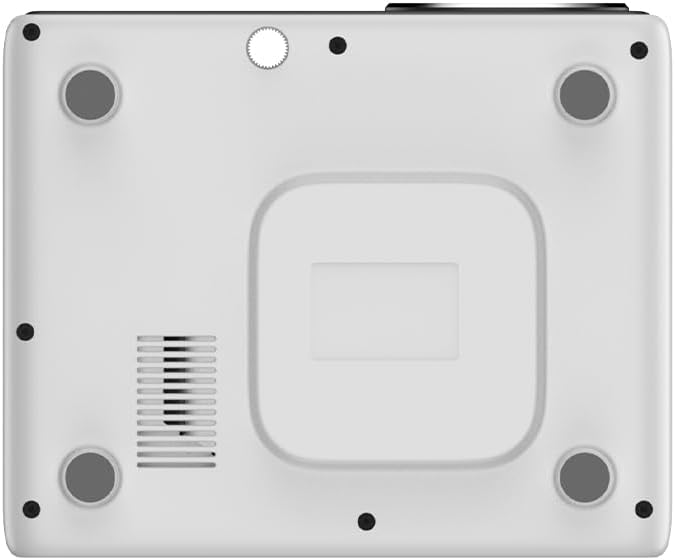
Figura 4.2: De jos view of the projector, indicating the mounting point and ventilation grilles.
4.3. Conexiune la alimentare
- Conectați adaptorul de alimentare la portul de intrare a proiectorului.
- Conectați adaptorul de alimentare la o priză electrică adecvată.
- Apăsați butonul de alimentare de pe proiector sau de pe telecomandă pentru a-l porni.
4.4. Configurarea inițială și conexiunea la rețea
- Upon first power-on, the projector will guide you through the initial Google TV setup process.
- Follow the on-screen instructions to select your language, connect to a Wi-Fi network (2.4G or 5G), and log in with your Google account.
- The projector features automatic focus and keystone correction. If the image is not perfectly clear or rectangular, you can access manual adjustment options in the settings menu.
5. Instrucțiuni de utilizare
5.1. Navigarea pe Google TV
The projector runs on Google TV, providing a user-friendly interface for accessing content.

Figure 5.1: The Google TV interface on the Next Cine800S Projector, showing recommended content and installed applications.
- Use the remote control to navigate through menus, select apps, and control playback.
- The home screen provides personalized recommendations and quick access to your favorite streaming services.
5.2. Aplicații de streaming
Access popular streaming platforms directly from your projector.

Figure 5.2: Supported streaming applications and Google Play Store access.
- Pre-installed apps include Netflix, Prime Video, YouTube, and Disney+.
- Descărcați aplicații suplimentare din Magazinul Google Play.
- Ensure you are logged into your respective service accounts to access content.
5.3. Conectarea dispozitivelor externe
- HDMI: Connect your device to an HDMI port. The projector will automatically detect the input or you can manually select it from the input source menu.
- USB: Insert a USB drive into the USB port. The media player application will typically launch automatically, allowing you to browse and play supported media files (JPG, PNG, BMP, JPEG, MP3, M4A, MP2, WAV, FLAC, MP4, MOV, TS, DAT, F4V, 3GP).
5.4. Screen Mirroring
The projector supports Air Screen and Google Cast for mirroring content from your iOS or Android devices.
- Asigurați-vă că dispozitivul mobil și proiectorul sunt conectate la aceeași rețea Wi-Fi.
- On your mobile device, open the screen mirroring function (e.g., 'Screen Cast', 'Smart View', 'AirPlay').
- Selectați proiectorul din lista de dispozitive disponibile.
6. Întreținere
Întreținerea regulată asigură performanțe optime și prelungește durata de viață a proiectorului.
6.1. Curățarea lentilei

Figure 6.1: Close-up of the projector lens, which requires careful cleaning.
- Use a soft, lint-free cloth or a lens cleaning brush to gently remove dust from the lens surface.
- For stubborn smudges, use a specialized lens cleaning solution applied to a microfiber cloth, not directly to the lens.
- Avoid abrasive materials or excessive force, which can scratch the lens.
6.2. Cleaning Ventilation Ports
- Periodically check the ventilation grilles for dust accumulation.
- Use a soft brush or a vacuum cleaner with a brush attachment to gently clean the grilles.
- Nu introduceți niciun obiect în orificiile de ventilație.
6.3. Actualizări software
- Ensure your projector is connected to the internet.
- Navigate to the system settings to check for and install available software updates. Updates can improve performance and add new features.
7. Depanare
Această secțiune abordează problemele frecvente pe care le puteți întâmpina cu proiectorul dumneavoastră.
| Problemă | Cauza posibila | Soluţie |
|---|---|---|
| Fără putere | Cablul de alimentare deconectat, problemă cu priza | Verificați conexiunea cablului de alimentare. Încercați o altă priză. |
| Nicio imagine | Input source not selected, device not connected, lens cap on | Ensure input source is correctly selected. Check HDMI/USB connections. Remove lens cap. |
| Imaginea este neclară | Focalizarea nu este ajustată | Adjust focus manually using the projector's focus ring or through the settings menu if automatic focus is not sufficient. |
| Image is distorted/trapezoidal | Keystone not adjusted, projector not perpendicular to screen | The projector has automatic keystone correction. If the image is still distorted, access the manual keystone correction settings to fine-tune the image. |
| Fără sunet sau calitate slabă a sunetului | Volume too low, external audio device not connected, speaker issue | Increase volume. Check external audio connections if used. If internal speaker sound is distorted at low volumes, consider connecting external speakers via the 2.5mm audio jack or Bluetooth. |
| Probleme de conexiune Wi-Fi | Parolă incorectă, probleme cu routerul, interferențe de semnal | Verify Wi-Fi password. Restart router. Ensure projector is within Wi-Fi range. |
| Telecomanda nu funcționează | Baterii descărcate/descărcate, senzor IR blocat | Replace batteries. Ensure no obstructions between remote and projector's IR sensor. |
8. Specificații
Detailed technical specifications for the Next Cine800S GoogleTV Projector.
| Caracteristică | Caietul de sarcini |
|---|---|
| Model | Cine800S |
| Tehnologia de afișare | Proiector LED |
| Rezoluție nativă | Full HD 1920x1080 |
| Luminozitate | 800 ANSI Lumens |
| Dimensiunea proiecției | 40" — 200" |
| Decodare video | 4Kx2K @ 60fps |
| Concentrează-te | Automatic sau Manual |
| Corecție corecție | Automat |
| Sistem de operare | Google TV, Android 14 |
| DRM Certification | Netflix L1, Prime Video, YouTube, Disney+ L1 |
| Wifi | 802.11 a/b/g/n/ac (2.4G & 5G) |
| Bluetooth | 5.0 |
| RAM | 2 GB LPDDR4 |
| Stocare internă | 8 GB eMMC |
| Ieșire difuzor | 12W (4W) |
| Porturi | HDMI, 2.5mm Audio Jack, USB |
| Formate media acceptate | JPG, PNG, BMP, JPEG, MP3, M4A, MP2, WAV, FLAC, MP4, MOV, TS, DAT, F4V, 3GP, FAT, NTFS |
| Mecanism optic | Dust-Sealed System |
| Oglindirea ecranului | Air Screen, Google Cast (iOS & Android) |
9. Garanție și asistență
For warranty information, please refer to the documentation provided with your purchase or visit the official Next website. For technical support, product inquiries, or service requests, please contact Next customer service through their official channels.
Păstrați la îndemână bonul fiscal și numărul de serie al produsului atunci când contactați serviciul de asistență.