
1. Introducere
This manual provides detailed instructions for the installation, operation, and maintenance of your JOOAN 4G Solar Security Camera. This outdoor wireless surveillance camera is designed for areas without traditional power or network infrastructure, utilizing 4G cellular connectivity and solar power for continuous operation. Please read this manual thoroughly before use to ensure proper setup and functionality.

Image 1.1: JOOAN 4G Solar Security Camera with its solar panel and a smartphone displaying the camera's live feed, highlighting its 4MP/5MP HD resolution capability.
2. Caracteristicile produsului
- Conectivitate 4G: Operates independently using a SIM card, ideal for remote locations.
- Alimentat cu energie solară: Equipped with a solar panel for continuous charging, reducing the need for external power sources.
- High Definition Resolution: Capturează videoclipuri claretage for effective surveillance.
- Vedere de noapte color: Offers multiple night vision modes including infrared, full-color, and smart color night vision for enhanced visibility in low-light conditions up to 10 meters.
- Stocare locală și în cloud: Supports up to 256GB SD card storage and optional cloud storage for recorded footage.
- Instalare ușoară: Designed for straightforward setup and mounting.
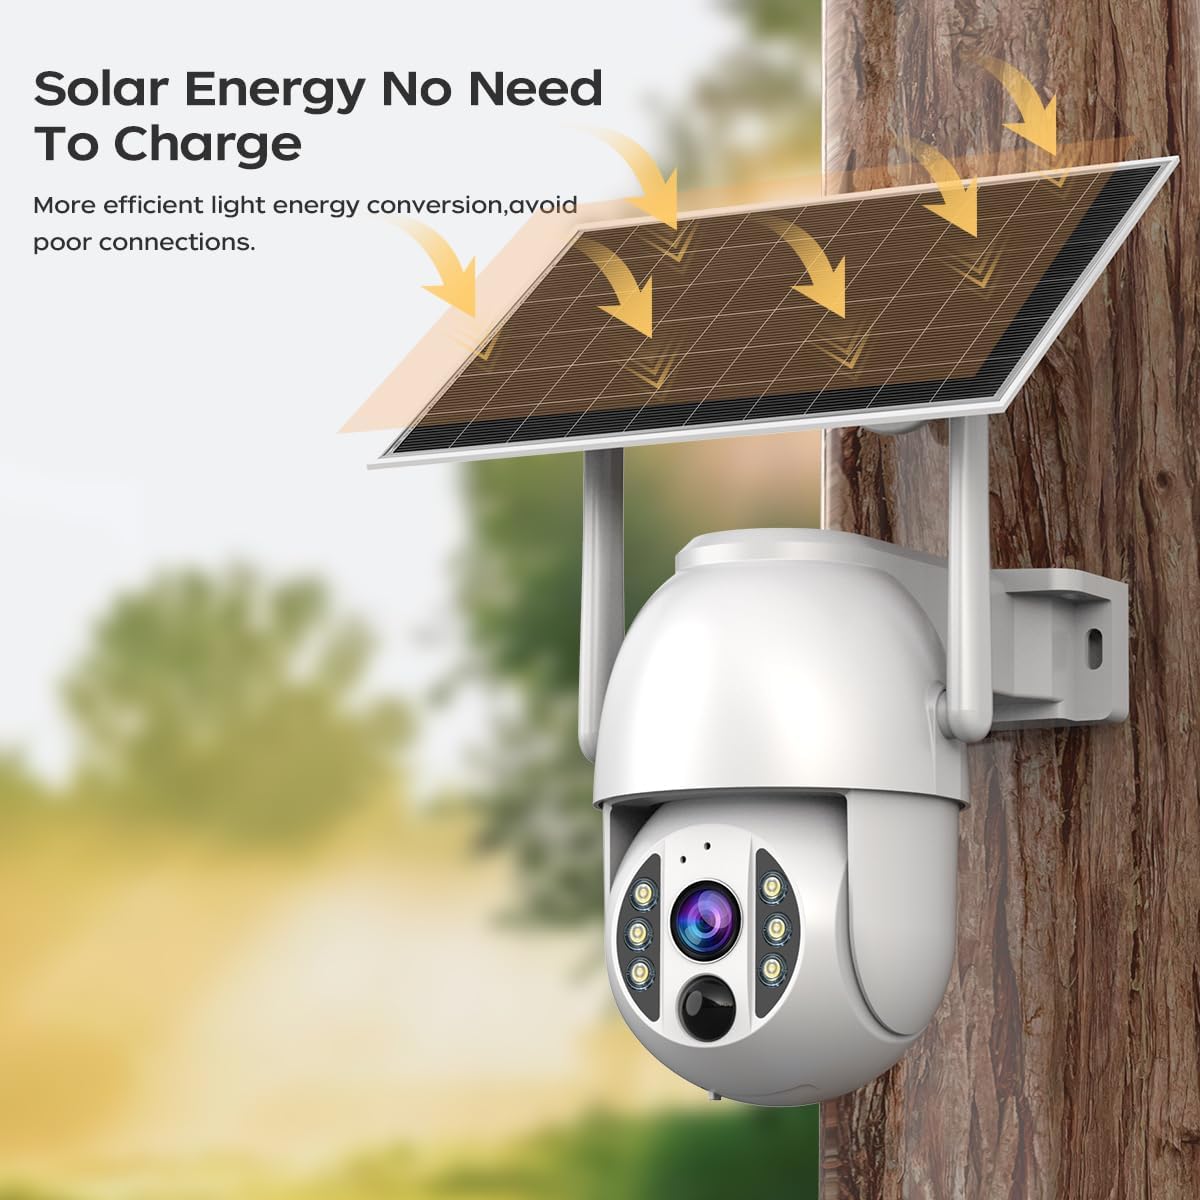
Image 2.1: The JOOAN 4G Solar Security Camera mounted with its solar panel, illustrating its solar energy capability for efficient light energy conversion and avoiding poor connections.
3. Configurare și instalare
3.1. Instalarea cartelei SIM și a cardului SD
Before mounting, install a 4G SIM card (not included) and an SD card (up to 256GB, not included) into the designated slots on the camera. Ensure the camera is powered off before inserting or removing cards.

Imaginea 3.1: Un prim-plan view of the JOOAN camera's SD card slot, indicating support for cloud storage and a maximum 256GB SD card.
3.2. Etape de montare
- Positioning and Punching: Select a suitable location for the camera and solar panel. Mark the drilling points on the wall. Use a drill to create holes at the marked positions.
- Introduceți șuruburile de expansiune: Gently tap the expansion screws into the drilled holes until they are flush with the surface.
- Montați camera: Align the camera bracket with the expansion screws and secure it using the provided screws.
- Instalare completa: Attach the solar panel to the camera bracket or mount it separately in a location with ample sunlight. Ensure all connections are secure.

Image 3.2: Visual guide showing the four installation steps: 1. Positioning and punching, 2. Inserting expansion screws, 3. Mounting the camera with screws, and 4. Completing the installation with the solar panel.
3.3. Conexiune la aplicație
Download the official JOOAN app from your smartphone's app store. Follow the in-app instructions to add your camera. There are typically two methods:
- Add APP Phone Code: Scan the QR code displayed on your mobile phone APP with the camera lens from a distance of 20-30cm to add the distribution network.
- Add Camera Body Code: Scan the QR code located on the camera body using the mobile phone APP to add the distribution network.

Image 3.3: Illustration of the two connection methods: scanning the APP phone code or scanning the camera body code to establish a network connection.
4. Funcționare
4.1. Pornire/Oprire
The camera automatically powers on when sufficient solar power is available or when connected to a power source. To power off, disconnect the power source and allow the battery to deplete, or use the app if a power-off function is available.
4.2. în direct View și Înregistrare
Once connected to the app, you can access the live video feed. The camera supports continuous recording to the SD card or cloud storage (subscription may be required). You can also manually record video or capture screenshots from the live view.
4.3. Detectarea mișcării și alertele
Configure motion detection sensitivity and alert settings within the app. The camera will send notifications to your smartphone when motion is detected. Recorded events can be reviewîn secțiunea de redare a aplicației.
4.4. Moduri de vedere nocturnă
The camera offers three night vision modes, selectable via the app:
- Viziune de noapte în infraroșu: Oferă imagini alb-negru clare în întuneric complet.
- Viziune nocturnă completă în culori: Utilizes built-in spotlights to provide color images in low-light conditions.
- Viziune nocturnă inteligentă în culori: Automatically switches from infrared to full-color vision upon detection of motion or specific events.

Image 4.1: Comparison of the three night vision modes: Infrared night vision, Full color night vision, and Smart color night vision, demonstrating the camera's ability to pick out details in darkness up to 10 meters away.
5. Întreținere
- Curățarea lentilei: Curățați periodic obiectivul camerei cu o cârpă moale și uscată pentru a asigura o calitate clară a imaginii. Evitați substanțele de curățare abrazive.
- Curățarea panourilor solare: Keep the solar panel free from dust, dirt, and debris to maximize charging efficiency. Clean with a damp pânză după cum este necesar.
- Actualizări firmware: Check the app periodically for available firmware updates to ensure optimal performance and security.
- Sănătatea bateriei: Ensure the solar panel receives adequate sunlight to maintain battery charge. Prolonged periods without sunlight may require temporary charging via a USB power adapter (not included).
6. Depanare
6.1. Camera Not Connecting to 4G Network
- Asigurați-vă că este introdusă corect cartela SIM și activată cu un abonament de date valid.
- Check 4G signal strength at the camera's location.
- Restart the camera by briefly disconnecting and reconnecting its power.
6.2. No Video Feed or Poor Quality
- Verify the camera has sufficient power.
- Check the 4G signal strength.
- Curățați obiectivul camerei.
6.3. Solar Panel Not Charging
- Ensure the solar panel is positioned to receive direct sunlight for several hours daily.
- Clean any dirt or obstructions from the solar panel surface.
- Verificați cablul de conexiune dintre panoul solar și cameră.
6.4. SD Card Not Recording
- Asigurați-vă că ați introdus și formatat corect cardul SD în aplicație.
- Verificați dacă are suficient spațiu liber pe cardul SD.
- Verificați setările de înregistrare în aplicație.
7. Specificații
| Caracteristică | Detaliu |
|---|---|
| Marca | JOOAN |
| Model | B0GCFGYCLX |
| Sursa de alimentare | Alimentat cu energie solară |
| Protocol de conectivitate | 4G Cellular (SIM card required), Wi-Fi (for initial setup/local access if applicable) |
| Utilizări recomandate | Indoor/Outdoor Surveillance |
| Caracteristica specială | Usor de instalat |
| Depozitare | Supports up to 256GB SD card, Cloud Storage (subscription may apply) |
8. Garanție și asistență
For warranty information and technical support, please refer to the JOOAN official website-ul web sau contactați direct serviciul lor de asistență pentru clienți. Păstrați bonul fiscal ca dovadă a achiziției.
Pentru asistență suplimentară, vă rugăm să vizitați: JOOAN Store on Amazon