
1. Introducere
This manual provides comprehensive instructions for the safe and efficient installation, operation, and maintenance of your ErGear Single Monitor Arm, Model EGDMA69B. Please read this manual thoroughly before installation and retain it for future reference.

Image 1.1: ErGear Single Monitor Arm, Model EGDMA69B.
2. Informații de siguranță
Respectați întotdeauna aceste instrucțiuni de siguranță pentru a preveni vătămările corporale sau deteriorarea produsului:
- Nu depășiți capacitatea maximă de greutate de 9 kg (19.8 lbs).
- Ensure your monitor's VESA pattern is compatible (75x75mm or 100x100mm).
- Verify your desk thickness is within the specified range for C-clamp (0.99 cm – 6.5 cm) or grommet base (0.99 cm – 7.5 cm).
- Perform installation with care, preferably with assistance for heavier monitors.
- Țineți copiii și animalele de companie departe în timpul instalării.
- Tighten all screws securely, but do not overtighten to avoid stripping threads.
3. Conținutul pachetului
Before installation, ensure all parts are present and undamaged. Refer to the included parts list in your product packaging for detailed component identification.
4. Specificații
| Caracteristică | Caietul de sarcini |
|---|---|
| Numărul de model | EGDMA69B |
| Dimensiunea ecranului compatibil | 13 - 34 inci |
| Capacitate maximă de greutate | 9 kg (19.8 lbs) |
| Compatibilitate VESA | 75x75mm, 100x100mm |
| Interval de înclinare | +80° / -50° |
| Gama rotativă | ±90° |
| Rotaţie | 360° |
| Ajustare maximă a înălțimii | Până la 445 mm (17.5 inchi) |
| Extensie maximă | Până la 460 mm (18.1 inchi) |
| Desk Thickness (C-clamp) | 0.99 cm – 6.5 cm |
| Grosimea biroului (inele de fixare) | 0.99 cm – 7.5 cm |
| Material | Aluminiu |

Imaginea 4.1: Compatibilitate pesteview for monitor size, VESA patterns, and maximum load.
5. Configurare și instalare
5.1 Desk Compatibility Check
Before installation, ensure your desk is compatible with the chosen mounting method. The arm supports both C-clamp and grommet hole mounting.
- C-clamp: Suitable for desk thickness between 0.99 cm and 6.5 cm.
- Grommet Hole: Suitable for desk thickness between 0.99 cm and 7.5 cm.
- Ensure there is sufficient space and a flat surface under your table for secure attachment.

Image 5.1: Two mounting options: C-clamp and Grommet Hole, with specified desk thickness ranges.

Image 5.2: Detailed desk compatibility check, including contact surface width, height, and overall width requirements.
5.2 Mounting the Arm to the Desk
Choose either the C-clamp or grommet base method based on your desk type and preference.
- Pentru C-clamp montare: Atașați C-clamp to the edge of your desk and tighten the knob until secure.
- For Grommet Hole mounting: Insert the grommet base through an existing hole in your desk and secure it from underneath with the provided hardware.

Image 5.3: The three-step fast setup process, showing desk clamp, arm attachment, and VESA plate mounting.
5.3 Atașarea plăcii VESA la monitor
The ErGear monitor arm features a tool-free VESA mounting plate for quick attachment.
- Ensure your monitor has VESA holes (75x75mm or 100x100mm). If your monitor has a stand, remove it first.
- Aliniați placa VESA cu orificiile de montare de pe spatele monitorului.
- Secure the VESA plate to the monitor using the provided screws. The design allows for tool-free attachment to the arm.

Image 5.4: Illustration of tool-free VESA mounting, highlighting ease of installation compared to traditional methods.

Image 5.5: Guidance on identifying VESA holes on your monitor and options for monitors without VESA compatibility.
5.4 Atașarea monitorului la braț
Once the VESA plate is secured to your monitor, slide the monitor onto the arm's VESA head until it clicks into place. Ensure it is firmly seated.
6. Operare și reglaje
6.1 Full Motion Flexibility
The monitor arm offers extensive adjustability to achieve your ideal viewing angle and ergonomic position. It supports:
- Reglarea înălțimii: Up to 17.5 inches (445mm).
- Ajunge: Up to 18.1 inches (460mm).
- Înclinare: +80° / -50° for optimal vertical angle.
- pivotare: ±90° for horizontal screen orientation.
- Rotaţie: 360° for landscape or portrait mode.

Image 6.1: Visual representation of the arm's maximum height, extension, tilt, swivel, and rotation capabilities.

Image 6.2: Illustration of how the monitor arm's extension changes based on monitor size (24", 27", 32").
6.2 Reglarea tensiunii
The gas spring mechanism requires tension adjustment to properly support your monitor's weight. Use the provided Allen key to adjust the tension screw on the arm.
- Hold the arm in a horizontal position.
- Rotiți șurubul clockwise (+) if the monitor drops down.
- Rotiți șurubul counter-clockwise (-) if the monitor rises up or is difficult to push down.
- Adjust until the monitor stays in place at any desired height.

Image 6.3: Step-by-step guide for adjusting the arm's tension to match your monitor's weight.
6.3 Managementul cablurilor
Integrated cable clips help keep your workspace tidy. Route your monitor and power cables through the clips along the arm for a clean setup.
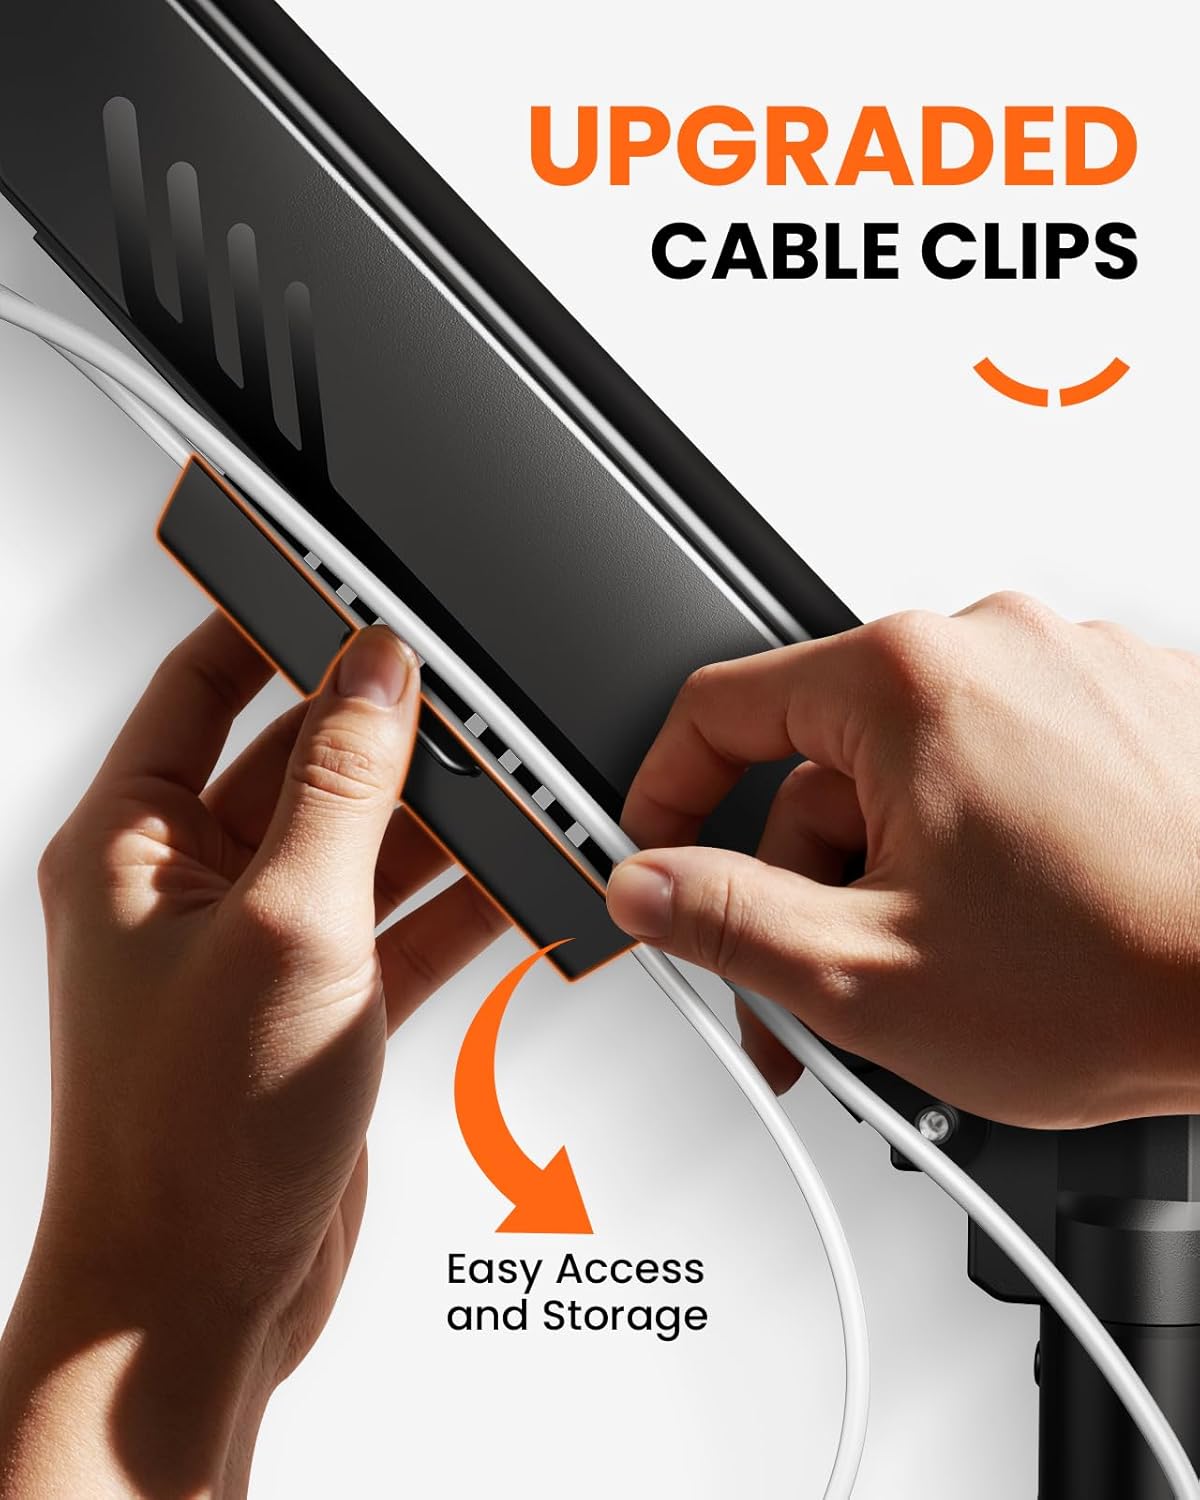
Image 6.4: Demonstration of the upgraded cable clips for easy cable organization.
7. Întreținere
To ensure the longevity and optimal performance of your ErGear Single Monitor Arm:
- Regularly check all screws and connections for tightness. Retighten if necessary.
- Curățați brațul cu o lavetă moale,amp Evitați utilizarea de produse de curățare abrazive sau solvenți.
- Do not lubricate the gas spring mechanism unless specifically instructed by customer support.
8. Depanare
If you encounter issues with your monitor arm, refer to the following common problems and solutions:
- Monitor sags or does not stay at desired height: The gas spring tension needs adjustment. Refer to Section 6.2 (Tension Adjustment) and use the provided Allen key to increase tension (turn clockwise).
- Monitor rises too easily or is difficult to push down: The gas spring tension is too high. Refer to Section 6.2 (Tension Adjustment) and use the provided Allen key to decrease tension (turn counter-clockwise).
- Arm feels wobbly: Ensure all mounting screws (desk clamp/grommet base and VESA plate) are securely tightened. Check desk stability.
- Cannot attach monitor to VESA plate: Verify your monitor's VESA pattern matches the arm's compatibility (75x75mm or 100x100mm). Ensure no obstructions are present on the monitor's back.
9. Garanție și asistență
ErGear products are designed for durability and performance. For warranty information, technical support, or replacement parts, please contact ErGear customer service through the retailer where you purchased the product or visit the official ErGear website. Please have your model number (EGDMA69B) and purchase details ready.