
Introducere
Thank you for choosing the SILENTWARE Flow 110 A-RGB Midi Tower PC Case. This manual provides essential information for the proper installation, operation, and maintenance of your new PC case. Please read these instructions carefully before beginning assembly to ensure optimal performance and longevity of your components.
The Flow 110 is designed for enthusiasts seeking efficient cooling, flexible component support, and customizable aesthetics. It features a mesh front panel, a tempered glass side panel, and four pre-installed 120mm A-RGB HDB fans with PWM control.
Informații de siguranță
Vă rugăm să respectați următoarele instrucțiuni de siguranță în timpul instalării și utilizării:
- Always disconnect the power supply from the wall outlet before installing or removing any components to prevent electrical shock.
- Be aware of sharp edges inside the case. Handle components carefully to avoid injury.
- Keep the case and its components away from liquids and excessive humidity.
- Ensure proper grounding to prevent electrostatic discharge (ESD) which can damage sensitive electronic components.
- Do not block the ventilation openings of the case, as this can lead to overheating.
Conținutul pachetului
Verificați dacă toate articolele sunt prezente în colet:
- SILENTWARE Flow 110 PC Case
- 4 x 120mm A-RGB HDB Fans (pre-installed)
- Accessory Box (screws, cable ties, standoffs, user manual)
Configurare și instalare
Follow these steps to assemble your PC within the Flow 110 case:
1. Pregătiți cazul
Place the case on a flat, stable surface. Remove the tempered glass side panel by unscrewing the thumb screws at the rear and carefully sliding it open, then lift it off. Remove the solid right side panel by unscrewing its thumb screws and sliding it backward.

This image displays the main interior compartment of the Flow 110, where the motherboard, graphics card, and other components are installed. Note the various cutouts for efficient cable routing.
2. Instalați placa de bază
Install the necessary standoffs for your motherboard form factor (ATX, mATX, or ITX). Carefully place your motherboard into the case, aligning it with the standoffs and the I/O shield opening at the rear. Secure the motherboard with screws.
3. Install the Power Supply
Mount your power supply unit (PSU) in the dedicated compartment at the rear bottom of the case. Secure it with screws from the rear of the case.
4. Instalați unitățile de stocare
The Flow 110 supports multiple storage drives. Locate the drive bays/mounts (typically behind the motherboard tray or in the PSU shroud area). Install your 2.5-inch SSDs or 3.5-inch HDDs as per the case design, securing them with screws.
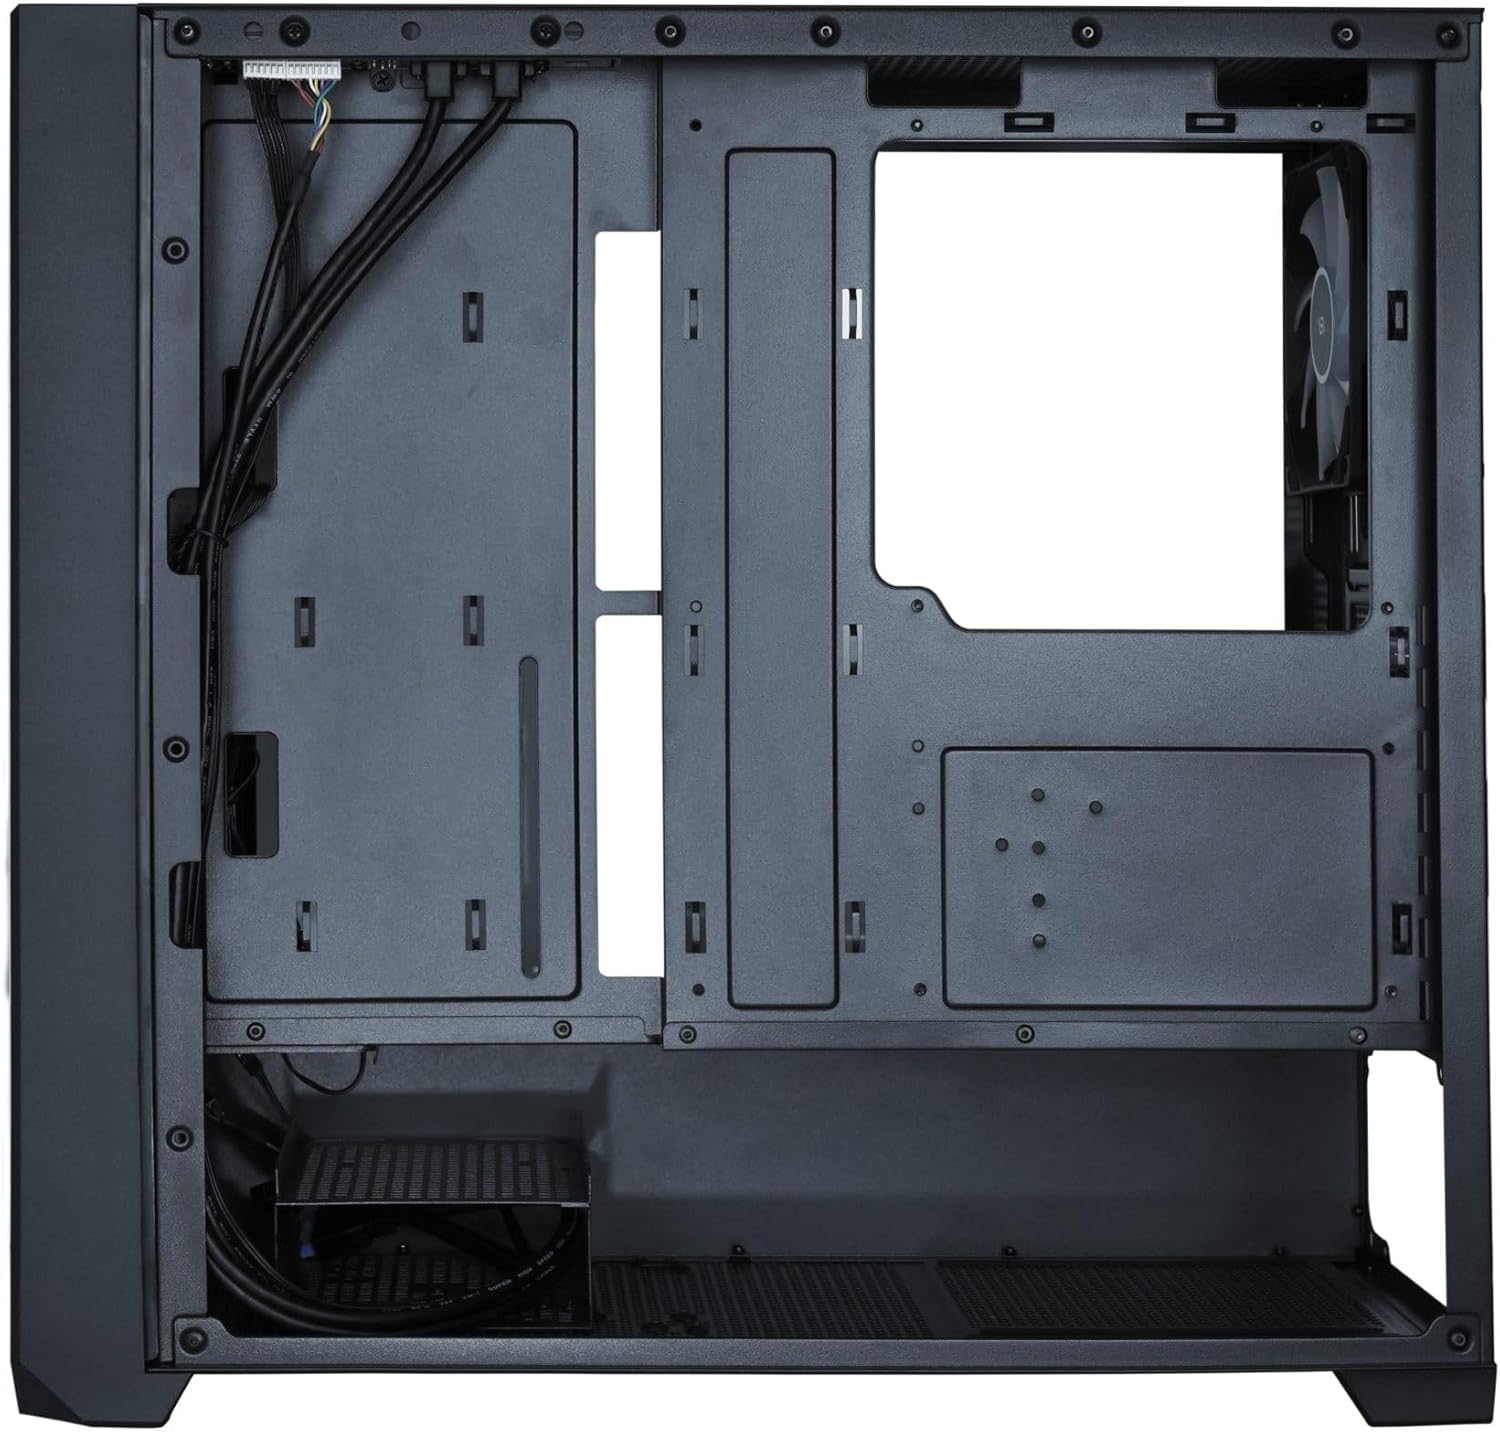
Acest view from behind the motherboard tray reveals the dedicated space for cable management and mounting storage drives, ensuring a clean and organized build.
5. Install Graphics Card and Expansion Cards
Remove the necessary expansion slot covers at the rear of the case. Insert your graphics card or other expansion cards into the appropriate PCIe slots on your motherboard. Secure them with screws.

This perspective highlights the tempered glass side panel, allowing a clear view of the internal components. The rear 120mm A-RGB fan is also visible, contributing to exhaust airflow.
6. Gestionarea cablurilor
Route all necessary cables (power, data, front panel connectors) through the designated cutouts and tie-down points. Connect the front panel I/O cables (USB, audio, power/reset switches, LEDs) to your motherboard according to your motherboard manual. Connect the fan power (PWM) and A-RGB cables to your motherboard or a compatible controller.
7. Închideți Carcasa
Once all components are installed and cables are managed, reattach the solid right side panel and then the tempered glass side panel, securing them with their respective thumb screws.
Instrucțiuni de operare
Pornirea
After connecting all external peripherals and the power cable to your PSU, press the power button on the top panel of the case to start your system.

This image displays the front of the Flow 110 PC case, highlighting the three 120mm A-RGB fans that provide both cooling and customizable lighting. The mesh front panel ensures optimal airflow.
Fan and A-RGB Control
The pre-installed 120mm A-RGB HDB fans support both PWM for speed control and 3-pin A-RGB for lighting control. Connect these to your motherboard's compatible headers or a dedicated controller.
- Control PWM: Fan speed can be adjusted via your motherboard's BIOS/UEFI settings or through motherboard software utilities. This allows for dynamic fan speed based on system temperature.
- A-RGB Lighting: The addressable RGB lighting can be controlled via your motherboard's RGB software (e.g., ASUS Aura Sync, MSI Mystic Light, Gigabyte RGB Fusion, ASRock Polychrome Sync) if connected to a compatible 3-pin 5V A-RGB header. This enables synchronization and customization of lighting effects.
Întreţinere
Întreținerea regulată ajută la asigurarea performanței optime și prelungește durata de viață a componentelor PC-ului.
- Curățarea filtrului de praf: The Flow 110 features dust filters (e.g., on the front and top panels, and under the PSU). Regularly remove and clean these filters with compressed air or by washing them with water (ensure they are completely dry before reinstallation).
- Curatenie interioara: Periodically open the case and use compressed air to remove dust buildup from fans, heatsinks, and other components. Ensure the system is powered off and unplugged before cleaning.
- Curatenie exterioara: Ștergeți suprafețele exterioare cu un material moale, damp cloth. Avoid harsh chemicals that may damage the finish or glass panel.
Depanare
If you encounter issues with your Flow 110 PC case, consider the following common solutions:
- Fără putere: Ensure the power supply is properly connected to the wall outlet and the motherboard. Check all front panel power switch connections to the motherboard.
- Ventilatoarele nu se învârt/RGB nu funcționează: Verify that all fan power (PWM) and A-RGB cables are securely connected to the motherboard or controller. Check motherboard BIOS/software settings for fan speed and RGB control.
- Supraîncălzire: Ensure all case fans are spinning correctly and oriented for proper airflow (front intake, rear/top exhaust). Clean any dust filters or internal components that may be obstructing airflow.
- Probleme de potrivire a componentelor: Double-check component compatibility with the case specifications (e.g., GPU length, CPU cooler height). Refer to your component manuals for specific dimensions.
Specificații
| Caracteristică | Caietul de sarcini |
|---|---|
| Numele modelului | Debit 110 |
| Marca | SILENTWARE |
| Tipul cazului | Turnul Midi |
| Culoare | Negru |
| Material | Oțel, Sticlă securizată, Plasă |
| Compatibilitate cu placa de baza | ATX, Micro ATX, Mini ITX |
| Ventilatoare preinstalate | 4 x 120mm A-RGB HDB Fans |
| Caracteristici speciale | Mesh front, Tempered glass side panel, A-RGB fans, PWM control |
| Lungimea maximă a GPU | Până la 380 mm |
| Montarea sursei de alimentare | Rear (Bottom) |
| Metoda de răcire | Aer |
| Locurile de unitate interne | 4 (details not specified) |
Garanție și suport
SILENTWARE products are manufactured to high-quality standards. For specific warranty information, please refer to the warranty card included with your product or visit the official SILENTWARE webPăstrați dovada achiziției pentru reclamații în garanție.
For technical support or inquiries, please contact SILENTWARE customer service through their official channels. Information regarding spare parts availability and software updates may be found on the manufacturer's website-ul.