
1. Introducere
This manual provides detailed instructions for the setup, operation, maintenance, and troubleshooting of the RGBlink NDI PTZ Camera Controller (RGBBKT). This device is designed for professional video production environments, offering comprehensive control over various PTZ cameras using multiple protocols.
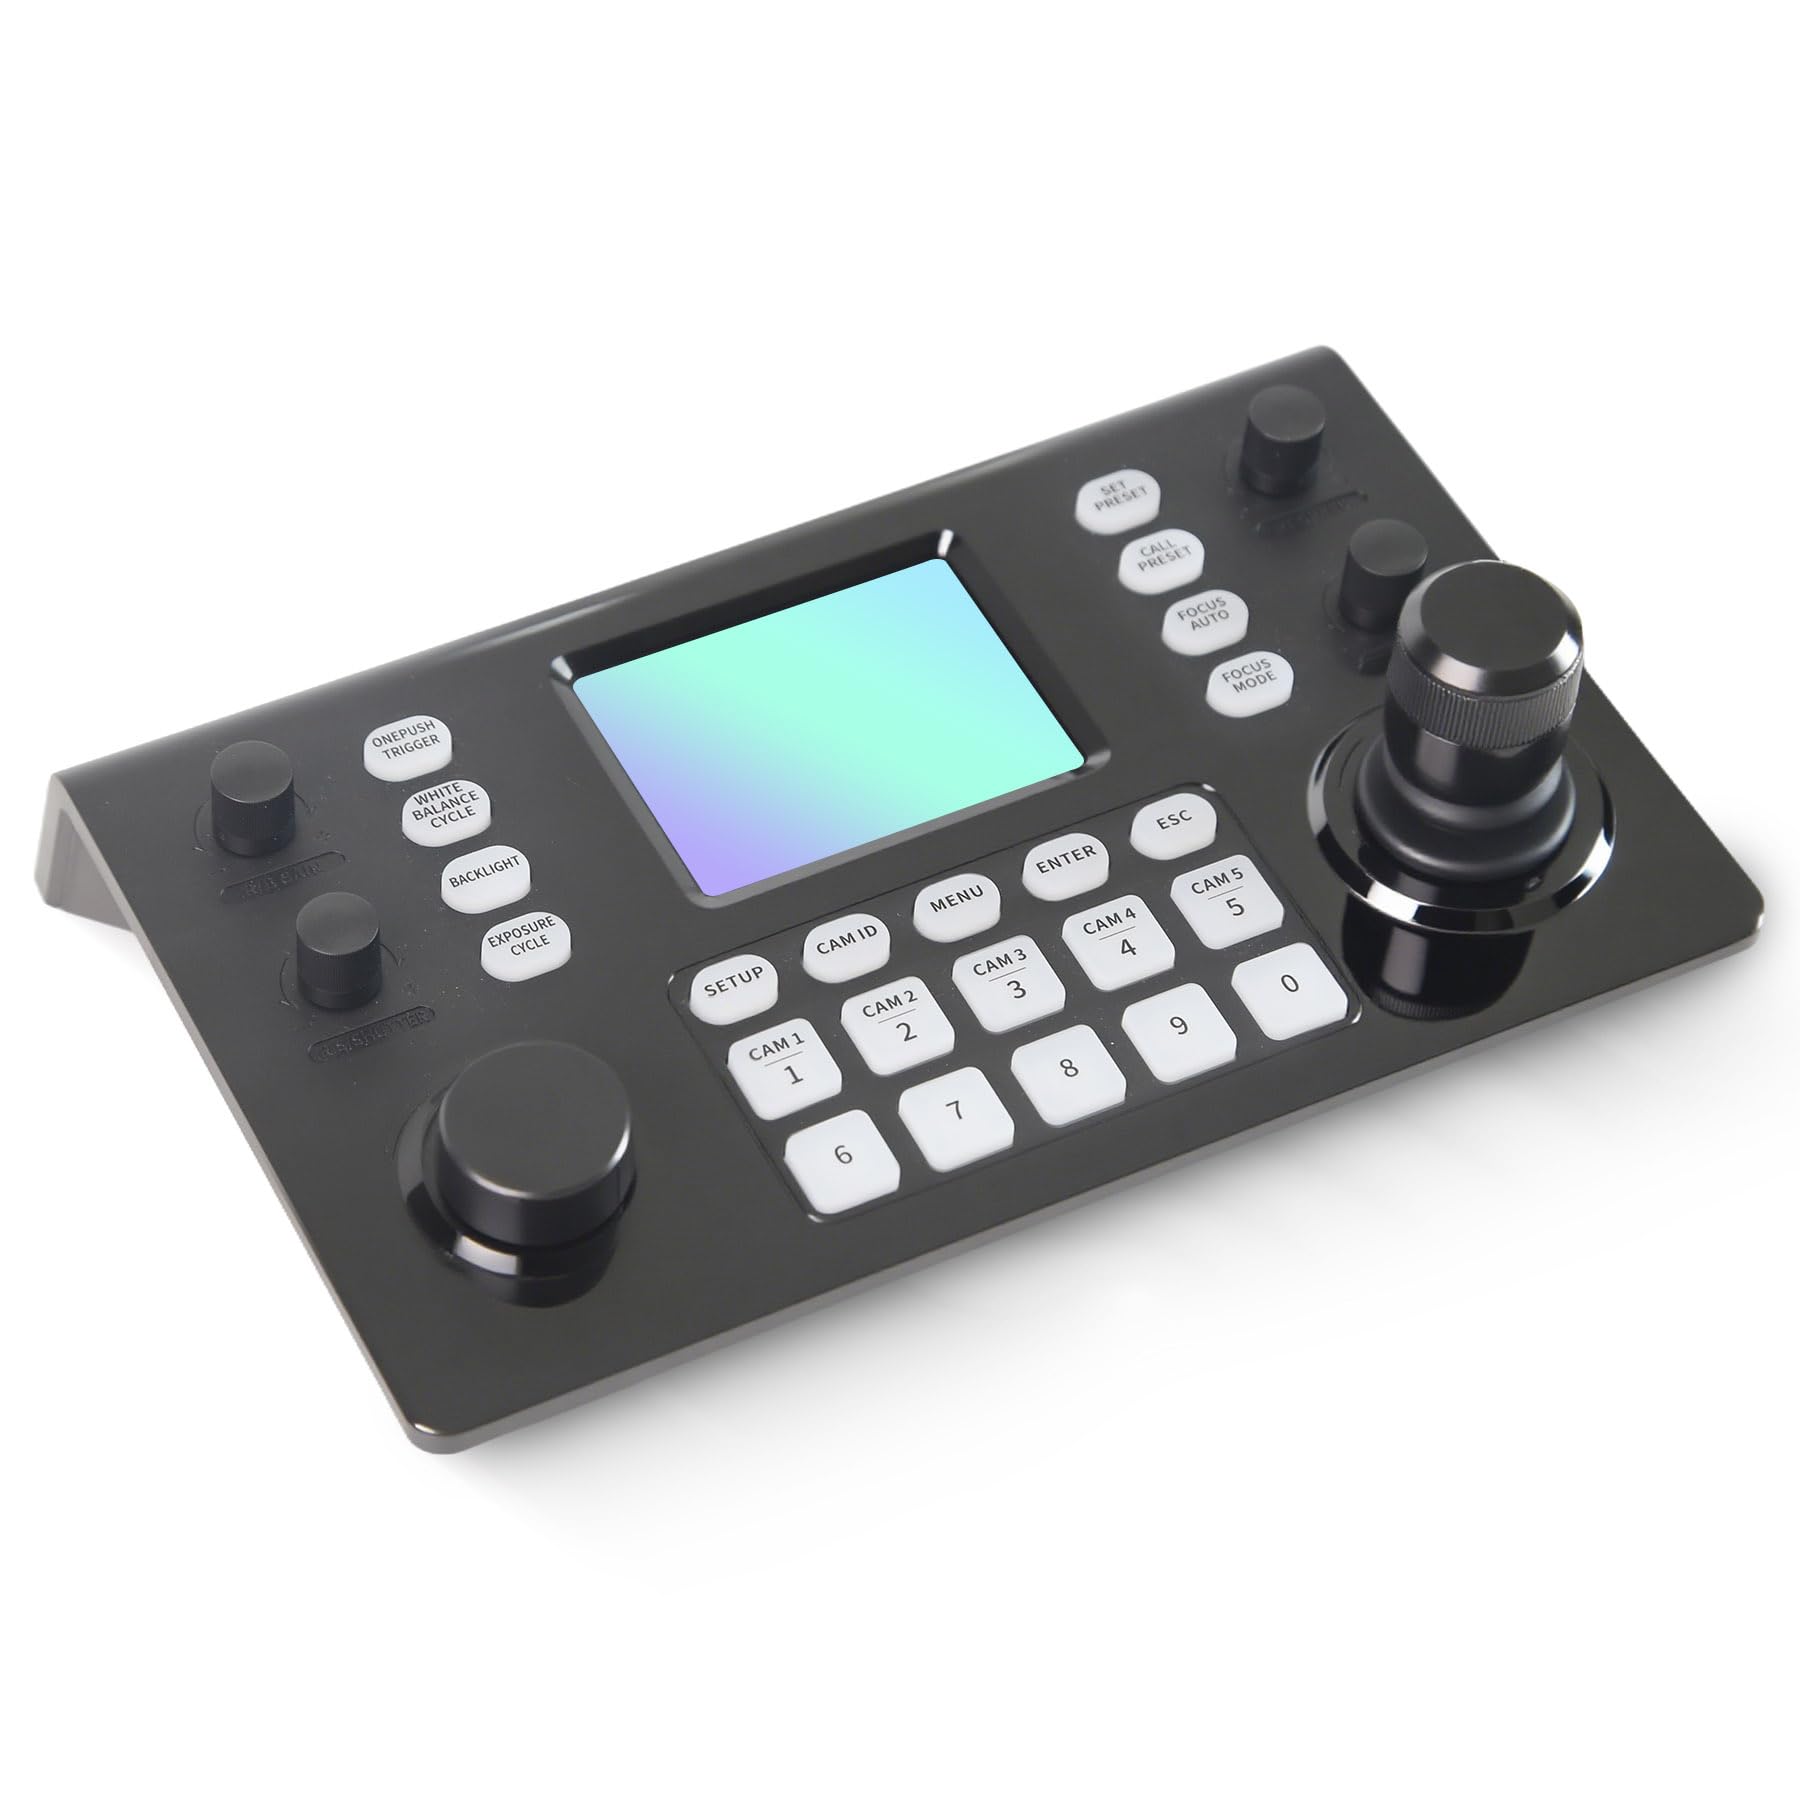
Image 1.1: RGBlink NDI PTZ Camera Controller (RGBBKT).
2. Configurare
Follow these steps to set up your RGBlink NDI PTZ Camera Controller.
2.1 Despachetarea și inspecția inițială
- Scoateți cu grijă toate componentele din ambalaj.
- Verificați dacă sunt prezente toate articolele enumerate în lista de ambalare.
- Inspect the controller for any signs of physical damage. If damage is found, contact your dealer immediately.
2.2 Conectarea controlerului
The RGBlink NDI PTZ Camera Controller supports various connection methods for power and camera control.
- Alimentare prin Ethernet (PoE): Connect a single RJ45 Ethernet cable from a PoE-enabled network switch to the controller's LAN port. This provides both power and network connectivity.
- Adaptor de alimentare extern: If PoE is not available, connect the provided power adapter to the DC 12V input port and to a power outlet.
- Conexiuni camere:
- Ethernet (IP Control): Connect PTZ cameras to the same network as the controller via RJ45 Ethernet cables. The controller supports VISCA over IP, ONVIF v2.42, and NDI v5.5 protocols.
- Control serial: For cameras supporting serial communication, use RS232, RS422, or RS485 interfaces. Connect the appropriate cables from the controller's serial ports to the cameras.

Image 2.1: Rear panel connections including RS-232, RS-422, LAN (PoE), and Power Input.

Imaginea 2.2: Example connection diagram showing PTZ Controller, PoE Switch, PTZ Cameras, Audio Mixer, and Computer.

Image 2.3: Diagram illustrating IP camera connections via a network switch.
2.3 Configurarea rețelei
For IP-based camera control, ensure the controller and cameras are on the same network segment. The controller supports automatic detection of NDI-enabled PTZ cameras.
- Access the controller's web interfață prin introducerea adresei sale IP într-un web browser. (Refer to the device's display or network tools to find the IP address).
- The default login credentials are typically 'admin' with a blank password. It is recommended to set a strong password immediately.
- În cadrul web interface, configure camera protocols (e.g., ONVIF, VISCA over IP) and enter camera-specific user credentials if required.

Image 2.4: NDI|HX camera search and control interface on the controller.
3. Funcționare
This section details the operational functions of the RGBlink NDI PTZ Camera Controller.
3.1 Pesteview de controale
The controller features a 3.49" LCD display, a 3D joystick, various knobs, and a numeric keypad for intuitive control.

Image 3.1: The controller's 3.49-inch LCD display.

Imaginea 3.2: Detaliată view of the 3D joystick and multi-function knobs.

Image 3.3: Layout of the controller's buttons and numeric keypad area.
3.2 Selectarea camerei
- Butoane de selectare rapidă: Use the dedicated CAM 1-5 buttons for quick selection of up to 5 cameras.
- Tastatură numerică: For cameras beyond the quick select buttons (up to 255), press the ID CAM button, then enter the camera number using the numeric keypad, and press ENTER.

Image 3.4: The controller's ability to manage multiple cameras.
3.3 Control PTZ
- joystick: The 3D joystick controls pan (left/right), tilt (up/down), and zoom (rotate the joystick).
- Buton de viteză PT: Adjusts the gimbal movement speed for pan and tilt.
- Zoom Knob: Provides precise zoom control, especially useful in preview modul.
3.4 Image Parameter Adjustment
- IRIS/SHUTTER Knob: Rotate to adjust aperture and shutter speed. Press to switch control modes.
- R/B GAIN Knob: Rotate to adjust red and blue gain. Press to switch control modes.
- FOCUS Button: Apăsați tasta FOCUS AUTOMAT button to switch the camera to auto focus mode.
- EXPOSURE Button: Cycles through exposure modes (Aperture Priority, Shutter Priority, Gain Priority, Manual Exposure, Auto Exposure).
- BACKLIGHT Button: Toggles the camera's backlight mode.
- WHITE BALANCE CYCLE Button: Cycles through white balance modes (Indoor, Outdoor, Manual, Auto).
- ONE PUSH TRIGGER Button: When white balance is set to "One-Push White Balance", press this button to initiate a one-push white balance calibration.

Image 3.5: Functions of buttons and knobs on the left side of the controller.

Image 3.6: Functions of buttons and knobs on the right side of the controller, including preset controls.
3.5 Presetări
- SET PRESET Button: Press to enter preset position mode. Use the numeric keys to enter the preset number (0-9) and press ENTER a salva. presa ESC a iesi.
- CALL PRESET Button: Press to enter preset recall mode. Use the numeric keys to enter the preset number (0-9) and press ENTER to recall. Press ESC a iesi.
- The controller supports saving and recalling up to 255 presets per camera.
3.6 Navigare prin meniu
- Butonul MENU: Press to open or close the camera settings menu. In menu control mode, the joystick controls navigation (up, down, left, right), ENTER confirms selections, and ESC acts as a back button.
4. Întreținere
Proper maintenance ensures the longevity and optimal performance of your RGBlink NDI PTZ Camera Controller.
4.1 Curățare
- Use a soft, dry cloth to clean the exterior of the controller.
- Pentru murdăria persistentă, dreaptă ușorampClătiți laveta cu apă sau cu o soluție de curățare blândă, neabrazivă.
- Avoid using harsh chemicals, solvents, or abrasive materials, as these can damage the surface and display.
- Ensure no liquids enter the device through openings or ports.
4.2 Depozitare
- When not in use for extended periods, store the controller in a cool, dry place away from direct sunlight and extreme temperatures.
- Protejați dispozitivul de praf și umiditate.
5. Depanare
Această secțiune oferă soluții pentru problemele comune pe care le-ați putea întâmpina.
5.1 Fara putere
- Verificați sursa de alimentare: Asigurați-vă că adaptorul de alimentare este conectat în siguranță atât la controler, cât și la o priză funcțională.
- Verificare PoE: If using PoE, verify that the Ethernet cable is connected to a PoE-enabled port on your network switch and that the switch is powered on.
- Integritatea cablului: Inspect the power cable and Ethernet cable for any damage.
5.2 Cannot Control Camera
- Conectivitate la rețea: For IP cameras, ensure the controller and cameras are on the same network and can communicate. Check network cables and IP addresses.
- Nepotrivirea protocolului: Verify that the correct control protocol (e.g., VISCA over IP, ONVIF, NDI, Pelco-D/P) is selected on both the controller and the camera.
- ID aparat de fotografiat: Ensure the correct camera ID is selected on the controller.
- Acreditări de conectare: If the camera requires authentication, confirm that the correct username and password are configured in the controller's web interfata.
- Conexiune serială: For serial control, check RS232/RS422/RS485 cable connections and ensure baud rates and addresses match between the controller and camera.
- Firmware: Ensure both the controller and cameras have the latest firmware installed. Visit the RGBlink support website pentru actualizări.
5.3 LCD Display Issues
- Fără afișare: Asigurați-vă că controlerul este pornit.
- Dim display: Check if there are any brightness settings on the controller that can be adjusted.
6. Specificații
| Caracteristică | Detaliu |
|---|---|
| Model | RGBBKT |
| Dimensiuni (L x l x H) | 11.4 x 7.8 x 5.9 inci (aprox. 290 x 200 x 150 mm) |
| Greutate | 2.2 livre (aprox. 1 kg) |
| Afişa | LCD de 3.49" |
| Protocoale de control | VISCA over IP, ONVIF v2.42, NDI v5.5, Pelco-D/P |
| Interfețe | RS232, RS422, RS485, RJ45 Ethernet (PoE) |
| Camera Capacity | Up to 255 PTZ cameras |
| Intrare de putere | PoE or DC 12V (external adapter) |
| Joystick | High-precision Hall sensor 3D joystick |

Image 6.1: Controller dimensions and typical usage environments.

Image 6.2: Visual representation of supported protocols including RJ45, RS485, RS422, RS232, ONVIF, NDI, Pelco-D, Pelco-P, and Visca.
7. Demonstrație video a produsului
Watch the official product video for a visual demonstration of the RGBlink NDI PTZ Camera Controller's features and operation.
Video 7.1: Official demonstration of the RGBlink PTZ Camera Controller Joystick, showcasing multi-camera control and key features.
8. Garanție și asistență
For warranty information, technical support, or service inquiries, please contact RGBlink customer service or visit their official website-ul.
- Producător: Xiamen RGBlink Science & Technology Co.,Ltd.
- Oficial Website: www.rgblink.com (Notă: Acesta este un substituent URL, please refer to your product packaging or official documentation for the correct support website-ul.)
- Informații de contact: Refer to the RGBlink official website for the most current contact details for technical support and warranty claims.