
1. Produs terminatview
The TOWODE 16CH 5MP DVR Security System is a versatile 6-in-1 hybrid video recorder designed for comprehensive surveillance. It supports various camera types and offers advanced features like AI human/face detection and H.265+ video compression for efficient storage.
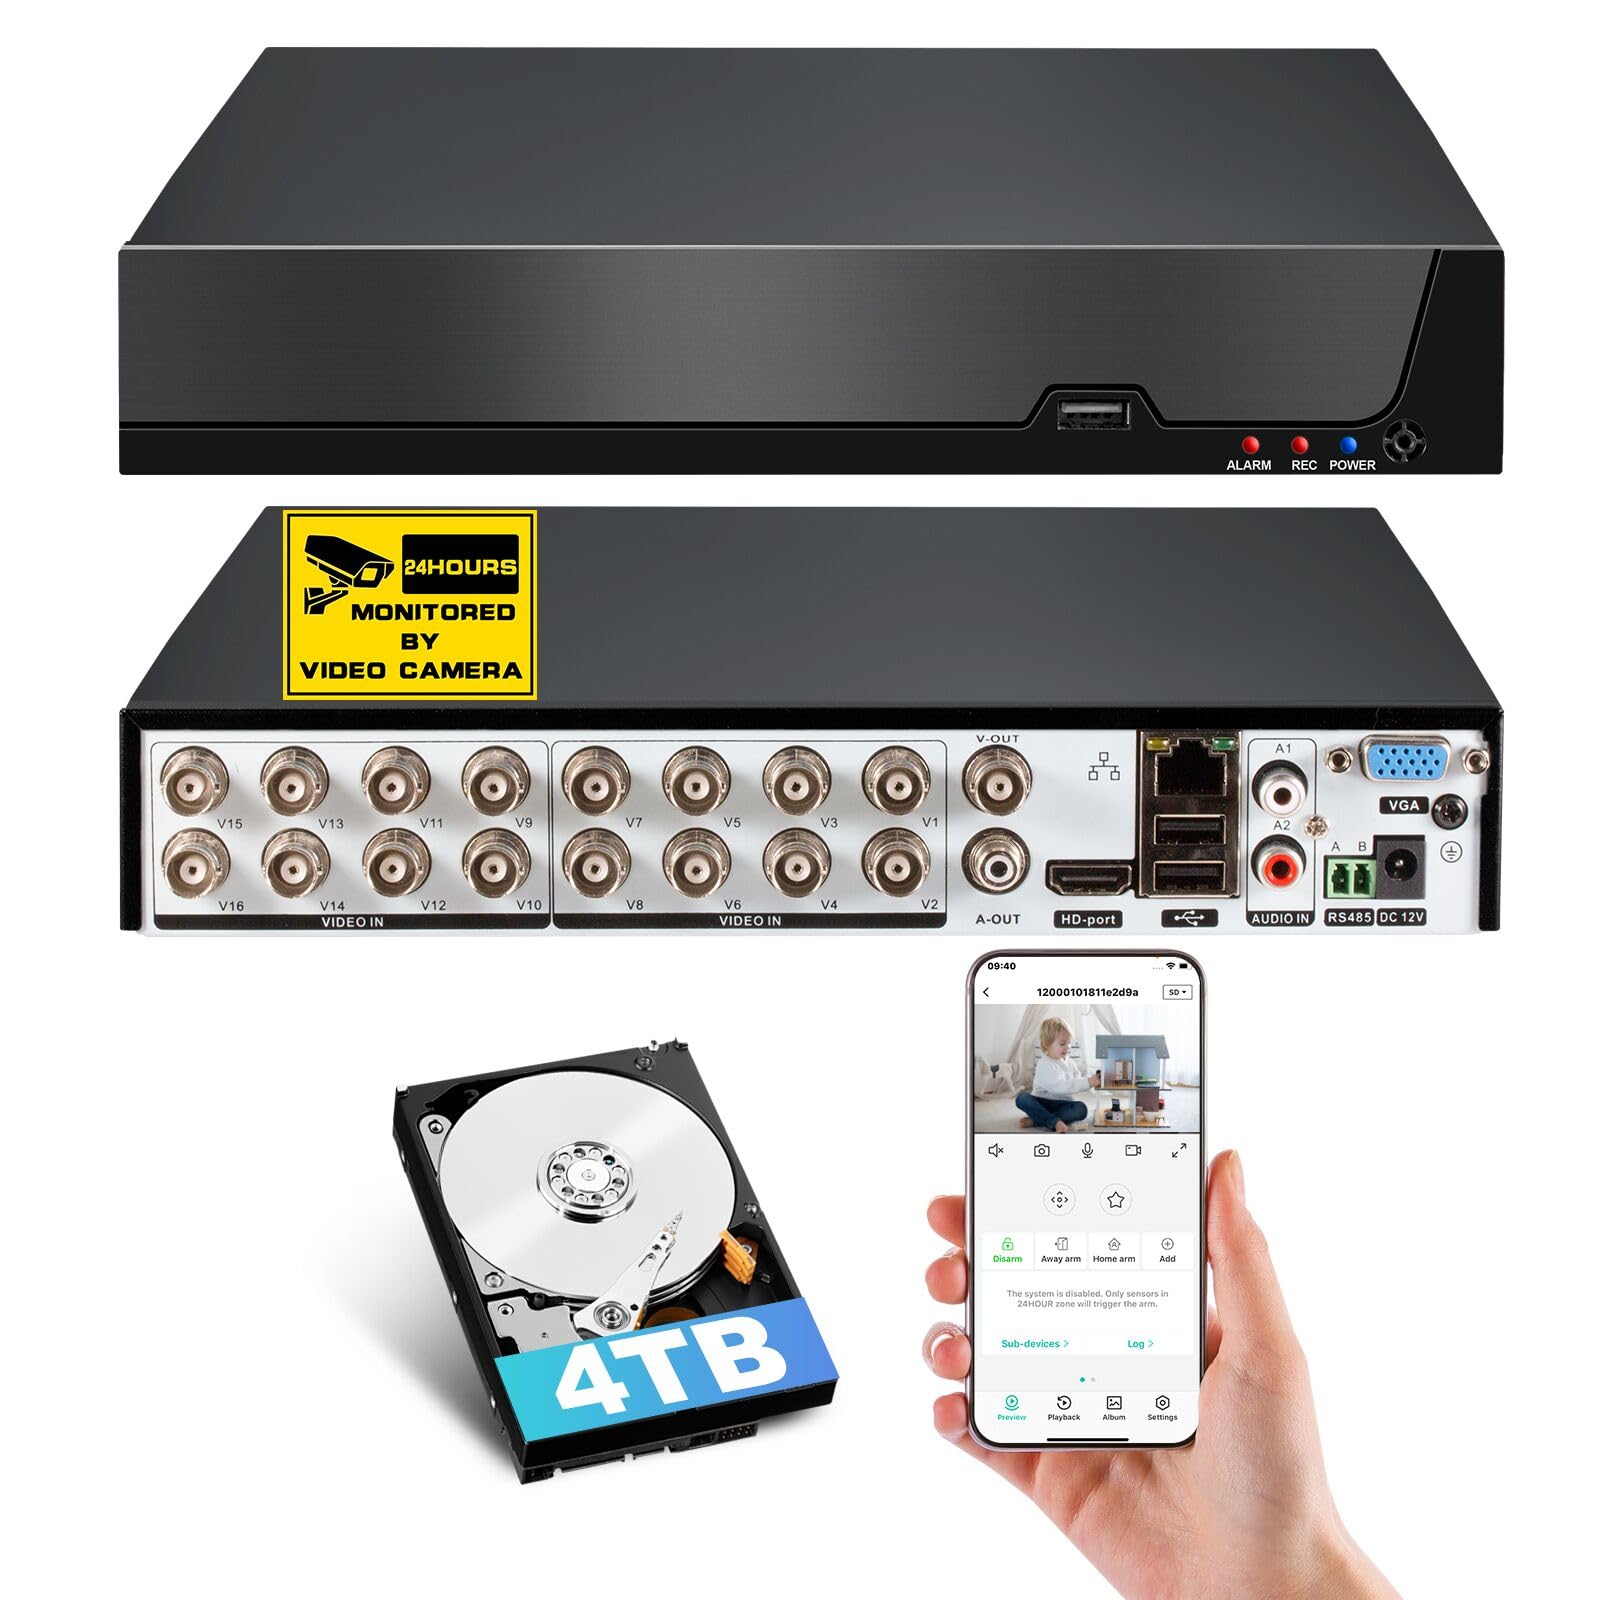
Figure 1: TOWODE 16CH 5MP DVR Security System - Front View
This image displays the main unit of the TOWODE 16CH 5MP DVR Security System, showcasindatorită designului său compact și indicatorilor de pe panoul frontal.
2. Conținutul pachetului
Upon unboxing your TOWODE DVR system, please verify that all components are present:
- 1x TOWODE 16CH 5MP DVR Unit (with 4T Hard Drive pre-installed)
- 1x adaptor de alimentare
- 1 x mouse USB
- 1x cablu HDMI
- 1x Manual de utilizare
- 1x Wall Sticker (24-Hour Video Surveillance)
- Cabluri de instalare HDD (dacă HDD-ul nu este preinstalat)
- Cablu de rețea

Figure 2: 6-in-1 Hybrid DVR System Compatibility
This diagram illustrates the DVR's compatibility with various camera types: TVI, CVI, AHD, XVI, IP, and Analog cameras.
Video 1: ANNKE 3K Lite 8CH DVR Unboxing
This video demonstrates the unboxing process for a similar DVR model, providing a visual guide to the typical package contents and initial presentation of the device.
3. Configurare
3.1 Conectarea inițială
- Connect the DVR to a monitor using the provided HDMI cable. Ensure your monitor supports HDMI 1.6 or higher.
- Conectați mouse-ul USB la un port USB al DVR-ului.
- Connect your cameras to the appropriate video input ports on the DVR.
- Conectați adaptorul de alimentare la DVR și introduceți-l într-o priză.
- The system will boot up and guide you through initial setup steps, including setting a password.
3.2 Compatibilitatea camerei
This DVR is compatible with TVI / CVI / AHD / XVI / Analog cameras that meet supported specifications (5MP ≤12fps, 4MP ≤15fps). Ensure your camera's resolution and frame rate match the DVR's supported modes. Both the HDMI cable and monitor must support HDMI 1.6 or higher to avoid display issues.

Figure 3: Camera Compatibility Chart and HDMI Notice
This image provides a detailed chart outlining camera frame rate and resolution compatibility with the DVR, along with an important notice regarding HDMI cable and monitor requirements.
3.3 Instalarea hard diskului
This model comes with a 4T surveillance-grade hard drive pre-installed. If you are upgrading or replacing the hard drive, the DVR supports storage expansion up to 14TB. Refer to the detailed instructions in the full user manual for hard drive installation procedures.

Figure 4: Pre-Installed 4T Hard Drive and Expansion Capability
This image highlights the DVR's pre-installed 4TB hard drive and its capability to expand storage up to 14TB, emphasizing the H.265+ compression benefits.
4. Instrucțiuni de utilizare
4.1 Local Recording and Remote Access
The DVR supports continuous local video recording and playback via a connected monitor, even without an internet connection. For remote access, connect the DVR to your network. You can then view live feeds or playback footage anytime using the iCSee app on your smartphone, tablet, or computer.

Figure 5: Remote Access and Playback Functionality
This image illustrates the seamless remote access and playback capabilities of the DVR, allowing users to monitor their property from anywhere using the iCSee app.
4.2 AI Human & Face Detection
Leverage advanced AI algorithms for accurate human body and facial feature detection, significantly minimizing false alarms. The system sends real-time alerts and snapshots to your mobile device via the iCSee app or email.

Figure 6: AI Human and Face Detection Features
This image demonstrates the AI human and face detection capabilities, showing how the system identifies individuals and sends smart alerts to a mobile device.
4.3 Setting Recording Plan
You can customize the recording schedule for each camera channel. The DVR allows for continuous recording or event-triggered recording. Access the 'Record' -> 'Schedule' menu in the DVR's configuration settings to adjust the timetable.
Video 2: How to Set Recording Plan for ANNKE 8CH DVR
This video provides a step-by-step guide on how to configure the recording schedule for a DVR, including setting continuous or event-triggered recording times for each channel.
4.4 Switching Analog Channels to IP Channels
This DVR supports 8 analog channels by default and 2 IP cameras for channel expansion. All 8 analog channels can be switched to IP channels as required, supporting up to 10 IP camera accesses. After enabling enhanced IP mode, it supports up to 12 network camera inputs.
Video 3: How to Change Analog Channels to IP Ones for ANNKE 8CH DVR
This video tutorial explains the process of converting analog camera channels to IP channels on a DVR, detailing the steps within the system's configuration menu.
5. Întreținere
5.1 NVR Reset
If you forget your login password, wrongly change settings, or encounter software issues, resetting the NVR can help. There are several methods to reset the NVR, including via the Reolink App, Reolink Client, web browser, or directly on a monitor.
Video 4: How to reset Reolink NVR
This video demonstrates various methods to reset a Reolink NVR, useful for troubleshooting forgotten passwords or incorrect settings. Note: This video is for a Reolink NVR, but the general principles of resetting a DVR may apply.
5.2 Managementul stocării
The DVR includes a built-in 4T surveillance-grade hard drive and supports storage expansion up to 14TB. H.265+ video compression saves up to 50% more storage than H.264, extending recording time while maintaining high video quality.

Figura 7: Eficiența compresiei video H.265+
This image visually compares H.265+ and H.264 compression, highlighting the 50% storage savings and enhanced quality offered by H.265+.
6. Depanare
6.1 Camera Not Displaying
If your camera is confirmed to be compatible but not showing up, the most common reason is insufficient power supply. Test night vision by making the room dark; if no red glow appears, the camera isn't getting enough power. Swap to a different power supply to resolve this.
Video 5: TIGERSECU DVR Frequently Asked Questions
This video addresses common questions about DVRs, including camera compatibility and troubleshooting issues like cameras not displaying, which can be helpful for general problem-solving.
7. Specificații
| Caracteristică | Detaliu |
|---|---|
| Numărul de model | DVR |
| Tehnologia de conectivitate | Ethernet, HDMI, USB, VGA |
| Dispozitive compatibile | Camera, Smartphone, TVI, CVI, AHD, XVI, IP, Analog Cameras, Television |
| Dimensiunile produsului | 21.3L x 4.3W x 25.5H centimetri |
| Capacitate de stocare a memoriei | 4 TB (extensibil până la 14 TB) |
| Hard-Drive Size | 4 TB (preinstalat) |
| Numărul de canale | 16 |
| Format media Video digital | HDD |
| Intrare audio | RCA |
| Total porturi USB | 2 |
| Intrare video | AHD, CVBS, CVI, HDCVI, IP, TVBS, XVI |
| Compresie video | H.265 + |
| Caracteristici AI | Human & Face Detection |
8. Garantie
This TOWODE DVR Security System comes with a 1-year warranty from the manufacturer.
9. Suport
For technical assistance, troubleshooting, or further inquiries, please refer to the full user manual included in your package or contact TOWODE customer support. The iCSee app is essential for remote access and smart alerts.