
AUTOOL EM355
AUTOOL EM355 Flash Reprogramming Power Supply and Battery Charger Instruction Manual
Model: EM355 | Marcă: AUTOOL
1. Produs terminatview
The AUTOOL EM355 is a versatile Flash Reprogramming Power Supply and Car Battery Charger designed for automotive professionals. It provides stable voltage for ECU programming, offers multi-stage intelligent battery charging, and includes a battery repair mode to extend battery life. Equipped with advanced safety protections and an HD color display, it ensures reliable and safe operation for various automotive electrical tasks.
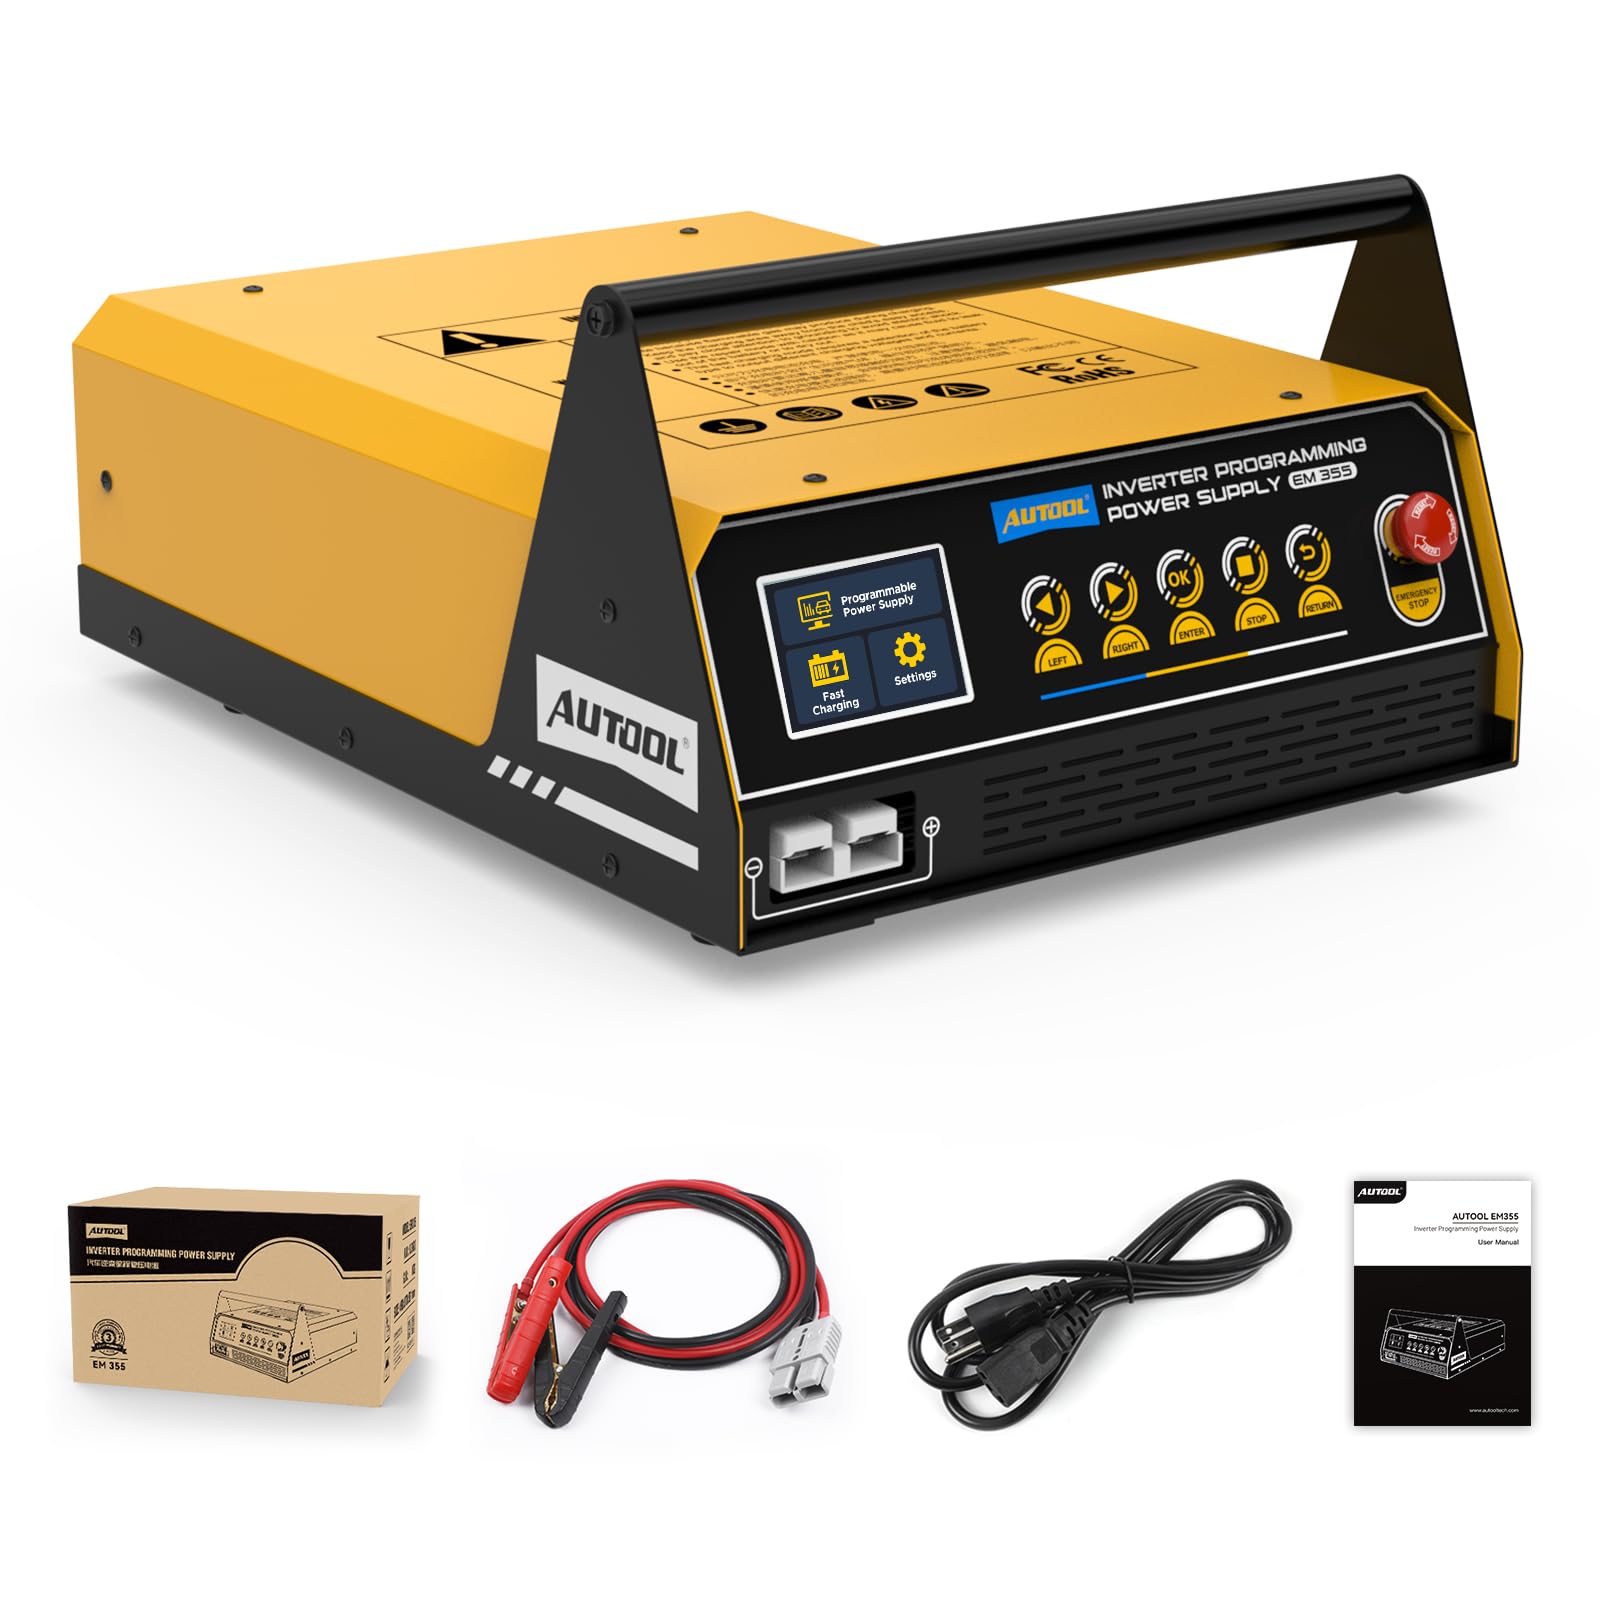
Figure 1: AUTOOL EM355 Flash Reprogramming Power Supply. This image shows the main unit with its control panel and carrying handle.
2. Informații de siguranță
Always observe the following safety precautions when operating the AUTOOL EM355 to prevent injury or damage to the device or vehicle:
- Asigurați o ventilație adecvată în timpul funcționării pentru a preveni supraîncălzirea.
- Conectați bateria clamps correctly: red to positive (+), black to negative (-). Reverse polarity can cause damage.
- Avoid short circuits between the battery clamps.
- Do not expose the device to rain or moisture. The unit has an IP21S rating, protecting against dust and minor liquid splashes, but is not waterproof.
- Always disconnect the power supply from the AC outlet before disconnecting the battery clamps din vehicul.
- Țineți aparatul departe de materiale inflamabile.
- In case of emergency, press the red EMERGENCY STOP button immediately.
2.1 Advanced Safety Protections
The EM355 is equipped with 9 protection functions to ensure safe operation:
- Oprire de urgență
- Protecție la scurtcircuit
- Protecție la supraîncălzire
- Overvoltage Protecție
- Subervoltage Protecție
- Protecția inversă a polarității
- No-Load Protection
- Protecție la supracurent de ieșire
- Supravoltage Protecție

Figure 2: Visual representation of the 9 advanced safety protections integrated into the AUTOOL EM355 unit.
3. Caracteristicile produsului
3.1 High-Current Programming Mode
Delivers a stable 10.8V–16.0V adjustable output with a 120A max current (sustained for 3 minutes). This mode is ideal for ECU programming, module coding, and ADAS calibrations, ensuring stable voltage without drops that can damage ECUs.

Figure 3: Illustration of the high-current programming mode, showing adjustable voltage settings and stable output for ECU tasks.
3.2 Fast Charging & Smart Charge
Offers multiple charging options: 20A/12V for lead-acid batteries, 40A for in-vehicle battery charging, and 20A for external battery charging. Features a multi-stage intelligent charging mode:
- Începutul anilor '60tage Încărcare: Uses pulse charging, gradually increasing power for optimal efficiency.
- Mijlocul anilor '70tage Încărcare: Quickly switches to high-power charging for rapid charging.
- Târzie-stage Încărcare: Automatically switches to trickle charging and stops when full to prevent overcharging.

Figure 4: Depicts the fast charging mode with indicators for voltage, current, and charging progress, highlighting the 20A/12V lead-acid battery charging capability.

Figure 5: A graph illustrating the multi-stage smart charging process, showing how power adjusts over time during charging.
3.3 Repararea bateriei
Revives deeply discharged or sulfated batteries, extending battery life and reducing replacement costs. Supports multiple battery types including standard lead-acid, AGM (flat/spiral), EFB, and gel batteries. The EM355 can repair batteries that have been discharged for a long time or suffered severe power loss.

Figure 6: Shows the battery restoration function, demonstrating how the device can revive batteries from 0% to 100% charge, applicable for aging, worn, or long-idle batteries.

Figure 7: Illustrates the various battery types supported by the EM355, including Standard Lead-Acid, AGM Flat Plate, AGM Spiral, EFB, and GEL batteries.
3.4 HD Color Display
The unit features an HD color display for real-time monitoring of voltage, current, and temperature. It provides an intuitive menu with quick-select modes for charging, programming, or maintenance. The auto-adjusting fan prevents overheating during prolonged use.

Figure 8: Close-up of the HD color display showing menu options for Programmable Power Supply, Fast Charging, and Settings.
4. Configurare
4.1 Conținutul pachetului
- Unitate principală AUTOOL EM355
- 2-meter Pure Copper Cable with fully insulated battery clips
- Cablu de alimentare
- Manual de utilizare

Figure 9: Displays the main unit, its packaging, the 2-meter pure copper cables, and the user manual.
4.2 Conectarea inițială
- Connect the power input cable to the EM355 unit and then to a suitable AC power outlet (110 Volts).
- Ensure the main power switch on the unit is in the OFF position before connecting to the battery.
- Connect the red (+) battery clamp la borna pozitivă a bateriei vehiculului.
- Connect the black (-) battery clamp la borna negativă a bateriei vehiculului.
- Turn the main power switch on the EM355 unit to the ON position. The HD color display will illuminate.
Video 1: Demonstrates the initial setup and connection of the AUTOOL EM355 to a vehicle battery, showing the power-on sequence and display initialization.
5. Moduri de operare
The AUTOOL EM355 offers several operating modes accessible via the HD color display and control buttons:
5.1 Programming Mode (High-Current)
This mode provides a stable, adjustable voltage output for sensitive ECU programming and diagnostic tasks.
- From the main menu, select "Programmable Power Supply".
- Asigurați-vă că bateria clamps are correctly connected (red to +, black to -).
- Choose between "Adjustable Mode" or "Fixed Mode" for voltagRegulamentul.
- Reglați volumultage within the 10.8V–16.0V range using the control buttons.
- The display will show real-time voltage și curent de ieșire.
Video 2: Illustrates the selection and use of the programming mode, demonstrating how to set voltage and connect to the vehicle for ECU reprogramming.
5.2 Mod de încărcare rapidă
Use this mode for efficient charging of various battery types.
- From the main menu, select "Fast Charging".
- Conectați bateria clamps la baterie.
- Select the appropriate charging option: "In-car Charging" (up to 40A) or "External Charging" (up to 20A).
- The unit will automatically adjust the charging power based on the battery's state and type.
- Charging will stop automatically once the battery is full to prevent overcharging.
5.3 Battery Repair Mode
This function helps to restore deeply discharged or sulfated batteries.
- From the main menu, select "Battery Restoration".
- For optimal results, the battery should be removed from the vehicle before restoration.
- Conectați bateria clamps la baterie.
- The unit will apply a specialized charging cycle to desulfate and revive the battery.
- Monitor the display for progress. The repair process may take an extended period (e.g., 24 hours for severely depleted batteries).
5.4 Mod de afișare a vehiculului
This mode provides stable power for showroom vehicle demonstrations, ensuring uninterrupted power supply without draining the vehicle's battery.
- From the main menu, select "Vehicle Display Mode".
- Conectați alimentarea clamps to the vehicle's battery terminals.
- The unit will provide a continuous, stable power supply to the vehicle.
- Monitor the display for real-time voltage și curent.
5.5 Mod de pornire forțată
This mode provides a high cranking current to start vehicles with low battery voltage.
- From the main menu, select "Forced Start".
- Connect the positive and negative terminals of the vehicle battery.
- The unit will prompt you to start the vehicle.
- Start the vehicle engine. The EM355 can provide up to 400A of cranking current.
6. Specificații
| Caracteristică | Caietul de sarcini |
|---|---|
| Numărul de model | EM355 |
| Programarea curentului de alimentare | 120A (max for 3 minutes) |
| Volumul sursei de alimentare programatetage Gama | 10.8V–16.0V (Adjustable) |
| Curent/Volum de încărcare a bateriei cu plumbtage | 20A/12V (External), 40A (In-Vehicle) |
| Vol. De intraretage | 110 Volts (110V ±25%) |
| Frecvența de intrare | 60 Hz |
| Putere nominală de intrare | 1200W |
| Pierdere de putere în gol | 6W |
| Eficienţă | 81% |
| Grad de izolare | F |
| Nivel de protecție a carcasei | IP21S |
| Dimensiunile produsului | 417 mm x 316 mm x 188 mm (aprox. 16 mm x 12 mm x 7 mm) |
| Greutatea articolului | 21 lire sterline |

Figure 10: Detailed diagram showing the dimensions and key specifications of the AUTOOL EM355 unit.
7. Întreținere
- Păstrați unitatea curată și fără praf și resturi.
- Regularly check the battery clampVerificați piesele și cablurile pentru orice semne de uzură sau deteriorare. Înlocuiți-le dacă este necesar.
- Depozitați unitatea într-un loc uscat și răcoros atunci când nu este utilizată.
- The auto-adjusting fan helps maintain optimal operating temperature; ensure its vents are not obstructed.
8. Depanare
Dacă întâmpinați probleme cu AUTOOL EM355, consultați următorii pași comuni de depanare:
- Unitatea nu pornește: Check the power input cable connection and the main power switch. Ensure the AC outlet is functional.
- Fără ieșire voltage / curent: Verificați dacă bateria este închisăamps are securely connected to the correct terminals. Check for any short circuits or reverse polarity.
- Mesaj de eroare pe afișaj: Refer to the specific error code in the full user manual for detailed instructions. Common errors include overvoltage, subvoltage, or reverse polarity.
- Bateria nu se încarcă: Ensure the correct battery type and charging mode are selected. Check if the battery is severely damaged and requires repair mode.
- Supraîncălzire: Ensure the unit's vents are clear and the auto-adjusting fan is operating. Reduce the load if operating in extreme conditions.
9. Garanție și asistență
The AUTOOL EM355 comes with a Three Years Warranty for any quality problems. If the EM355 has any defect, AUTOOL will provide a new replacement or solutions to ensure customer satisfaction without delay. Lifetime technical support is also provided. For any needs, please contact AUTOOL customer service, and they will respond within 24 hours.
Ask a question about this manual
Ask about setup, troubleshooting, compatibility, parts, safety, or missing instructions. Manuals+ will review the question and use this page’s manual context to help answer it.