
1. Introducere
This manual provides detailed instructions for the safe and effective use of your OLIGHT Perun 3 Mini rechargeable headlamp and OLIGHT Oclip Pro EDC flashlight. Please read this manual thoroughly before operation and retain it for future reference.

Image: The OLIGHT Perun 3 Mini headlamp attached to its elastic headband, ready for use.
2. Conținutul pachetului
- OLIGHT Perun 3 Mini Headlamp
- OLIGHT Oclip Pro EDC Flashlight
- Headband with quick-detach bracket
- Cablu magnetic de încărcare
- Manual de utilizare (acest document)
3. Configurare
3.1. Perun 3 Mini Headlamp
- Attaching to Headband: Insert the Perun 3 Mini into the quick-detach bracket on the headband. Ensure it clicks securely into place.
- Reglarea benzii pentru cap: Adjust the elastic straps for a comfortable and secure fit on your head.
- Utilizare portabilă: The quick-detach bracket allows for easy removal of the Perun 3 Mini for handheld operation. Press the release button on the bracket to detach.
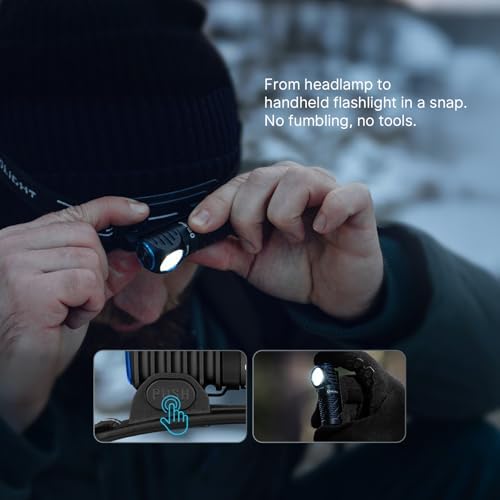
Image: Transitioning the Perun 3 Mini from headlamp to handheld flashlight by pressing the release button on the bracket.
3.2. Oclip Pro EDC Flashlight
- Deblocare: Before first use, press and hold the main button for approximately 1 second to unlock the Oclip Pro. A visual indicator may confirm unlocking.
- Tăiere: Use the integrated clip to attach the Oclip Pro to clothing, gear, or other suitable surfaces.
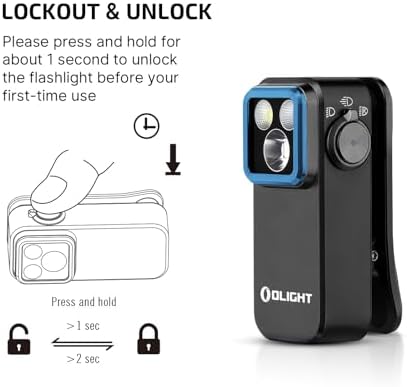
Image: Instructions for unlocking the Oclip Pro by pressing and holding the button for 1 second.
4. Instrucțiuni de utilizare
4.1. Perun 3 Mini Headlamp
The Perun 3 Mini features multiple white light modes and red light modes for various applications.
- Moduri de lumină albă: Offers 5 different white light output levels, including a Moonlight mode for extended use.
- Moduri de lumină roșie: Provides 3 red light modes, suitable for preserving night vision or as an emergency signal.
- Comutarea modului: Refer to the device's specific button press sequences for cycling through modes (e.g., single press, double press, press and hold).
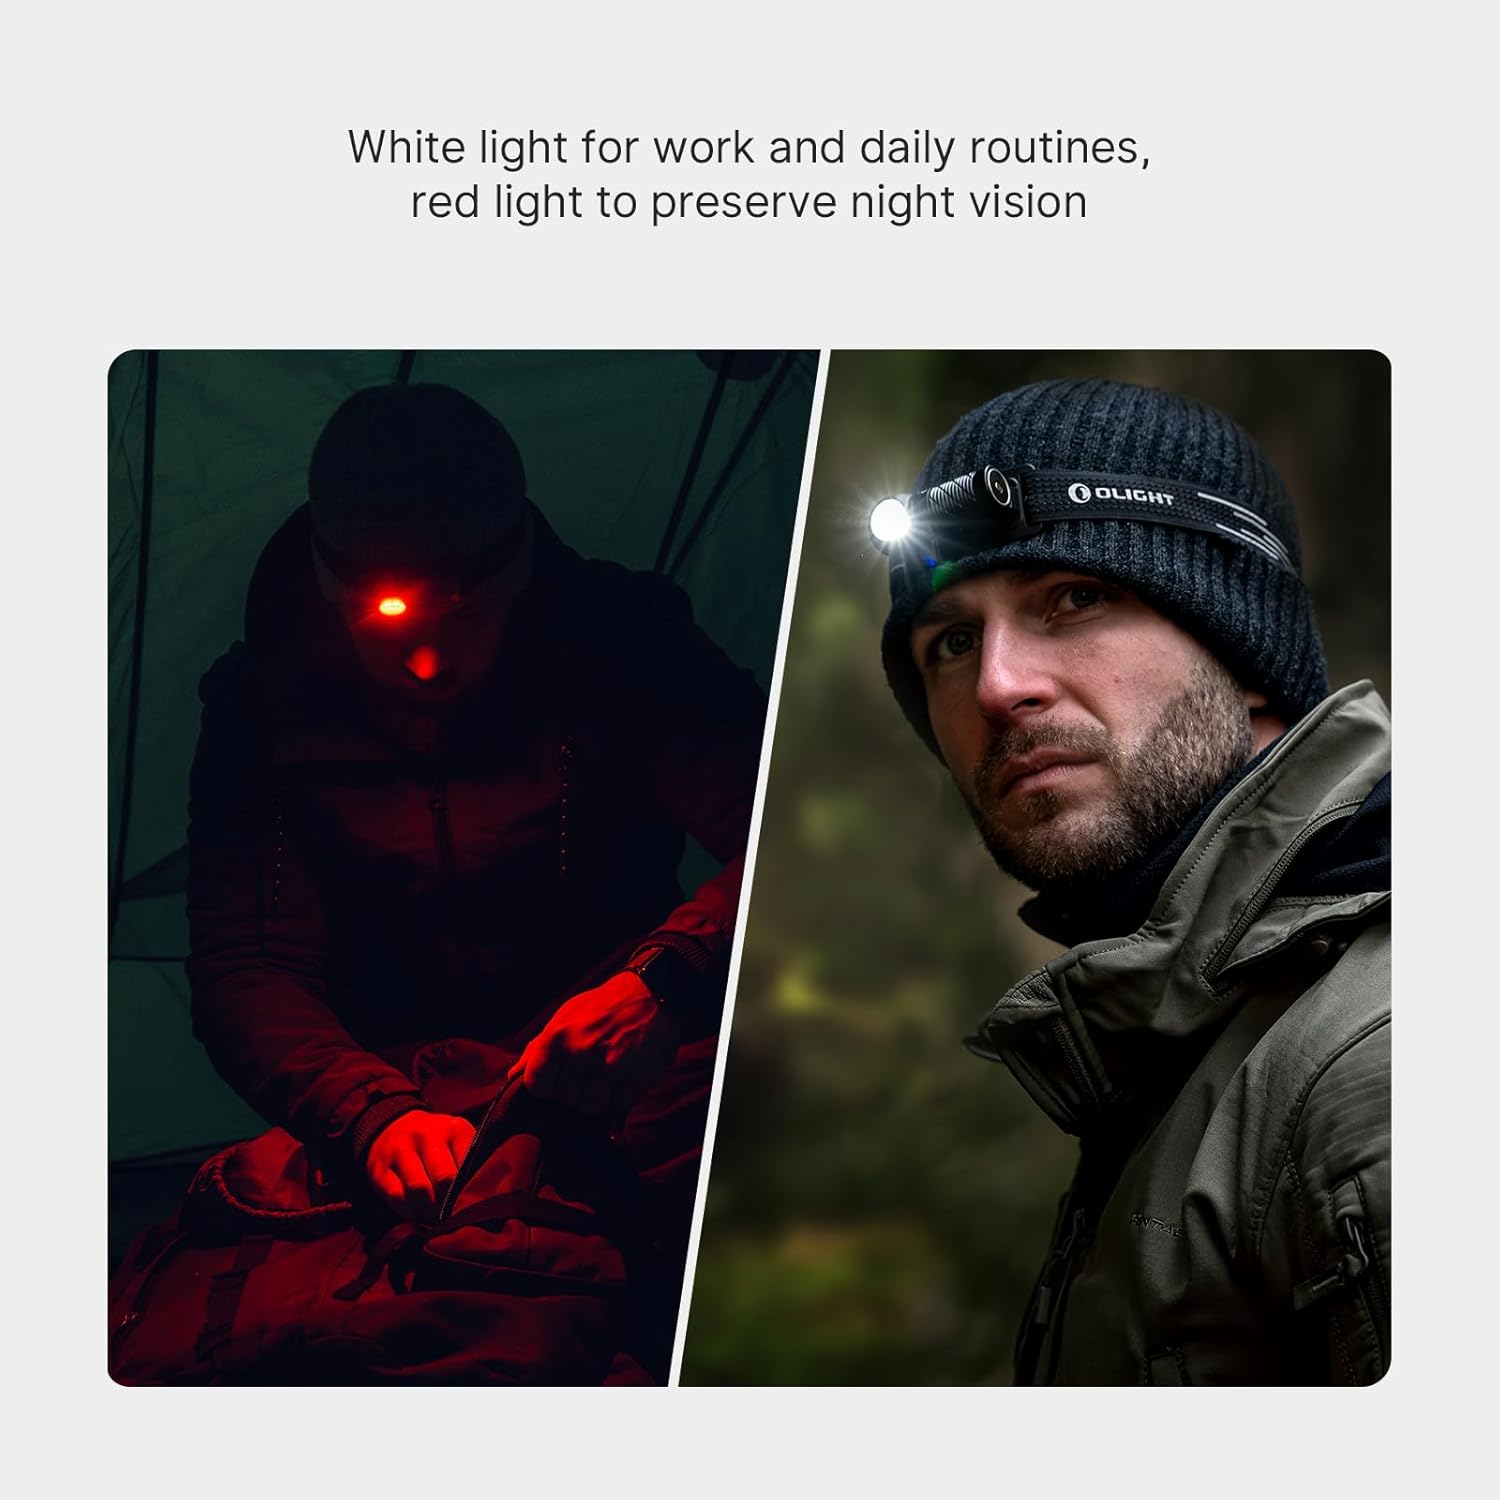
Image: The Perun 3 Mini in use, demonstrating both white light for general tasks and red light for night vision preservation.
4.2. Oclip Pro EDC Flashlight
The Oclip Pro offers three distinct lighting solutions controlled by a user-friendly interface.
- Lighting Solutions:
- Proiector: For wide area illumination (up to 500 lumens).
- În centrul atenției: For focused, long-range illumination (up to 120-meter range).
- Lumină roșie: For night vision preservation or signaling (40/4 lumens).
- Interfata utilizator: Modes are switched by toggling the selector.
- Indicator baterie: A battery indicator located in the center of the switch displays the current battery level.

Image: Visual representation of the Oclip Pro's floodlight for daily routines, spotlight for focused tasks, and red light for night vision.
5. Întreținere
5.1. Încărcare
Both the Perun 3 Mini and Oclip Pro are rechargeable. Use the provided magnetic charging cable to recharge the devices. Connect the magnetic charging end to the flashlight's charging port and the USB end to a compatible power source.
The Perun 3 Mini's rechargeable battery offers up to 10 days of continuous use in Moonlight mode, reducing the frequency of recharging.
5.2. Curățare și depozitare
- curatenie: Ștergeți dispozitivele cu o lavetă moale,amp o lavetă pentru a îndepărta murdăria sau resturile. Nu utilizați produse de curățare abrazive sau solvenți.
- Depozitare: Store the flashlights in a cool, dry place away from direct sunlight and extreme temperatures. For long-term storage, ensure the battery is partially charged (e.g., 50%) to prolong battery life.
6. Depanare
- Lumina nu se aprinde:
- Verificați nivelul bateriei și reîncărcați-o dacă este necesar.
- Ensure the device is unlocked (refer to Setup section for Oclip Pro).
- Verify proper connection if using the Perun 3 Mini with the headband bracket.
- Ieșire de lumină slabă:
- Battery may be low; recharge the device.
- Lens may be dirty; clean according to maintenance instructions.
- Supraîncălzirea dispozitivului:
- High output modes can generate heat. If the device becomes excessively hot, switch to a lower mode or turn it off to cool down.
7. Specificații
7.1. OLIGHT Perun 3 Mini Headlamp
- Ieșire maximă: Până la 920 de lumeni
- Distanta de fascicul: Până la 133 metri
- Moduri de lumină: 5 white light modes, 3 red light modes
- Battery Life (Moonlight Mode): Până la 10 de zile
- Bandă pentru cap: Lightweight with breathable holes, anti-sweat strip, reflective material. Quick-detach bracket.

Image: Key specifications of the Perun 3 Mini, highlighting its compact size, lumen output, and beam distance.
7.2. OLIGHT Oclip Pro EDC Flashlight
- Floodlight Output: Până la 500 de lumeni
- Spotlight Range: Până la 120 metri
- Red Light Output: 40/4 lumeni
- Clip Durability: 10,000-open-close-cycle tested
- Interfata utilizator: Toggle selector for mode switching, integrated battery indicator.

Imagine: Diverse views of the Oclip Pro, showcasing its design and compact form factor.

Image: The Oclip Pro emphasizing its versatile lighting options and the robust, tested clip mechanism.
8. Garanție și asistență
For detailed warranty information, please refer to the official OLIGHT website or contact OLIGHT customer service. OLIGHT products typically come with a manufacturer's warranty covering defects in materials and workmanship.
Pentru asistență suplimentară, asistență tehnică sau pentru a view other OLIGHT products, please visit the official OLIGHT store: