
Introducere
This manual provides detailed instructions for the Biling 8W Solar Irrigation System and the Biling 8W Solar Fountain Pump. This combined product offers an efficient, solar-powered solution for automatic plant watering and creating decorative water features in gardens, ponds, and bird baths. Please read this manual thoroughly before installation and operation to ensure proper use and longevity of your product.

Image: The Biling 8W Solar Irrigation System (left) and the Biling 8W Solar Fountain Pump (right) shown together, illustrating their respective applications in a garden setting.
Conținutul pachetului
Verificați dacă toate componentele enumerate mai jos sunt prezente în pachet.
For Solar Irrigation System:
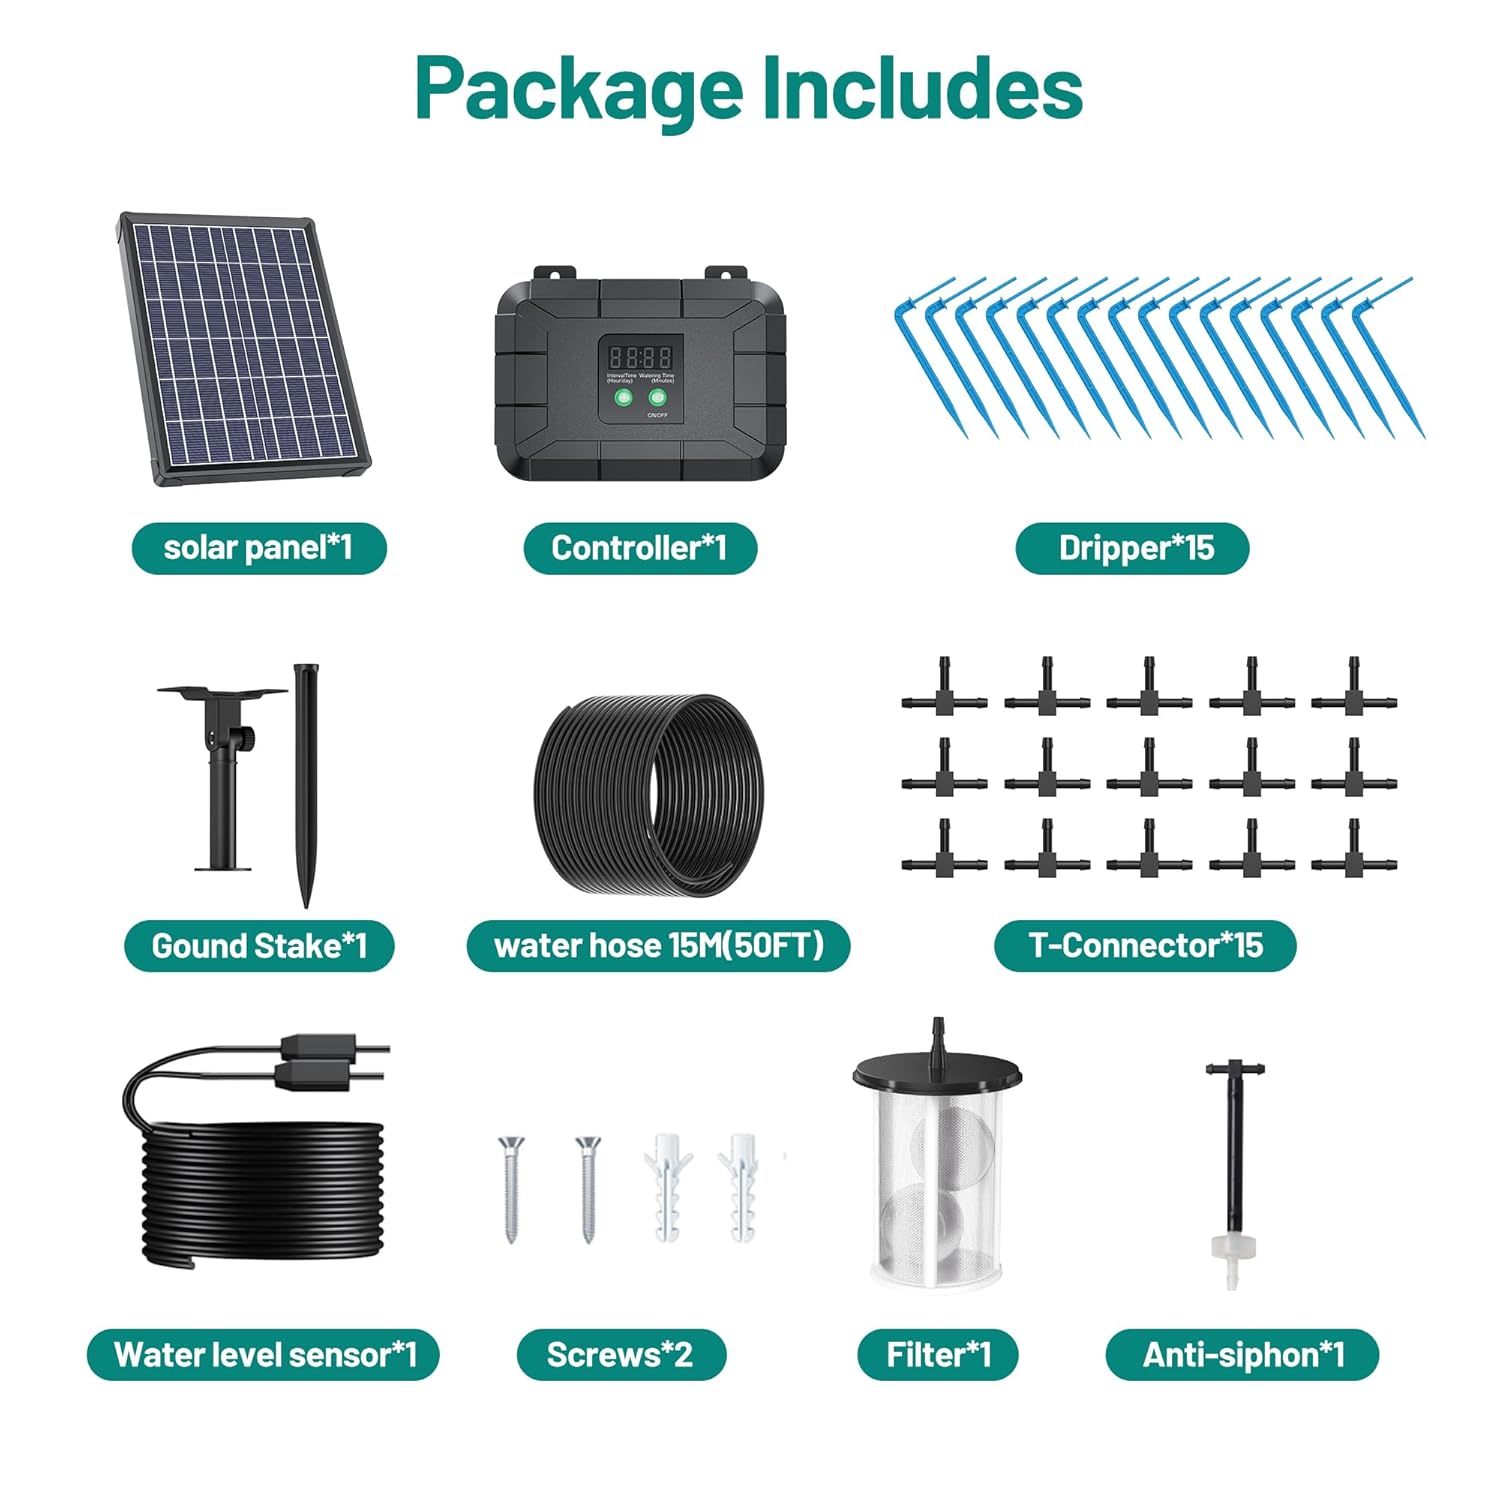
Image: A visual representation of the Biling Solar Irrigation System components, including the solar panel, controller, drippers, ground stake, water hose, T-connectors, water level sensor, screws, filter, and anti-siphon device.
- Panou solar (1)
- Controler (1)
- Drippers (15)
- Miza la sol (1)
- Water Hose 15M (50FT) (1)
- T-Connector (15)
- Senzor de nivel al apei (1)
- Șuruburi (2)
- Filtru (1)
- Anti-siphon (1)
For Solar Fountain Pump:

Imagine: O imagine detaliată view of the Biling Solar Fountain Pump components, including the solar panel, various nozzles and rods, PVC tubing, mounting bracket, filter sponges, floating board, and the water pump itself, with dimensions indicated.
- Panou solar (1)
- Pompa de apa (1)
- Nozzles & Rods (various types)
- PVC Tubing (5 FT)
- Suport de montare (1)
- Filter Sponges (2)
- Floating Board (1)
Produs terminatview
Both the irrigation system and fountain pump utilize an 8W solar panel for power, featuring a 3600mAh battery backup for continuous operation. The water pump is designed for longevity with a ceramic motor shaft, reducing noise to 30 dB.
Controller Interface (Irrigation System)

Image: Close-up of the Biling irrigation system controller, highlighting its digital display and control buttons. Labels indicate 'Interval Time', 'Watering Time', '+: Increase numbers', 'SET: switch interval and watering time, long press for 3s to turn on or off', 'Out: Water Outlet', 'In: Water Inlet', 'Water detector connection cable', and 'Solar panel connection cable'.
- Interval de timp: Sets the frequency between watering cycles.
- Timp de udare: Sets the duration of each watering cycle.
- +: Button to increase numerical values for settings.
- A STABILIT: Button to switch between Interval Time and Watering Time settings. Long press for 3 seconds to turn the system on or off.
- Ieșire: Water Outlet port.
- În: Water Inlet port.
- Water detector connection cable: Port for the water level sensor.
- Solar panel connection cable: Port for the solar panel.
Pump and Solar Panel Construction

Imagine: O explozie view illustrating the construction of the solar panel (tempered glass, solar wafer, TPT backplane, aluminum shell) and the brushless motor water pump with its filter sponge and water sensor for dry-run protection.
The solar panel features a durable construction with tempered glass, a solar wafer, TPT backplane, and a strong aluminum shell. The water pump incorporates a brushless motor with a filter sponge and a water sensor for dry-run protection, enhancing its service life.
Instrucțiuni de configurare
1. Solar Irrigation System Setup
- Plasarea panourilor solare: Position the solar panel in a location that receives direct sunlight for most of the day. Use the provided ground stake to secure it. Ensure the panel is angled for optimal sun exposure.
- Conexiune controler: Connect the solar panel cable to the 'Solar panel connection cable' port on the controller.
- Water Source Connection: Place the filter end of the water inlet hose into your water reservoir (e.g., bucket, tank). Connect the other end to the 'In: Water Inlet' port on the controller.
- Senzor de nivel al apei: Connect the water level sensor cable to its designated port on the controller. Place the sensor in the water reservoir to prevent dry running.
- Drip Line Installation: Connect the main water hose to the 'Out: Water Outlet' port. Route the hose to your plants. Use T-connectors to branch off smaller tubes to individual drippers. Insert drippers into the soil near the base of each plant. Ensure the anti-siphon device is installed correctly to prevent backflow.
- Taxă inițială: Allow the solar panel to charge the internal battery for at least 6-8 hours in direct sunlight before first use.

Image: The Biling Solar Irrigation System set up in a garden, with the solar panel positioned to capture sunlight and the controller attached to a water bucket, demonstrating the automatic watering of potted plants.
2. Solar Fountain Pump Setup
- Asamblați pompa: Attach the desired nozzle and extension rods to the water pump.
- Floating Board (Optional): If using in a pond or larger water body, attach the pump to the floating board to allow it to float on the water surface.
- Plasare: Place the assembled pump into your bird bath, pond, or water feature, ensuring it is fully submerged in water.
- Conexiune panou solar: Connect the solar panel cable to the water pump. Position the solar panel in direct sunlight. The pump will begin operating once sufficient sunlight is received.
Instrucțiuni de operare
1. Solar Irrigation System Operation
- Pornire/Oprire: Long press the 'SET' button for 3 seconds to turn the system on or off.
- Set Interval Time: With the system on, press the 'SET' button briefly until 'Interval Time' is displayed. Use the '+' button to adjust the desired interval (e.g., 1 hour, 12 hours, 24 hours).
- Set Watering Time: Press the 'SET' button again briefly until 'Watering Time' is displayed. Use the '+' button to adjust the duration of watering (e.g., 30 seconds, 1 minute, 5 minutes).
- Funcționare automată: Once settings are configured, the system will automatically water your plants according to the programmed schedule. The 3600mAh battery backup ensures operation even during cloudy periods or at night.
- Ieșire de apă: The system delivers 800-900ml of water per minute and can support automatic watering for up to 30 pots.
2. Solar Fountain Pump Operation
- Activare automată: The fountain pump will automatically start operating when the solar panel receives sufficient sunlight. The integrated battery backup allows for continuous operation even when sunlight is intermittent.
- Changing Spray Patterns: To change the spray pattern, remove the pump from the water and replace the current nozzle with a different one from the provided set.

Image: A collage demonstrating eight different spray patterns achievable with the Biling Solar Fountain Pump by interchanging the included nozzles, shown in a bird bath setting.

Image: Various applications of the Biling Solar Fountain Pump, including use in bird baths, ponds, water features, and multi-tiered fountains.
Întreţinere
Întreținerea regulată asigură performanțe optime și prelungește durata de viață a produsului.
- Curățați panoul solar: Ștergeți periodic suprafața panoului solar cu o lavetă moale și damp cloth to remove dust, dirt, and debris. A clean panel ensures maximum sunlight absorption.
- Clean Pump Filter: For both systems, regularly remove and clean the pump filter sponges to prevent blockages and maintain water flow. Rinse them under clean water.
- Check Tubing and Drippers: For the irrigation system, inspect tubing and drippers for any blockages, kinks, or leaks. Clear any obstructions to ensure even water distribution.
- Rezervor de apa: Ensure the water reservoir is kept clean and free of algae or debris that could clog the pump or filter.
- winterization: In freezing climates, disconnect and drain both systems before the first frost. Store components indoors in a dry, protected area to prevent damage.
Depanare
Dacă întâmpinați probleme, consultați următoarele probleme comune și soluții.
| Problemă | Cauza posibila | Soluţie |
|---|---|---|
| Irrigation System not watering / Fountain Pump not running | Lumina solară insuficientă Încărcare scăzută a bateriei Nivelul apei prea scăzut Pump/filter clogged Sistem oprit | Ensure solar panel is in direct sunlight. Allow solar panel to charge battery. Reumpleți rezervorul de apă. Clean pump and filter. Long press 'SET' button to turn on. |
| Low water flow / Weak spray | Clogged filter/nozzle Tubul îndoit Insufficient water in reservoir | Clean filter and nozzle. Îndreptați tubulatura. Check and refill water reservoir. |
| Controller not responding (Irrigation System) | Baterie descărcată Conexiune slabă | Ensure solar panel is charging the battery. Verificați toate conexiunile prin cablu. |
| Water leakage (Irrigation System) | Loose tubing connections Damaged tubing/dripper | Secure all tubing connections. Inspectați și înlocuiți componentele deteriorate. |
Specificații
- Puterea panoului solar: 8W
- Capacitate baterie: 3600mAh
- Water Output (Irrigation): 800-900ml per minute
- Max Plants Supported (Irrigation): Up to 30 pots
- Pump Noise Level: Reduced to 30 dB
- Pump Motor Shaft Material: ceramică
- ASIN: B0F9KLBS92
- Prima dată disponibilă: 19 martie 2025
Garanție și suport
Biling provides a Garanție de rambursare a banilor de 60 de zile si a 1 an garanție de la data achiziționării acestui produs. Această garanție acoperă defectele de fabricație și asigură funcționarea produsului conform destinației în condiții normale de utilizare.
For further assistance, troubleshooting not covered in this manual, or warranty claims, please contact Biling customer service through the retailer's platform where the product was purchased. Please have your purchase details and product model (B0F9KLBS92) available when contacting support.