
1. Introducere
Thank you for choosing the ELUSH 100A MPPT Solar Charge Controller. This device is designed to efficiently manage power from your solar panels to charge various battery types, ensuring optimal performance and longevity of your solar system. It automatically recognizes 12V, 24V, 36V, and 48V systems and features dual USB 5V charging ports for added convenience.
This manual provides essential information for the safe and effective installation, operation, and maintenance of your solar charge controller. Please read it thoroughly before use.

Imaginea 1: Față view of the ELUSH 100A MPPT Solar Charge Controller, showing the LCD display and control buttons.
2. Produs terminatview și Caracteristici
2.1 Superior MPPT Technology
This controller incorporates an advanced Maximum Power Point Tracking (MPPT) algorithm to swiftly track the maximum power point of your photovoltaic (PV) array. This ensures a tracking efficiency of no less than 99.5%, significantly enhancing energy utilization within your solar system. It's important to note that this controller integrates both MPPT and PWM charging technologies, offering high charging efficiency and consistent performance.
2.2 Versatile Design and User Interface
The controller features a multi-function LCD with a backlight display and an integrated clock. It offers seven distinct operating modes to suit various application needs:
- Mod de încărcare
- Modul de control al luminii
- Light Control + Time Delay Control Mode
- Universal Control Mode
- Modul de control manual
- Timing Control Mode
The upgraded version supports precise time control, allowing connected devices to be automatically powered on and off according to user-defined schedules. The screen can also maintain a continuous bright state without entering hibernation or lock mode.
2.3 User-Centric Display and Controls
The LCD dynamically displays operational data and the working status of the equipment. Key parameters visible include:
- Modul de lucru
- Volumul baterieitage
- Curent de încărcare PV
- Battery Discharging Current
- Temperatura de lucru a produsului
- Timp de întârziere
For configuration adjustments or restoring default settings, a 'reset to factory settings' feature is available, providing a quick and effective solution.

Image 2: Diagram illustrating the four major upgrades: accurate time control, screen stays lit, quick restore factory settings, and solar panel voltage afișare.
3. Configurare și instalare
3.1 Important Startup Sequence
WARNING: Incorrect connection order can damage the controller or battery. Always follow these steps:
- First, connect the rechargeable battery to the controller. Ensure the battery has sufficient power.
- After the controller successfully starts up and displays battery information, then connect the solar panel(s) to the controller.
- În cele din urmă, conectați orice sarcină de curent continuu la bornele de sarcină ale controlerului.
3.2 Connection Terminals
The controller features clearly labeled terminals for solar panel input, battery connection, and DC load output. Additionally, it includes a DC output port and dual USB output ports for charging external devices.

Imaginea 3: Partea de jos view of the controller, highlighting the aluminum base plate for heat dissipation and the DC output and dual USB output ports.

Image 4: Diagram illustrating the connection of solar panels, battery, and load to the charge controller, along with the LCD display and USB outputs.
4. Instrucțiuni de utilizare
4.1 Navigare pe ecranul LCD
The LCD provides real-time data. Use the 'MENU' button to cycle through different display screens and parameters. The 'RESET' button can be used to restore factory settings when needed.
4.2 Setarea modurilor de funcționare
The controller offers seven operating modes. Refer to the detailed instructions in the full product manual (if available) for specific configuration of each mode, including light control, time delay, and timing control. The 'ON/OFF' button typically controls the load output.
4.3 Time Control Function
The upgraded time control feature allows users to set precise schedules for powering devices on and off. This can be configured through the controller's menu interface. The screen can be set to remain continuously bright for constant monitoring.
5. Battery Charging Options
The ELUSH 100A MPPT Solar Charge Controller is compatible with a diverse range of battery types, ensuring flexibility for various solar power systems. Supported battery types include:
- Seal (Sealed Lead-Acid)
- GEL
- Flooded (Open Lead-Acid)
- LifePO4 (Lithium Iron Phosphate)
Ensure you select the correct battery type in the controller's settings for optimal charging and battery health.
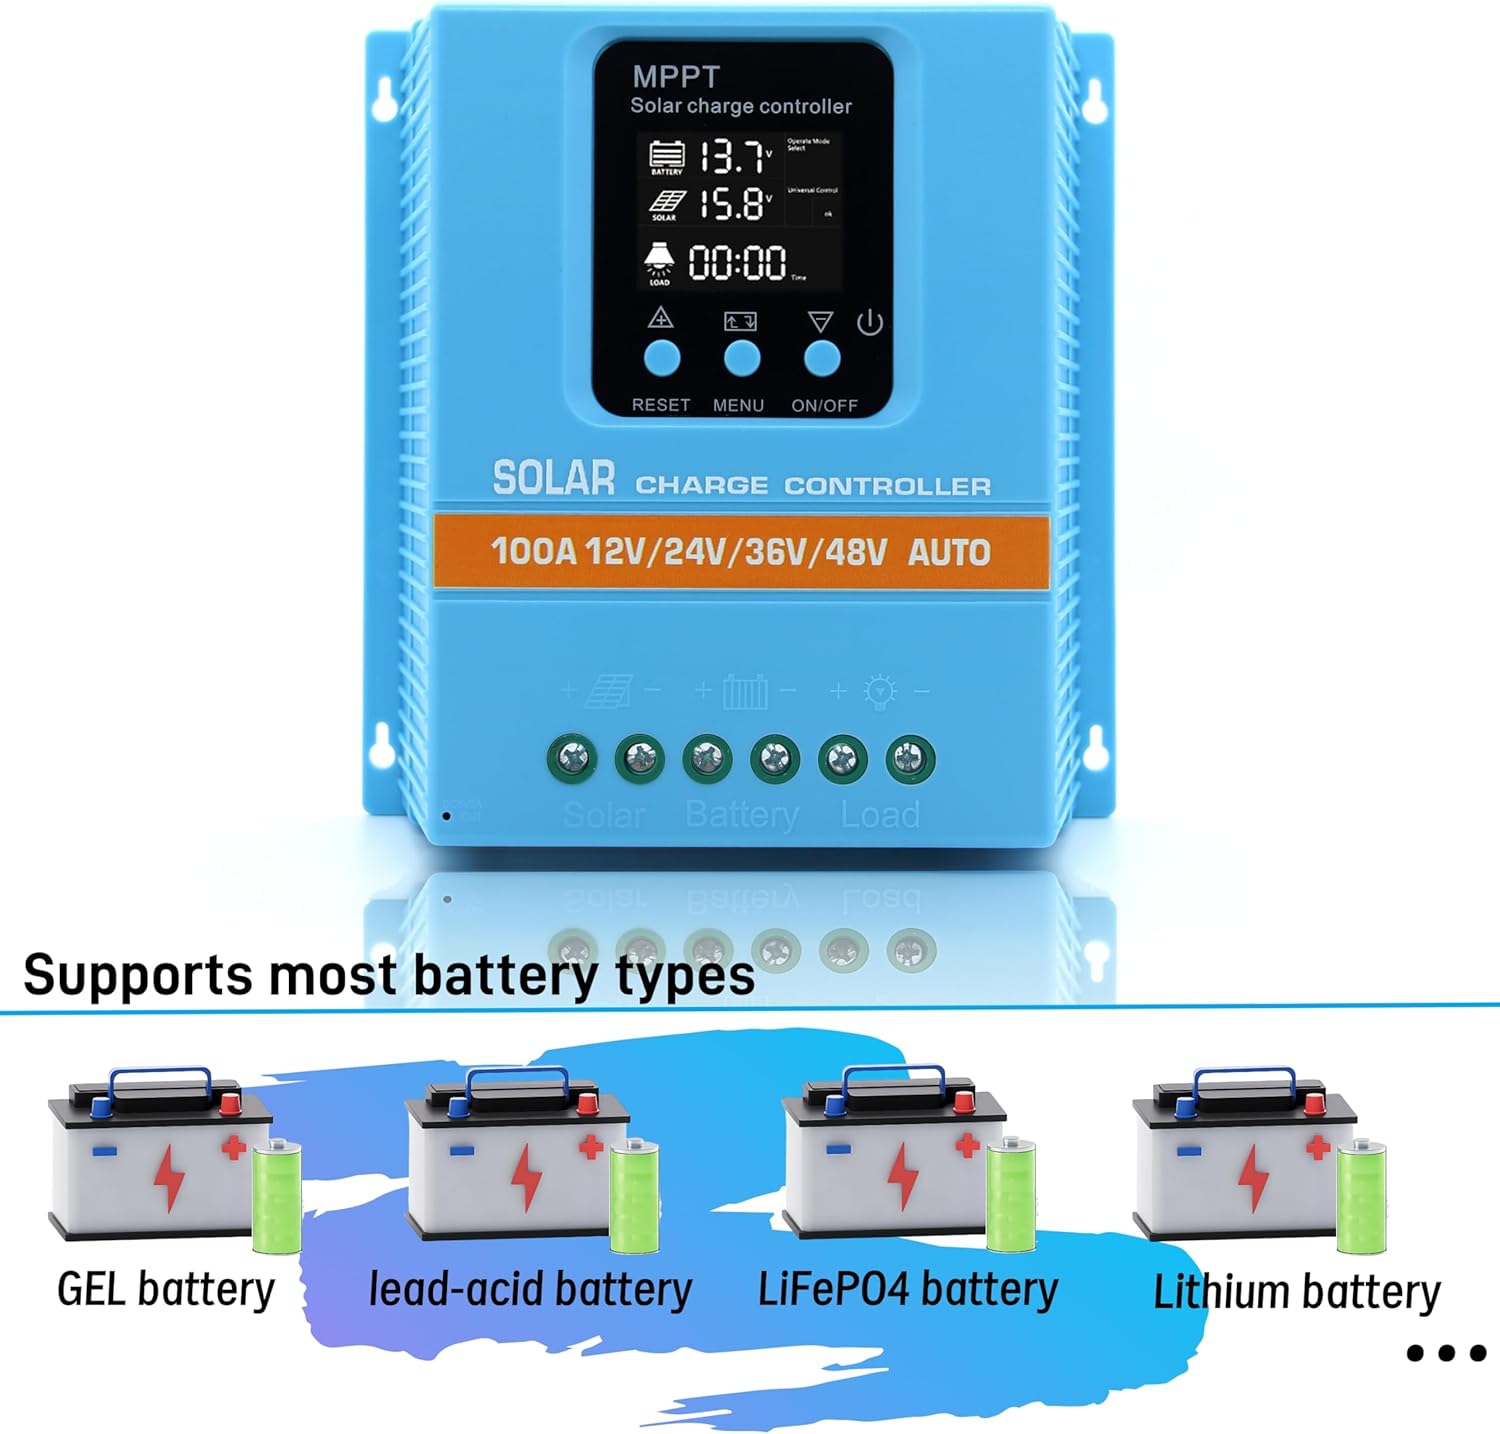
Image 5: Visual representation of the controller's compatibility with GEL, lead-acid, LiFePO4, and Lithium battery types.
6. Caracteristici de siguranță și protecție
The MPPT solar controller is equipped with comprehensive voltage protection mechanisms to safeguard your system and ensure reliable operation. These include:
- Baterie supra-voltage Protecție
- Protecție la supracurent
- Protecția împotriva defecțiunilor de alimentare
- Protecție la supraîncărcare
- Protecție la descărcare profundă
- Protecția conexiunii inverse
- Protecție la supraîncălzire
The device also displays the real-time voltage of the solar panel, allowing users to monitor energy input and assist in troubleshooting any potential issues.
7. Întreținere
To ensure the long-term performance and reliability of your ELUSH 100A MPPT Solar Charge Controller, consider the following maintenance guidelines:
- Inspecție regulată: Verificați periodic toate conexiunile cablurilor pentru a vă asigura că sunt sigure și fără coroziune.
- Curăţenie: Păstrați controlerul curat și fără praf și resturi. Folosiți o cârpă uscată pentru curățare.
- Ventilare: Ensure the installation location provides adequate ventilation to prevent overheating, especially given the aluminum base plate designed for heat dissipation.
- Conditii de mediu: Protect the controller from direct sunlight, moisture, and extreme temperatures outside its operating range.
8. Depanare
If you encounter issues with your solar charge controller, consider the following common troubleshooting steps:
8.1 Device Not Starting or Displaying Data
- Verificați conexiunea bateriei: Ensure the rechargeable battery is connected first and has sufficient power to activate the controller. The controller requires battery power to operate.
- Verify Solar Panel Connection: Confirm that solar panels are connected correctly după bateria.
- Inspectați cablarea: Check all wiring for loose connections, breaks, or incorrect polarity.
8.2 Low Charging Efficiency
- Ieșire panou solar: Ensure solar panels are clean, unobstructed, and receiving adequate sunlight.
- Setare tip baterie: Verify that the correct battery type is selected in the controller's settings.
- Sistem Voltage: Confirm that the system voltage (12V/24V/36V/48V) is correctly recognized by the controller.
- Tehnologie hibridă: Remember that this controller integrates both MPPT and PWM technologies. While efficient, its performance characteristics may differ from pure MPPT controllers.
8.3 Load Not Functioning
- Verificați conexiunea sarcinii: Ensure the load is correctly connected to the load terminals.
- Mod de încărcare: Verify the operating mode (e.g., light control, timing control) is correctly configured and enabled.
- Volumul baterieitage: Dacă volumul baterieitage is too low, the controller may disconnect the load to protect the battery from deep discharge.
9. Specificații
The following table outlines the technical specifications for the ELUSH 100A MPPT Solar Charge Controller:
| Caracteristică | Caietul de sarcini |
|---|---|
| Volumul baterieitage | 12V/24V/36V/48V Auto |
| Curent de încărcare | 100A |
| Max Solar Input (Voc) | 15-25V (12V Battery); 30-50V (24V Battery); 45-75V (36V Battery); 60-100V (48V Battery) |
| Putere maximă de intrare PV | 1200W (12V Battery); 2400W (24V Battery); 3600W (36V Battery); 4800W (48V Battery) |
| Port USB | DC 5V/1.5A x 2 USB |
| Temperatura de operare | -25°C până la 55°C |
| Tip de afișare | LCD |
| Producător | ELUSH |
| Dimensiuni pachet | 8.5 x 8.23 x 2.83 inci |
| Greutatea articolului | 2.09 lire sterline (0.95 kilograme) |
| Culoare | Albastru |
| Material | Plastic |

Image 6: Dimensions of the ELUSH 100A MPPT Solar Charge Controller (7.6in x 7.3in x 2.6in).
10. Garanție și asistență
The ELUSH 100A MPPT Solar Charge Controller comes with a 1 an garanție and lifetime technical support. Should you require assistance, have questions, or encounter any issues, please do not hesitate to contact the ELUSH support team. Our engineers are available to provide advice and solutions.