Aeomjk CM5320 Espresso and Cappuccino Coffee Machine Instruction Manual
Model: CM5320
Introducere
This manual provides detailed instructions for the safe and efficient operation of your new Aeomjk CM5320 Espresso and Cappuccino Coffee Machine. Please read all instructions carefully before use and retain this manual for future reference.
The Aeomjk CM5320 is designed to prepare a variety of coffee beverages, including espresso, cappuccino, and latte, with ease. Featuring a 20-bar high-pressure pump and an integrated automatic milk frother, it delivers quality coffee experiences.
Produs terminatview
The Aeomjk CM5320 combines a sleek design with user-friendly features for a convenient coffee brewing experience.
Figura 1: Față view of the Aeomjk CM5320 Espresso and Cappuccino Coffee Machine, showcasindatorită designului său compact și panoului de control.
Caracteristici cheie:
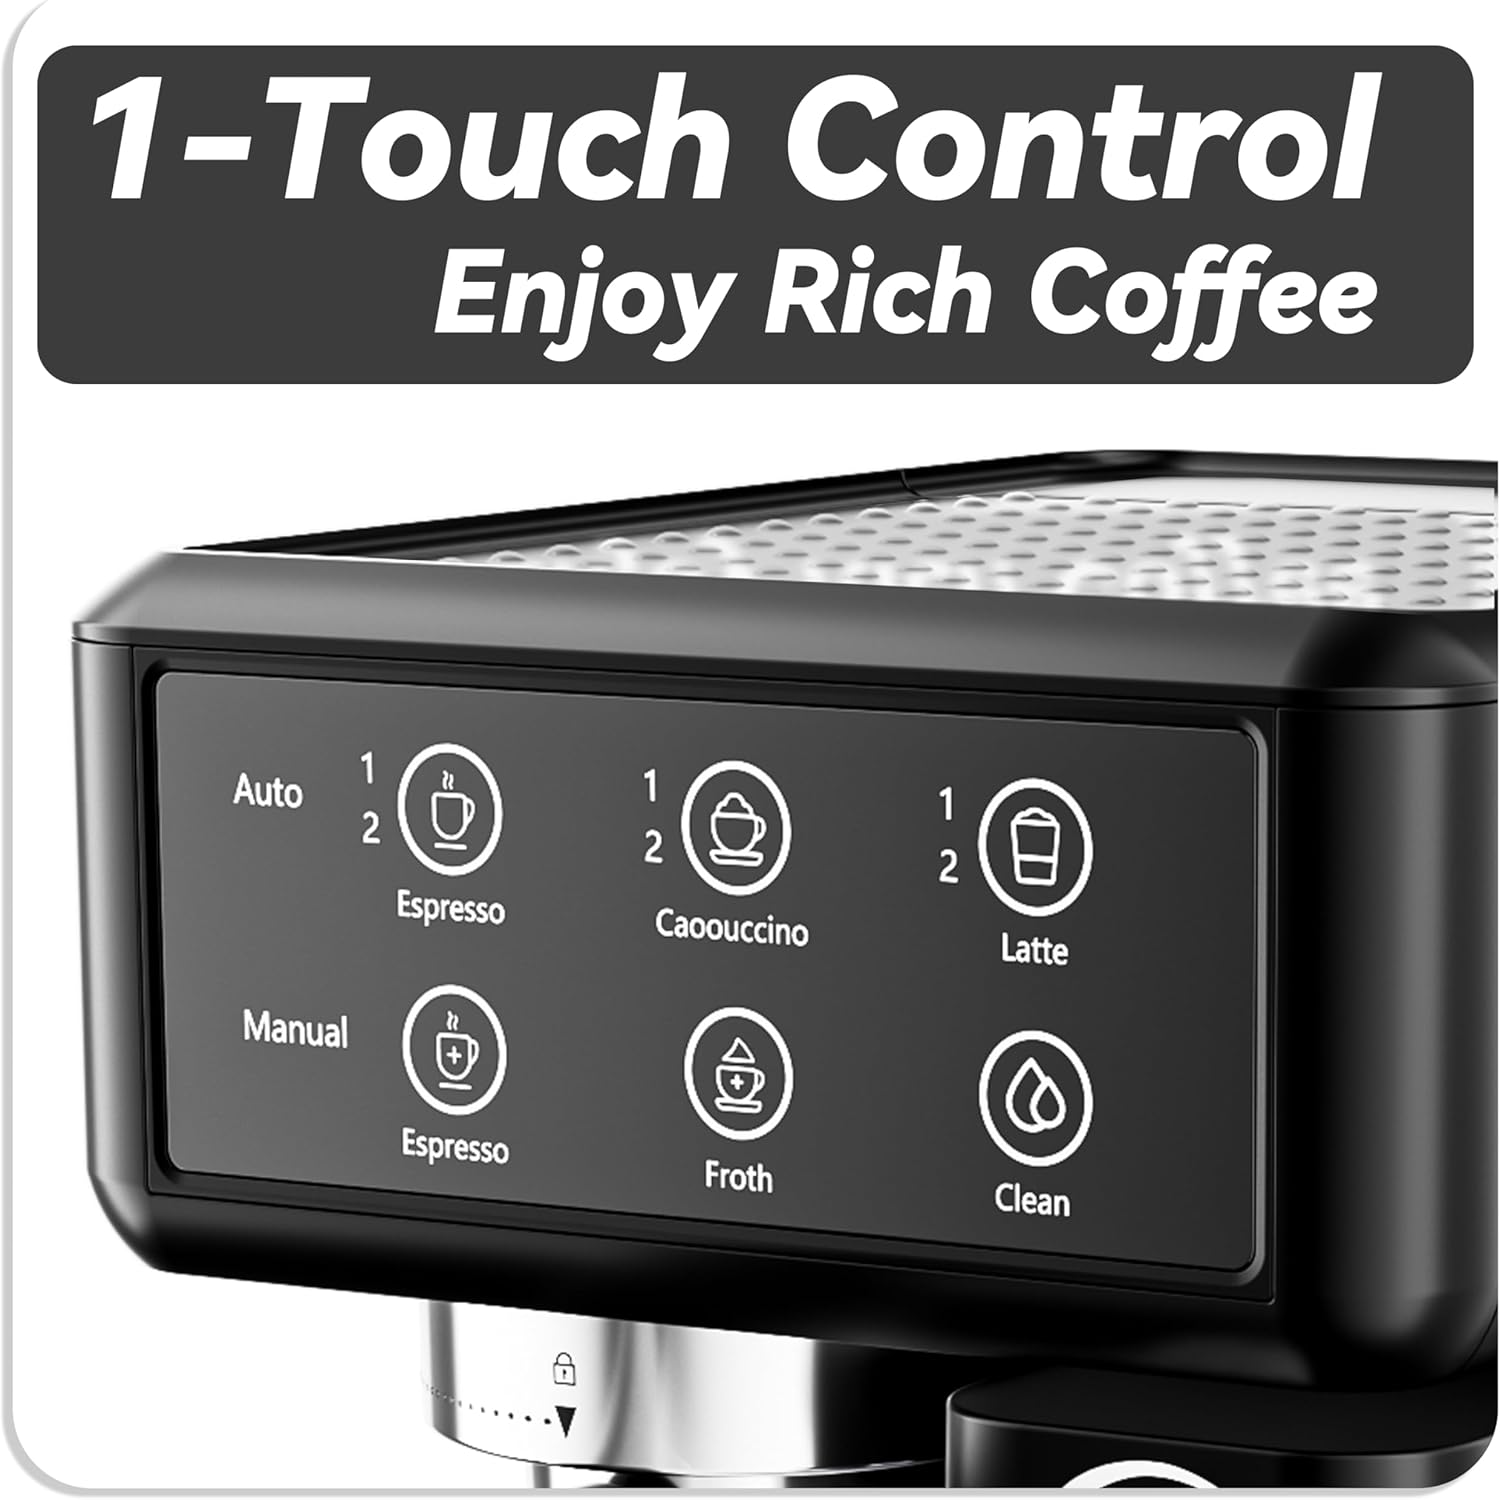
Operare cu un singur buton: Simplifies the brewing process for various coffee drinks.
20-Bar High Pressure: Ensures optimal extraction for rich espresso.
Automatic Milk Frother: Integrated system for creating creamy milk foam for cappuccinos and lattes.
Large Capacity Milk Box: Allows for precise control over milk quantity and temperature.
Funcția de autocurățare: Maintains hygiene of the milk frother system.
Design compact: Space-saving integrated body and milk tank.
Încălzitor de pahare: Top surface designed to keep cups warm.
Înființat
1. Despachetarea și curățarea inițială:
Îndepărtați toate materialele de ambalare și autocolantele de pe mașină.
Wash the water tank, milk frother tank, portafilter, and filter baskets with warm soapy water. Rinse thoroughly and dry.
2. Umplerea rezervorului de apă:
Open the lid of the water tank located at the back of the machine.
Fill the water tank with clean, cold water. Do not exceed the 'MAX' line.
Închideți bine capacul rezervorului de apă.
Video 1: Demonstrates how to fill the water tank of the espresso machine. Ensure water level does not exceed the maximum fill line.
3. Assembling the Milk Frother:
Remove the milk frother tank from the machine.
Open the lid of the milk frother tank and pour in refrigerated whole milk (41-50°F). Do not exceed the 'MAX' line.
Close the lid and reattach the milk frother tank to the machine, ensuring it clicks into place.
Video 2: Demonstrates the assembly and use of the automatic milk frother for creamy beverages.
Instrucțiuni de operare
1. Powering On and Preheating:
Conectați mașina la o priză adecvată.
Press the power button. The machine will begin preheating. Wait until the indicator lights are stable, indicating it's ready for use.
2. Preparing Espresso:
Introduceți coșul de filtrare dorit (cu o singură sau două doze) în portafiltru.
Umpleți coșul filtrului cu cafea măcinată. Folosiți butonulamper to firmly press the coffee grounds.
Attach the portafilter to the brewing head of the machine and lock it into place by turning the handle to the right.
Place a cup under the portafilter spouts.
Select either '1 Espresso' for a single shot or '2 Espresso' for a double shot on the control panel. The machine will automatically brew the espresso.
Figure 2: The intuitive one-touch control panel for selecting espresso, cappuccino, or latte.
3. Preparing Cappuccino or Latte:
Follow steps 1-3 for preparing espresso.
Adjust the milk frother knob to your desired froth level (delicate or fluffy).
Place a cup under the portafilter spouts and the milk frother spout.
Select '1 Cappuccino' or '2 Cappuccino' for cappuccino, or '1 Latte' or '2 Latte' for latte. The machine will first froth the milk and then brew the espresso into your cup.
Figure 3: The adjustable milk frother knob allows customization of milk foam texture.
Curatenie si intretinere
1. Self-Cleaning Function (Milk Frother):
After each use of the milk frother, turn the milk frother knob to the 'CLEAN' position.
The machine will automatically flush the milk frother system with hot water to prevent milk residue buildup.
Return the knob to the 'OFF' position once cleaning is complete.
2. Curățare regulată:
Water Tank & Milk Frother Tank: Remove and wash with warm soapy water. Rinse thoroughly.
Portafiltru și coșuri de filtrare: Remove coffee grounds and wash with warm soapy water.
Tavă de scurgere: Goliți și curățați tava de colectare a picăturilor în mod regulat. Este detașabilă pentru o curățare ușoară.
Exterior: Ștergeți exteriorul mașinii cu reclamăamp pânză. Nu utilizați produse de curățare abrazive.
Depanare
If you encounter any issues with your Aeomjk CM5320, please refer to the following common troubleshooting steps:
Aparatul nu pornește: Asigurați-vă că cablul de alimentare este bine conectat la o priză funcțională.
No coffee brewing: Check if the water tank is filled and correctly seated. Ensure the portafilter is properly locked.
Weak espresso: Verify that the coffee grounds are fresh and tamped firmly. Adjust grind size if necessary.
No milk froth: Ensure the milk frother tank has sufficient milk and is correctly attached. Check if the frother spout is clean.
Machine leaking: Check all removable parts (water tank, drip tray, portafilter) are correctly installed and sealed.
Pentru probleme persistente, vă rugăm să contactați serviciul de asistență pentru clienți.
Specificații
Caracteristică
Detaliu
Marca
Aeomjk
Numele modelului
CM5320
Culoare
Negru
Dimensiunile produsului
11" D x 8.5" L x 12.6" H
Tip aparat de cafea
Aparat de espresso
Modul de operare
Complet automat
Caracteristici speciale
Cup Warmer, Milk Frother, Removable Tank, Self-Cleaning
Presiune
20 bar
Putere
1350W
Capacitatea rezervorului de apă
1.8 litri (60.8 oz)
Capacitatea rezervorului de lapte
17 oz
Tip de intrare cafea
Pods/Capsules (Note: The product's feature bullets describe using ground coffee with a portafilter, which contradicts this specification. Please refer to product packaging for definitive compatibility.)
Garanție și suport
For warranty information or customer support, please refer to the product packaging or contact the manufacturer directly. Keep your proof of purchase for any warranty claims.
Ask a question about this manual
Ask about setup, troubleshooting, compatibility, parts, safety, or missing instructions. Manuals+ will review the question and use this page’s manual context to help answer it.