
1. Introducere
This manual provides detailed instructions for the installation, operation, and maintenance of your JONSBO N5 NAS PC Case. The JONSBO N5 is designed for multi-drive NAS storage and high-performance computing hosts, featuring a robust structure and extensive compatibility for various components. Please read this manual thoroughly before proceeding with any installation or operation.
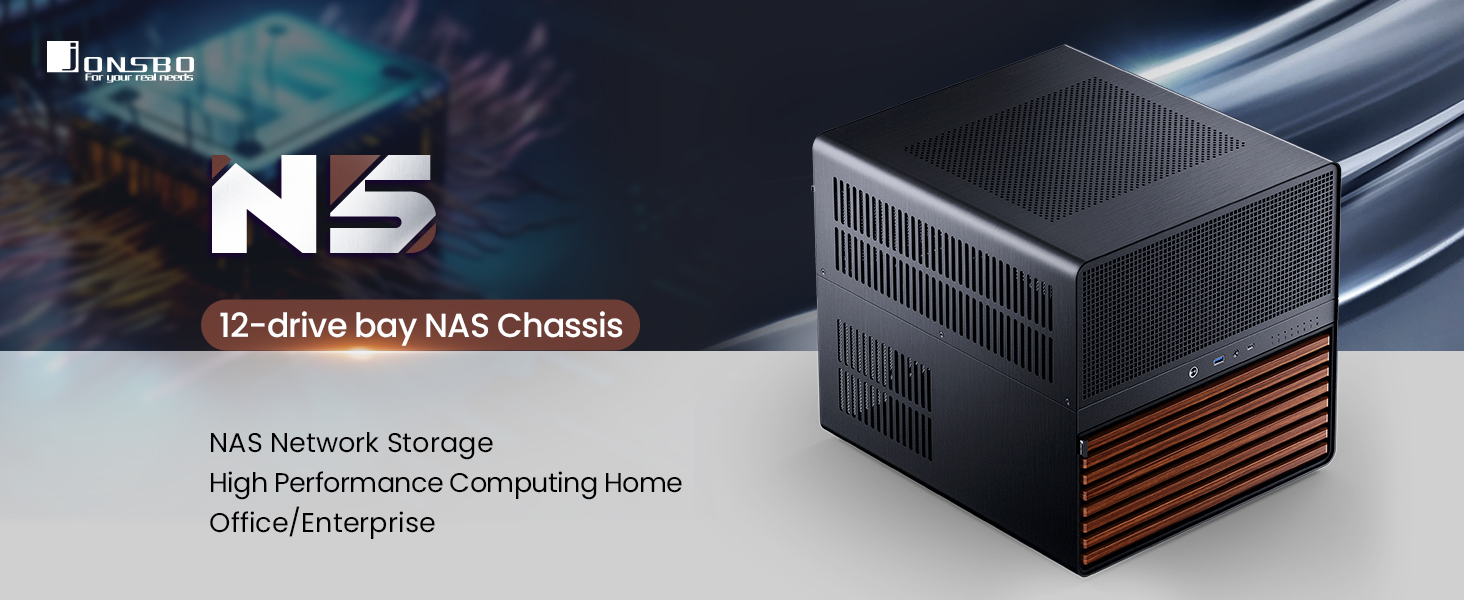
Image 1.1: JONSBO N5 12-drive bay NAS Chassis overview.
2. Produs terminatview
The JONSBO N5 chassis is engineered for versatility and performance, supporting a wide range of hardware configurations. Its design incorporates an upper and lower compartment structure, optimizing space for components and airflow.
Caracteristici cheie:
- Baile de mers: Supports 12x 3.5-inch hot-swappable HDDs in the front and 4x 2.5-inch SSDs on the side.
- Compatibilitate placa de baza: Compatible with ITX, M-ATX, ATX, and E-ATX motherboards.
- Suport GPU: Accommodates up to 4 graphics cards.
- Sistem de racire: Features extensive fan support (Front 120mm*2 or 140mm*2, Right 120mm*3, Rear 120mm*3 (standard), Left 120mm*3) and front AIO support (240mm/280mm).
- Alimentare electrică: Supports ATX power supplies (170mm-240mm).
- Interfață frontală: Includes USB 3.2 Gen2 Type-C*1 and USB 3.0*(2IN1) for high-speed data transfer.
- Material: Constructed from steel plate, aluminum plate, and features North American black walnut veneer.
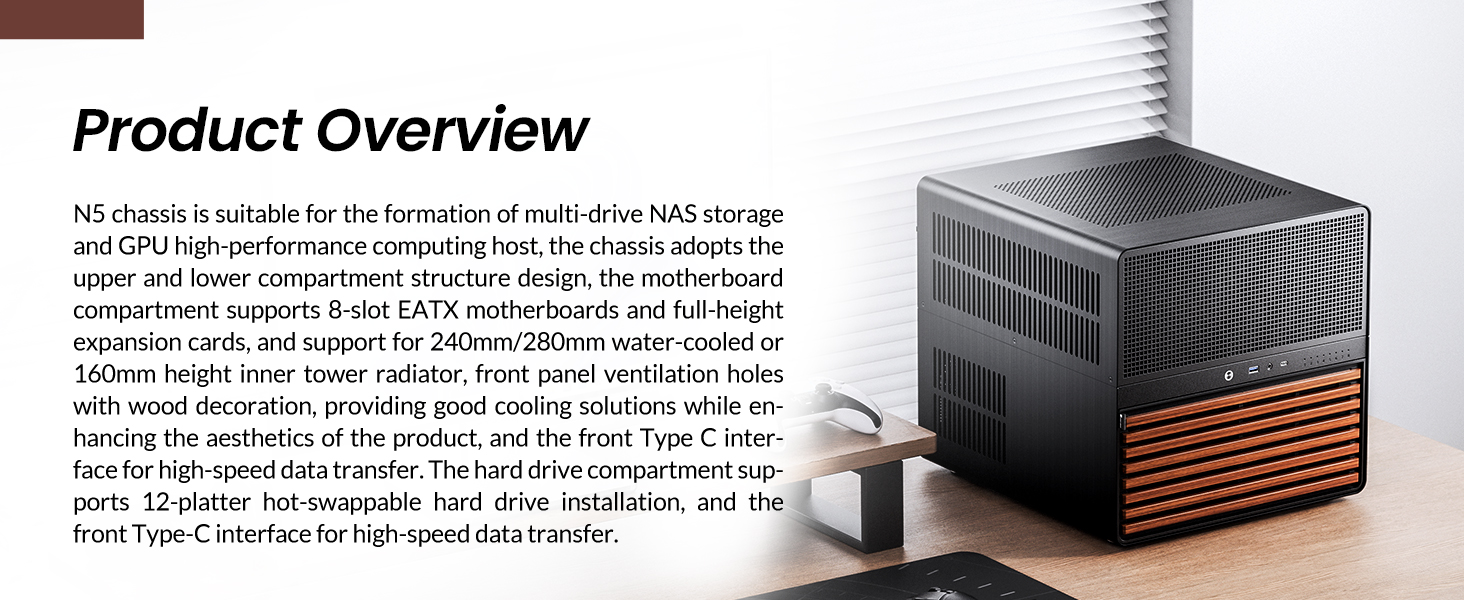
Image 2.1: JONSBO N5 NAS PC Case in a typical desktop environment.
3. Configurare și instalare
Follow these steps for proper assembly and installation of components into your JONSBO N5 case.
3.1 Pregătirea șasiului
- Carefully unpack the chassis and all accessories.
- Remove the top cover and side panels to access the internal compartments. The top cover is designed for easy removal.

Image 3.1: Front panel of the JONSBO N5 case opened to reveal drive bays.
3.2 Instalarea plăcii de bază
- Identify the correct standoff locations for your motherboard size (ITX, M-ATX, ATX, E-ATX).
- Install the necessary standoffs and carefully place your motherboard, securing it with screws.
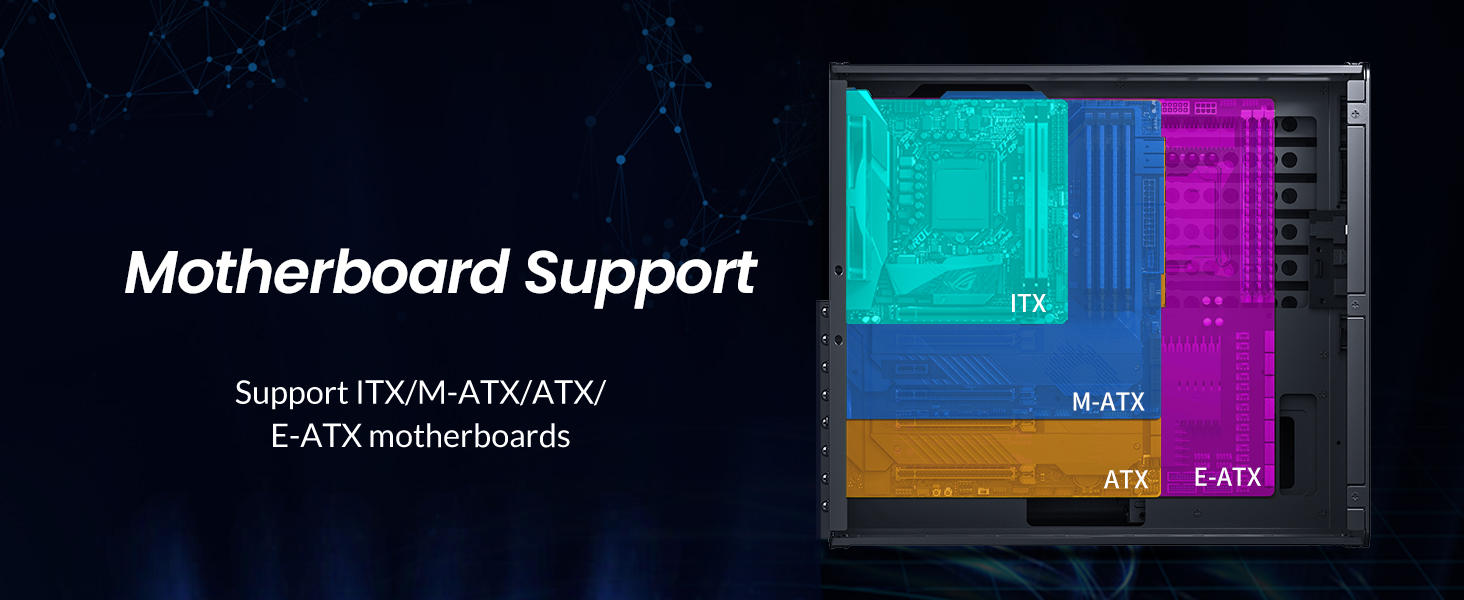
Image 3.2: Diagram illustrating motherboard compatibility (ITX, M-ATX, ATX, E-ATX) within the chassis.
3.3 Instalarea unității (HDD/SSD)
- HDD-uri de 3.5 inci: The front compartment supports 12 hot-swappable 3.5-inch HDDs. Slide each HDD into its designated bay until it clicks into place.
- 2.5-inch SSDs: The case supports 4x 2.5-inch SSDs for side installation. Secure these drives in their respective mounting locations.
- Connect the SATA data and power cables to the drives and the server-grade hot-swappable backplane.

Imaginea 3.3: Intern view highlighting the 12x 3.5-inch HDD bays and 4x 2.5-inch SSD mounting locations.
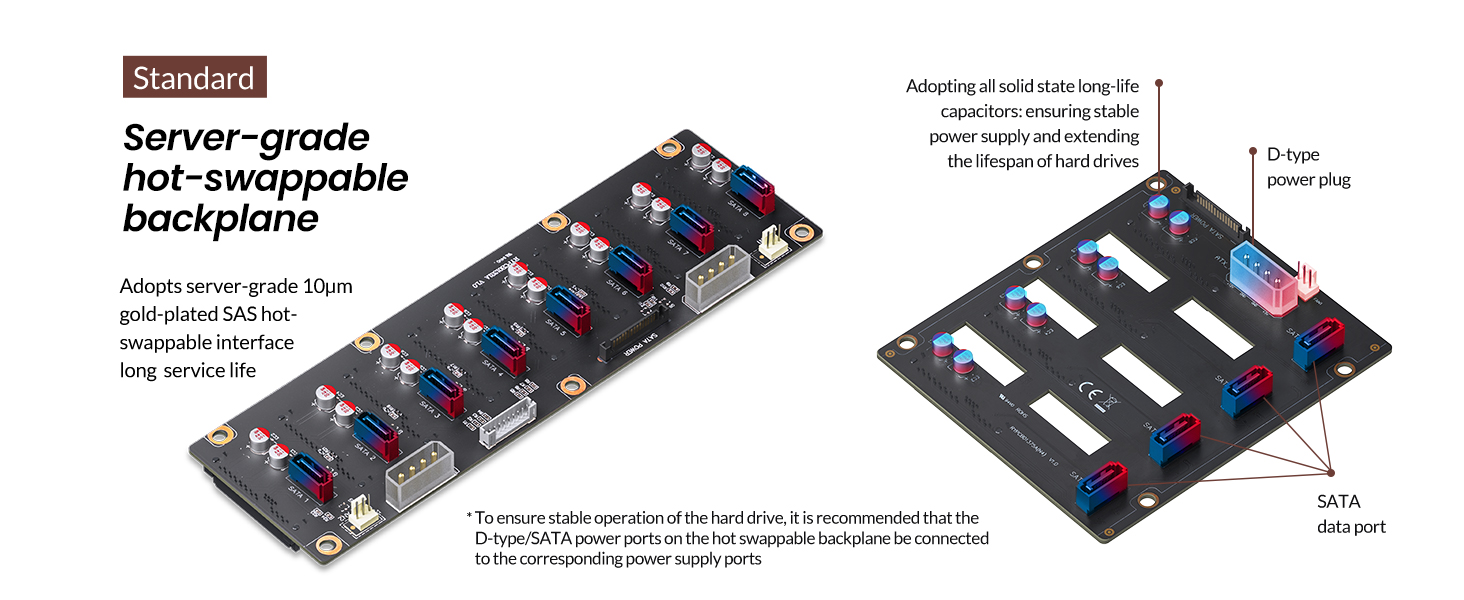
Image 3.4: Server-grade hot-swappable backplane for reliable drive connections.
3.4 Instalarea unității de alimentare (PSU).
- The case supports ATX power supplies ranging from 170mm to 240mm.
- If using a PSU ≤ 170mm, all 12 front HDD slots can be utilized.
- If using a PSU ≥ 170mm, the front compartment can accommodate 8 HDD slots (requires removal of a side movable hard drive compartment).
- Mount the PSU in its designated area and connect all necessary power cables to the motherboard, drives, and other components.
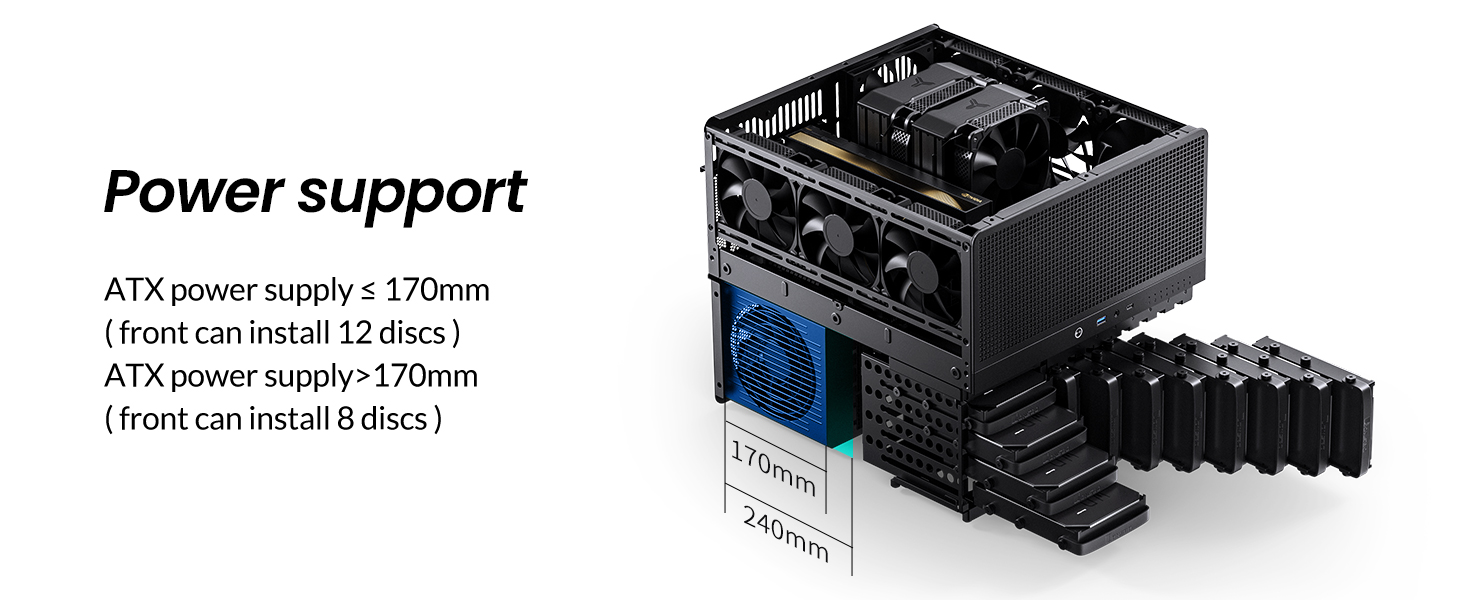
Image 3.5: Diagram showing PSU installation and its impact on HDD bay availability.
3.5 Instalarea plăcii grafice (GPU)
- The JONSBO N5 supports up to 4 graphics cards.
- Ensure your GPU length is within the supported limits: <325mm with front AIO, or <350mm with front fans.
- Install GPUs into the available 8 PCI expansion slots.
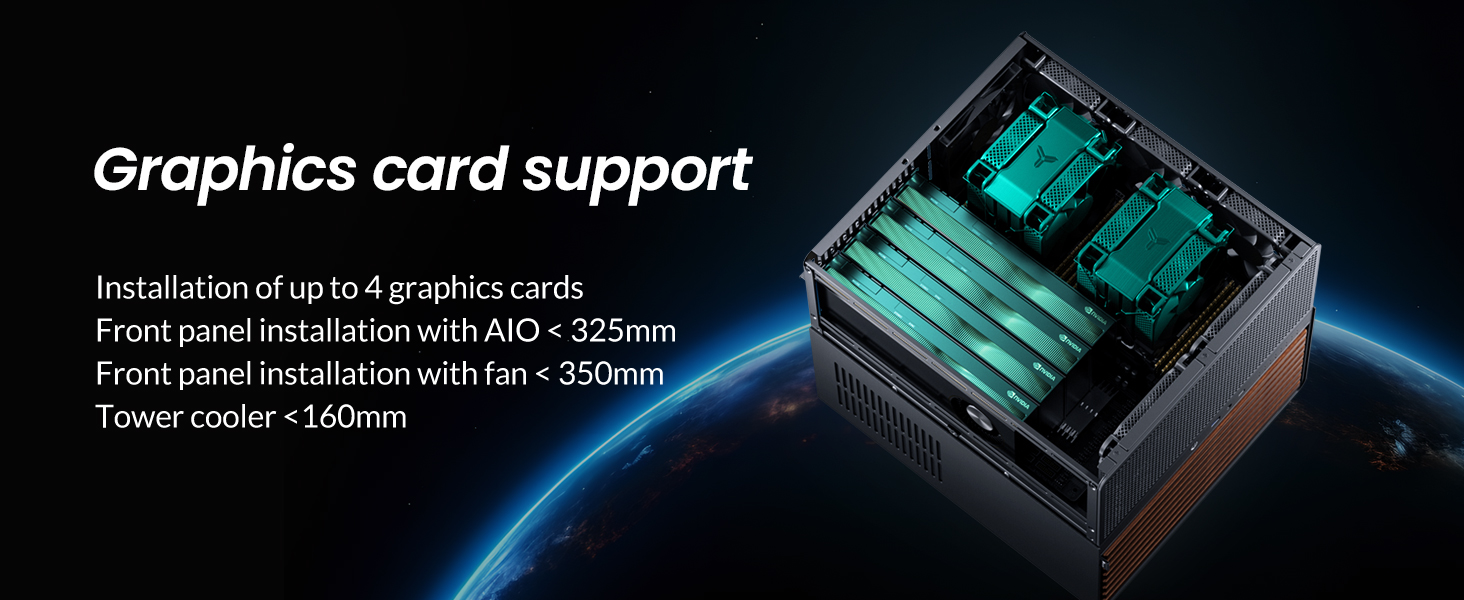
Imaginea 3.6: Intern view demonstrating graphics card installation and clearance.
3.6 Configurarea sistemului de răcire
- The case comes standard with 3x 120mm fans installed at the rear.
- Additional fan support: Front (2x 120mm or 2x 140mm), Right (3x 120mm), Rear (3x 120mm, Standard), Left (3x 120mm).
- For water cooling, the front supports 240mm or 280mm integrated AIO solutions.
- CPU cooler height is limited to <160mm.
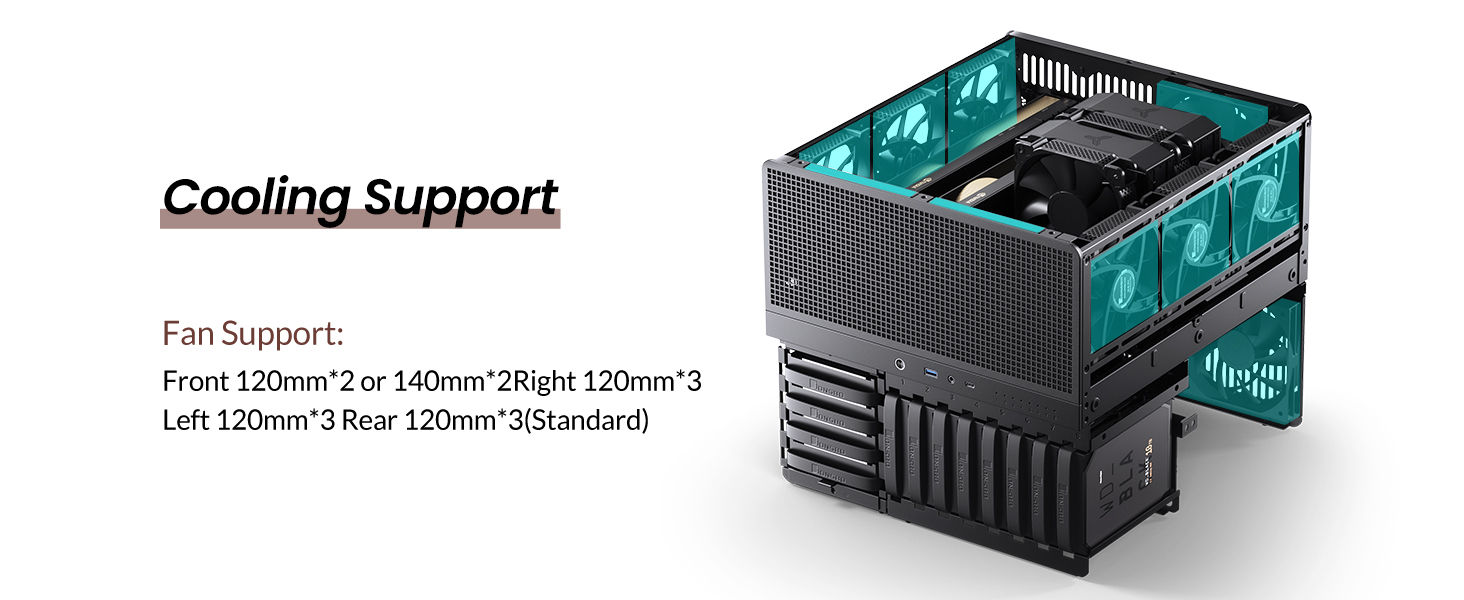
Image 3.7: Diagram showing various fan and cooling configurations within the chassis.
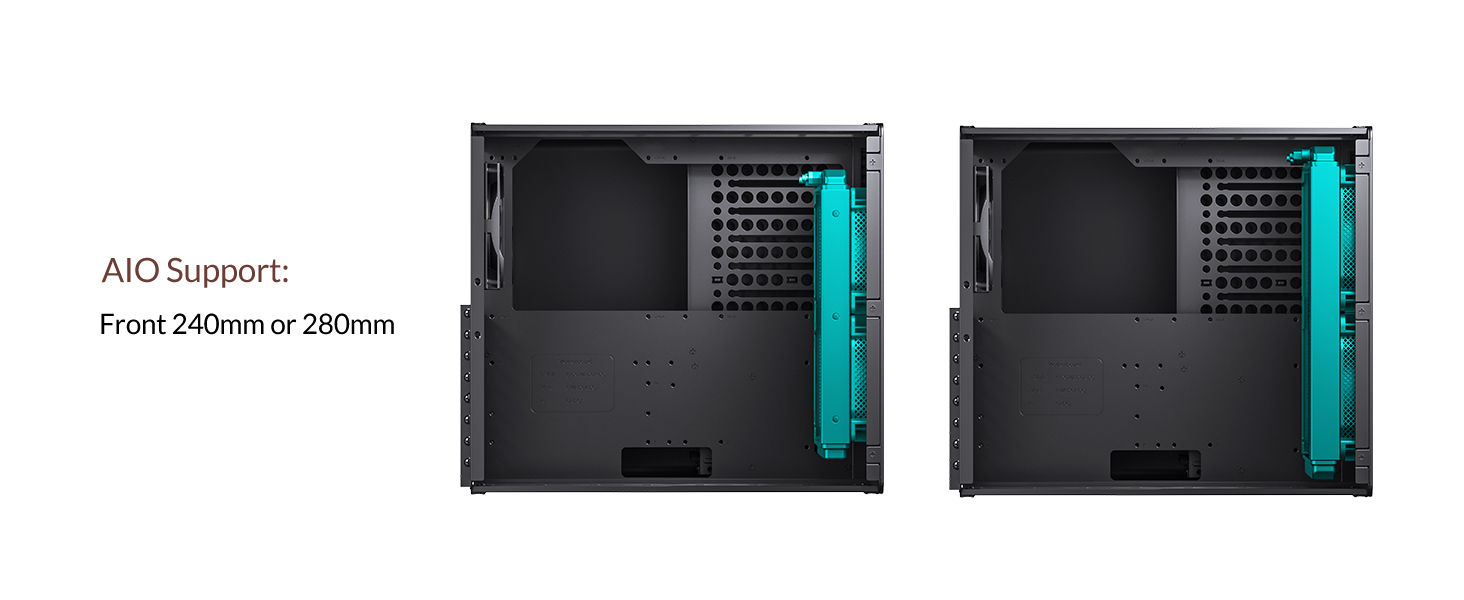
Image 3.8: Illustration of AIO water cooling radiator placement in the front of the case.
3.7 Conexiuni la panoul frontal
- Connect the front panel cables (USB 3.2 Gen2 Type-C, USB 3.0, audio, power, reset) to their corresponding headers on your motherboard.
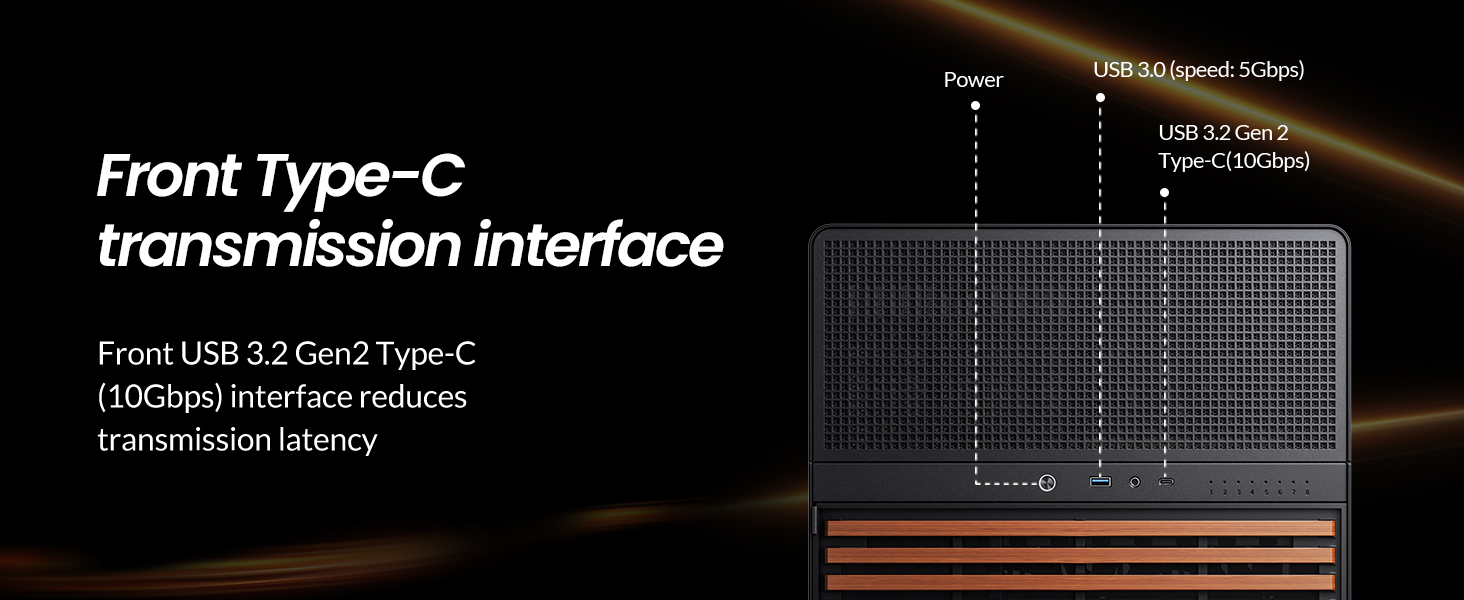
Image 3.9: Detail of the front panel interfaces, including USB 3.2 Gen2 Type-C and USB 3.0 ports.
4. Instrucțiuni de utilizare
Once all components are installed and secured, and all cables are connected, you can power on your system.
- Asigurați-vă că întrerupătorul de alimentare este în poziția „ON”.
- Press the power button on the front panel of the chassis.
- Monitor system boot-up and ensure all drives are detected by your operating system or NAS software.
5. Întreținere
Regular maintenance helps ensure the longevity and optimal performance of your JONSBO N5 PC Case and its components.
5.1 Curățare
- Periodically clean dust from the case's ventilation areas, especially the top and side panels. Use compressed air or a soft brush.
- The front dust filter is located behind a grate and is not easily removable. Use a vacuum cleaner with a brush attachment to clean it.
- For the wooden veneer, wipe gently with a dry, soft cloth. Avoid harsh chemicals.
5.2 Înlocuirea ventilatorului
- If a fan becomes noisy or fails, it may need replacement. Refer to the fan support specifications for compatible sizes.
- Disconnect power before attempting any internal component replacement.
6. Depanare
Această secțiune abordează problemele frecvente pe care le-ați putea întâmpina.
6.1 Sistemul nu pornește
- Check if the power supply is properly connected to the wall outlet and the PSU switch is ON.
- Verify all power cables from the PSU are securely connected to the motherboard and components.
- Asigurați-vă că cablul butonului de alimentare de pe panoul frontal este conectat corect la conectorul plăcii de bază.
6.2 Drives Not Detected
- Confirm that SATA data and power cables are securely connected to both the drives and the hot-swappable backplane.
- Check the backplane connections to the motherboard (if applicable, via a SATA controller card).
- Ensure drives are fully seated in their bays.
- If using a PSU ≥ 170mm, confirm that the correct number of HDD slots are being used (max 8 in front).
6.3 Zgomot excesiv
- Inspect all fans (CPU, case, GPU, PSU) for obstructions or loose mounting.
- The included case fans may be audible; consider replacing them with quieter aftermarket fans if noise is a concern.
- Ensure all panels are securely closed to prevent rattling.
7. Specificații
| Caracteristică | Caietul de sarcini |
|---|---|
| Numele modelului | N5 |
| Dimensiunile produsului (Lxlxh) | 15.8 x 13.9 x 13.8 inches (W355*D403*H350mm) |
| Greutatea articolului | 20.6 lire sterline (9.37 kilograme) |
| Material | Steel plate, Aluminum plate, Wood (North American black walnut veneer) |
| Goluri pentru hard disk | 12x 3.5" HDD (hot-swappable), 4x 2.5" SSD |
| Compatibilitate cu placa de baza | ITX, M-ATX, ATX, E-ATX (up to 330mm) |
| Sloturi de expansiune PCI | 8 sloturi |
| Porturi frontale | USB 3.2 Gen2 Type-C*1, USB 3.0*(2IN1) |
| Suport pentru alimentare | ATX 170mm-240mm (≤170mm for 12 HDDs, ≥170mm for 8 HDDs) |
| Limită de înălțime a răcitorului CPU | <160 mm |
| Limita de lungime a GPU | <325mm (with front AIO), <350mm (with front fans) |
| Cooling System (Fan Support) | Față: 2x 120 mm sau 2x 140 mm Right: 3x 120mm Rear: 3x 120mm (Standard) Left: 3x 120mm |
| Suport pentru răcire cu apă | Front: 240mm or 280mm AIO |

Image 7.1: JONSBO N5 NAS PC Case with key dimensions (W355*D403*H350mm) indicated.
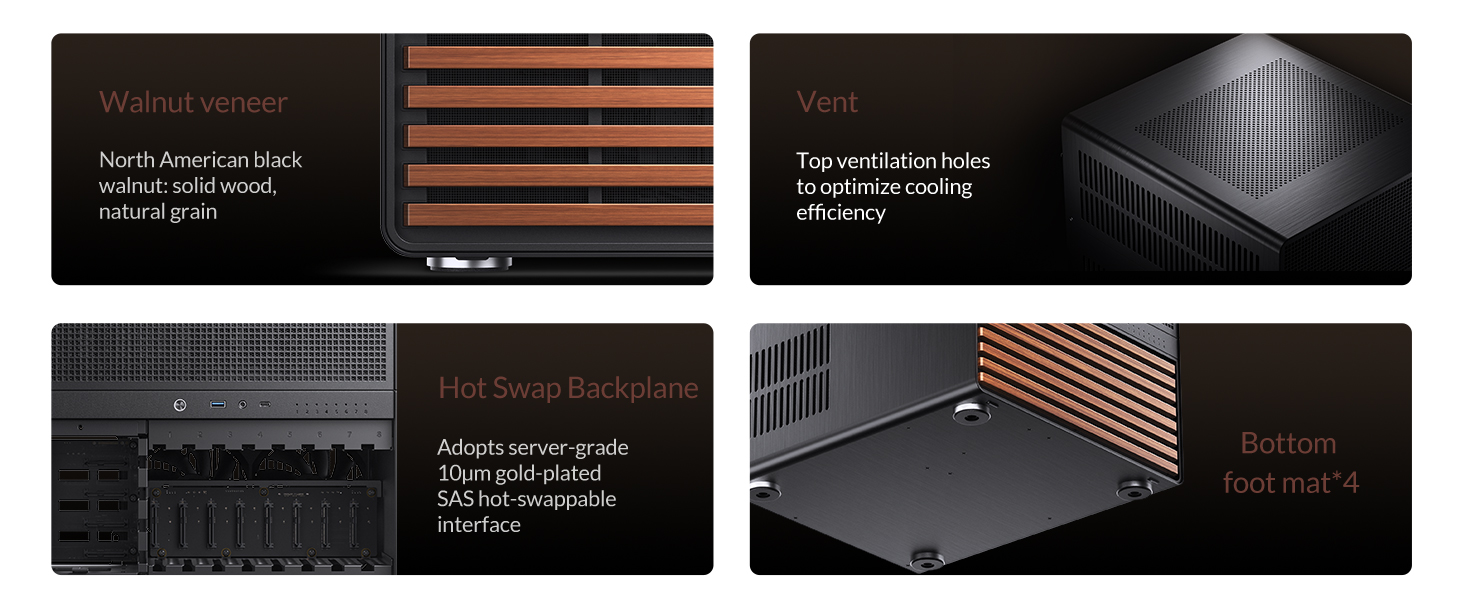
Image 7.2: Detailed product specifications for the JONSBO N5 NAS PC Case.
8. Videoclip oficial al produsului
Video 8.1: Official JONSBO N5 PC NAS Case product video, demonstrating features and internal layout.
9. Garanție și asistență
Pentru informații despre garanție și asistență tehnică, vă rugăm să consultați site-ul oficial JONSBO website or contact your retailer. Specific warranty terms may vary by region and retailer.
For additional protection, extended protection plans may be available for purchase separately. Please consult your retailer for details on available protection plans.