
1. Instrucțiuni importante de siguranță
Please read all instructions carefully before using the Teesa Steam Mop TSA5051. Keep this manual for future reference.
- Always ensure the appliance is unplugged before filling the water tank or performing maintenance.
- Do not leave the steam mop unattended while powered on.
- Țineți copiii și animalele de companie departe de aparat în timpul funcționării.
- Folosiți doar apă distilată sau demineralizată în rezervor pentru a preveni acumularea de minerale.
- Nu îndreptați aburul spre oameni, animale sau aparate electrice.
- Avoid using the steam mop on unsealed hardwood floors or surfaces that are sensitive to heat and moisture.
- Always attach a cleaning pad before operating the steam mop.
- Dacă cablul de alimentare este deteriorat, acesta trebuie înlocuit de producător, de agentul său de service sau de persoane calificate similar pentru a evita un pericol.
2. Produs terminatview și Componente
Familiarize yourself with the parts of your Teesa Steam Mop TSA5051 before assembly and operation.

Figura 2.1: Fully assembled Teesa Steam Mop TSA5051, front view.

Figura 2.2: Latura view of the steam mop, showing the handle and power cord wrap.
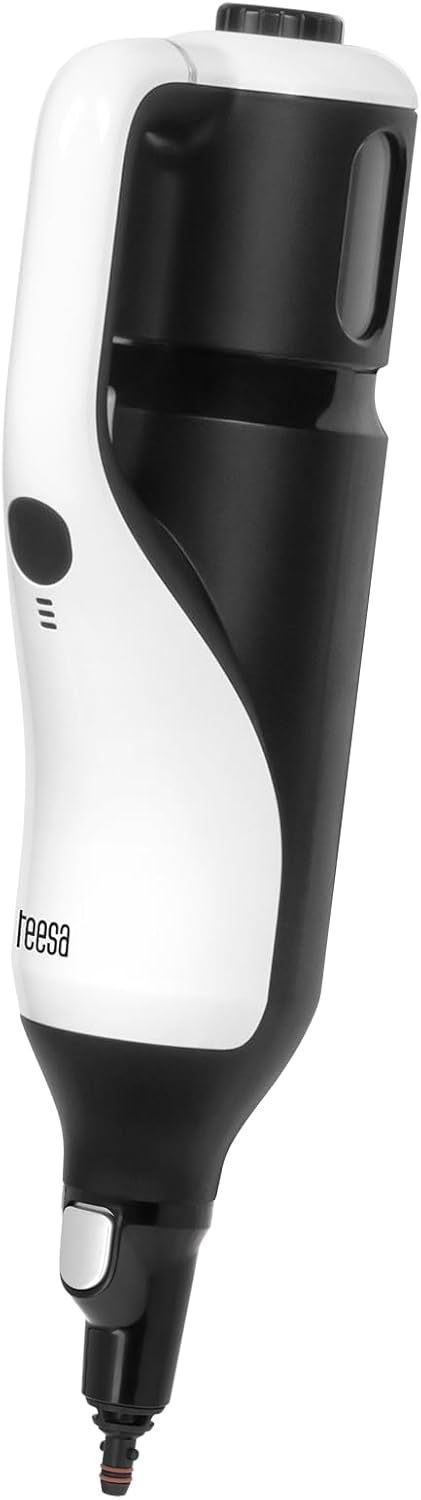
Figura 2.3: The detachable handheld steam unit.

Figura 2.4: Illustration of detaching the handheld unit from the main body.
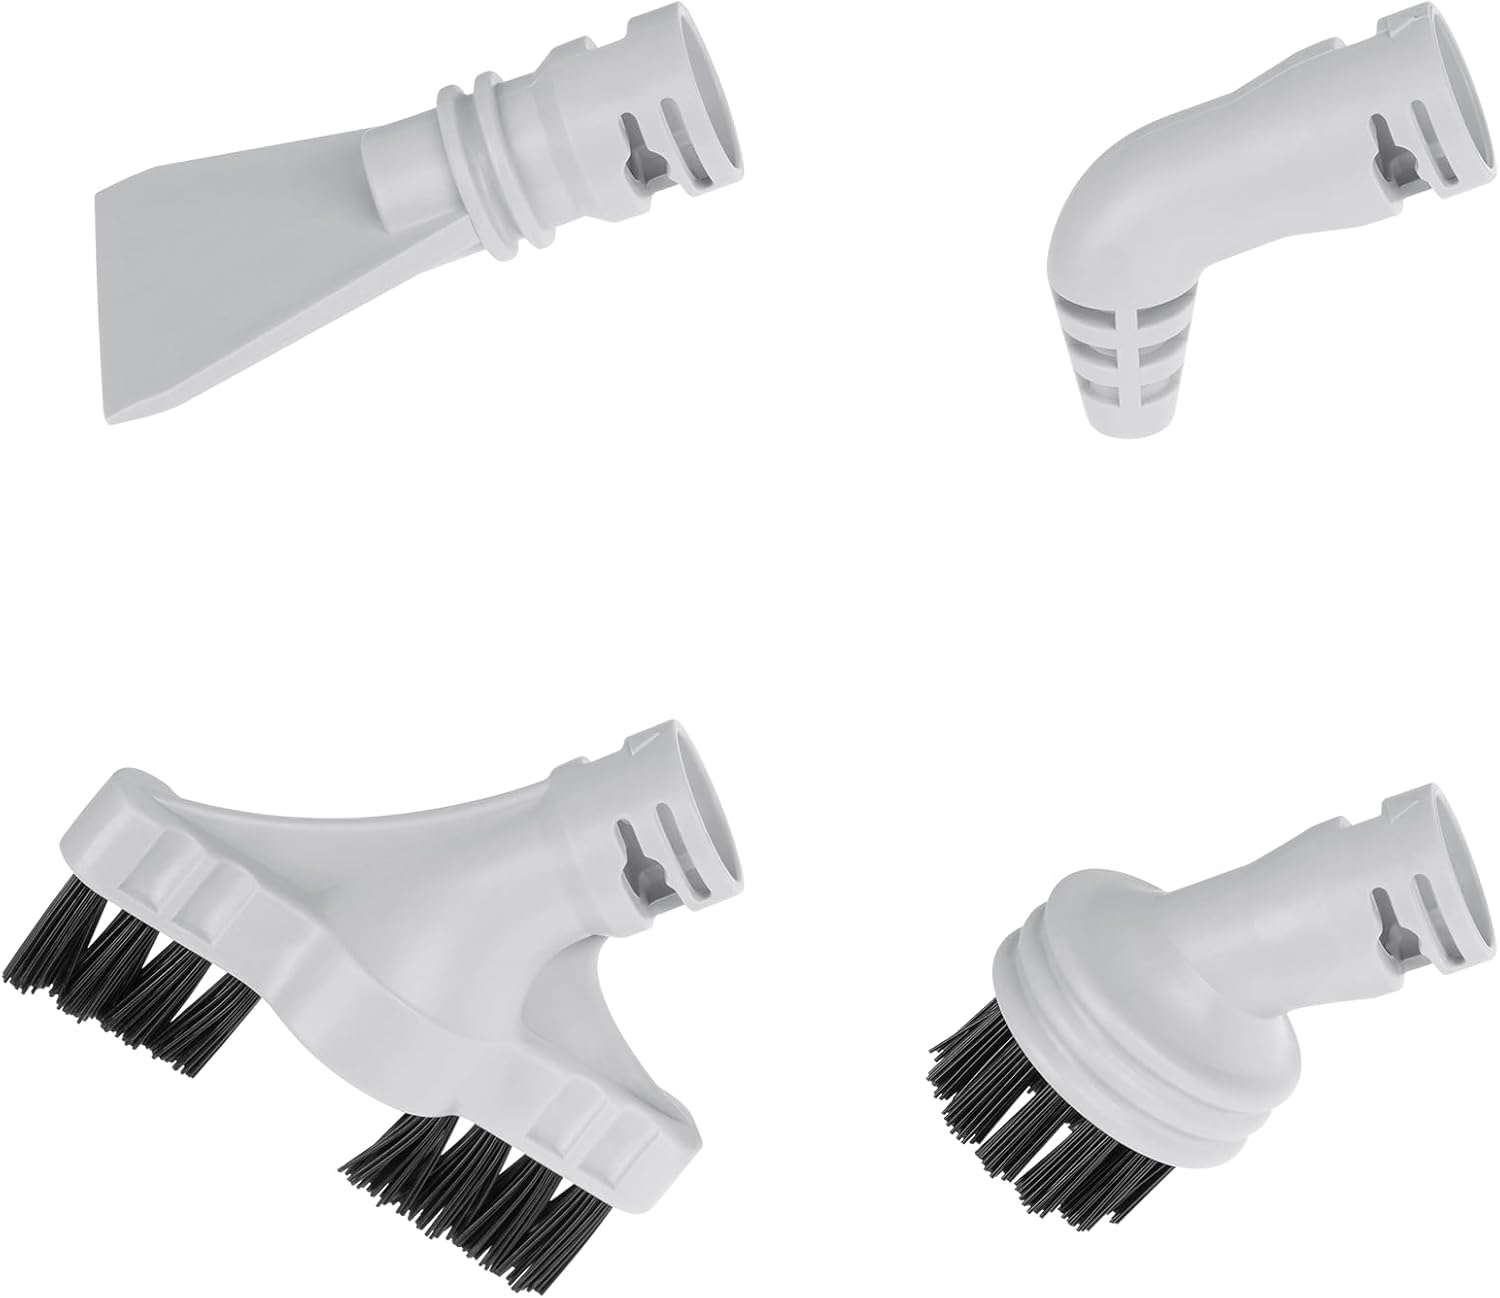
Figura 2.5: Included accessories: round brush, joint accessory, slot nozzle, scraper.

Figura 2.6: Measuring cup for water and adapter for accessories.
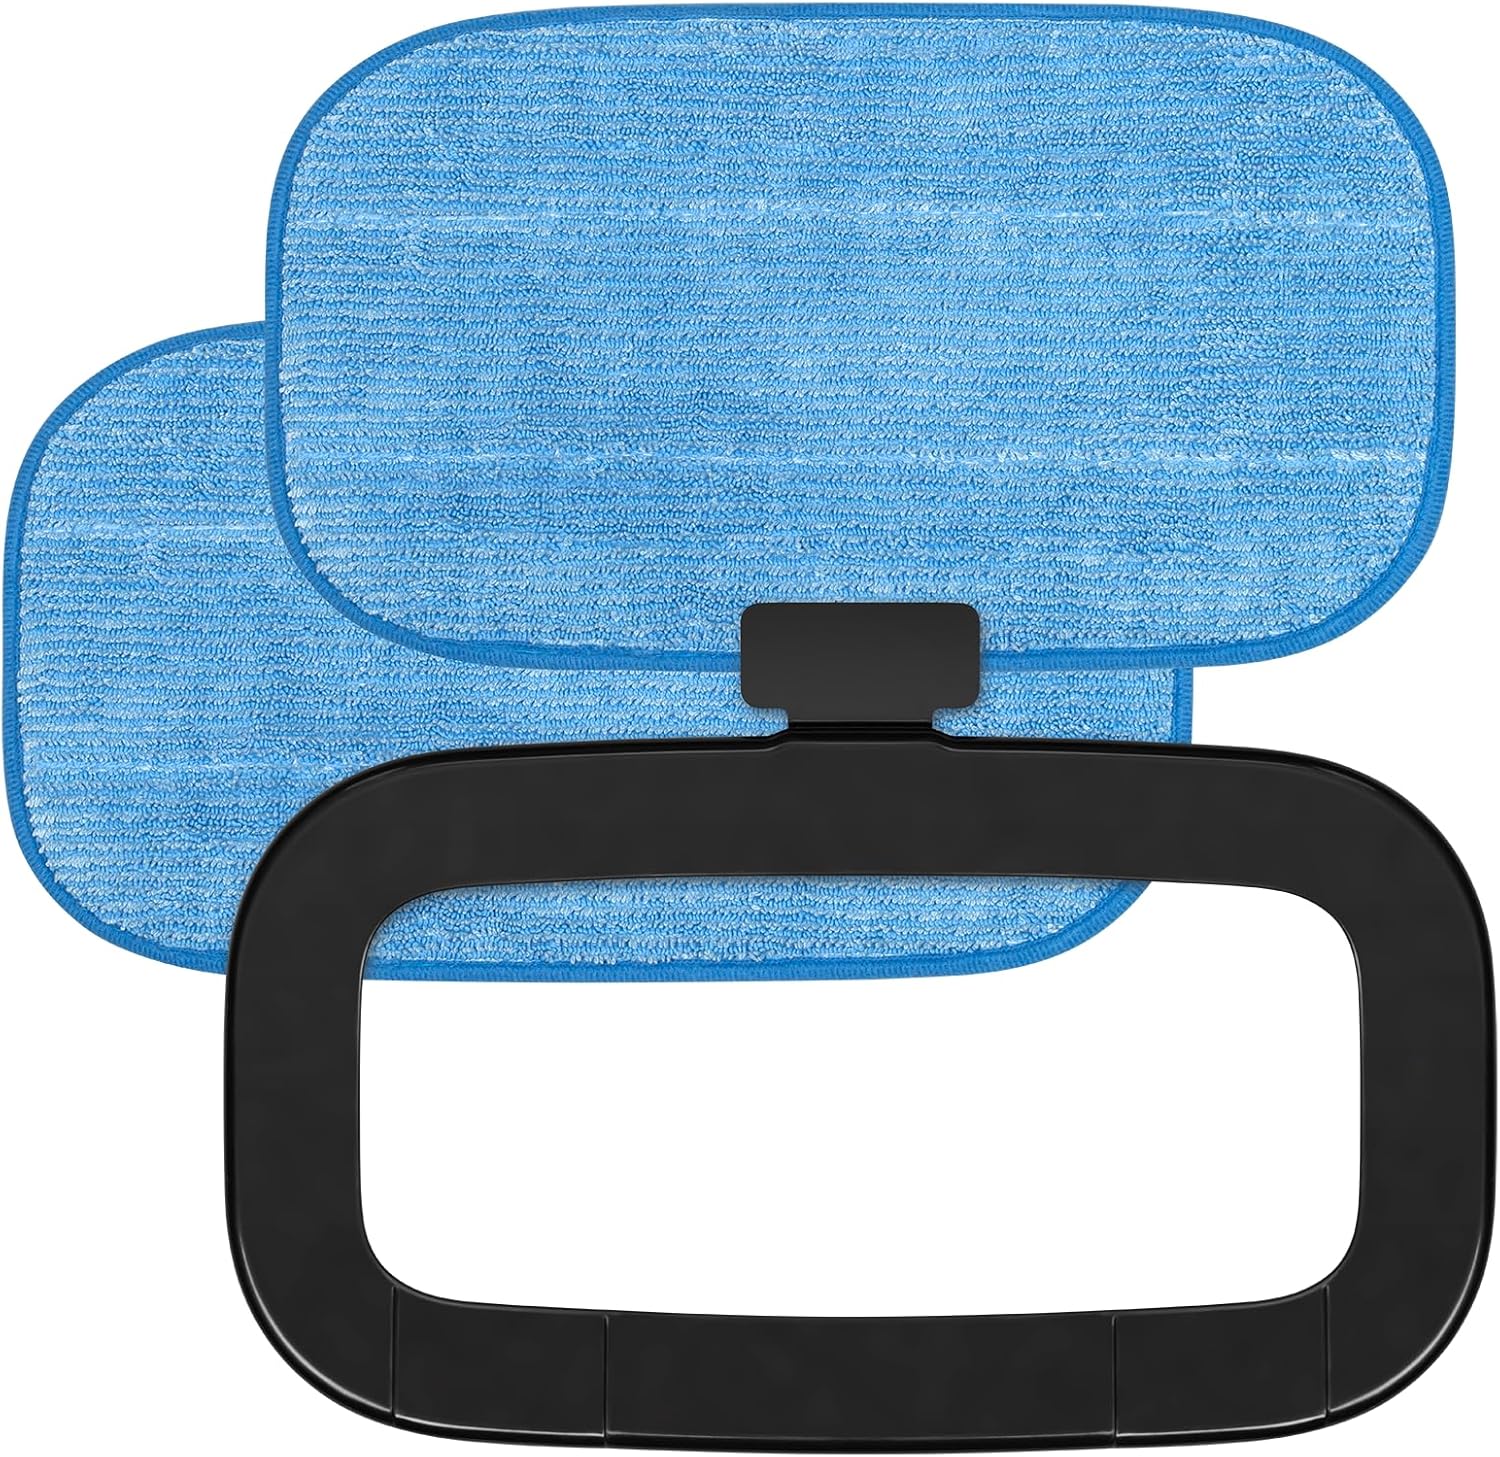
Figura 2.7: Two sponge cloths (mop pads) and the carpet glider frame.
Componente incluse:
- Unitate principală de mop cu abur (cu abur portabil detașabil)
- Asamblarea mânerului
- 2 x Sponge Cloths (Mop Pads)
- Cupa de masurat
- Adaptor pentru accesorii
- Pensulă rotundă
- Joint Accessory
- Duză cu fantă
- Răzuitor
- Carpet Glider Frame
3. Configurare și asamblare
- Asamblați mânerul: Insert the handle assembly into the main steam mop unit until it clicks securely into place.
- Atașați laveta de curățare: Place one of the sponge cloths onto the bottom of the mop head, ensuring it is securely attached.
- Umpleți rezervorul de apă:
- Deschideți capacul rezervorului de apă.
- Using the provided measuring cup, fill the water tank with up to 380 ml of distilled or demineralized water. Do not overfill.
- Închideți bine capacul rezervorului de apă.
- Optional: Attach Carpet Glider: For refreshing carpets, place the mop head with the attached cleaning pad into the carpet glider frame.
4. Instrucțiuni de utilizare
4.1. Utilizarea ca mop cu abur
- Ensure the water tank is filled and a cleaning pad is attached.
- Plug the power cord into a grounded electrical outlet (220-240 V AC, 50 Hz).
- The steam mop will begin heating. The indicator light will illuminate, signaling preparation. The device is ready in approximately 25 seconds.
- Select the desired steam level (3 levels available) using the control button.
- Begin cleaning by moving the mop head slowly and steadily over the floor surface. The swivel head allows for easy maneuverability.
- For carpet refreshing, ensure the carpet glider is attached and move the mop over the carpet.
- When finished, unplug the appliance and allow it to cool before emptying any remaining water and cleaning.
4.2. Using as a Handheld Steam Cleaner
- Deconectați mopul cu abur și asigurați-vă că s-a răcit.
- Press the release button to detach the handheld steam unit from the main body (refer to Figure 2.4).
- Attach the desired accessory (e.g., round brush, slot nozzle, joint accessory, scraper) to the handheld unit using the accessory adapter if needed.
- Fill the water tank if necessary (follow instructions in Section 3.3).
- Plug in the handheld unit. Wait for the indicator light to show it's ready (approx. 25 seconds).
- Direct the steam towards the surface to be cleaned. Use caution as steam is hot.
- After use, unplug the unit and allow it to cool before detaching accessories and storing.
5. Întreținere
Regular maintenance ensures optimal performance and extends the life of your steam mop.
- Tampoane de curățare: The sponge cloths can be machine washed with mild detergent. Do not use bleach or fabric softeners. Air dry only. Replace pads when they become worn or lose their cleaning effectiveness.
- Golirea rezervorului de apă: After each use, unplug the appliance and allow it to cool. Empty any remaining water from the tank.
- Curățarea exteriorului: Wipe the exterior of the steam mop with a damp pânză. Nu utilizați substanțe chimice dure sau produse de curățare abrazive.
- Detartraj: If you notice a decrease in steam production or mineral residue, descaling may be necessary.
- Amestecați o soluție de 1 parte oțet alb cu 2 părți apă.
- Se toarnă soluția în rezervorul de apă.
- Plug in the unit and allow it to heat up.
- Run the unit until half of the solution is used, then unplug and let it sit for 30 minutes.
- Plug it back in and run until the tank is empty.
- Rinse the tank thoroughly with fresh water and run two full tanks of fresh water through the unit to flush out any vinegar residue.
- Depozitare: Store the steam mop in a cool, dry place. Wrap the power cord around the designated cord wraps on the handle (refer to Figure 2.2).
6. Depanare
| Problemă | Cauza posibila | Soluţie |
|---|---|---|
| No steam or low steam. |
|
|
| Curge apă din capul mopului. |
|
|
| Mopul nu alunecă ușor. |
|
|
7. Specificații
| Numărul de model | TSA5051 |
| Putere | 1500 W |
| Capacitatea rezervorului de apă | 380 ml |
| Steam Ejection Rate | 21 / 28 ml/min (3 levels) |
| Timp de încălzire | Aproximativ. 25 de secunde |
| Alimentare electrică | 220-240 V AC, 50 Hz |
| Lungimea cablului de alimentare | 5 m |
| Greutate | 3.0 kg (product), 4 kg (package) |
| Dimensiuni (asamblate) | 30 x 25 x 110 cm |
8. Garanție și asistență
For warranty information and customer support, please refer to the warranty card included with your product or visit the official Teesa webPăstrați dovada achiziției pentru orice reclamații în garanție.
For further assistance, you may contact Teesa customer service through their official channels.