
1. Introducere
This manual provides detailed instructions for the safe and proper installation, operation, and maintenance of your USX STAR SAS202 Ceiling TV Mount. Please read this manual thoroughly before installation and retain it for future reference. This mount is designed to securely hold televisions ranging from 26 to 65 inches, with a maximum weight capacity of 110 lbs, and VESA patterns from 50x50mm to 400x400mm.
2. Informații de siguranță
- AVERTIZARE: Do not mount this product on drywall alone. It must be mounted to a solid structural support such as wood studs, concrete, or brick.
- Ensure the mounting surface can safely support the combined weight of the mount and your television.
- Always use the provided hardware. If you are unsure about any part of the installation, consult a qualified professional.
- Țineți copiii și animalele de companie departe în timpul instalării.
- Nu depășiți capacitatea maximă de greutate de 50 kg.
- Verify your TV's VESA pattern and screen size are compatible with the mount before proceeding.
3. Conținutul pachetului
Please check to ensure all components are present and undamaged. If any parts are missing or defective, contact customer support immediately.
- Ansamblu plăci de tavan
- Stâlp reglabil
- TV Bracket Plate
- Vertical TV Brackets (2x)
- Mounting Hardware Kit (screws, washers, spacers, anchors for various ceiling types)
- Cheie Allen
4. Specificații
| Caracteristică | Caietul de sarcini |
|---|---|
| Numărul de model | SAS202 |
| Compatibilitate cu dimensiunea ecranului | 26" până la 65" |
| Capacitate de greutate | Până la 110 lbs (50 kg) |
| Compatibilitate VESA | Min. 50x50mm, Max. 400x400mm |
| Reglarea înălțimii | 21.14" to 29.02" (5 height settings) |
| Unghi de înclinare | Up to 15 degrees down |
| Unghi pivotant | 360 degrees (full rotation) |
| Tavan pivotant | Up to 90 degrees for sloped ceilings |
| Material | Metal |
| Culoare | Negru |
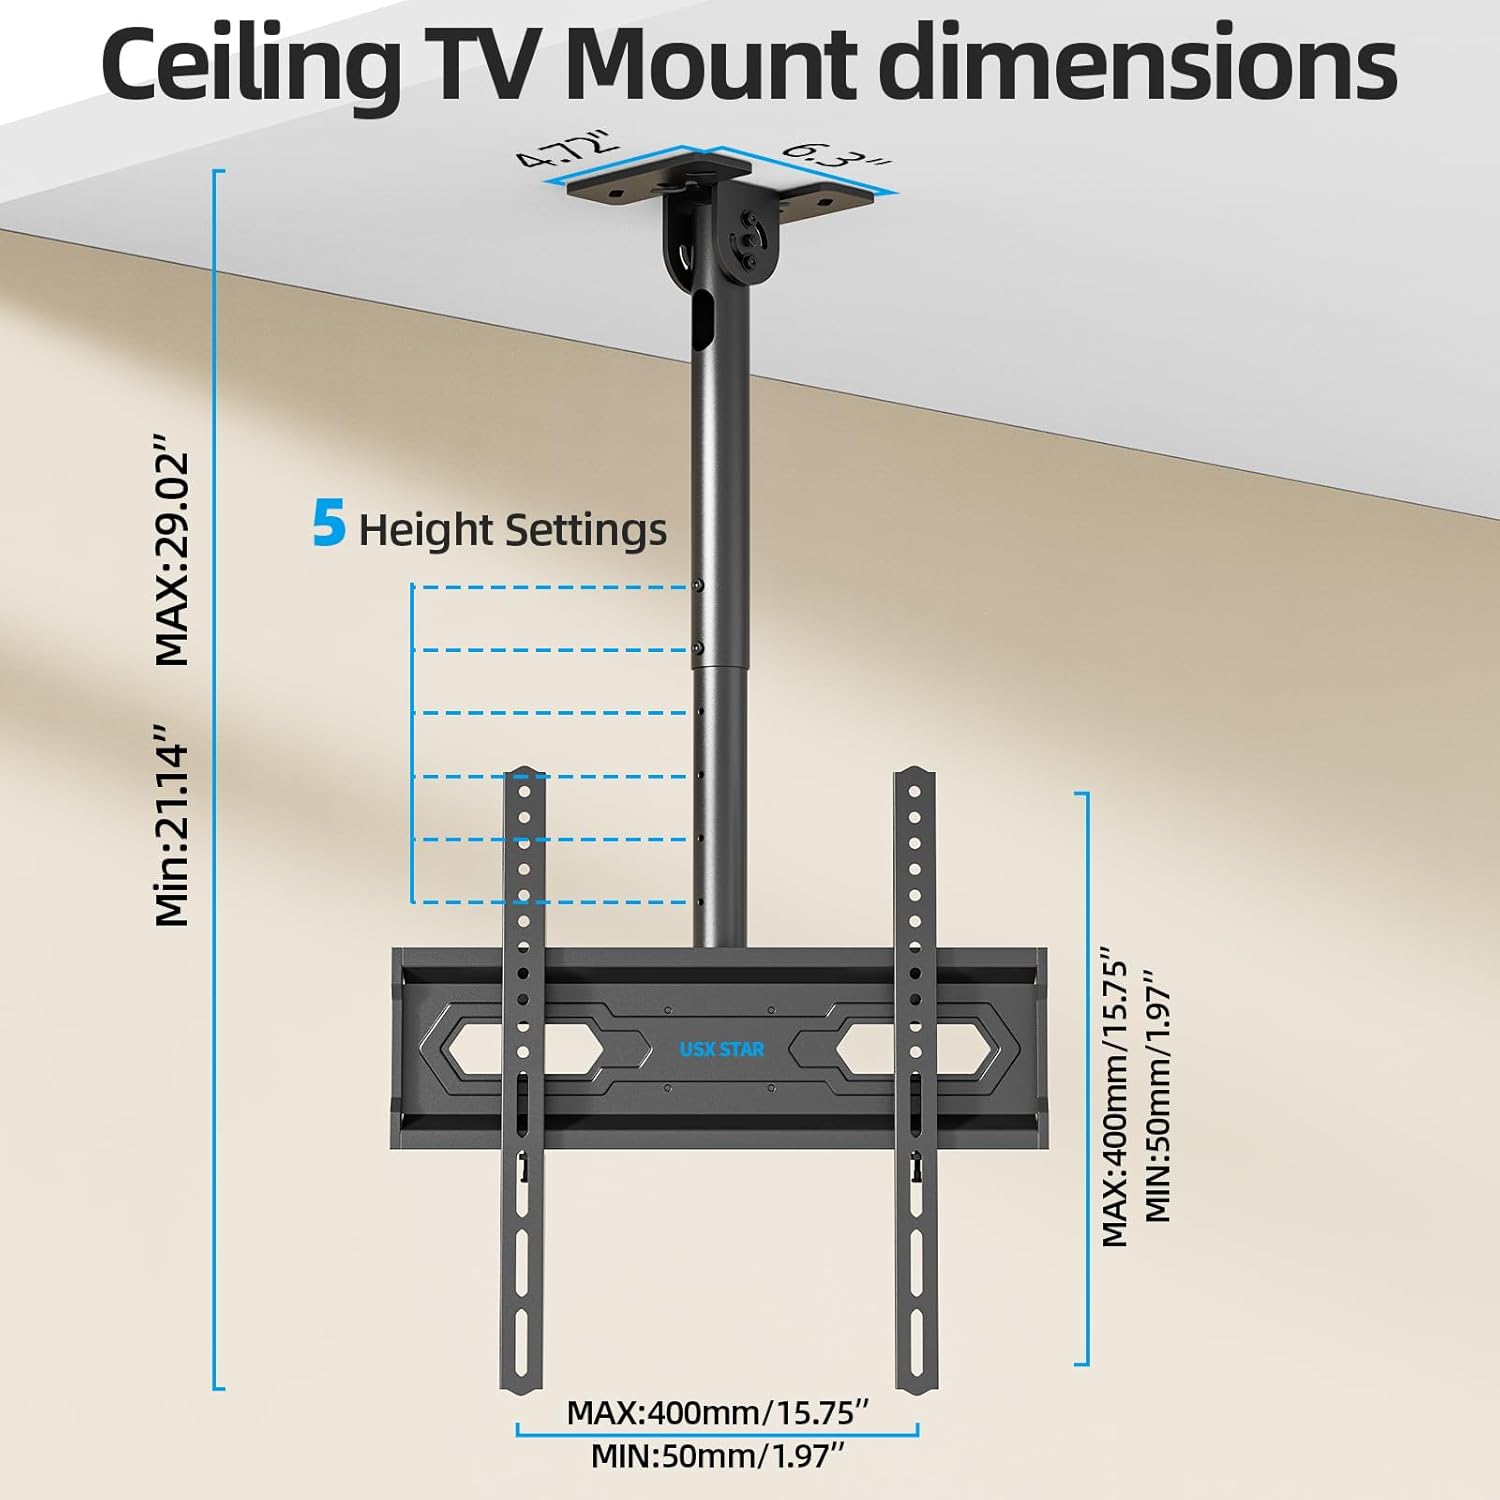
Image: Wide Compatibility Overview
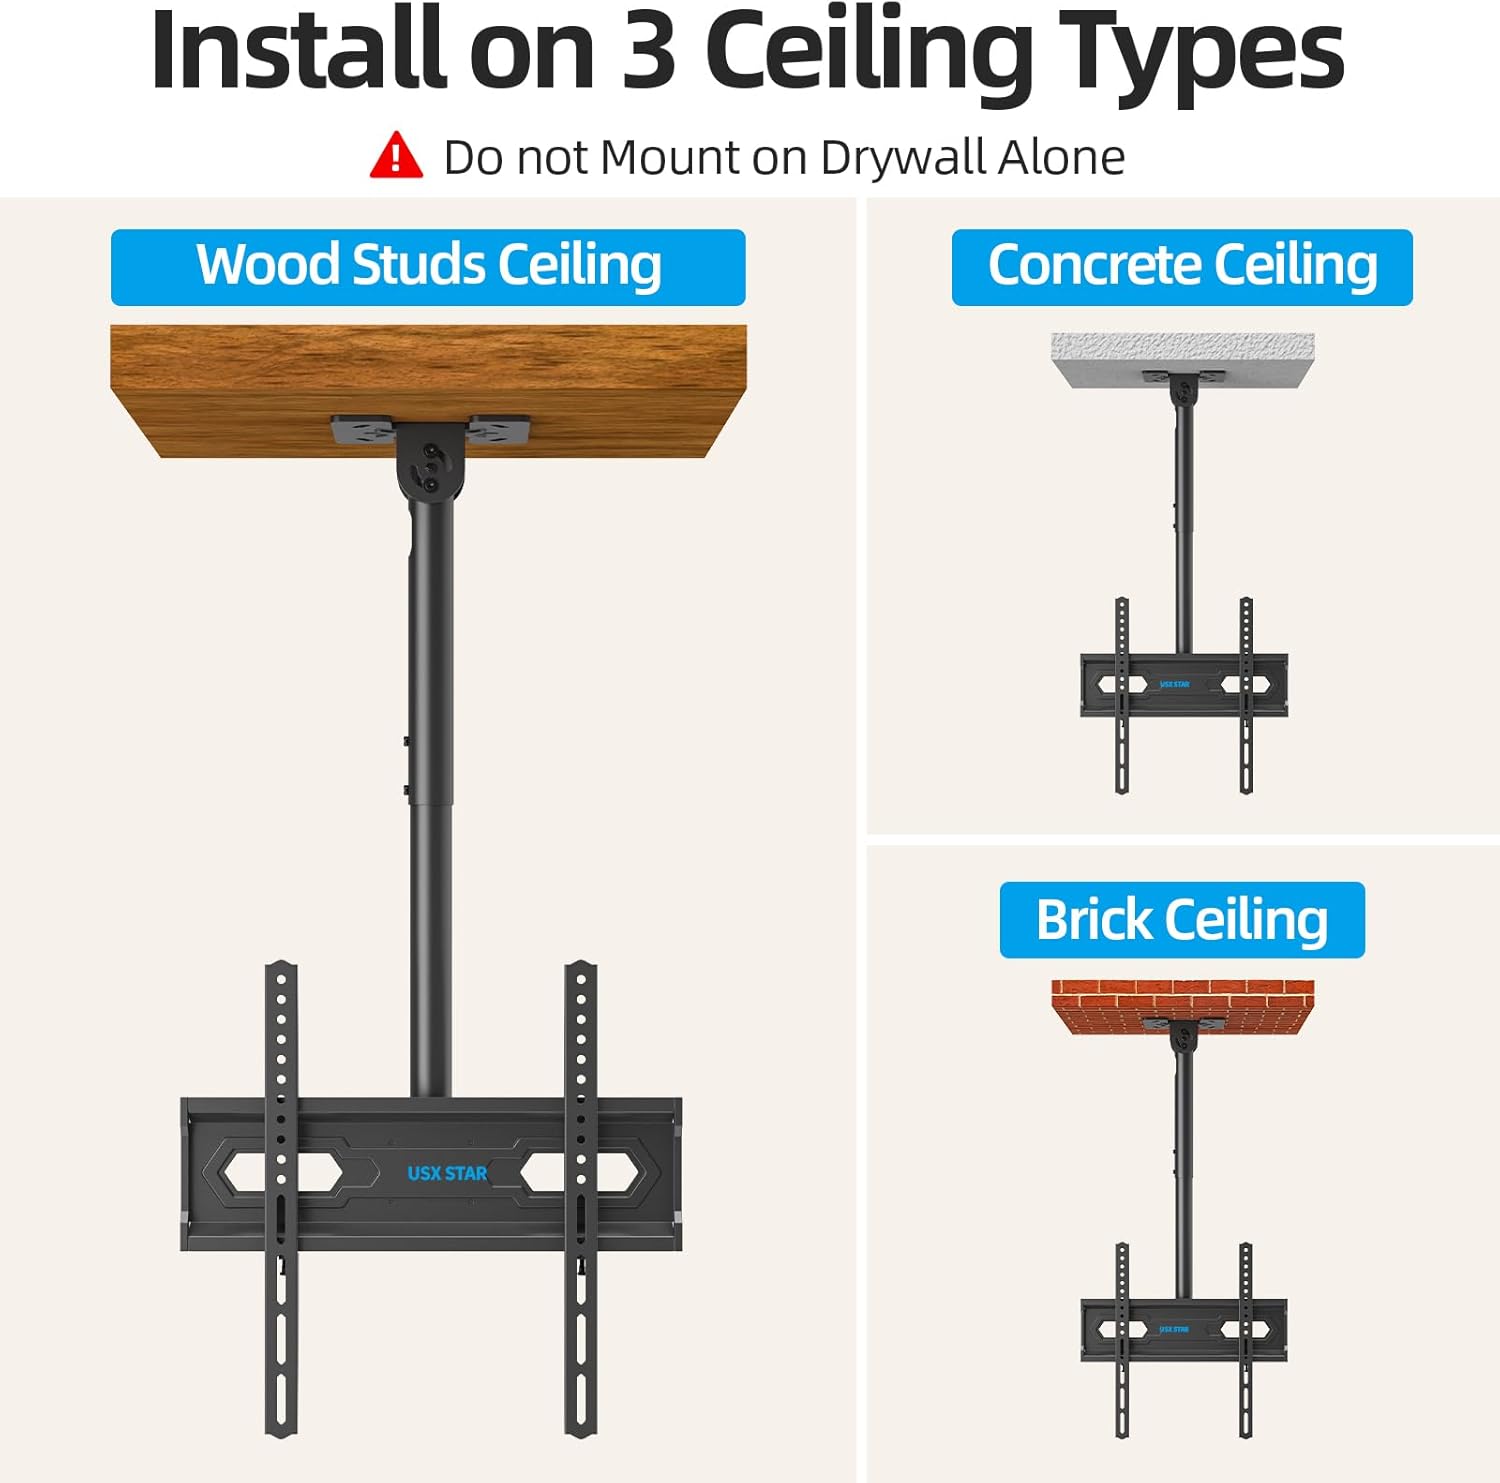
Image: Ceiling TV Mount Dimensions
5. Configurare și instalare
5.1 Lista de verificare înainte de instalare
- Verify your TV's screen size (26-65 inches), weight (under 110 lbs), and VESA mounting pattern (50x50mm to 400x400mm).
- Identify your ceiling type: wood studs, concrete, or brick. Do not install on drywall alone.
- Gather necessary tools: drill, stud finder (for wood studs), level, screwdriver, pencil, measuring tape.
5.2 Montarea plăcii de tavan
- Determine the desired location for your TV mount. Use a stud finder to locate wood studs if applicable.
- Position the ceiling plate against the ceiling and mark the drill holes. Ensure it is level.
- Drill pilot holes according to the marked positions and your ceiling type (wood, concrete, or brick).
- Secure the ceiling plate using the appropriate screws and anchors from the hardware kit. Ensure it is firmly attached.
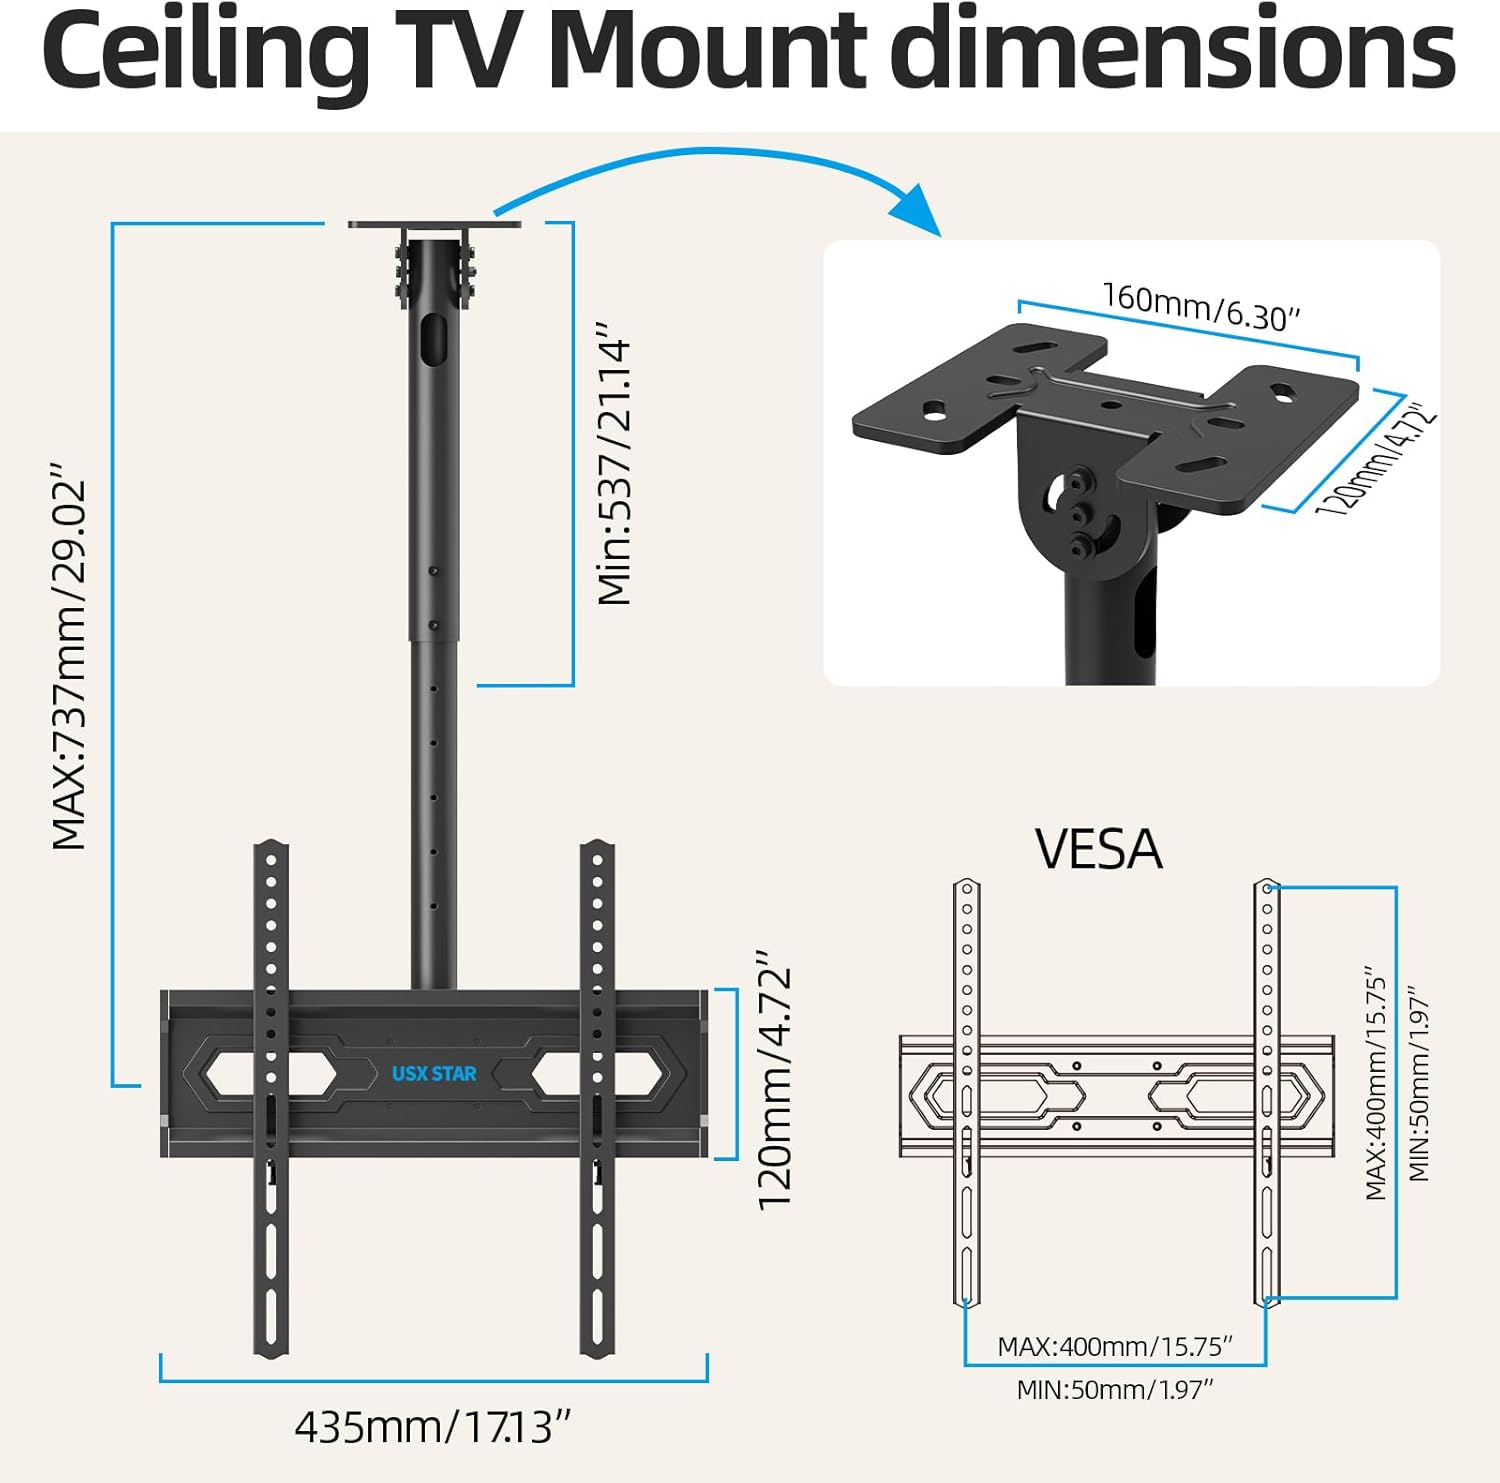
Image: Installation on Various Ceiling Types
5.3 Attaching TV Brackets
- Lay your TV face down on a soft, clean surface to prevent scratches.
- Attach the two vertical TV brackets to the back of your television using the appropriate screws, washers, and spacers from the hardware kit. Ensure the brackets are centered and securely fastened to the TV's VESA holes.
5.4 Agățarea televizorului
- With assistance, carefully lift the television and hook the vertical TV brackets onto the TV bracket plate of the ceiling mount.
- Secure the TV to the mount by tightening the safety screws or locking mechanisms on the vertical brackets.
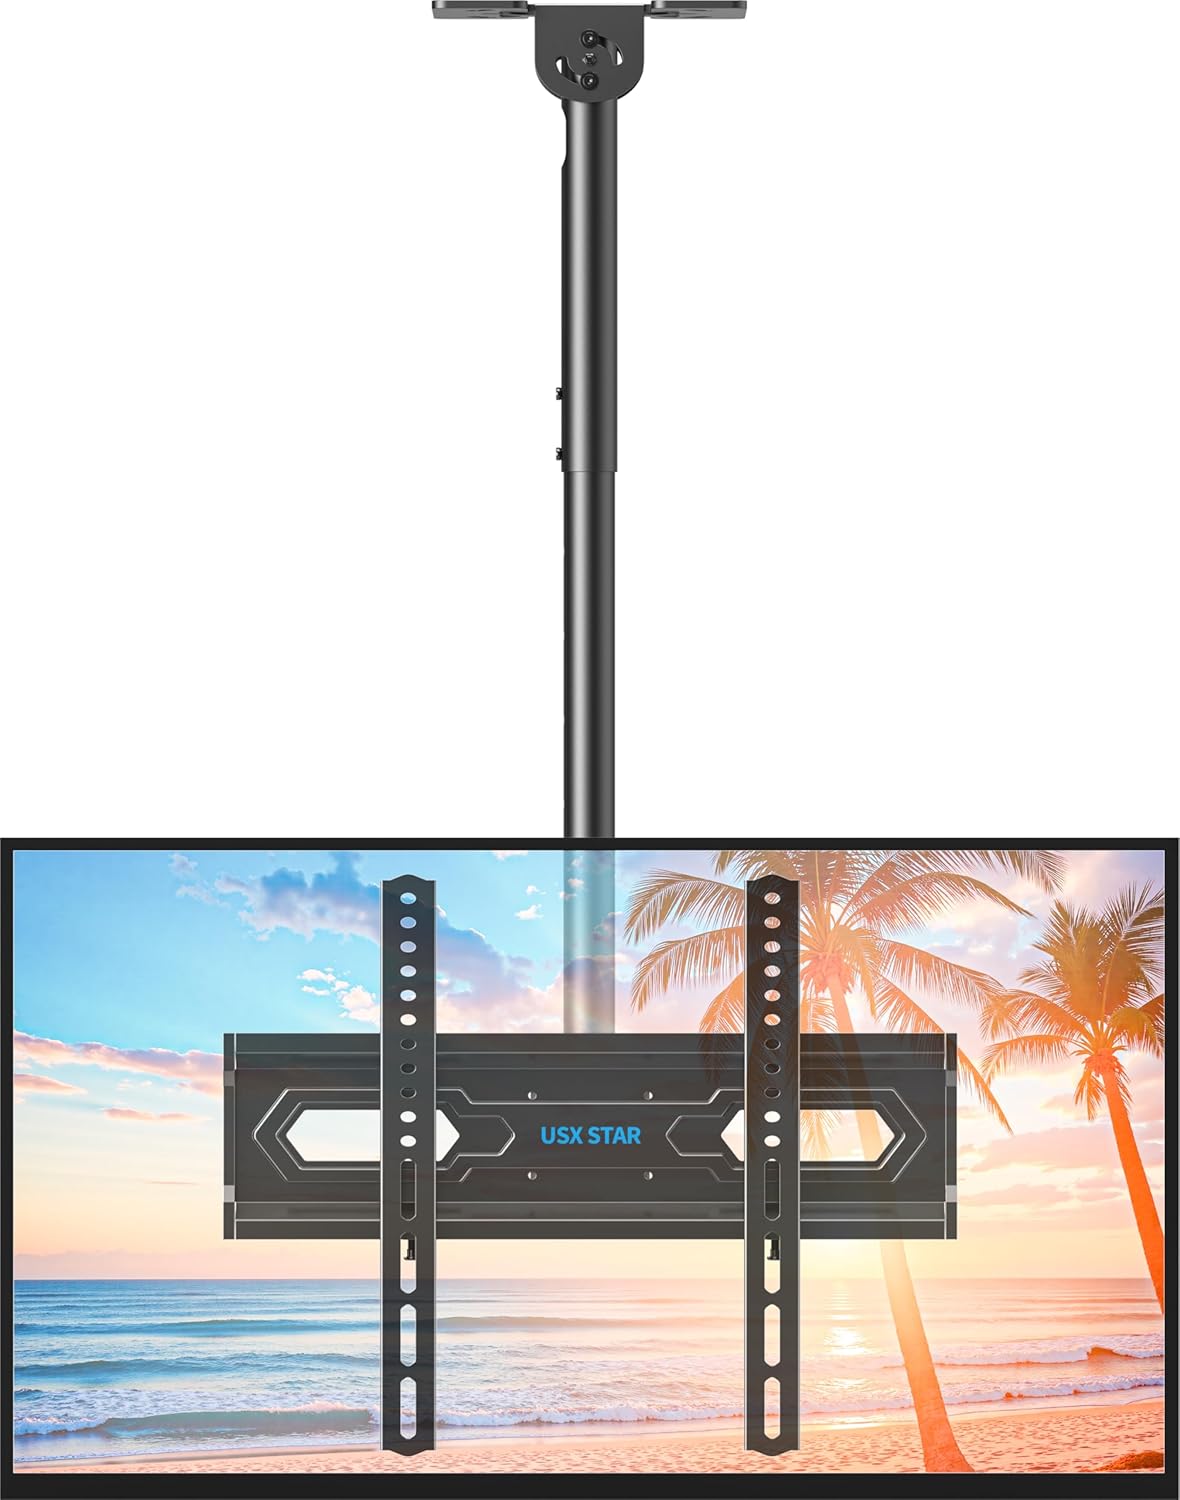
Image: Assembled Ceiling TV Mount with Television
6. Funcționare și reglaje
The USX STAR SAS202 mount offers multiple adjustment options for optimal viewing.
6.1 Reglarea înălțimii
- The mount features 5 height settings, allowing adjustment from 21.14 inches to 29.02 inches.
- To adjust the height, loosen the locking mechanism on the pole, slide the TV to the desired height, and re-tighten securely.
6.2 Reglarea înclinării
- The TV can be tilted down by up to 15 degrees to reduce glare and achieve a comfortable viewunghiul de ing.
- Use the provided Allen key to loosen the tilt adjustment screws, set the desired tilt, and then re-tighten the screws firmly.
6.3 Rotație și pivotare
- The mount allows for a full 360-degree rotation of the TV, enabling viewing from various positions in the room.
- Additionally, the base of the mount can swivel up to 90 degrees, making it suitable for installation on angled or sloped ceilings.
- To adjust swivel, loosen the handle on the mount, rotate the TV to the desired angle, and re-tighten the handle.
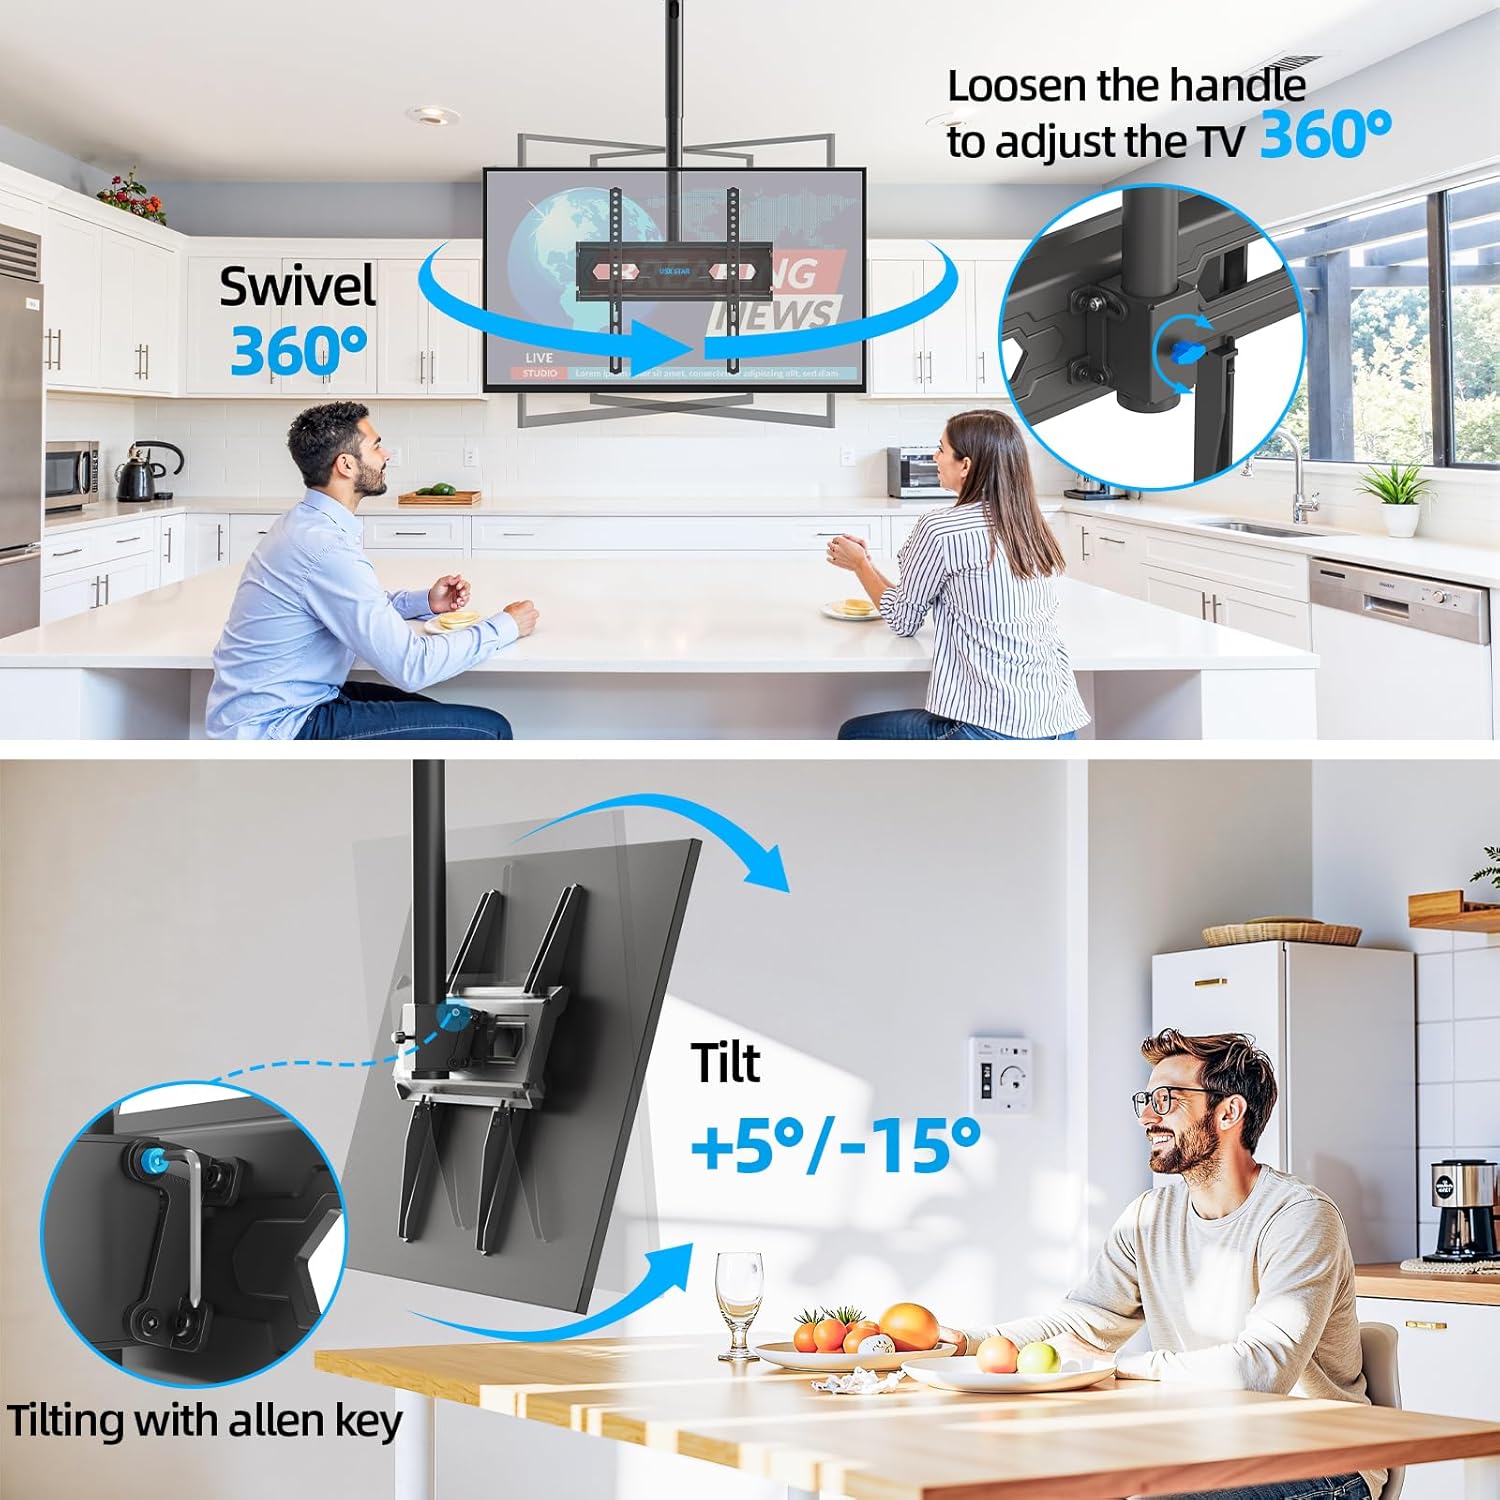
Image: Swivel and Tilt Adjustments

Image: Leveling and Sloped Ceiling Adaptability
7. Întreținere
- Verificați periodic toate șuruburile și conexiunile pentru a vă asigura că rămân strânse și fixate.
- Curățați suportul cu o cârpă moale și uscată. Evitați utilizarea de produse de curățare abrazive sau solvenți.
- Ensure cables are properly managed through the cable management holes to prevent strain or damage.
8. Depanare
- Televizorul nu este orizontal: Check the leveling screws on the TV bracket plate and adjust as needed. Ensure the ceiling plate was installed level.
- Montura se simte slăbită: Re-check all mounting screws on the ceiling plate and TV brackets. Ensure they are tightened securely. Do not overtighten.
- Dificultate la reglarea înclinării/rotației: Loosen the adjustment screws/handles slightly before attempting to move the TV, then re-tighten once the desired position is achieved.
9. Garanție și asistență
USX STAR products are backed by a warranty. For specific warranty details, product support, or assistance with installation, please refer to the warranty card included with your product or visit the official USX STAR website. Our US-based customer service team is available to provide quick responses and support tailored to your needs.
Thank you for choosing USX STAR.