
1. Introducere
This manual provides essential information for the installation, operation, maintenance, and troubleshooting of the Extreme Networks Summit X460-G2-48T-10GE4 Ethernet Switch. Please read this manual thoroughly before operating the device to ensure proper functionality and safety.
The Extreme Networks Summit X460-G2-48T-10GE4 is a high-performance, scalable Gigabit Ethernet switch designed for enterprise and data center environments, offering 48 10/100/1000BASE-T ports and 4 10 Gigabit Ethernet SFP+ ports.
2. Informații de siguranță
AVERTISMENT: PRODUS LASER CLASA 1
CAUTION: Invisible laser radiation when fiber optic connectors are unplugged. Avoid direct exposure to beam. Use of optical modules provided by Extreme for use in this unit comply with 21 CFR 1040.10.
Always ensure proper ventilation. All System Interface Devices (SIDs) must be filled with Power Supply (PS) blanks or I/O modules to maintain proper cooling and Electromagnetic Compatibility (EMC) compliance.
The device operates with an AC power input of 100-240 V~ at 50-60 Hz, with a maximum current of 1.25A per power supply unit.
For detailed safety guidelines, refer to the official Extreme Networks safety documentation.

Image: Product label on the underside of the switch, displaying safety warnings, regulatory compliance marks (UL, CE, EAC, ANATEL), and product identification details including Part No. 16702 and Serial No. 1523N-47832.
3. Conținutul pachetului
Verificați dacă pachetul dvs. conține următoarele articole:
- Extreme Networks Summit X460-G2-48T-10GE4 Ethernet Switch
- Cablu(e) de alimentare
- Console Cable (typically RJ-45 to DB-9)
- Rackmount Ears/Brackets
- Documentation (Quick Reference Guide, Safety Information)
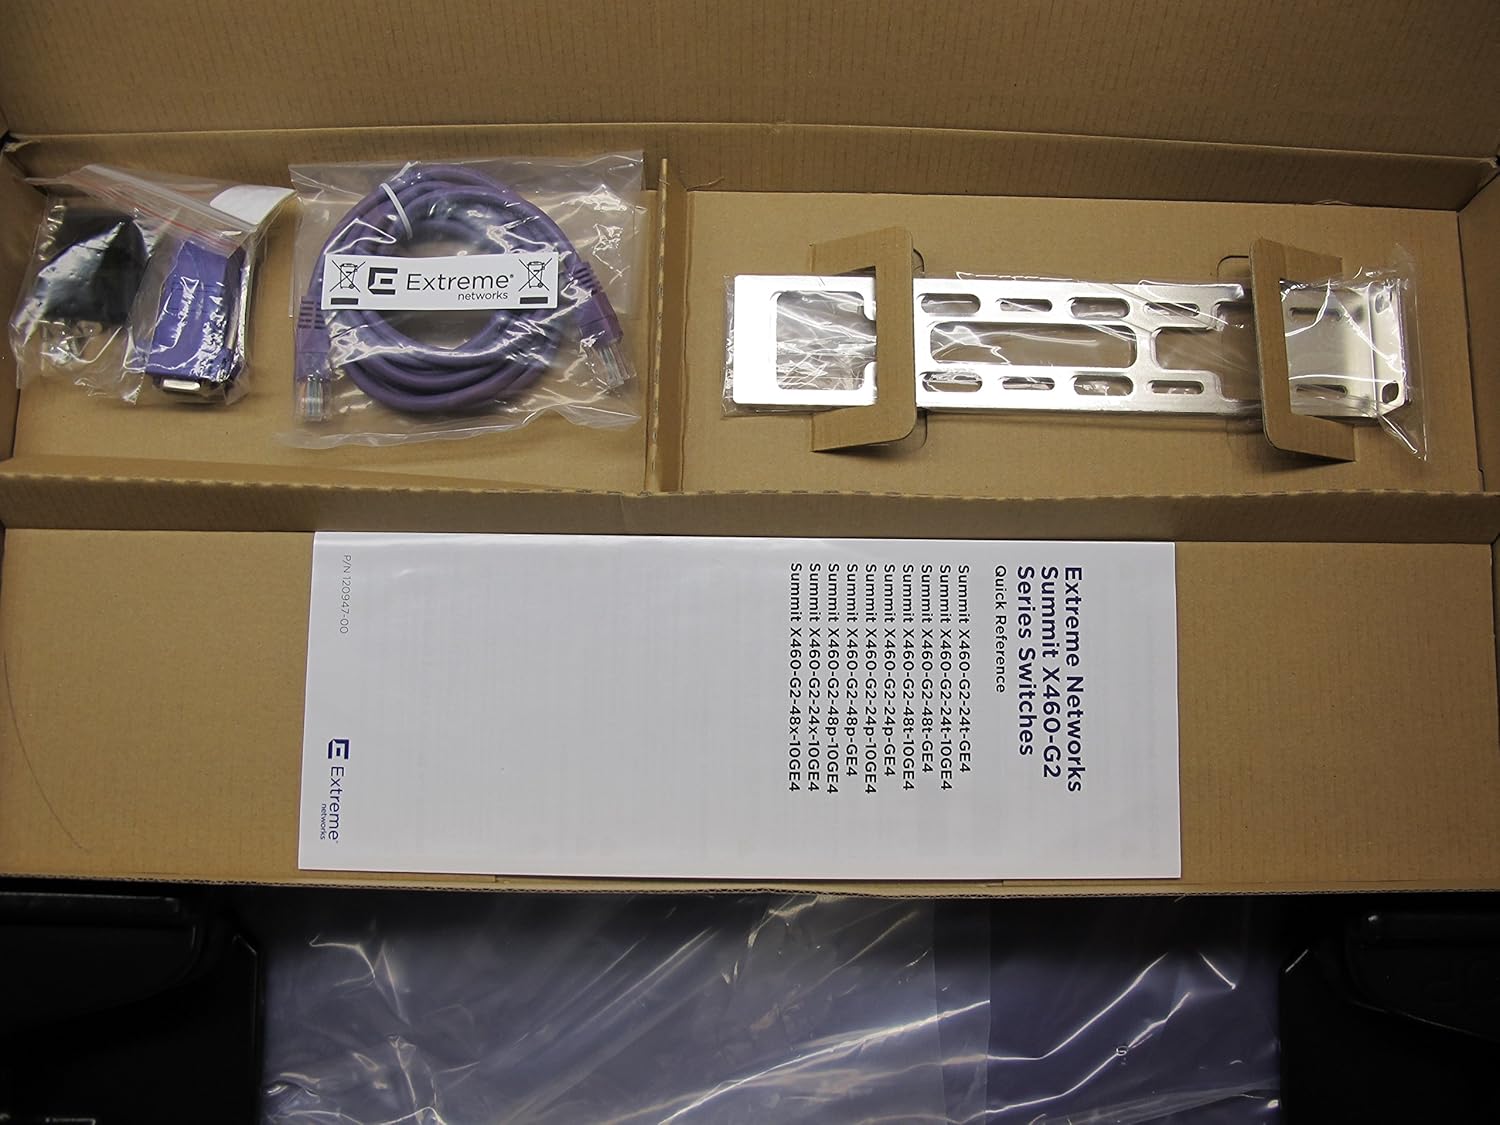
Image: Unboxed components of the switch, showing the main unit, a purple console cable, a power cable, rackmount brackets, and a Quick Reference Guide for Summit X460-G2 Series Switches.
4. Descriere fizică
4.1 Panoul frontal
The front panel of the Summit X460-G2-48T-10GE4 switch features 48 10/100/1000BASE-T Ethernet ports for standard network connections and 4 SFP+ ports for high-speed 10 Gigabit Ethernet uplinks or stacking. Status LEDs are present for each port and for system status.

Image: Front perspective of the Extreme Networks Summit X460-G2-48T-10GE4 switch, highlighting the array of 48 copper Gigabit Ethernet ports and the four SFP+ transceiver slots on the right side.
4.2 Panoul din spate
The rear panel includes bays for redundant power supplies, ensuring high availability. It also typically houses fan modules and a console port for out-of-band management.

Imagine: Spate view of the Extreme Networks Summit X460-G2-48T-10GE4 switch, displaying two empty bays designed for hot-swappable power supply units.
5. Configurare
5.1 Montarea pe rack
- Attach the provided rackmount ears to the sides of the switch using the screws included in the kit.
- Secure the switch into a standard 19-inch equipment rack using appropriate rack screws. Ensure the switch is level and adequately supported.
5.2 Conexiune la alimentare
- Insert the power supply units (PSUs) into the bays on the rear of the switch until they click into place.
- Connect the power cord(s) to the PSU(s) and then to a grounded AC power outlet.
- Asigurați-vă că sursa de alimentare respectă tensiunea specificatătage and current requirements (100-240 V~, 50-60 Hz, 1.25A max per PS).
5.3 Conexiune de rețea
- Connect Ethernet cables from your network devices (computers, servers, other switches) to the 10/100/1000BASE-T ports on the front panel.
- For high-speed uplinks or stacking, insert compatible SFP+ transceivers into the 10 Gigabit Ethernet SFP+ ports and connect fiber optic cables.
5.4 Initial Configuration (Console Access)
- Connect the console cable from your management workstation to the console port on the switch.
- Open a terminal emulation program (e.g., PuTTY, Tera Term) and configure the serial port settings: 9600 baud, 8 data bits, no parity, 1 stop bit, no flow control.
- Power on the switch. The boot process will display messages in the terminal.
- Follow the on-screen prompts or refer to the Extreme Networks documentation for initial configuration, including IP address assignment and basic network settings.
6. Instrucțiuni de utilizare
6.1 Pornire/Oprire
- Pornire: Once connected to power, the switch will automatically power on. Observe the system status LEDs for boot sequence.
- Oprire: To power off, disconnect the power cords from the AC outlets. For controlled shutdown, use the command-line interface (CLI) to save configurations before disconnecting power.
6.2 Indicatori LED
The switch features various LED indicators to provide status information:
- LED de stare a sistemului: Indicates overall device health (e.g., green for normal operation, amber for warning, red for critical error).
- LED-uri de stare portului: Each network port has LEDs indicating link status (on for link, off for no link) and activity (blinking for data transmission).
- LED-uri ale sursei de alimentare: Indicate the status of each installed power supply unit.
6.3 Basic Network Management
After initial setup, the switch can be managed via:
- Interfață linie de comandă (CLI): Accessible via console port, Telnet, or SSH for detailed configuration and monitoring.
- WebInterfață de gestionare bazată pe: If enabled, accessible via a web browser using the switch's IP address.
- SNMP: For integration with network management systems.
Refer to the Extreme Networks EXOS User Guide for comprehensive CLI commands and management procedures.
7. Întreținere
7.1 Curățare
Periodically clean the exterior of the switch with a soft, dry cloth. Ensure ventilation openings are free from dust and debris to prevent overheating. Do not use liquid cleaners or aerosols directly on the device.
7.2 de actualizări de firmware
Regularly check the Extreme Networks support website for the latest firmware updates. Keeping the firmware up-to-date ensures optimal performance, security, and access to new features. Follow the provided instructions carefully when performing firmware upgrades.
7.3 Considerații de mediu
Ensure the switch operates within its specified environmental ranges for temperature and humidity. Maintain proper airflow around the device and within the rack to prevent thermal issues.
8. Depanare
8.1 Fara putere
- Verify that the power cords are securely connected to both the switch's power supply units and the AC outlets.
- Check the power source and ensure the outlet is functional.
- Confirm that the power supply units are fully seated in their bays.
8.2 Fără legătură pe port
- Ensure the Ethernet or fiber optic cable is properly connected at both ends.
- Check the cable for damage. Try a different cable.
- Verificați dacă dispozitivul conectat este pornit și funcționează corect.
- Verificați configurația portului de pe switch (de exemplu, viteza, setările duplex).
8.3 Unable to Access Management Interface
- Verify the switch's IP address and your workstation's network settings.
- Ensure there is network connectivity between your workstation and the switch.
- Check firewall settings on your workstation or network.
- If using the console, ensure correct serial port settings.
For more advanced troubleshooting, consult the Extreme Networks support documentation or contact technical support.
9. Specificații
| Model | Summit X460-G2-48T-10GE4 |
| Numărul piesei | 16702 |
| Număr de serie | 1523N-47832 |
| Marca | Rețele extreme |
| Producător | Extreme Network |
| Numărul de porturi | 48 x 10/100/1000BASE-T, 4 x 10 Gigabit Ethernet SFP+ |
| Tip de interfață | RJ45, SFP+ |
| Dimensiunile produsului | 17.36 x 17.01 x 1.73 inchi (44.09 x 43.19 x 4.39 cm) |
| Greutatea articolului | 13.2 lire sterline (6 kilograme) |
| Intrare de putere | 100-240 V~, 50-60 Hz, 1.25A max per PS |
| UPC / GTIN | 786513729804 |
10. Garanție și asistență
For information regarding product warranty, technical support, and service agreements, please refer to the official Extreme Networks website or contact your authorized Extreme Networks reseller.
Extreme Networks Support: https://www.extremenetworks.com/support/
Ensure you have your product's serial number (e.g., 1523N-47832) available when contacting support.