
1. Informații importante privind siguranța
Read this entire manual before installing or using the Kikkaboo i-Tour i-Size Car Seat. Failure to follow these instructions can result in serious injury or death to your child.
- Always secure your child in the car seat using the 5-point harness system.
- Ensure the car seat is correctly installed using the ISOFIX system and Top Tether (where applicable) according to the vehicle's manual and these instructions.
- The car seat is designed for children with a height of 40 to 150 cm.
- Rear-facing installation is mandatory for children from 40 to 105 cm.
- Forward-facing installation is suitable for children from 76 to 150 cm.
- Nu lăsați niciodată copilul nesupravegheat în scaunul auto.
- Do not modify the car seat in any way.
- In case of an accident, the car seat must be replaced, even if there is no visible damage.
2. Produs terminatview
The Kikkaboo i-Tour i-Size Car Seat provides a safe and comfortable travel solution for children from birth up to approximately 12 years old (40-150 cm height). Key features include a 360-degree rotatable base, ISOFIX installation, Top Tether, Side Protection System (SPS), and multiple recline positions.
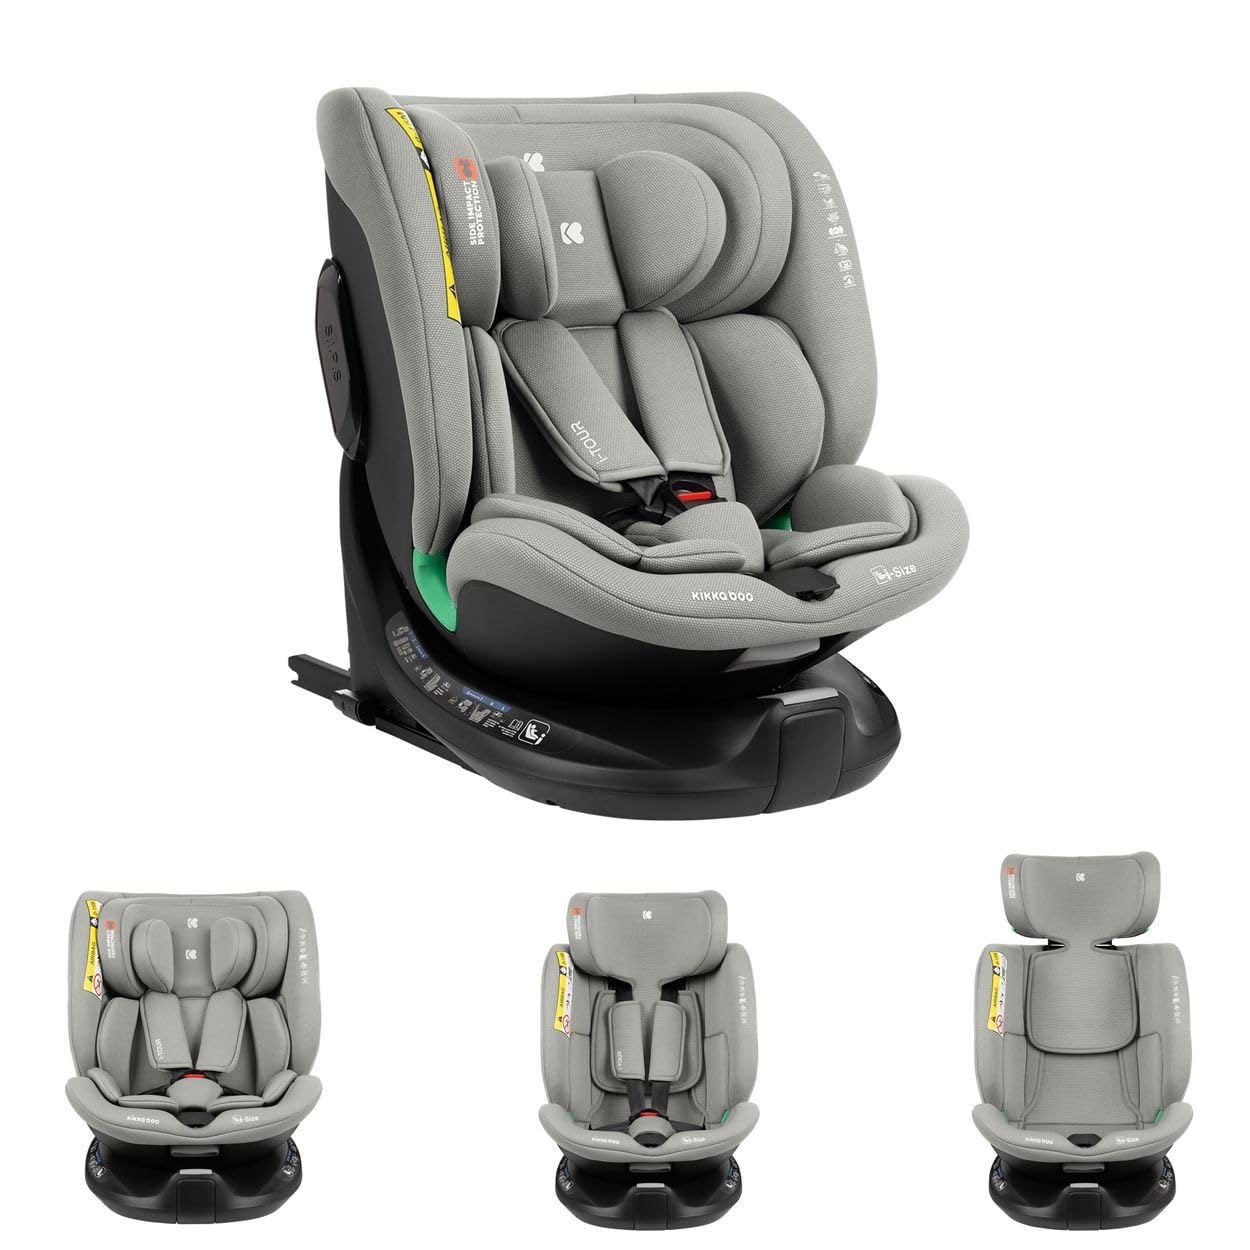
Figura 2.1: Față view of the Kikkaboo i-Tour i-Size Car Seat, showing the 5-point harness and headrest.
Caracteristici cheie:
- i-Size Certification: Conforms to ECE R129 safety standards.
- Age/Height Range: Suitable for children from 40 cm (birth) to 150 cm (approx. 12 years).
- Instalare: ISOFIX system with Top Tether for secure attachment.
- Rotaţie: 360-degree seat rotation for easy child placement.
- Poziții de înclinare: 4 adjustable recline positions for both rear-facing and forward-facing modes.
- Side Protection System (SPS): Protecție îmbunătățită la impact lateral.
- Tetiera: 12-position height-adjustable headrest with memory foam.
- Valorifica: 5-point safety harness with soft padding, adjustable with one hand.
- Confort: Soft full-body support cushion and memory foam headrest cushion.
- Rebound Bar: Additional stability feature on the base.
3. Configurare și instalare
Proper installation is crucial for your child's safety. Always refer to your vehicle's owner's manual for specific ISOFIX anchor locations and weight limits.
3.1 Pregătirea scaunului auto
- Unpack the car seat and ensure all components are present.
- Familiarize yourself with the ISOFIX connectors, Top Tether strap, recline adjustment lever, and rotation mechanism.
3.2 Instalarea ISOFIX
The car seat is installed using the vehicle's ISOFIX anchor points.
- Locate the ISOFIX anchor points in your vehicle. These are usually found between the seat back and seat cushion.
- Extend the ISOFIX connectors from the car seat base by pressing the release buttons (refer to Figure 3.1).
- Align the ISOFIX connectors with the vehicle's anchor points and push firmly until you hear a "click" and the indicators turn green.
- Push the car seat firmly against the vehicle seat back to remove any slack.

Figura 3.1: View of the car seat base, showing the ISOFIX connectors and rebound bar.
3.3 Top Tether Connection
The Top Tether provides additional stability and reduces forward movement in a collision.
- Locate the Top Tether anchor point in your vehicle (usually on the parcel shelf, seat back, or floor).
- Attach the Top Tether hook to the vehicle's anchor point.
- Tighten the Top Tether strap until it is taut and the indicator (if present) shows it is correctly tensioned.

Figura 3.2: lateral view of the car seat, illustrating the Top Tether strap extending from the back.
3.4 Instalare cu orientarea spre spate (40-105 cm)
For infants and toddlers, the car seat must be installed rear-facing.
- Ensure the car seat is rotated to the rear-facing position.
- Adjust the recline to one of the rear-facing positions (refer to Figure 3.3).
- Verify that the car seat is securely installed and does not move more than 2.5 cm (1 inch) at the belt path.
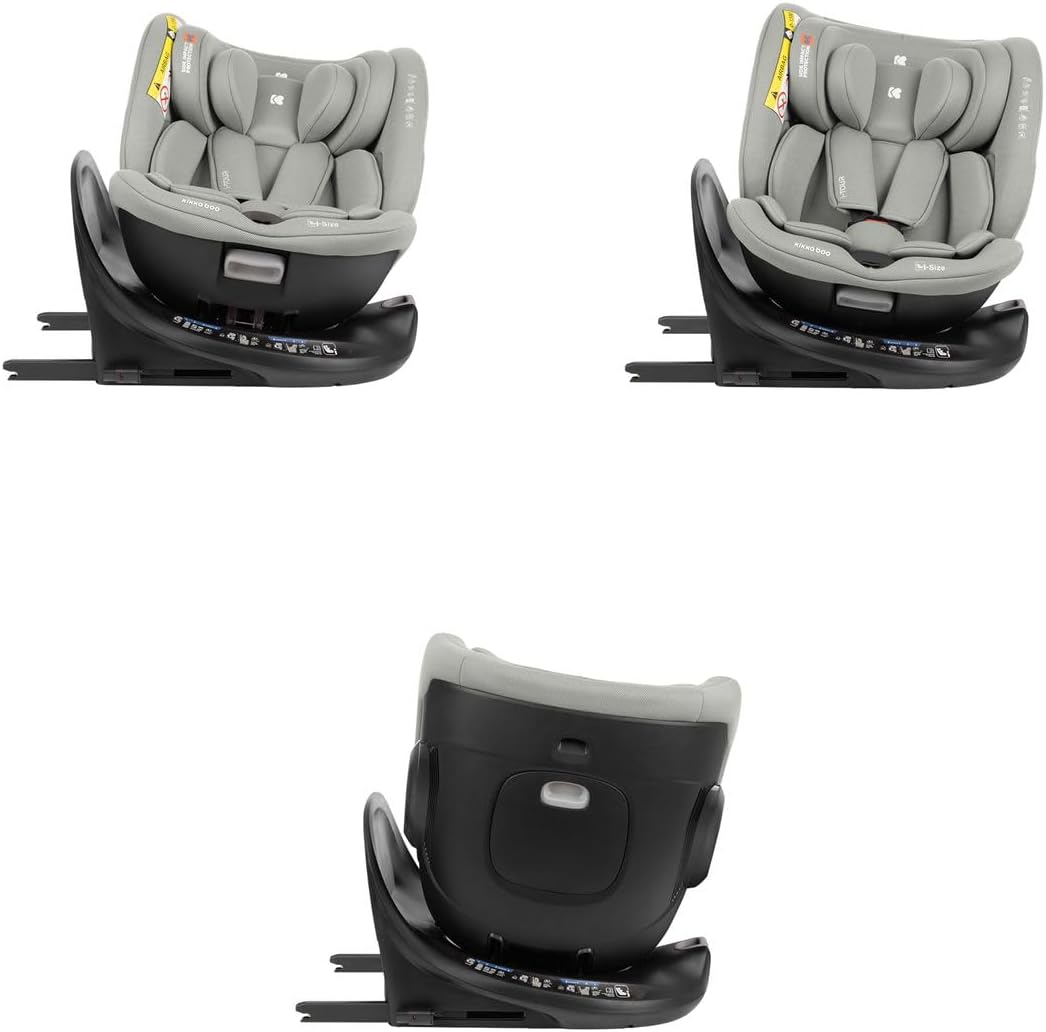
Figure 3.3: Car seat shown in a reclined rear-facing position, suitable for infants.
3.5 Instalare cu fața spre direcția de mers (76-150 cm)
For older toddlers and children, the car seat can be installed forward-facing.
- Ensure the car seat is rotated to the forward-facing position.
- Adjust the recline to one of the forward-facing positions.
- For children up to 105 cm, continue to use the 5-point harness.
- For children from 100-150 cm, the 5-point harness should be removed, and the child secured using the vehicle's 3-point seat belt (refer to Figure 3.4).
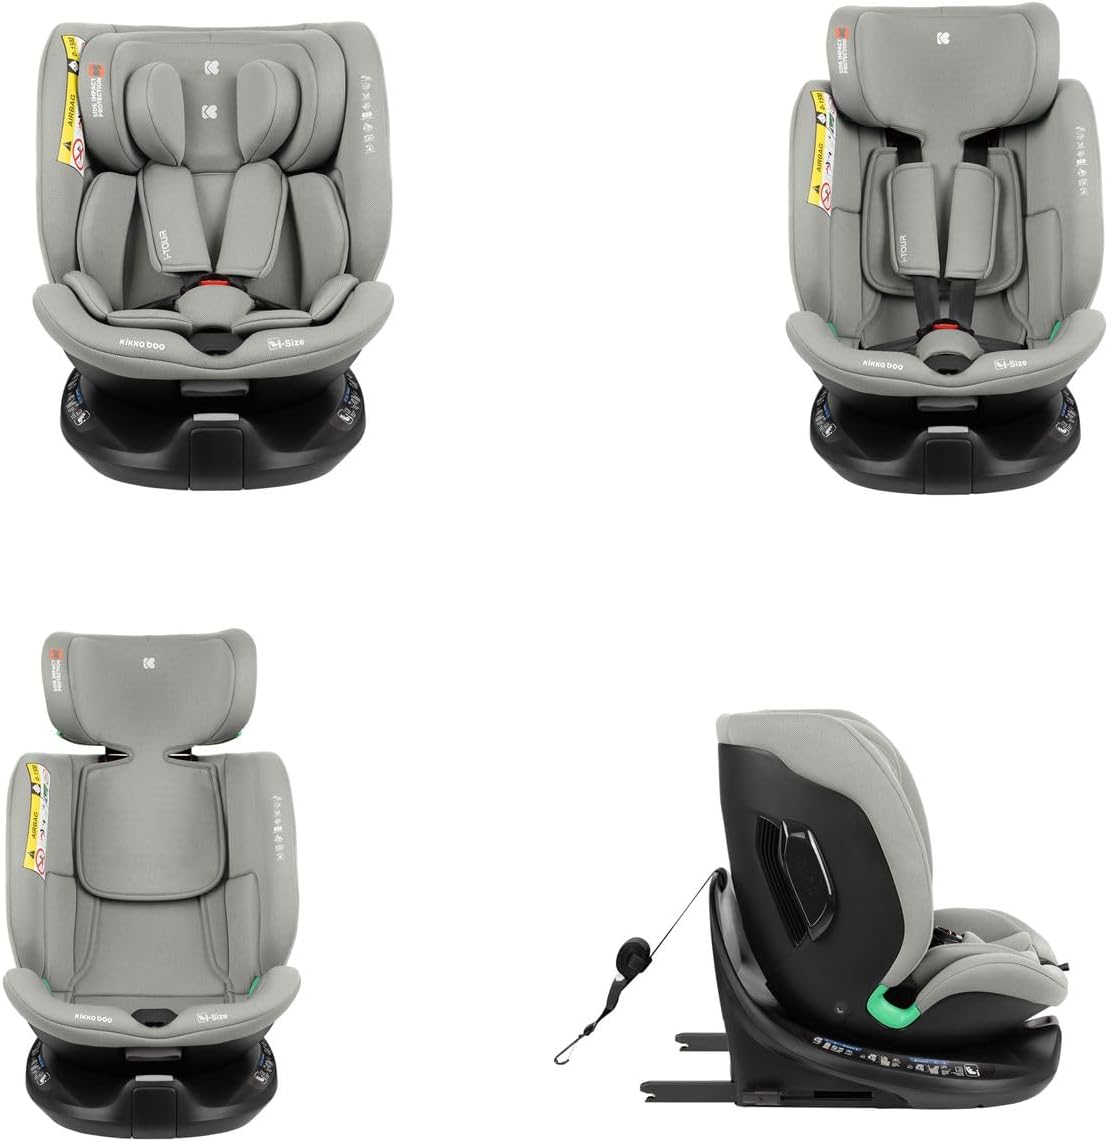
Figure 3.4: Car seat in a forward-facing orientation, demonstrating the 5-point harness system.
4. Instrucțiuni de utilizare
4.1 Rotating the Car Seat
The car seat features a 360-degree rotation function for easy access to your child.
- Ensure the car seat is not in a reclined position that obstructs rotation.
- Localizați maneta de eliberare a rotației, de obicei în partea din față a bazei.
- Press the lever and rotate the seat to the desired position (e.g., facing the car door for child placement, then to rear-facing or forward-facing for travel).
- Release the lever and ensure the seat locks securely into place before driving.
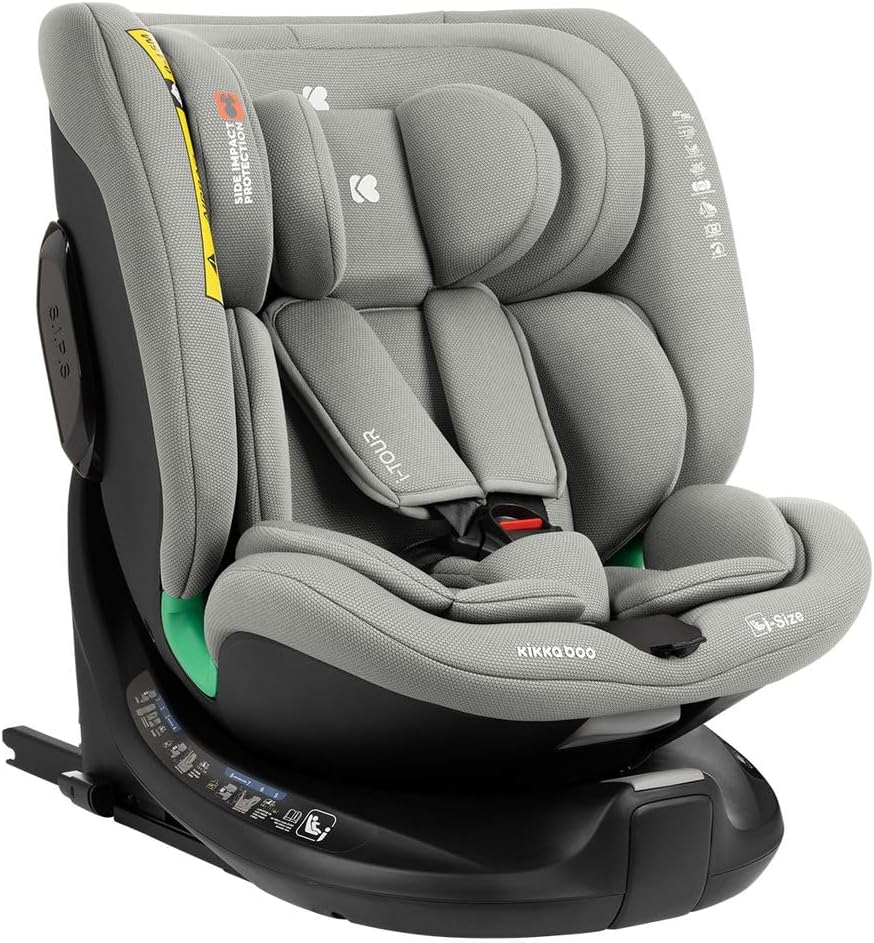
Figure 4.1: Car seat rotated to face the side, facilitating easy placement or removal of the child.
4.2 Adjusting Recline Positions
The car seat offers 4 recline positions for optimal comfort and safety.
- Locate the recline adjustment lever, usually at the front or side of the seat base.
- Pull the lever and adjust the seat to one of the 4 available positions.
- Ensure the seat locks firmly into the chosen recline position.
4.3 Adjusting Headrest and Harness Height
The headrest and harness system adjust simultaneously to 12 different height positions.
- Locate the headrest adjustment handle, typically at the top of the headrest.
- Squeeze the handle and move the headrest up or down until the harness straps are at or just below your child's shoulders for rear-facing, or at or just above for forward-facing.
- Eliberați mânerul pentru a bloca tetiera în poziție.
4.4 Asigurarea copilului (ham cu 5 puncte)
Always ensure the harness is snug and correctly positioned.
- Puneți copilul în scaunul de mașină.
- Bring the two buckle tongues together and insert them into the buckle until you hear a "click".
- Pull the harness adjustment strap (usually located at the front of the seat) to tighten the harness. Ensure you cannot pinch any excess webbing at your child's shoulder.
- To loosen the harness, press the harness release button (usually under a flap at the front) and pull the shoulder straps forward.
5. Întreținere și îngrijire
Regular maintenance helps prolong the life of your car seat and ensures continued safety.
5.1 Curățarea huselor din material textil
- The fabric covers are removable for cleaning. Refer to the care label on the fabric for specific washing instructions.
- Typically, covers can be hand-washed with mild soap and cold water, or machine-washed on a delicate cycle.
- Do not use harsh detergents, bleach, or abrasive cleaners.
- Allow covers to air dry completely before reattaching them to the car seat frame.
5.2 Curățarea hamului și a cataramei
- Ștergeți curelele hamului cu reclamăamp cloth and mild soap. Do not submerge the harness in water.
- Clean the buckle by rinsing it under warm water. Do not use lubricants or detergents on the buckle.
- Asigurați-vă că toate piesele sunt uscate înainte de reasamblare.
5.3 Curățarea pieselor din plastic
- Ștergeți piesele din plastic cu adamp cârpă și săpun blând.
- Nu utilizați agenți de curățare abrazivi sau solvenți.
6. Depanare
If you encounter any issues with your Kikkaboo i-Tour i-Size Car Seat, please refer to the following common solutions. If the problem persists, contact Kikkaboo customer support.
6.1 Scaunul auto pare slăbit după instalare
- Check ISOFIX: Ensure both ISOFIX connectors are fully engaged and show green indicators. Push the seat firmly towards the vehicle seat back.
- Check Top Tether: Verify the Top Tether is securely attached and tightened.
- Reinstala: Remove and re-install the car seat, carefully following all steps in Section 3.
6.2 Hamul este dificil de strâns sau de slăbit
- Check for Twists: Asigurați-vă că curelele hamului nu sunt răsucite.
- Eliminați obstacolele: Check for any fabric or debris obstructing the harness mechanism.
- Clean Buckle: If the buckle is sticky, clean it as described in Section 5.2.
6.3 Seat Does Not Rotate Smoothly
- Check Recline: Ensure the seat is in an upright position that allows for rotation.
- Eliminați obstacolele: Check for any objects or fabric preventing smooth rotation.
- Engage Release Lever: Make sure the rotation release lever is fully engaged while attempting to rotate.
7. Specificații
| Caracteristică | Detaliu |
|---|---|
| Numărul de model | 31002100026 |
| Dimensiuni produs (L x l x H) | 50 x 44 x 56 cm |
| Greutatea produsului | 10.2 kg |
| Înălțimea recomandată a copilului | 40 - 150 cm |
| Greutate maximă recomandată | 36 kg |
| Tip de instalare | ISOFIX, centură de fixare superioară |
| Tip ham | 5 punct |
| Orientare | Rear-facing (40-105 cm), Forward-facing (76-150 cm) |
| Poziții de înclinare | 4 |
| Rotaţie | 360 de grade |
| Material | Plastic (frame), Fabric (cover) |
8. Garanție și asistență
For warranty information, product registration, or technical support, please contact Kikkaboo customer service. Keep your proof of purchase for any warranty claims.
Producător: Kikkaboo
Please visit the official Kikkaboo website-ul web sau contactați distribuitorul pentru cele mai recente informații de asistență.