
Introducere
This manual provides detailed instructions for the installation, operation, and maintenance of your TVT TD 2104-TS-CL 4 Channel Digital Video Recorder (DVR). This DVR supports TVI, CVI, and AHD video inputs, offering versatile compatibility with various surveillance cameras. It features H.264 compression for efficient storage and network transmission, an intuitive Graphical User Interface (GUI), and comprehensive recording and playback options. Please read this manual thoroughly before using the device to ensure proper setup and functionality.
Ce este în cutie
Despachetați cu grijă conținutul și asigurați-vă că toate articolele sunt prezente:
- TVT TD 2104-TS-CL 4 Channel DVR Unit
- Adaptor de alimentare
- Mouse USB
- SATA Cable (for internal hard drive connection)
- Manual de utilizare (acest document)
Înființat
1. Conexiuni fizice
Before powering on the DVR, make all necessary physical connections.
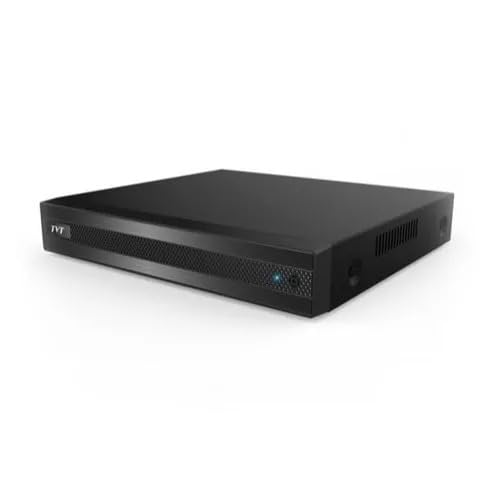
Imagine: Față și spate view of the TVT TD 2104-TS-CL 4 Channel DVR, showing various ports for video input, audio, network, USB, and power.
- Instalare hard disk (opțional): If you plan to record video, install a compatible SATA hard drive inside the DVR chassis using the provided SATA cable. Refer to the DVR's internal diagram for proper connection.
- Conexiuni camere: Connect your TVI, CVI, or AHD surveillance cameras to the BNC video input ports on the rear panel of the DVR. Ensure secure connections for each channel.
- Conexiune monitor: Connect a monitor to the HDMI output port on the DVR's rear panel. This will display the DVR's interface and live video feeds.
- Conexiune mouse: Plug the USB mouse into one of the USB ports on the DVR. The mouse is essential for navigating the Graphical User Interface (GUI).
- Conexiune retea: For remote access and network features, connect an Ethernet cable from your router or network switch to the LAN port on the DVR.
- Conexiune de alimentare: Connect the provided power adapter to the DVR's power input port, then plug the adapter into a suitable power outlet.
2. Pornirea inițială și configurarea
Once all connections are made, the DVR will power on automatically. Follow the on-screen prompts for initial setup, which typically includes setting the date/time, creating an administrator password, and configuring network settings.
Instrucțiuni de operare
1. Moduri de înregistrare
The DVR supports multiple recording modes:
- Înregistrare manuală: Porniți și opriți înregistrarea manual.
- Înregistrare cu temporizator: Schedule recording periods based on specific times and days.
- Înregistrare detectare mișcare: The DVR records automatically when motion is detected in the camera's view. Configure motion detection zones and sensitivity in the settings.
2. Redare și căutare
Pentru a review inregistrat footage:
- Access the playback menu via the GUI.
- Redare simultană: The DVR supports 4, 8, or 16 channel simultaneous playback depending on the model variant.
- Optiuni de cautare: Utilize search functions such as time slice, specific time, event (manual, motion), and tag search to quickly locate desired footage.
3. Copiere de rezervă a datelor
Backup recorded data to external storage:
- Backup USB: Connect a USB flash drive to a USB port on the DVR and follow the on-screen instructions to export selected footage.
- Backup de rețea: Utilize the network connection to back up data to a remote server or network-attached storage (NAS).
4. Remote Access and Surveillance
The DVR offers robust remote access capabilities:
- Web Browser (IE): Access the DVR interface via Internet Explorer using its IP address.
- CMS (Central Management Software): Use the provided CMS software for comprehensive management of multiple DVRs.
- Mobile Device Surveillance: Download the official mobile application for iOS and Android devices. Scan the QR code provided by the DVR for easy setup.
- Protocoale de rețea: Supports DHCP, DDNS, PPPoE, and NAT functions for seamless network integration.
- Dual Stream Technology: Enables high-definition local storage while providing efficient remote network transmission for mobile surveillance.
5. Control PTZ
If your system includes PTZ (Pan-Tilt-Zoom) cameras, the DVR supports:
- Presetari PTZ: Configure up to 255 preset positions for quick camera movement.
- Croazieră automată: Set up to 8 cruise paths for automated camera patrolling.
6. Managementul utilizatorilor
Manage user accounts and permissions:
- Authorization Management: Create multiple user accounts with varying access levels.
- Log Review: Accesați jurnalele de sistem pentru a review device status and user activities.
Întreţinere
- Curățare regulată: Keep the DVR unit clean and free from dust. Use a soft, dry cloth. Do not use liquid cleaners.
- Ventilare: Asigurați-vă că DVR-ul este amplasat într-o zonă bine ventilată pentru a preveni supraîncălzirea. Nu blocați orificiile de ventilație.
- Actualizări firmware: Periodically check the TVT official website for firmware updates. Updating firmware can improve performance and add new features. Follow update instructions carefully.
- Starea hard disk-ului: Monitor the health of the installed hard drive through the DVR's system settings. Replace the hard drive if errors are detected to prevent data loss.
- Securitate prin parolă: Regularly change your administrator password and ensure it is strong and unique.
Depanare
If you encounter issues with your DVR, refer to the following common problems and solutions:
- Fără ieșire video pe monitor:
- Check HDMI cable connection to both DVR and monitor.
- Asigurați-vă că monitorul este pornit și setat la sursa de intrare corectă.
- Fără imagine de la cameră:
- Verify camera power supply.
- Check BNC cable connections from camera to DVR.
- Ensure camera type (TVI/CVI/AHD) is compatible and correctly configured in DVR settings.
- Fără conexiune la rețea:
- Check Ethernet cable connection to DVR and router.
- Verify router is functioning correctly.
- Check DVR network settings (IP address, gateway, DNS) for correct configuration.
- Cannot Record:
- Ensure a hard drive is installed and properly initialized.
- Check hard drive status in DVR settings; replace if faulty.
- Verify recording schedule or motion detection settings are correctly configured.
- Accesul de la distanță nu funcționează:
- Confirm network connection is active.
- Check port forwarding settings on your router if required.
- Ensure DDNS service is updated if using a dynamic IP address.
- Verify mobile app or CMS settings are correct.
Dacă problemele persistă, contactați asistența tehnică.
Specificații
| Caracteristică | Caietul de sarcini |
|---|---|
| Numărul de model | TD 2104-TS-CL (Base Model 2104) |
| Intrare video | 4 Channel TVI / CVI / AHD |
| Rezoluție de înregistrare | 1080P lite / 720P / WD1 |
| IPC Support (4 CH DVRs) | 1 / 1 CH IPC 1080P / 960P / 720P recording |
| Compresie video | H.264 High Profile |
| Ieșire video | HDMI 1080P |
| Tehnologia de conectivitate | Ethernet, HDMI, USB |
| Protocoale de rețea | DHCP, DDNS, PPPoE |
| Depozitare | Supports 1 SATA HDD (up to specified capacity, HDD not included) |
| Media încorporate | Adapter, MOUSE, SATA CABLE |
| Acces de la distanță | IE browser, CMS, Mobile App (iOS/Android) |
| Control PTZ | 255 Presets, 8 Cruises |
Garanție și suport
For warranty information, please refer to the documentation provided at the time of purchase or visit the official TVT website. For technical support, contact your vendor or the manufacturer's support channels. Keep your purchase receipt and product serial number handy when seeking support.