
Introducere
This instruction manual provides comprehensive guidance for the installation, operation, and maintenance of your Vrabocry 5V 5050 RGB LED Strip Light. Please read this manual thoroughly before use to ensure proper functionality and safety.
Conținutul pachetului
Verificați dacă toate articolele enumerate mai jos sunt incluse în pachetul dumneavoastră:
- 4 x LED Strip Lights (each 1.64ft / 50cm)
- 1 x 44-Key IR Remote Control (battery not included)
- 1 x USB Controller Cable
- 3 x Strip Connector Cables

Image: All components included in the Vrabocry LED Strip Light package.
Specificații
| Caracteristică | Caietul de sarcini |
|---|---|
| Tip LED | SMD 5050 RGB |
| Lungimea benzii | 4 x 1.64ft (50cm) sections |
| Lățimea PCB | 10mm |
| Cantitate LED-uri | 30 LEDs per 50cm section |
| Culoare LED | RGB (Multi-color) |
| Metoda de control | 44-Key IR Remote Control |
| Vol. De lucrutage | USB DC 5V |
| Rata de impermeabilitate | IP30 (Non-Waterproof) |
| Adeziv | Double-sided tape on back |
| Utilizare în interior/exterior | Numai pentru utilizare în interior |
Informații de siguranță
- This LED strip light is designed for numai pentru utilizare în interior. It is not waterproof (IP30 rated). Avoid exposure to water or high humidity.
- Ensure the power source is 5V DC USB. Using an incorrect voltage poate deteriora produsul.
- Do not cover the LED strips with flammable materials when in operation.
- A nu se lăsa la îndemâna copiilor.
Configurare și instalare
Follow these steps to install your LED strip lights:
- Pregătiți suprafața: Clean the surface where the LED strips will be installed. Ensure it is dry and free of dust or grease for optimal adhesive performance.
- Instalați bateria telecomenzii: Open the battery compartment on the back of the 44-key IR remote control and insert a CR2025 button cell battery (not included), ensuring correct polarity.
- Conectați benzile: Connect the individual LED strip sections using the provided strip connector cables. Ensure the arrows on the connectors align with the '+' markings on the LED strips for proper electrical connection.
- Connect to USB Controller: Attach the assembled LED strip to the USB controller cable.
- Adhere the Strips: Peel off the protective backing from the double-sided tape on the back of the LED strips. Firmly press the strips onto the cleaned surface. For long-term use, consider reinforcing the adhesive with additional glue or by gently heating the tape with a hairdryer before application to improve adhesion.
- Cutting the Strips (Optional): The LED strips can be cut at designated marks (usually indicated by a scissor icon or copper pads) to fit specific lengths. Cut only along these marks to avoid damaging the circuit.
- Pornire: Plug the USB controller into a 5V USB power source (e.g., TV USB port, USB wall adapter, power bank).
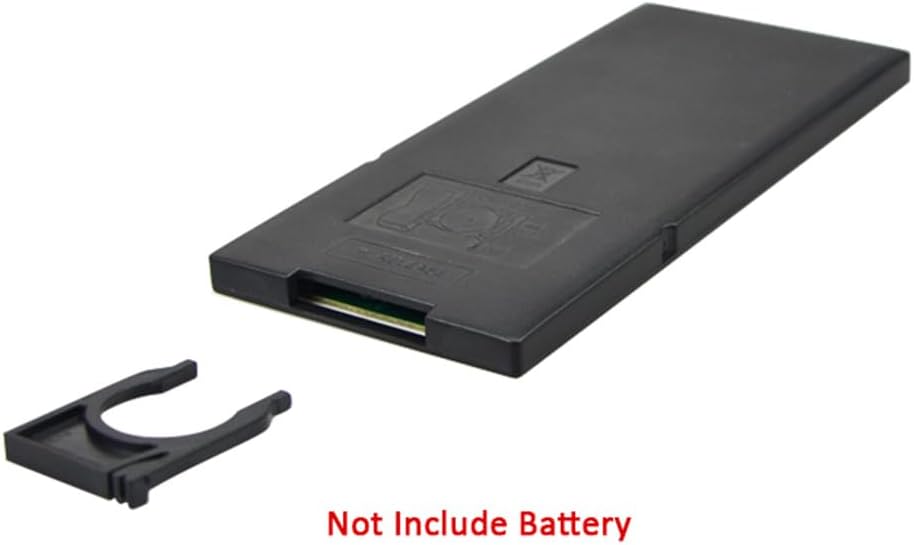
Image: Remote control battery compartment. Battery is not included.

Image: Visual guide for surface preparation, strip connection, and cutting points.
Instrucțiuni de operare
Use the 44-key IR remote control to manage your LED strip lights:

Image: 44-Key IR Remote Control layout and functions.
- Pornire/Oprire: Apăsați tasta ON/OFF buton.
- Reglarea luminozității: Utilizați Luminozitate + şi Luminozitate - arrows to increase or decrease light intensity.
- Culori statice: Select from 20 preset static colors, including Red, Green, Blue, and White, by pressing the corresponding color buttons.
- Setare DIY a culorilor:
- Apăsați pe unul dintre DIY1 la DIY6 butoane.
- Utilizați Roșu, Verde, Albastru arrow buttons (e.g., Red+, Red-) to adjust the intensity of each primary color.
- Apăsați la fel DIY button again to save your custom color.
- Moduri dinamice:
- MAȘINĂ: Cycles through various dynamic modes automatically.
- RAPID/LENT: Ajustează viteza modurilor dinamice.
- JUMP3/JUMP7: Jumps between 3 or 7 different colors.
- FADE3/FADE7: Fades between 3 or 7 different colors.
- FLASH: Flashes through different colors.
Întreţinere
- curatenie: Gently wipe the LED strips with a dry, soft cloth to remove dust. Do not use liquid cleaners or immerse in water.
- Adeziv: If the adhesive tape loses its stickiness over time, you may reinforce it with additional double-sided tape or a suitable adhesive.
- Depozitare: When not in use for extended periods, store the LED strips in a cool, dry place away from direct sunlight.
Depanare
| Problemă | Cauza posibila | Soluţie |
|---|---|---|
| LED strips do not light up. | No power, incorrect connection, remote battery depleted. | Ensure USB power source is active. Check all connections, especially arrow alignments. Replace remote battery. |
| Telecomanda nu funcționează. | Battery depleted, IR receiver blocked, remote too far. | Replace remote battery. Ensure clear line of sight between remote and IR receiver on the USB controller. Operate within 5-8 meters. |
| Culorile sunt incorecte sau inconsistente. | Incorrect connection, faulty strip section. | Verify all strip connector cables are correctly aligned (arrow to '+'). If one section is consistently problematic, it may be faulty. |
| Adhesive tape not sticking well. | Surface not clean, cold temperature. | Clean surface thoroughly. Gently heat the adhesive tape with a hairdryer before application to improve stickiness. Consider additional adhesive. |
Garanție și suport
Specific warranty information for this product is not provided in the available documentation. For warranty inquiries or technical support, please contact Vrabocry customer service through your purchase platform or the manufacturer's official contact channels.