
1. Introducere
This manual provides comprehensive instructions for the installation, operation, maintenance, and troubleshooting of the Vivotek FE9391-EHV-V2 12MP Outdoor Fisheye IR Illumination Camera. Please read this manual thoroughly before using the product to ensure proper setup and functionality. Retain this manual for future reference.
2. Produs terminatview
2.1 Caracteristici cheie
- 12 Megapixel Effective Still Resolution for high-quality imaging.
- Fisheye Lens with 1.2mm focal length for wide-area surveillance.
- Integrated IR Illumination for clear night vision up to 20 meters.
- WDR Pro technology for optimal image visibility in high contrast lighting.
- H.265/H.264/MJPEG compression for efficient video streaming.
- IP66-rated weather-resistant enclosure for outdoor use.
- Motion-only alert type for event detection.
- Wi-Fi Connectivity Protocol for flexible network integration.
2.2 Conținutul pachetului
Verificați dacă toate articolele sunt prezente în colet:
- Vivotek FE9391-EHV-V2 Camera Unit
- Kit de montare (șuruburi, ancore)
- Conector impermeabil
- Ghid de instalare rapidă
- Software CD (or download link information)
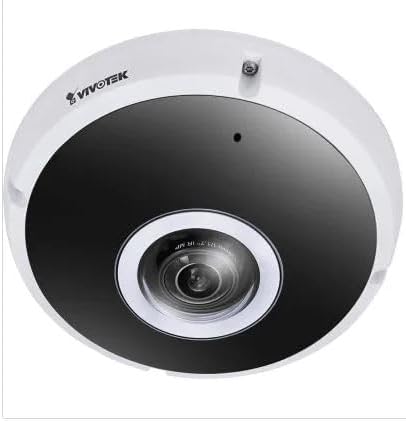
Figura 2.1: Față view of the Vivotek FE9391-EHV-V2 12MP Outdoor Fisheye IR Illumination Camera, showing the lens and IR illuminators.
3. Informații de siguranță
- Citiți cu atenție toate instrucțiunile înainte de instalare și utilizare.
- Ensure the power source matches the camera's requirements (Corded Electric).
- Nu încercați să dezasamblați sau să modificați camera. Aceasta va anula garanția.
- Avoid pointing the camera directly at strong light sources for extended periods.
- Instalarea trebuie efectuată de către personal calificat, în conformitate cu codurile electrice locale.
- Protejați cablurile de călcare sau ciupire.
4. Configurare și instalare
4.1 Locul de montare
Select a suitable outdoor location for mounting. Consider the desired surveillance area, proximity to power, and network connectivity (Wi-Fi or wired Ethernet). The camera is IP66 rated for outdoor use.

Figure 4.1: Dimensional drawing of the Vivotek FE9391-EHV-V2 camera, showing a diameter of 150mm and height of 68.2mm.
4.2 Instalare fizică
- Pregătiți suprafața de montare: Folosiți șablonul de montare furnizat (dacă este inclus) pentru a marca găurile.
- Găuri: Dați găuri pilot și introduceți ancore de perete, dacă este necesar.
- Securizați camera: Attach the camera base securely to the mounting surface using the provided screws.
- Cabluri de conectare:
- Putere: Conectați cablul de alimentare la o sursă de alimentare adecvată.
- Reţea: Connect an Ethernet cable for wired network access, or ensure Wi-Fi signal strength is adequate for wireless connection. Use the waterproof connector for outdoor Ethernet connections.
- Reglați unghiul camerei: Loosen the adjustment screws (if applicable) to position the fisheye lens for optimal coverage. Tighten screws once adjusted.

Figure 4.2: An Ethernet cable with an RJ45 connector, used for wired network connectivity.
4.3 Configurația inițială a rețelei
After physical installation and power-up, the camera needs to be configured on your network.
- Descoperă camera: Use the Vivotek IP Utility software (available on the manufacturer's website) to discover the camera on your network.
- Atribuiți adresa IP: Assign a static IP address or ensure it obtains an IP address via DHCP.
- Acces Web Interfata: Deschide a web browser și introduceți adresa IP a camerei pentru a accesa webinterfață de configurare bazată pe
- Log in: Enter the default username and password (refer to the Quick Installation Guide for defaults). Change the default password immediately for security.
- Wi-Fi Setup (if applicable): Navigate to the network settings and configure the Wi-Fi connection if you are using wireless connectivity.
5. Instrucțiuni de utilizare
5.1 În direct View
Once configured, you can access the live video feed through the web interface or compatible Vivotek surveillance software.
- Web Browser: Conectați-vă la camera web interface and navigate to the "Live View" secțiune.
- Surveillance Software: Add the camera to your Vivotek NVR or VMS (Video Management Software) for centralized monitoring.
- Aplicație mobilă: Download the Vivotek mobile app and add your camera for remote viewing.

Figura 5.1: Example of surveillance footage from multiple cameras displayed on a tablet device, demonstrating remote monitoring capabilities.

Figure 5.2: A monitor displaying a split-screen view of four camera feeds, labeled CAM1 through CAM4, illustrating a typical surveillance setup.
5.2 Înregistrare și stocare
Camera acceptă diverse opțiuni de înregistrare:
- Stocare locală: Insert a microSD card (not included) into the camera's slot for edge recording. Configure recording schedules and event triggers (e.g., motion detection).
- Înregistrator video de rețea (NVR): Connect the camera to a compatible NVR for continuous or event-based recording.
- Stocare în cloud: Some Vivotek models or third-party services may offer cloud storage integration. Refer to the camera's web interface for specific options.
5.3 Detectarea mișcării și alertele
Configurați zonele de detectare a mișcării și setările de sensibilitate în meniul camerei web interface. When motion is detected, the camera can trigger actions such as:
- Recording video to local storage or NVR.
- Sending email notifications with snapshots.
- Uploading footage to an FTP server.
6. Întreținere
- Curățarea lentilelor: Gently wipe the camera lens with a soft, clean cloth. For stubborn dirt, use a lens cleaning solution designed for optical surfaces. Do not use abrasive cleaners.
- Curățarea locuinței: Curățați carcasa camerei cu reclameamp Evitați utilizarea detergenților sau solvenților puternici.
- Actualizări firmware: Regularly check the Vivotek website for firmware updates. Updating firmware can improve performance, add features, and enhance security.
- Verificarea cablului: Periodically inspect all cables for signs of wear or damage, especially for outdoor installations.
- Verificare de mediu: Asigurați-vă că mediul de funcționare al camerei se încadrează în intervalele de temperatură și umiditate specificate.
7. Depanare
7.1 Fără flux video
- Verificați puterea: Ensure the camera is receiving power. Verify power adapter and cable connections.
- Conexiune retea: Confirm the Ethernet cable is securely connected or that the Wi-Fi signal is strong and the camera is connected to the correct network.
- Adresa IP: Verify the camera's IP address and ensure it is not conflicting with another device on the network.
- Firewall: Check if any firewall settings on your network or computer are blocking access to the camera.
7.2 Calitate slabă a imaginii
- Curățați lentila: Asigurați-vă că obiectivul camerei este curat și fără praf sau pete.
- Conditii de iluminare: Adjust camera settings for optimal exposure in varying light conditions. Ensure IR illuminators are functioning at night.
- Setări de rezoluție: Verify that the video resolution and quality settings are configured appropriately in the camera's web interfata.
- Lățimea de bandă a rețelei: Lățimea de bandă insuficientă a rețelei poate duce la videoclipuri sacadate sau de calitate scăzută. Verificați încărcarea rețelei.
7.3 Detecția mișcării nu funcționează
- Activare detectare mișcare: Ensure motion detection is enabled in the camera's settings.
- Sensitivity and Zones: Adjust motion detection sensitivity and define detection zones correctly.
- Program de înregistrare: Verify that the recording schedule is active for motion-triggered events.
8. Specificații
| Caracteristică | Detaliu |
|---|---|
| Numărul de model | FE9391-EHV-V2 |
| Rezoluție statică efectivă | 12 MP |
| Obiectiv | 1.2mm Fisheye Lens |
| IR Illumination Range | 20m |
| Tehnologia WDR | WDR Pro |
| Compresie video | H.265 / H.264 / MJPEG |
| Protocol de conectivitate | Wifi |
| Evaluarea internațională de protecție | IP66 |
| Sursa de alimentare | Electric cu fir |
| Dimensiuni produs (L x l x H) | 5.9 x 5.9 x 2.68 inchi (150 x 150 x 68.2 mm) |
| Producător | Vivotek Inc. |
| Utilizări recomandate | Securitate în aer liber |
9. Garanție și asistență
For warranty information, technical support, and additional resources, please visit the official Vivotek website-ul sau contactați departamentul de servicii pentru clienți.
- Producător: Vivotek Inc.
- Website: www.vivotek.com (Examplinkul, linkul real poate varia)
- Contact: Consultați website for regional support contact information.
Please have your model number (FE9391-EHV-V2) and purchase date available when contacting support.