
1. Introducere
This manual provides detailed instructions for the installation, operation, and maintenance of your Turing TP-MMD4MV2 Smart Series TwilightVision 4MP IR Zoom Dome IP Camera. This advanced surveillance camera features a 2.7-13.5mm motorized varifocal lens, Smart IR illumination up to 40m (131ft), and TwilightVision technology for optimal image clarity in low-light conditions. It supports up to a 256GB MicroSD card for edge storage and is designed for outdoor use with IP67 weather resistance and IK10 vandal resistance. Please read this manual thoroughly before using the product to ensure proper setup and functionality.
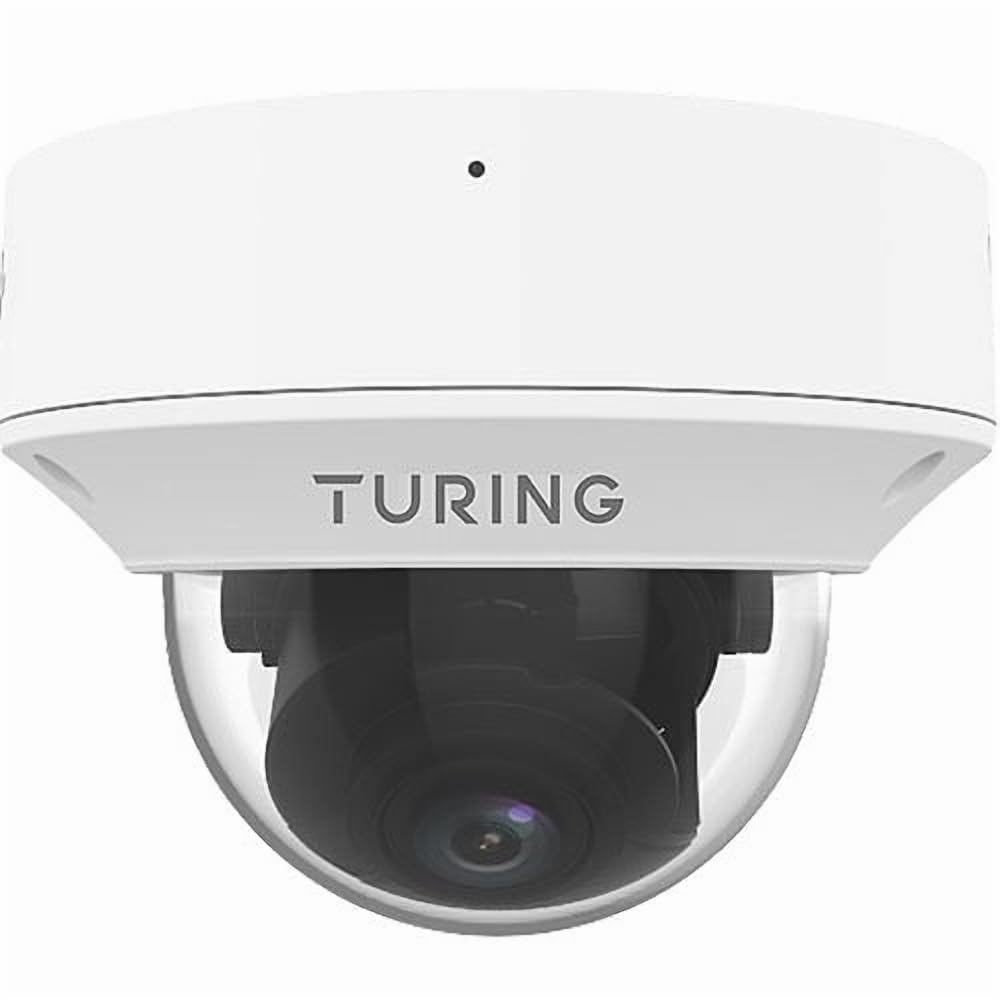
Figure 1: Turing TP-MMD4MV2 Smart Series TwilightVision 4MP IR Zoom Dome IP Camera. This image shows the white dome camera with its protective casing.
2. Informații de siguranță
Vă rugăm să respectați următoarele măsuri de siguranță pentru a preveni vătămările corporale sau deteriorarea produsului:
- Siguranta electrica: Ensure power supply meets the camera's requirements (DC 12V+/-25% or PoE IEEE 802.3af). Do not overload power outlets.
- Instalare: Installation should be performed by qualified personnel. Mount the camera securely to prevent it from falling.
- Mediu: Nu expuneți camera la temperaturi extreme, umiditate sau medii corozive care depășesc condițiile de funcționare specificate.
- curatenie: Use a soft, dry cloth for cleaning. Do not use strong detergents or abrasive materials.
- dezasamblarea: Nu încercați să dezasamblați sau să modificați camera. Aceasta va anula garanția și poate provoca deteriorări.
3. Conținutul pachetului
Verificați dacă toate articolele sunt prezente în colet:
- Turing TP-MMD4MV2 IP Dome Camera
- Mounting Screw Kit (screws, wall anchors)
- Conector impermeabil pentru cablu Ethernet
- Șablon de foraj
- Ghid de pornire rapidă / Manual de utilizare (acest document)
Note: A MicroSD card and DC 12V power adapter are not included and must be purchased separately if not using Power over Ethernet (PoE).
4. Produs terminatview
The TP-MMD4MV2 camera is designed for robust outdoor surveillance, offering high-resolution imaging and intelligent features.
4.1 Caracteristici cheie
- Rezoluție de 4 megapixeli: Captures video at 2688x1520 pixels at 30/25fps.
- Motorized Varifocal Lens: 2.7-13.5mm lens with auto-focus for flexible viewunghiuri de ing.
- TwilightVision Technology: Enhances image clarity in extremely low-light conditions (down to 0.002 Lux).
- IR inteligent: Infrared illumination up to 40 meters (131 feet) for clear night vision.
- People and Vehicle Search: Advanced analytics when used with Turing SMART series NVRs and Turing Vision Cloud.
- Microfon încorporat: Pentru monitorizare audio.
- Stocare la margine: Supports up to 256GB MicroSD card (not included).
- Design durabil: IP67 weather-rated and IK10 vandal-resistant.
- Opțiuni de alimentare: Supports Power over Ethernet (PoE) and DC 12V.
4.2 Componentele camerei
The camera consists of the main dome unit, a mounting base, and various ports. While a specific diagram is not provided, typical components include:
- Capac cupolă: Protective, vandal-resistant casing.
- Modulul camerei: Contains the lens, image sensor, and IR LEDs.
- Port Ethernet (RJ45): For network connection and PoE.
- Intrare curent continuu: For optional 12V DC power supply.
- Buton de resetare: Pentru a restaura setările implicite din fabrică.
- Slot pentru card MicroSD: Located internally, accessible by removing the dome cover.
Figure 2: Illustrative diagram of camera components (image not available). This diagram would typically show the external parts of the dome camera, including the lens, IR LEDs, and the location of the cable connections and reset button.
5. Configurare și instalare
Urmați acești pași pentru instalarea corectă a camerei.
5.1 Montarea camerei
- Alegeți o locație: Select a suitable outdoor location for wall mounting, ensuring a clear field of view and within range of your network cable. The camera is IP67 and IK10 rated for outdoor use.
- Pregătiți suprafața: Use the provided drill template to mark the screw holes on the mounting surface. Drill pilot holes as indicated.
- Asigurați baza: Attach the camera's mounting base to the surface using the supplied screws and wall anchors.
- Organizare de cabluri: Route the Ethernet cable through the mounting base or side cable entry point. Use the waterproof connector for outdoor installations to protect the RJ45 connection.
Figure 3: Illustrative diagram of camera mounting (image not available). This diagram would show the steps for securing the camera base to a wall or ceiling, including drilling and cable routing.
5.2 Alimentarea camerei
Camera poate fi alimentată în două moduri:
- Alimentare prin Ethernet (PoE): Connect an Ethernet cable from a PoE-enabled switch or NVR to the camera's RJ45 port. This provides both power and data.
- Adaptor de alimentare CC 12V: If PoE is not available, connect a 12V DC power adapter (not included) to the camera's DC power input. Then, connect an Ethernet cable for data transmission.
5.3 Conexiune de rețea
Connect the camera to your network via an Ethernet cable. The camera supports Ethernet connectivity. While 'Wireless Communication Technology: Wi-Fi' is listed in some specifications, the primary and most robust connection method for this model is wired Ethernet, especially for PoE. For initial setup, a wired connection is recommended.
5.4 Instalarea cardului MicroSD
To install a MicroSD card for local storage (up to 256GB):
- Oprire: Disconnect power from the camera before proceeding.
- Remove Dome Cover: Carefully twist and remove the outer dome cover to access the internal components.
- Introduceți cardul MicroSD: Locate the MicroSD card slot and gently insert the card until it clicks into place.
- Replace Dome Cover: Reattach the dome cover, ensuring it is securely sealed to maintain weather resistance.
Figure 4: Illustrative diagram of MicroSD card slot location (image not available). This diagram would show the internal view of the camera with the dome cover removed, highlighting the MicroSD card slot.
6. Operarea camerei
Once installed and powered, the camera can be accessed and configured.
6.1 Acces inițial și configurare
The camera is designed to integrate with Turing SMART NVRs (TR-MR(P) models) and the Turing Vision Cloud for full functionality, including People and Vehicle Search. Refer to your NVR's manual or Turing Vision Cloud documentation for specific integration steps.
- Network Discovery: Use Turing's network discovery tool to find the camera's IP address on your network.
- Web Interfata: Accesați camera web interfață prin a web browser using its IP address. Log in with default credentials (refer to the Quick Start Guide for defaults).
- Schimbaţi parola: Din motive de securitate, schimbați parola implicită imediat după prima conectare.
- Setări de rețea: Configure IP address, subnet mask, and gateway if necessary.
6.2 Adjusting the Motorized Lens
The 2.7-13.5mm motorized varifocal lens allows you to remotely adjust the zoom and focus:
- Accesați imaginile live ale camerei view through the NVR interface or web browser.
- Locate the zoom and focus controls.
- Adjust the zoom to achieve the desired field of view. The camera will automatically adjust focus (AF).
6.3 Smart IR and TwilightVision
The camera automatically switches between day and night modes. Smart IR adjusts the intensity of the infrared LEDs to prevent overexposure of close-up objects, ensuring balanced illumination up to 40m (131ft). TwilightVision technology provides enhanced color images in extremely low-light conditions before switching to IR mode.
6.4 Înregistrare și stocare
- Înregistrare NVR: Configure recording schedules and motion detection settings on your Turing SMART NVR.
- Înregistrare pe card MicroSD: If a MicroSD card is installed, configure event-triggered or continuous recording via the camera's web interfata.
- Codificare video: The camera supports Ultra 265, H.265, H.264, and MJPEG video encoding formats.
Monitorizare audio 6.5
The built-in microphone captures audio. Ensure audio recording is enabled in the camera's settings if desired. Audio compression uses G.711.
7. Întreținere
Întreținerea regulată asigură performanța optimă și durata de viață a camerei dumneavoastră.
- curatenie: Periodically clean the dome cover with a soft, damp o lavetă pentru a îndepărta praful, murdăria sau petele de apă care pot afecta calitatea imaginii. Nu utilizați substanțe chimice dure.
- Actualizări firmware: Check the Turing website for the latest firmware updates. Regularly updating firmware can improve performance, add features, and enhance security. Follow the provided instructions carefully during updates.
- Verificarea cablului: Periodically inspect all cables and connections for wear, damage, or corrosion, especially for outdoor installations.
- Verificări de mediu: Ensure the camera's environment remains within its operating temperature and humidity ranges.
8. Depanare
Consultați tabelul următor pentru problemele comune și soluțiile acestora.
| Problemă | Cauza posibila | Soluţie |
|---|---|---|
| Nu există alimentare cu energie la cameră | Incorrect power supply; PoE not active; loose connection | Verify 12V DC power or PoE source. Check all cable connections. |
| Fără flux video | Network issue; incorrect IP address; camera not configured | Check network cable. Ensure camera is powered. Verify IP address and network settings. Restart camera. |
| Calitate slabă a imaginii | Dirty lens/dome; improper focus; low light conditions | Clean the dome cover. Adjust focus via the motorized lens controls. Ensure sufficient lighting or proper IR operation. |
| Nu se poate accesa camera prin rețea | IP address conflict; firewall blocking; incorrect network settings | Use network discovery tool. Check network configuration. Temporarily disable firewall for testing. Reset camera to factory defaults if necessary. |
| Cardul MicroSD nu înregistrează | Card full; card not formatted; recording schedule not set | Check card status in settings. Format card if needed. Configure recording schedule. Ensure card is properly inserted. |
9. Specificații
Detailed technical specifications for the Turing TP-MMD4MV2 camera:
| Caracteristică | Caietul de sarcini |
|---|---|
| Numărul de model | TP-MMD4MV2 |
| Senzor de imagine | 1/3-inch, 4.0 megapixel, progressive scan, CMOS |
| Max. Rezoluţie | 4MP (2688x1520) at 30/25fps |
| Obiectiv | 2.7-13.5mm motorized varifocal, AF automatic focusing |
| Unghiul de View | H: 98.26 - 31.35 degrees; V: 54.76 - 18.55 degrees; D: 127.74 - 36.99 degrees |
| Iluminare minima | Color: 0.002 Lux (F1.2, AGC on); 0 Lux with IR on |
| IR Range | Smart IR up to 40m (131ft) |
| Compresie video | Ultra 265, H.265, H.264, MJPEG |
| Compresie audio | G.711 |
| Reducere digitală a zgomotului | 2D and 3D DNR |
| Depozitare Edge | Card MicroSD, până la 256 GB (nu este inclus) |
| Alimentare electrică | DC 12V+/-25%, PoE (IEEE 802.3af) |
| Consumul de energie | Max 7.0W |
| Protecție la intrare | IP67 |
| Rezistența vandalică | IK10 |
| Dimensiuni (D x H) | 5.88 x 4.4 inchi (149.35 x 111.76 mm) |
| Greutate | 2.03 lbs (0.92 kg) |
| Temperatura de operare | Refer to manufacturer's official specifications for exact range |
| Protocol de conectivitate | Ethernet |
| Supported NVR | Turing SMART NVR: modele TR-MR(P). |
10. Informații despre garanție
Turing products are covered by a limited warranty. For specific warranty terms, conditions, and duration, please refer to the official Turing website-ul web sau cardul de garanție inclus împreună cu produsul. Păstrați dovada achiziției pentru a putea solicita garanția.
11. Asistență pentru clienți
If you encounter any issues or have questions not covered in this manual, please contact Turing customer support:
- Website: Visit the official Turing website pentru întrebări frecvente, resurse de asistență și informații de contact.
- Suport tehnic: Contact details for technical assistance can typically be found on the manufacturer's webpe site sau în ambalajul produsului dumneavoastră.
12. Videoclipuri cu produse
Nu au fost furnizate videoclipuri oficiale ale produsului de la vânzător în datele produsului pentru încorporarea în acest manual.