
1. Introducere
The Tenmars TM-901N is a professional LAN cable tester designed for efficient and accurate diagnosis of network cable issues. It is capable of identifying various wiring faults such as discontinuity, short-circuits, incorrect connections, and split pairs in both Shielded Twisted Pair (STP) and Unshielded Twisted Pair (UTP) cables. This device can measure cable lengths up to 265 meters, making it an essential tool for network installers and technicians.
2. Informații de siguranță
Please read and understand all safety instructions before operating the device. Failure to follow these instructions may result in injury or damage to the device.
- Do not attempt to test live circuits or cables connected to active network equipment.
- Ensure the battery is correctly installed before use.
- Nu expuneți dispozitivul la umezeală sau la temperaturi extreme.
- Nu deschideți dispozitivul casing, deoarece acest lucru poate anula garanția și vă poate expune la pericole electrice.
- Aruncați bateriile în conformitate cu reglementările locale.
3. Conținutul pachetului
Verificați dacă toate articolele sunt prezente în colet:
- Tenmars TM-901N Main Unit
- Remote ID Locator (ID 1)
- Manual de utilizare (acest document)
- Note: A 9V battery is typically required and may not be included.
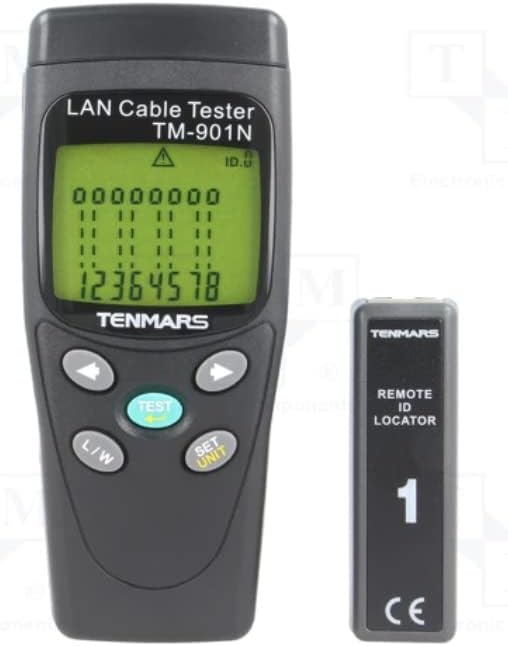
Image 3.1: Tenmars TM-901N Main Unit and Remote ID Locator.
4. Produs terminatview
4.1 unitate principală
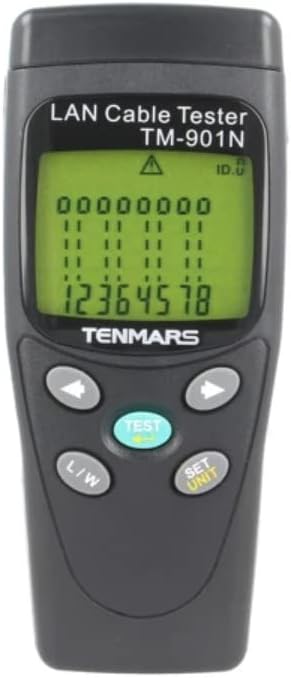
Imaginea 4.1: Față view of the TM-901N Main Unit.
The main unit features an LCD display for showing test results and cable status. It includes several control buttons:
- Butonul TEST: Initiates a cable test.
- L/W Button: Toggles between Length measurement and Wiremap display modes.
- SET/UNIT Button: Used to enter settings mode and change measurement units (e.g., meters, feet).
- Butoane săgeată (stânga/dreapta): Used for navigation in settings or for reviewobținerea rezultatelor testelor.
4.2 Remote ID Locator

Image 4.2: Remote ID Locator.
The remote ID locator is a passive unit used in conjunction with the main unit to test installed cables. It connects to one end of the cable while the main unit connects to the other. The remote unit is labeled "ID 1" for identification.
4.3 Rear Panel and Wiring Diagram

Imaginea 4.3: Spate view of the TM-901N Main Unit with wiring diagram.
The rear panel of the main unit includes the battery compartment and a printed wiring diagram for reference, showing standard T568A/B pin assignments for RJ45 connectors.
5. Configurare
5.1 Instalarea bateriei
- Locate the battery compartment cover on the rear of the main unit.
- Slide the cover open or remove it as indicated.
- Introduceți o baterie nouă de 9V, asigurându-vă că polaritatea este corectă (+/-).
- Puneți bine capacul compartimentului bateriei.
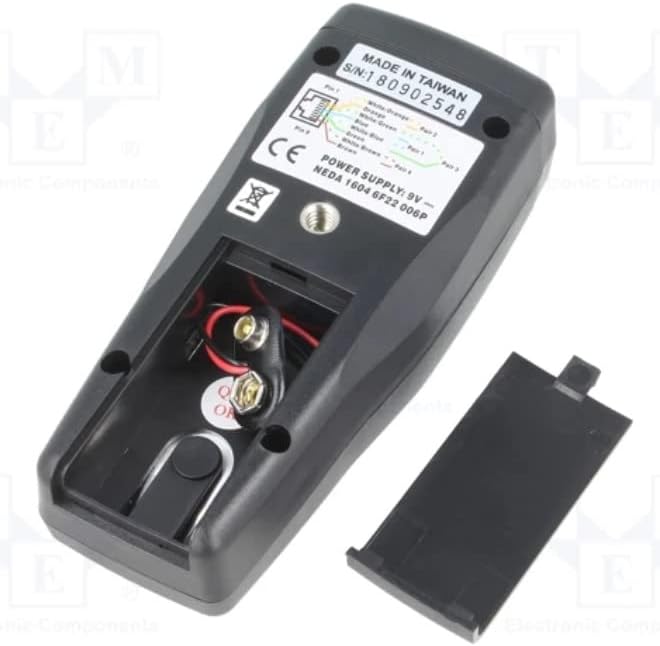
Image 5.1: Battery compartment with cover removed.
5.2 Conectarea cablurilor pentru testare
Before connecting any cables, ensure they are disconnected from all active network devices.
- For patch cables (uninstalled cables): Connect one end of the cable to the RJ45 port on the main unit and the other end to the RJ45 port on the remote ID locator.
- For installed cables: Connect the main unit to one end of the installed cable (e.g., a wall jack) and the remote ID locator to the other end of the cable (e.g., in a patch panel).
6. Instrucțiuni de utilizare
6.1 Pornire/Oprire
The device typically powers on automatically when a cable is connected and the TEST button is pressed, or by pressing the TEST button. It usually powers off automatically after a period of inactivity to conserve battery.
6.2 Performing a Cable Test
- Ensure the cable is properly connected to the main unit and the remote ID locator.
- Apăsați tasta TEST buton.
- The tester will automatically scan the cable and display the results on the LCD.
6.3 Interpreting Test Results (Wiremap)
The LCD will display the wiremap, indicating the connection status of each wire pair. Common indications include:
- Pasa: All wires are correctly connected (1-1, 2-2, etc. for straight-through, or appropriate cross-over mapping).
- Open/Discontinuity: A break in one or more wires. The display will show which wire(s) are open.
- Scurtcircuit: Two or more wires are touching. The display will indicate the shorted wires.
- Incorrect Connection/Miswire: Wires are connected to the wrong pins at one or both ends. The display will show the incorrect mapping (e.g., 1-3, 2-6).
- Împărțiți perechi: A more complex fault where two pairs are swapped, but the wiremap appears correct. The tester is designed to detect this.
6.4 Măsurarea lungimii cablului
- After performing a test, press the L/L button to switch to Length measurement mode.
- The display will show the estimated length of the cable.
- To change the unit of measurement (meters, feet), press the SET/UNIT button while in Length mode and use the arrow buttons to select the desired unit. Press SET/UNIT din nou pentru a confirma.
7. Întreținere
7.1 Curățare
Ștergeți dispozitivul cu o lavetă moale și uscată. Nu utilizați substanțe de curățare abrazive sau solvenți. Asigurați-vă că nu pătrunde umezeală în dispozitiv.
7.2 Înlocuirea bateriei
When the battery low indicator appears on the display, replace the 9V battery as described in Section 5.1. Remove the battery if the device will not be used for an extended period to prevent leakage.
7.3 Depozitare
Depozitați dispozitivul într-un loc răcoros și uscat, ferit de lumina directă a soarelui și de temperaturi extreme. Păstrați-l în ambalajul original sau într-o husă de protecție atunci când nu îl utilizați.
8. Depanare
| Problemă | Cauza posibila | Soluţie |
|---|---|---|
| Dispozitivul nu pornește. | Low or dead battery; incorrectly installed battery. | Replace the 9V battery; check battery polarity. |
| Inaccurate length measurement. | Cable not fully extended; incorrect cable type setting (if applicable); cable damage. | Ensure cable is straight; verify cable integrity; check if unit calibration is needed (refer to advanced settings if available). |
| "Open" or "Short" displayed for a new cable. | Faulty cable; improper connection to tester. | Re-seat the cable connectors firmly; try testing a known good cable; inspect cable for visible damage. |
| No display or erratic display. | Baterie descărcată; defect intern. | Înlocuiți bateria. Dacă problema persistă, contactați serviciul de asistență pentru clienți. |
9. Specificații
| Caracteristică | Caietul de sarcini |
|---|---|
| Model | TM-901N |
| Type of Tester | LAN wiring |
| Measured Cable Length | Max. 265 m |
| Măsurarea rezoluției | 1m |
| Cable/Adapter Structure | mufa RJ45 |
| Caracteristici de măsurare | Connection map test: discontinuity, short circuit, incorrect connection, split pairs |
| Cabluri acceptate | STP / UTP cables |
| Precizia măsurătorilor | ±10% ±1m |
| Alimentare electrică | baterie de 9 V x1 |
| Greutate | 160 g |
| Dimensiuni | 130x58x35mm |
| Producător | TENMARURI |
| Țara de origine | Taiwan |
10. Garanție și asistență
For warranty information and technical support, please refer to the documentation provided with your purchase or contact your local distributor. Keep your proof of purchase for warranty claims.