
1. Introducere și Pesteview
The Baofeng PMR446 Professional Two-Way Radio is designed for reliable and clear communication over long distances. This device features 16 pre-set channels, ensuring stable communication even in remote areas or where mobile signals are weak. Equipped with DCS and CTCSS functions, it effectively blocks external interference and reduces noise, providing clear audio through high-quality speakers and microphones. Each radio includes a headset and a shoulder strap clip for convenient, hands-free operation.
The radio is powered by a high-capacity 1500 mAh rechargeable lithium-ion battery, offering extended usage. A low battery alert system notifies you when recharging is necessary. Its user-friendly design includes an automatic voice transmit and receive (VOX) function for hands-free calls and an emergency alert feature for enhanced safety in hazardous environments. Compact, lightweight, durable, and splash-proof, this walkie-talkie is suitable for various applications such as survival camping, cycling, hiking, construction sites, and security work. It also features an integrated LED light for use in dark conditions.
2. Conținutul pachetului
Vă rugăm să verificați cu atenție coletul pentru a vă asigura că toate articolele sunt prezente și în stare bună. Dacă lipsesc sau sunt deteriorate articole, contactați distribuitorul.
- 2 x Baofeng PMR446 Two-Way Radios
- 2 x 1500 mAh Lithium-ion Batteries
- 2 x Charging Bases (DC plug type)
- 2 x căști
- 2 x Cleme pentru centura
- 2 x șnururi
- 1 x Manual de utilizare

Figura 2.1: Conținutul pachetului
3. Produs terminatview (Componente)
Familiarize yourself with the main components of your Baofeng PMR446 radio:

Figure 3.1: Radio Components
- Antenă: Pentru transmiterea și recepționarea semnalelor.
- Selector de canal: Buton rotativ pentru selectarea unuia dintre cele 16 canale disponibile.
- Volume Control / Power Switch: Buton rotativ pentru pornirea/oprirea radioului și reglarea volumului.
- Indicator LED: Displays radio status (e.g., transmitting, receiving, low battery).
- SP/MIC Jack: Port for connecting the earpiece/headset.
- Difuzor clar: Ieșiri audio recepționate.
- Microfon integrat: Capturează vocea ta pentru transmitere.
- Buton lanternă: Activează lanterna LED încorporată.
- Buton PTT (Apăsare și Vorbire): Apăsați și țineți apăsat pentru a transmite, eliberați pentru a primi.
- MONI Button (Monitor): Apăsați pentru a dezactiva temporar squelch-ul și a asculta semnale slabe.
4. Configurare
4.1 Instalarea bateriei
- Aliniați pachetul de baterii cu canelurile de pe spatele radioului.
- Glisați bateria în sus până când se fixează în poziție cu un clic.
- Pentru a o scoate, apăsați zăvorul de eliberare (dacă există) și glisați bateria în jos.
4.2 Atașarea antenei
- Înșurubați antena în sensul acelor de ceasornic în conectorul din partea superioară a radioului până când este fixată ferm. Nu strângeți prea tare.
4.3 Încărcarea bateriei
Before first use, fully charge the battery. The typical charging time is 4-5 hours.
- Connect the DC plug charger to a power outlet.
- Place the radio (with battery installed) into the charging base.
- Indicatorul LED de pe încărcător va afișa starea de încărcare (de exemplu, roșu pentru încărcare, verde pentru încărcare completă).
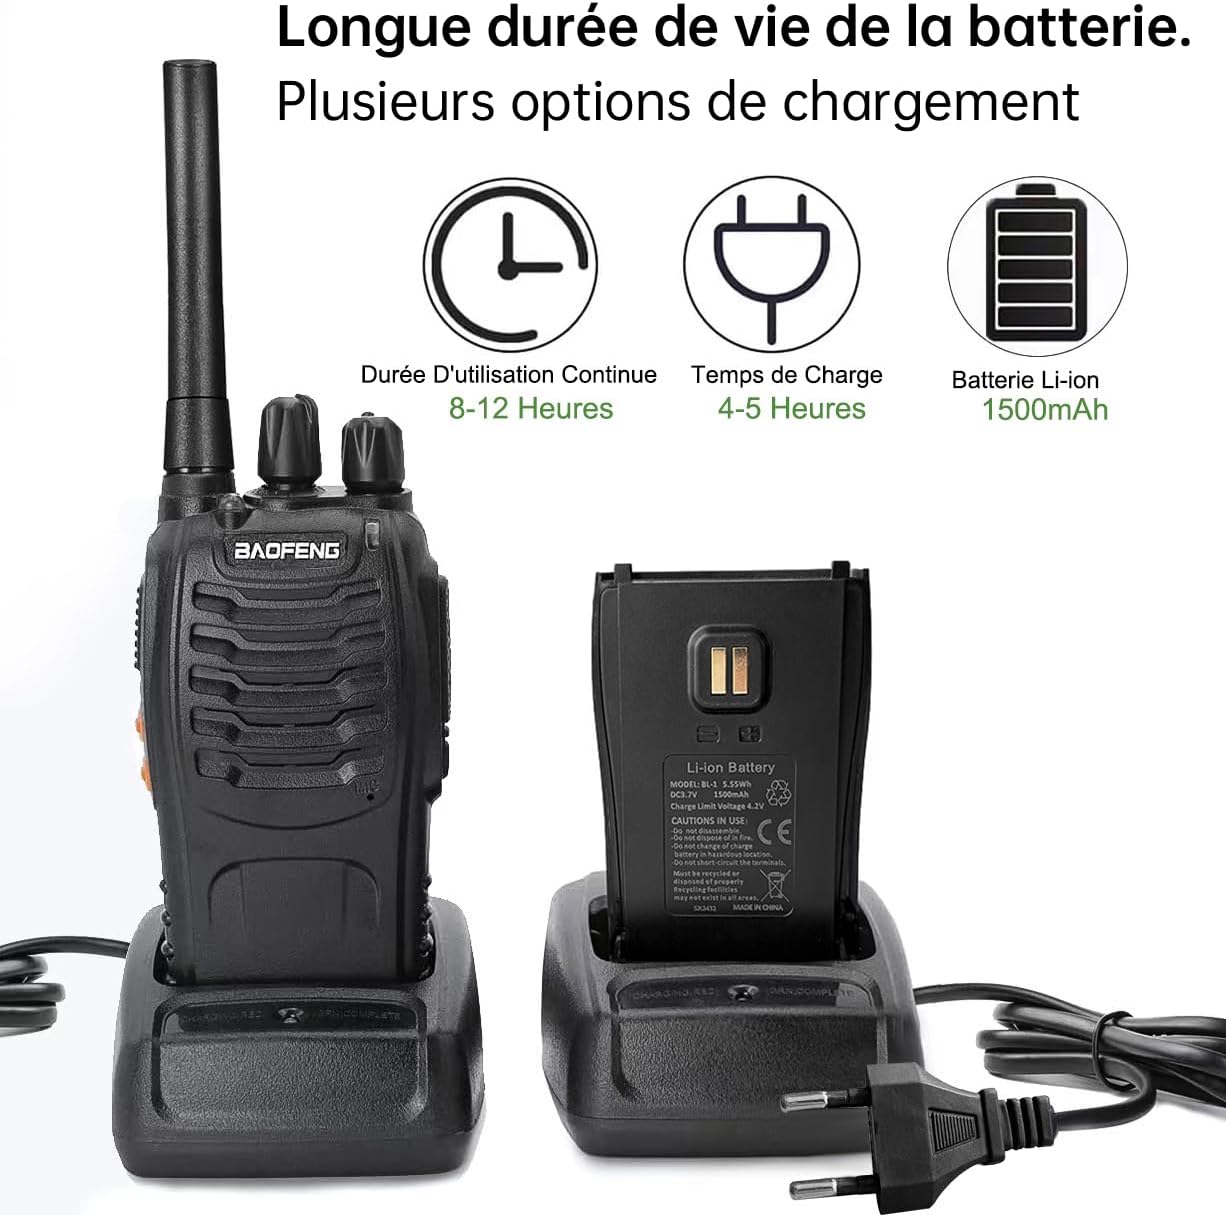
Figure 4.1: Charging the Radio
The radio also supports USB Type-C charging (cable not included) for convenience.

Figura 4.2: Port de încărcare USB tip C
4.4 Attaching Belt Clip and Lanyard
- Fixați clema de curea în zona desemnată de pe spatele radioului folosind șuruburile furnizate.
- Attach the lanyard to the loop on the top or side of the radio for added security.
4.5 Connecting Earpiece
- Insert the earpiece plug firmly into the SP/MIC jack on the side of the radio.
5. Instrucțiuni de utilizare
5.1 Pornire/Oprire și Reglare Volum
- To turn on the radio, rotate the Volume Control / Power Switch clockwise until you hear a click.
- Continue rotating the knob to adjust the volume to a comfortable level.
- Pentru a opri radioul, rotiți butonul în sens invers acelor de ceasornic până când auziți un clic.
5.2 Selectarea canalului
- Rotate the Channel Selector knob on top of the radio to choose one of the 16 available channels.
- Asigurați-vă că toate stațiile radio cu care doriți să comunicați sunt setate pe același canal.
5.3 Transmisie și recepție
- To transmit, press and hold the PTT (Push-to-Talk) button on the side of the radio. Speak clearly into the microphone. The LED indicator will typically glow red during transmission.
- Eliberați butonul PTT pentru a opri transmisia și a reveni la modul de recepție. Indicatorul LED va lumina de obicei în verde atunci când se primește un semnal.
5.4 Funcția de monitorizare (MONI)
- Press and hold the MONI button to temporarily disable the squelch function. This allows you to listen for very weak signals that might otherwise be blocked, or to check if a channel is clear before transmitting.
5.5 Funcția VOX (Centrală operată vocal)
The VOX function allows for hands-free transmission. When activated, the radio will automatically transmit when it detects your voice, without needing to press the PTT button. Refer to the full user manual for specific instructions on activating and adjusting VOX sensitivity.
5.6 Lanterna
- Press the Flashlight button to turn the LED flashlight on or off.
5.7 Alertă de urgență
The radio features an emergency alert function. Consult the detailed user manual for instructions on how to activate and use this feature, which can provide increased safety in critical situations.
6. Întreținere
6.1 Îngrijirea bateriei
- Nu supraîncărcați și nu descărcați complet bateria.
- Depozitați bateriile într-un loc răcoros și uscat atunci când nu sunt utilizate.
- Înlocuiți bateriile atunci când performanța lor scade semnificativ.
6.2 Curățare
- Curățați exteriorul radioului cu o lavetă moale șiamp pânză. Nu utilizați substanțe chimice dure sau produse de curățare abrazive.
- Ensure the SP/MIC jack and charging contacts are free of dust and debris.
6.3 Depozitare
- Dacă depozitați radioul pentru o perioadă lungă de timp, scoateți bateria.
- Store in a dry, temperature-controlled environment.
6.4 Rezistența la apă
The radio has a water-repellent design (estimated IPX4 rating). While it can withstand splashes, it is not designed for submersion. Avoid exposing it to heavy rain or direct water jets.
7. Depanare
- Radioul nu pornește: Check if the battery is properly installed and charged. Ensure the volume/power knob is turned clockwise.
- No sound or weak sound: Adjust the volume. Check earpiece connection. Ensure radios are on the same channel. Disable MONI function if accidentally activated.
- Poor range or interference: Ensure antenna is securely attached. Move to an open area away from obstructions (buildings, hills). Check for strong electromagnetic interference sources.
- Nu se poate transmite: Ensure PTT button is fully pressed. Check if the battery is low. Verify you are on an active channel.
- Bateria se descarcă repede: Ensure battery is fully charged. Reduce transmission time. Consider replacing an aging battery.
8. Specificații
| Marca | BaoFeng |
| Numărul de model | PMR446 |
| Culoare | Negru 01 |
| Numărul de canale | 16 |
| Caracteristici speciale | Rechargeable, Stable |
| Gama de frecvente | 300 MHz - 3 GHz |
| Raza maximă | 5 kilometri |
| Voltage | 3.7 volți |
| Nivel de rezistență la apă | Water Repellent (IPX4 estimated) |
| Tip baterie | 2 baterie litiu-ion (inclusă) |
| Dispozitive compatibile | Other walkie-talkies using the same frequency band (300 MHz - 3 GHz) and UHF tuner technology, compatible earpieces/headsets. |
| Protocol de conectivitate | Alte |
| Tip tuner | UHF |
9. Garanție și asistență
9.1 Informații despre garanție
This product comes with a one-month warranty from the date of purchase. Please retain your proof of purchase for any warranty claims. The warranty covers manufacturing defects but does not cover damage caused by misuse, accidents, unauthorized modifications, or normal wear and tear.
9.2 Asistență pentru clienți
For any questions, technical assistance, or warranty claims, please contact the seller or the manufacturer's customer support. Refer to your purchase documentation for contact details.


