
1. Introducere
The D-Link AC1750 WiFi Range Extender (DAP-1720) is designed to expand the coverage of your existing wireless network, providing a stronger and more reliable Wi-Fi signal throughout your home or office. This device supports dual-band connectivity (2.4 GHz and 5 GHz) with combined speeds up to 1750 Mbps, making it ideal for high-bandwidth activities like 4K streaming and online gaming across multiple devices. Its smart signal indicator assists in finding the optimal placement for maximum coverage.
2. Produs terminatview
The DAP-1720 features a compact, plug-in design with external antennas for enhanced signal strength. It includes a Gigabit Ethernet port for wired connections and a smart signal indicator for easy setup.
2.1 Caracteristici cheie
- Extends Wi-Fi coverage and eliminates dead spots with Dual Band connectivity.
- Supports both 2.4 GHz and 5 GHz bands for combined speeds up to 1750 Mbps.
- Smart Signal Indicator helps identify the best location for optimal Wi-Fi coverage.
- Features a 3x3 antenna configuration for improved data rates and reliability.
- Includes a 10/100/1000 Gigabit Ethernet Port for wired device connectivity.
2.2 Aspectul dispozitivului

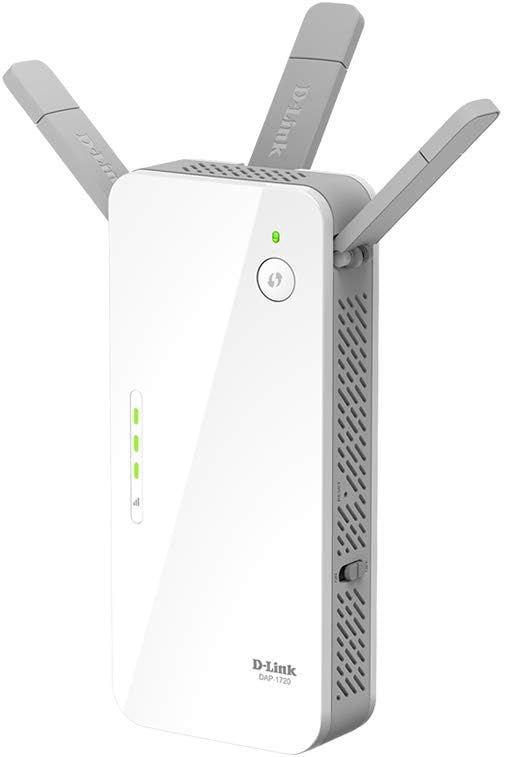
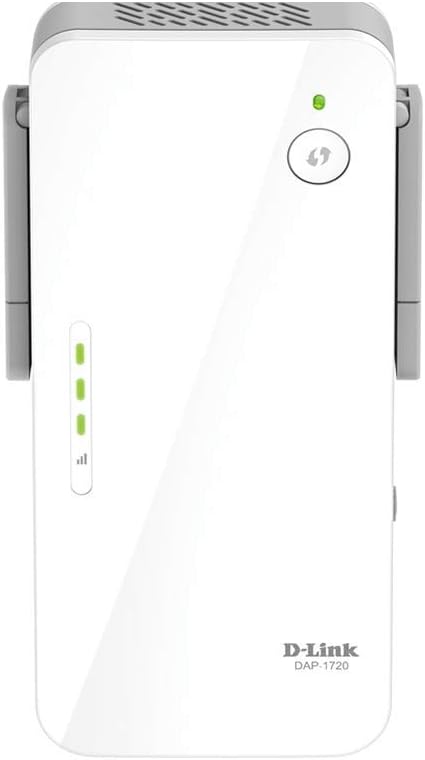

3. Instrucțiuni de configurare
There are two primary methods to set up your D-Link DAP-1720 Range Extender: using Wi-Fi Protected Setup (WPS) or manual configuration via a web browser.
3.1 WPS Setup (Recommended)
- Pornire: Plug the DAP-1720 into a power outlet near your existing wireless router. Wait for the power LED to turn solid green.
- Activați WPS pe router: Press the WPS button on your wireless router. Refer to your router's manual for the exact location of this button.
- Activați WPS pe extender: Within two minutes, press the WPS button on the DAP-1720 (often indicated by a circular arrow icon).
- Stare monitor: The signal indicator LEDs on the DAP-1720 will flash during the connection process. Once connected, the LEDs will turn solid green, indicating a successful connection.
- Plasare optimă: Unplug the DAP-1720 and move it to a location halfway between your router and the Wi-Fi dead zone. Plug it into a power outlet. The Smart Signal Indicator LEDs will help you find the best spot. Aim for at least two solid green bars for good signal strength.
Note: If the signal indicator shows red or only one bar, move the extender closer to your router.
3.2 Manual Setup (Web Browser)
- Pornire: Plug the DAP-1720 into a power outlet near your existing wireless router.
- Conectare la extender: On your computer or mobile device, connect to the D-Link extender's default Wi-Fi network (e.g., "dlink-XXXX"). The default Wi-Fi name and password are usually found on a label on the device or in the Quick Installation Guide (QIG).
- Expertul de configurare a accesului: Deschide a web browser și tip http://dlinkap.local or the default IP address (e.g., 192.168.0.50) în bara de adrese.
- Urmați instrucțiunile de pe ecran: The setup wizard will guide you through selecting your existing Wi-Fi network(s) and configuring the extender's settings, including its new Wi-Fi name and password.
- Plasare optimă: After configuration, unplug the DAP-1720 and move it to a suitable location as described in step 5 of the WPS setup.
4. Operating Your Range Extender
4.1 Conectarea dispozitivelor
- Dispozitive wireless: Once the extender is set up, search for the new extended Wi-Fi network name (SSID) on your devices (e.g., "YourNetworkName_EXT" or "YourNetworkName_5G_EXT") and connect using the password you configured.
- Dispozitive cu fir: For devices like smart TVs, gaming consoles, or desktop computers that benefit from a stable wired connection, use an Ethernet cable to connect them to the Gigabit Ethernet port on the DAP-1720.
Funcționalitate 4.2 Dual-Band
The DAP-1720 operates on both 2.4 GHz and 5 GHz frequency bands. The 2.4 GHz band offers wider coverage and better penetration through walls, while the 5 GHz band provides faster speeds over shorter distances with less interference. Your devices will automatically connect to the optimal band, or you can manually select the preferred band if separate SSIDs were configured during setup.
5. Întreținere
- Actualizări firmware: Verificați periodic suportul D-Link website for firmware updates. Keeping your device's firmware up-to-date ensures optimal performance, security, and access to new features.
- curatenie: Ensure the device's ventilation slots are clear of dust to prevent overheating. Use a soft, dry cloth for cleaning. Do not use liquid cleaners.
- Resetarea dispozitivului: If you encounter persistent issues or wish to reconfigure the extender from scratch, you can perform a factory reset. Locate the reset button (usually a small pinhole) on the device, and while the device is powered on, press and hold it for about 10 seconds using a paperclip until the LEDs flash.
6. Depanare
6.1 No Internet Access After Connecting to Extender
- Verificați conexiunea routerului: Asigurați-vă că routerul principal funcționează corect și are acces la internet.
- Plasarea extensorului: Verify the DAP-1720 is placed within range of your main router. The Smart Signal Indicator should show at least two green bars. Relocate if necessary.
- Reluați configurarea: Try re-running the WPS or manual setup process to ensure the extender is properly connected to your main Wi-Fi network.
- Conflict de adresă IP: If you manually configured the extender, ensure its IP address does not conflict with other devices on your network.
6.2 Poor Signal or Slow Speeds
- Mutați extensia: Move the extender closer to your main router. The ideal location is halfway between the router and the area needing coverage.
- Minimizați interferența: Keep the extender away from large metal objects, concrete walls, and devices that emit radio frequency interference (e.g., microwaves, cordless phones).
- Check Router Performance: Ensure your main router is providing adequate signal strength and speed.
- Actualizarea firmware-ului: Ensure the extender's firmware is up-to-date.
6.3 Nu se poate accesa Web-Based Setup Page
- Verificați conexiunea: Ensure your device is connected to the extender's Wi-Fi network (e.g., "dlink-XXXX") or directly via Ethernet.
- Adresă corectă: Double-check that you are typing http://dlinkap.local or the correct IP address into your browser's address bar.
- Ștergeți memoria cache a browserului: Încearcă să ștergi memoria cache și cookie-urile browserului sau folosește un alt browser.
- Temporarily Disable Firewall/Antivirus: Your computer's security software might be blocking access.
- Resetare din fabrică: If all else fails, perform a factory reset and attempt the manual setup again.
7. Specificații
| Caracteristică | Detaliu |
|---|---|
| Numărul de model | DAP-1720/RE |
| standard wireless | 802.11ac, 802.11n |
| Rata de transfer de date | Până la 1750 Mbps (450 Mbps pe 2.4GHz, 1300 Mbps pe 5GHz) |
| Clasa de bandă de frecvență | Dual-Band |
| Port Ethernet | 1 x 10/100/1000 Gigabit Ethernet Port |
| Configurarea antenei | 3x3 Internal Antennas |
| Dimensiunile produsului | 6.5 x 2.5 x 1.5 inci |
| Greutatea articolului | 8 uncii |
| Componente incluse | DAP-1720 device, Quick Installation Guide (QIG) |
8. Garanție și asistență
For detailed warranty information, technical support, and additional resources, please visit the official D-Link support website. You can find FAQs, updated drivers, and contact information for customer service.
Asistență D-Link Website: www.dlink.com/support