
1. Introducere
The Watts BT-D03 RF is a wireless digital room thermostat designed for precise temperature control in various heating and cooling installations. It features a backlit LCD screen and operates via 868 MHz radio frequency communication. This manual provides comprehensive instructions for the proper installation, operation, and maintenance of your thermostat.

Figura 1: Față view of the Watts BT-D03 RF Thermostat, showing the display and control buttons.
2. Informații de siguranță
- Citiți cu atenție toate instrucțiunile înainte de instalare și utilizare.
- Instalarea trebuie efectuată numai de către un electrician sau inginer de încălzire calificat.
- Asigurați-vă că sursa de alimentare este deconectată înainte de a efectua orice cablare sau întreținere.
- Nu expuneți dispozitivul la temperaturi extreme, umiditate sau lumina directă a soarelui.
- Țineți aparatul departe de copii.
3. Conținutul pachetului
Verificați dacă toate componentele sunt prezente în pachet:
- Watts BT-D03 RF Wireless Digital Room Thermostat
- Suport de masă
- Șuruburi de montare și dibluri de perete
- Manual de utilizare
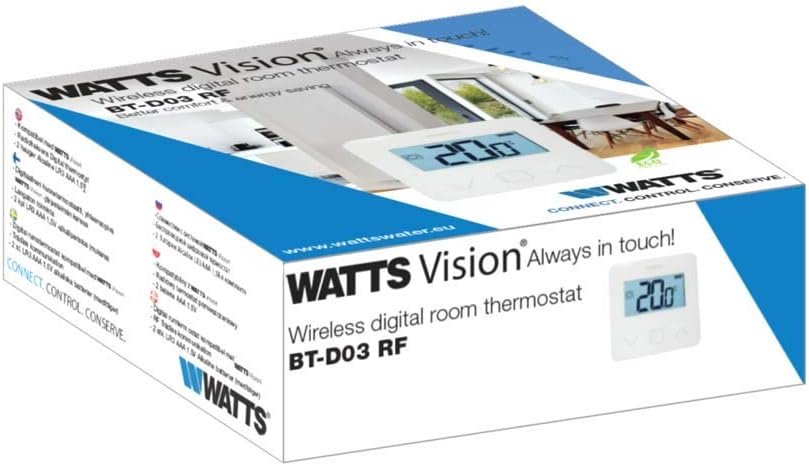
Figure 2: Product packaging of the Watts BT-D03 RF Thermostat.
4. Produs terminatview
4.1 Componente
- Display LCD: Backlit screen showing temperature, battery level, and operating status.
- Butoane de control: Up, Down, and OK/Menu buttons for navigation and setting adjustments.
- Senzori interni: For detecting ambient room temperature.
- External Sensor Port: For optional NTC 10 kOhm external sensor (not included).
- Indicator LED: Shows active heating/cooling signal.
- Internal Reset Button: For quick RF pairing or system reset.
- Buzzer: Provides audible feedback for certain operations.

Figura 3: Față detaliată view of the thermostat display.

Figura 4: Spate view of the thermostat, showing battery compartment and mounting points.
4.2 Dimensiuni
The physical dimensions of the thermostat are provided below for installation planning.
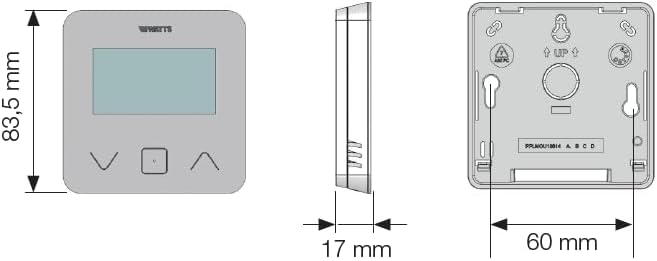
Figure 5: Dimensional drawing of the Watts BT-D03 RF Thermostat.
5. Configurare
5.1 Instalarea bateriei
- Remove the back cover of the thermostat.
- Introduceți două baterii AAA, asigurând polaritatea corectă.
- Puneți la loc capacul din spate.
5.2 Opțiuni de montare
The thermostat can be installed in two ways:
- Montare pe perete: Use the provided screws and wall plugs to secure the thermostat to a wall at an appropriate height (typically 1.5 meters from the floor).
- Plasare pe masă: Attach the included stand to the back of the thermostat for placement on a flat surface.

Figure 6: Thermostat with tabletop stand attached.
5.3 RF Pairing
To establish wireless communication with the receiver unit (sold separately), follow the pairing instructions provided with your receiver. The thermostat features an internal reset button for quick RF pairing, typically requiring a short press during the receiver's pairing mode.
6. Instrucțiuni de utilizare
6.1 Pornire/Oprire
The thermostat powers on automatically upon battery insertion. There is no dedicated on/off button for the thermostat unit itself; it remains active as long as batteries are present.
6.2 Reglarea temperaturii
Use the Up and Down buttons to adjust the desired setpoint temperature. The LCD will display the current setpoint during adjustment.
6.3 Moduri de afișare
You can choose to display either the detected ambient temperature or the currently set temperature on the LCD. Refer to the full installation parameters mode for configuration details.
6.4 Keypad Lock (PIN Code)
To prevent unauthorized changes, the keypad can be locked using a PIN code. This feature is particularly useful for installations in public areas. Consult the advanced settings menu for PIN code setup and activation.
6.5 Detectarea ferestrei deschise
The thermostat includes an open window detection feature. When a sudden drop in temperature is detected, the thermostat can temporarily suspend heating/cooling to conserve energy. This function can be configured in the settings.
6.6 Proportional Band Setting (PWM)
The thermostat supports proportional band setting (PWM) or configurable institutions (0.2÷3) for precise control of heating/cooling systems. This advanced setting allows for fine-tuning the system's response to temperature changes.
7. Întreținere
7.1 Înlocuirea bateriei
When the battery charge level indicator on the LCD shows low power, replace the two AAA batteries promptly to ensure continuous operation. Follow the battery installation steps in Section 5.1.
7.2 Curățare
Clean the thermostat's exterior with a soft, dry cloth. Do not use abrasive cleaners, solvents, or spray directly onto the device.
8. Depanare
- Fără afișare: Verificați instalarea bateriilor și nivelul de încărcare. Înlocuiți bateriile dacă este necesar.
- Nicio comunicare cu receptorul: Ensure the thermostat and receiver are within range. Re-perform the RF pairing procedure (Section 5.3).
- Citire incorectă a temperaturii: Asigurați-vă că termostatul nu este expus la lumina directă a soarelui, curenților de aer sau surselor de căldură.
- Tastatura nu răspunde: Check if the keypad lock (PIN Code) is active. Unlock the keypad as per instructions.
8.1 Funcția de resetare
If the thermostat is not functioning as expected, an internal reset button can be used. Consult the full installation parameters mode for specific reset procedures, as this may clear custom settings.
9. Specificatii tehnice
| Marca | wați |
| Numărul de model | BT-D03-RF-GT |
| Dimensiuni produs (L x l x H) | 6.2 x 1.7 x 8.35 cm |
| Greutatea articolului | 0.18 g |
| Voltage | 230 volți (pentru sistemul conectat, termostatul este alimentat de la baterie) |
| Sursa de alimentare | Alimentat cu baterie |
| Tip controler | Control manual |
| Tip de afișare | LCD |
| Iluminare de fundal | Da |
| Temperatura de operare | 0 până la 40 °C |
10. Informații de conformitate
The Watts BT-D03 RF Wireless Digital Room Thermostat complies with the following directives:
- 2014/35/UE
- 2014/30/UE
- 2014/53/UE
- 2011/65/UE
- 2012/19/UE
- 2015/1188/UE