
Introducere
This manual provides instructions for the proper setup, operation, and maintenance of your ELECOM EX-G Left Handed Trackball Mouse, model M-XT4DRBK-G. This wireless trackball mouse is designed for left-handed users, featuring ergonomic design, thumb control, and programmable buttons for enhanced productivity and comfort.

Image: The ELECOM EX-G Left Handed Trackball Mouse, showcasing its ergonomic design and red trackball.
Înființat
1. Conținutul pachetului
Verificați dacă toate articolele sunt prezente în colet:
- ELECOM EX-G Left Handed Trackball Mouse
- Receptor wireless USB
- Baterii AA (1)
- Manual de instrucțiuni (acest document)

Image: The trackball mouse, a single AA battery, and the USB receiver, representing the items included in the box.
2. Instalarea bateriei
- Localizați compartimentul bateriei pe partea inferioară a mouse-ului.
- Deschideți capacul compartimentului bateriei.
- Introduceți bateria AA furnizată, asigurându-vă că polaritatea este corectă (+/-).
- Închideți bine capacul compartimentului bateriei.

Image: A diagram showing the battery installation process for the trackball mouse.
3. Conectarea receptorului USB
- Scoateți receptorul USB din slotul său de stocare de pe partea inferioară a mouse-ului.
- Conectați receptorul USB la un port USB disponibil de pe computer.
- Your computer should automatically detect the device.

Image: A diagram illustrating how to insert the USB receiver into a computer's USB port.
4. Pornire
Locate the power switch on the underside of the mouse and slide it to the "ON" position. The mouse is now ready for use.

Image: A diagram showing the power switch on the underside of the trackball mouse in the "ON" position.
5. Software Installation (ELECOM Mouse Assistant)
To customize the 6 programmable buttons and other settings, download and install the "ELECOM Mouse Assistant" software from the official ELECOM website. This software allows you to assign various functions to each button.

Image: Screenshot of the ELECOM website showing the download links for the Mouse Assistant software for Windows and Mac.

Image: Screenshot of the ELECOM Mouse Assistant software interface, showing button customization options and DPI settings.
Instrucțiuni de operare
1. Basic Trackball Operation
Control the cursor by rolling the red trackball with your thumb. The optical tracking technology provides precise movement.

Image: A left hand operating the trackball mouse, demonstrating thumb control of the red trackball.
Video: Official product video demonstrating the ELECOM Left-Handed Wireless Thumb-Operated Trackball Mouse (M-XT4DRBK-G) in use, highlighting its features and ergonomic design.
2. Ajustarea DPI-ului
The DPI button allows you to switch between two cursor speeds: 750 DPI (Low) and 1500 DPI (High). Press the DPI button located near the scroll wheel to toggle between these settings.

Image: Close-up of the trackball mouse showing the DPI switch button, labeled "HIGH", located above the trackball.
3. Funcții butoane
The mouse features 6 physical buttons, which can be customized using the ELECOM Mouse Assistant software. Default functions include:
- Click stânga: Selecție primară.
- Click dreapta: Meniu contextual.
- Clic cu rotița de derulare: Middle click or auto-scrolling.
- Butonul Înapoi: Navighează înapoi în web browsere sau file exploratori.
- Buton înainte: Navighează înainte în web browsere sau file exploratori.
- Buton de funcție: Personalizabil prin software.
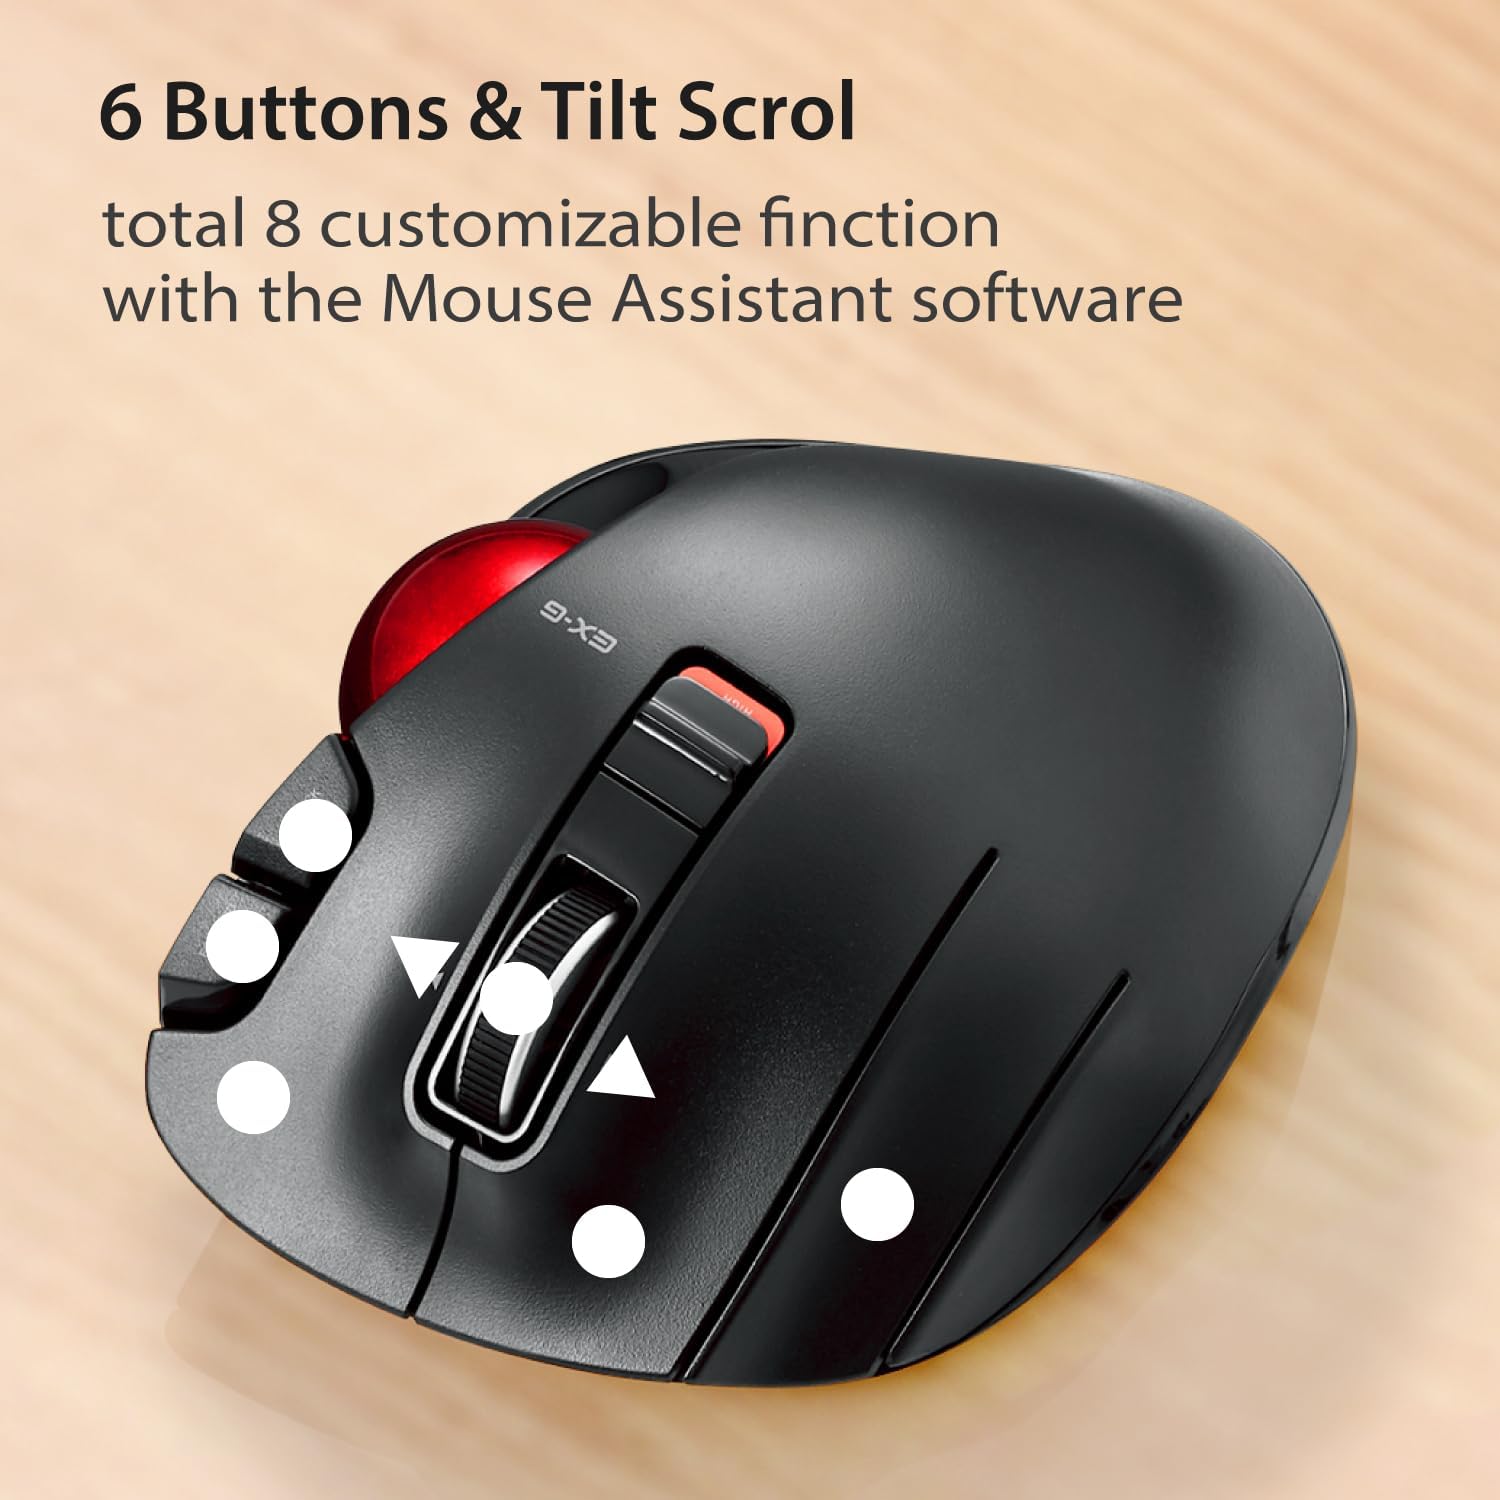
Imagine: De sus în jos view of the trackball mouse highlighting the positions of its 6 buttons and tilt scroll wheel.

Image: Detailed diagram labeling the tilt wheel, function button, back/forward buttons, DPI switch, 34mm ball, ball removal hole, power switch, low power indicator, high speed indicator, and USB receiver storage.
4. Tilt Scroll
The scroll wheel can be tilted left or right to enable horizontal scrolling, useful for navigating wide documents or spreadsheets. This function may not be supported on all operating systems (e.g., Windows RT8.1).
5. Design ergonomic
The mouse is designed to support the left hand in a natural, angled position, promoting comfort during extended use and reducing strain.

Image: A left hand resting comfortably on the trackball mouse, illustrating its ergonomic shape.
Întreţinere
1. Trackball Cleaning
Over time, dust and debris may accumulate around the trackball, affecting its smooth operation. To clean:
- Opriți mouse-ul.
- Locate the trackball removal hole on the underside of the mouse.
- Folosește un pix sau un obiect similar, neascuțit, pentru a împinge trackball-ul afară de jos în sus.
- Clean the trackball and the inside of the trackball housing with a soft, lint-free cloth.
- Reinsert the trackball until it clicks into place.
Image: Diagram showing the location of the trackball removal hole on the underside of the mouse, indicating where to push to remove the trackball for cleaning.
2. Înlocuirea bateriei
When the battery remaining light lamp indicates low power, replace the AA battery following the installation steps in the Setup section.
Depanare
| Problemă | Cauza posibila | Soluţie |
|---|---|---|
| Cursorul nu se mișcă sau se mișcă neregulat. |
|
|
| Buttons are not responding as expected. |
|
|
| Horizontal scrolling not working. |
|
|
Specificații
| Caracteristică | Detaliu |
|---|---|
| Numărul de model | M-XT4DRBK-G |
| Dimensiuni (L x l x H) | 4.9 x 3.73 x 1.89 inchi (124.4 x 94.7 x 47.9 mm) |
| Greutate (fara baterie) | 4.5 uncii (aprox. 127.6 g) |
| Conectivitate | Wireless 2.4 GHz (receptor USB) |
| Niveluri DPI | 750 / 1500 count (switchable) |
| Butoane | 6 (Programmable) + Tilt Scroll |
| Tehnologia de urmărire | Optical (Red Ball) |
| Sursa de alimentare | 1 x baterie AA (inclusă) |
| Cerințe de sistem | Windows Vista, 7, 8, 10 or later; macOS 10.10 or later |

Image: Diagram showing the length, width, and height dimensions of the trackball mouse.
Informații despre garanție
ELECOM products are typically covered by a limited manufacturer's warranty. For specific details regarding the warranty period and terms for your M-XT4DRBK-G trackball mouse, please refer to the warranty card included with your product or visit the official ELECOM website-ul.
Sprijin
For further assistance, technical support, or to download the latest version of the ELECOM Mouse Assistant software, please visit the official ELECOM-USA website:
You can also find additional product information and FAQs on the ELECOM brand store on Amazon.