
1. Introducere
The RICHMETERS RM098 is a compact, auto-ranging digital multimeter designed for accurate measurement of various electrical parameters. It is an ideal tool for professionals in laboratories and factories, as well as for hobbyists and general household use. This manual provides essential information for safe and effective operation of your device.
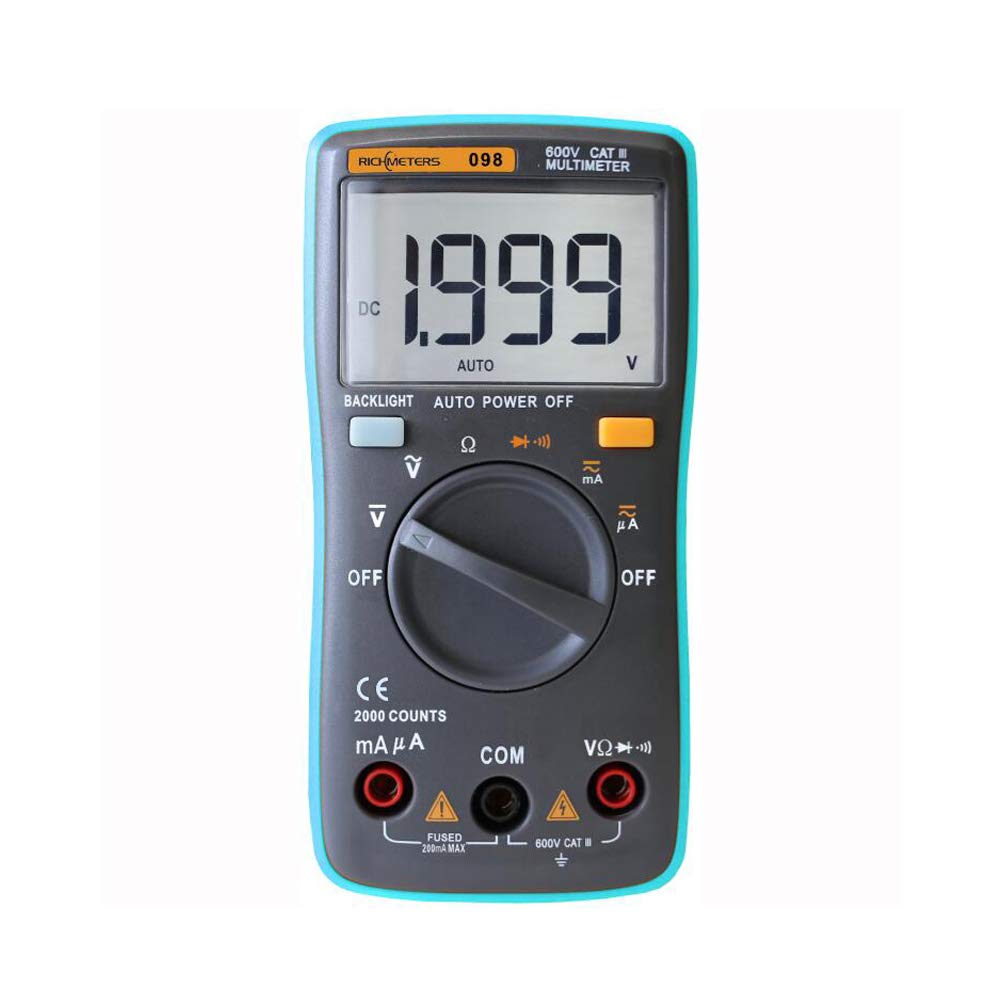
Figure 1: The RICHMETERS RM098 Digital Multimeter, showcasing its compact design and clear LCD display.
2. Informații de siguranță
To ensure safe operation and avoid personal injury or damage to the multimeter, please read and follow all safety instructions carefully.
- Asigurați-vă întotdeauna că multimetrul este în funcția și intervalul corect înainte de a efectua măsurători.
- Do not apply more than 600V DC between the test leads and ground. Exceeding this limit can cause severe damage to the device and pose a safety risk.
- Nu utilizați niciodată multimetrul dacă pare deteriorat sau dacă sondele de testare sunt compromise.
- Fiți extrem de precauți când lucrați cu voltagpeste 30V AC RMS, 42V peak sau 60V DC. Aceste voltajetagreprezintă un pericol de șoc.
- Înlocuiți bateriile imediat ce apare indicatorul de baterie descărcată pentru a asigura citiri precise.
- Asigurați-vă că capacul bateriei este închis corect înainte de utilizare.
- Nu utilizați multimetrul în medii cu gaze explozive, vapori sau praf.
3. Produs terminatview
3.1. Componente
The RM098 multimeter features a clear LCD display, a rotary function switch, and multiple input jacks for test leads.

Figura 2: Față view of the RM098 Multimeter, showing the display, rotary switch, and function buttons. The integrated kickstand allows for convenient hands-free operation.
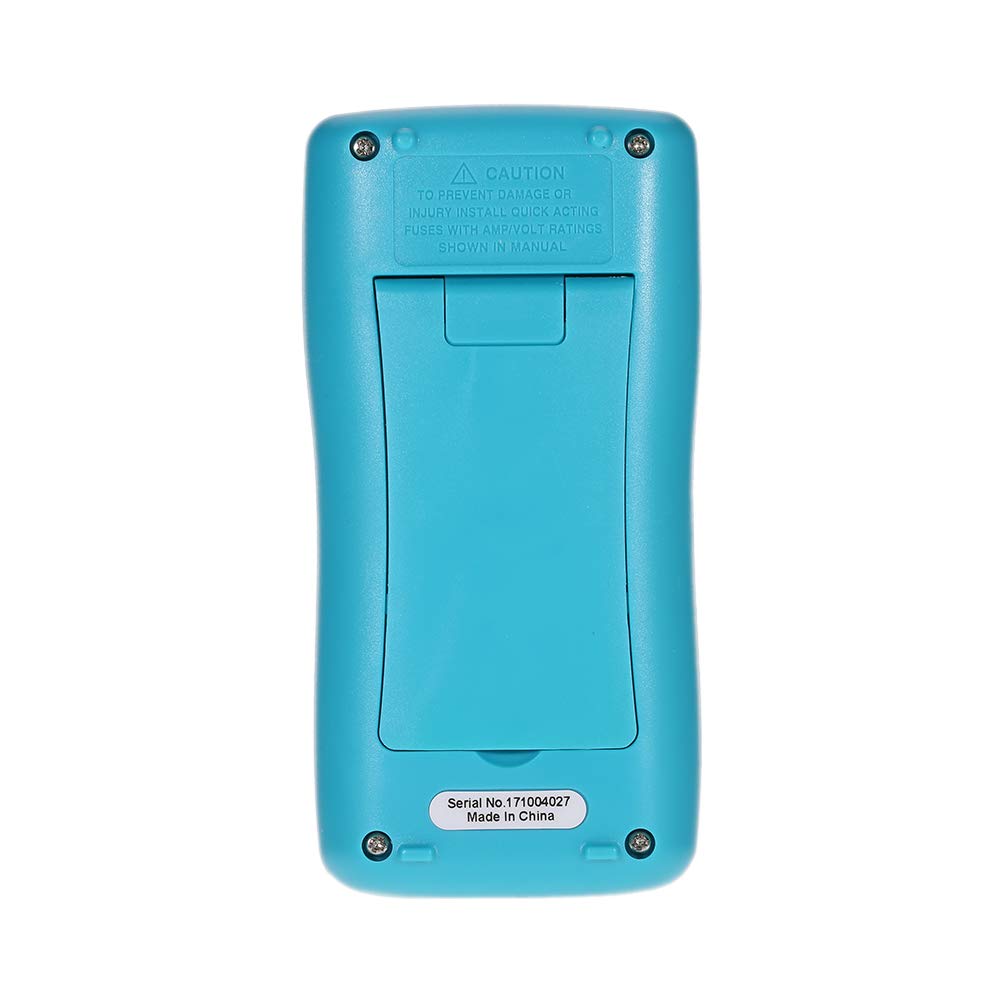
Figura 3: Spate view of the RM098 Multimeter, showing the battery compartment and safety warnings.

Figura 4: lateral view of the RM098 Multimeter, highlighting its slim profile.
3.2. Afișaj și comenzi
- Display LCD: 2000 counts with backlight for easy reading in various lighting conditions.
- Comutator rotativ: Folosit pentru a selecta funcția de măsurare dorită (Volumtage, Current, Resistance, Diode, Continuity).
- Butoane funcționale: Includes a 'Backlight' button and an 'Auto Power Off' indicator.
- Mufe de intrare: Dedicated ports for connecting test leads for different measurements (VΩmA, COM, 10A).
4. Configurare
4.1. Instalarea bateriei
- Asigurați-vă că multimetrul este oprit.
- Localizați compartimentul bateriei pe spatele dispozitivului (consultați Figura 3).
- Folosiți o șurubelniță pentru a deschide capacul compartimentului bateriei.
- Introduceți două baterii AAA de 1.5 V, respectând polaritatea corectă (+/-) așa cum este indicată în interiorul compartimentului.
- Puneți la loc capacul compartimentului bateriei și fixați-l cu șurubul.
4.2. Conectarea cablurilor de testare
- Connect the black test lead to the "COM" (common) input jack.
- Pentru majoritatea volumuluitage, resistance, diode, and continuity measurements, connect the red test lead to the "VΩmA" input jack.
- For current measurements (up to 200mA), connect the red test lead to the "VΩmA" input jack.
- For higher current measurements (up to 10A), connect the red test lead to the "10A" input jack.

Figure 5: The RM098 Multimeter with test leads properly connected to the input jacks.

Figura 6: Un prim-plan view of the test leads, showing the red and black probes.
5. Funcționare
This section details how to perform various measurements using the RICHMETERS RM098 multimeter.
5.1. Măsurarea tensiunii continue (DC Vol)tage (V–)
- Turn the rotary switch to the "V–" position.
- Connect the black test lead to the "COM" jack and the red test lead to the "VΩmA" jack.
- Connect the test probes across the DC voltage source to be measured, ensuring correct polarity.
- Citiți voltagValoarea de pe ecranul LCD.
5.2. Măsurarea AC Voltage (V∼)
- Turn the rotary switch to the "V∼" position.
- Connect the black test lead to the "COM" jack and the red test lead to the "VΩmA" jack.
- Conectați sondele de testare la priza de curent alternativtagsursa de măsurat.
- Citiți voltagValoarea de pe ecranul LCD.
5.3. Measuring DC Current (mA– / µA–)
- Turn the rotary switch to the "mA–" or "µA–" position, depending on the expected current range.
- Conectați sonda neagră de testare la mufa „COM”.
- For currents up to 200mA, connect the red test lead to the "VΩmA" jack. For currents up to 10A, connect the red test lead to the "10A" jack.
- Open the circuit where current is to be measured and connect the multimeter in series with the load, observing polarity.
- Citiți valoarea curentă pe afișajul LCD.
5.4. Measuring AC Current (mA∼ / µA∼)
- Turn the rotary switch to the "mA∼" or "µA∼" position.
- Conectați sonda neagră de testare la mufa „COM”.
- For currents up to 200mA, connect the red test lead to the "VΩmA" jack. For currents up to 10A, connect the red test lead to the "10A" jack.
- Open the circuit where current is to be measured and connect the multimeter in series with the load.
- Citiți valoarea curentă pe afișajul LCD.
5.5. Măsurarea rezistenței (Ω)
- Rotiți comutatorul rotativ în poziția „Ω”.
- Connect the black test lead to the "COM" jack and the red test lead to the "VΩmA" jack.
- Ensure the circuit or component to be measured is de-energized.
- Conectați sondele de testare la componentă.
- Citiți valoarea rezistenței pe afișajul LCD.
5.6. Diode Test (→|←)
- Turn the rotary switch to the "→|←" position.
- Connect the black test lead to the "COM" jack and the red test lead to the "VΩmA" jack.
- Conectați sonda roșie la anod și sonda neagră la catodul diodei.
- Afișajul va afișa volumul înaintetage drop. Reverse the probes; the display should show "OL" (Open Line) for a good diode.
5.7. Test de continuitate (♫)
- Turn the rotary switch to the "♫" position.
- Connect the black test lead to the "COM" jack and the red test lead to the "VΩmA" jack.
- Conectați sondele de testare la circuit sau la componentă.
- If the resistance is less than 60Ω, the built-in buzzer will sound, indicating continuity.
5.8. Iluminare de fundal
Press the "BACKLIGHT" button to turn the display backlight on or off. This feature enhances readability in dimly lit environments.
5.9. Oprire automată
The multimeter automatically powers off after approximately 15 minutes of inactivity to conserve battery life. To reactivate, turn the rotary switch to OFF and then back to the desired function, or press any button.
6. Specificații
Technical specifications for the RICHMETERS RM098 Digital Multimeter:

Figure 7: Detailed specifications table for the RM098 Multimeter, including ranges, accuracy, and resolution for various measurements.
| Parametru | Caietul de sarcini |
|---|---|
| Model | RM098 |
| Afişa | 2000 Counts, LCD with Backlight |
| Sample Rate | Aproximativ. de 3 ori/secundă |
| Impedanta de intrare | 10 MΩ |
| DC Voltage Gama | 200.0mV / 2.00V / 20.0V / 200.0V / 800.0V |
| AC Voltage Gama | 200.0mV / 2.00V / 20.0V / 200.0V / 600.0V |
| Gama de curent continuu | 200.0µA / 2000µA / 20.00mA / 200.0mA |
| Gama de curent alternativ | 200.0µA / 2000µA / 20.0mA / 200.0mA |
| Interval de rezistență | 200.0Ω / 2.000kΩ / 20.0kΩ / 200.0kΩ / 2.000MΩ / 20.00MΩ |
| Diode Test Current | 1.0 ± 0.7 mA |
| Continuitate Buzzer | Sounds if resistance < 60Ω |
| Temperatura de operare | 0-20°C, <70% RH |
| Temperatura de depozitare | -20-60°C, <80% RH (with battery removed) |
| Max Input Protection | 0.2A / 250V Fast Blow Ceramic Fuse |
| Alimentare electrică | 2 baterii AAA de 1.5 V (nu sunt incluse) |
| Greutatea articolului | 112 g / 3.94 oz |
| Dimensiunea produsului | 12.5 x 6.5 x 3cm / 4.9 x 2.56 x 1.18 in |
7. Întreținere
7.1. Îngrijire generală
- Păstrați multimetrul curat și uscat. Ștergeți carcasa cu un prosopamp cârpă și detergent blând. Nu folosiți abrazivi sau solvenți.
- Depozitați dispozitivul într-un loc răcoros și uscat, ferit de lumina directă a soarelui și de temperaturi extreme.
- If the multimeter is not used for an extended period, remove the batteries to prevent leakage.
7.2. Înlocuirea bateriei
When the low battery indicator appears on the display, replace the batteries immediately to ensure accurate measurements. Follow the battery installation steps in Section 4.1.
7.3. Înlocuirea siguranței
The multimeter is protected by a 0.2A / 250V fast blow ceramic fuse. If the current measurement function stops working, the fuse may need replacement. Fuse replacement should only be performed by qualified personnel. Ensure to use a fuse of the exact specified type and rating.
8. Depanare
If you encounter issues with your RM098 multimeter, refer to the following common problems and solutions:
- Fără afișaj / Afișaj slab: Verificați instalarea bateriilor și nivelul de încărcare. Înlocuiți bateriile dacă este necesar.
- Citiri incorecte: Ensure test leads are properly connected to the correct input jacks. Verify the rotary switch is set to the appropriate function and range. Check for damaged test leads.
- Fără măsurare a curentului: Check the fuse. Ensure the multimeter is connected in series with the circuit.
- "OL" (Overload) on Display: The measured value exceeds the selected range. Switch to a higher range or ensure the circuit is within the device's capabilities.
9. Conținutul pachetului
The RICHMETERS RM098 package includes the following items:

Figure 8: The RM098 Multimeter, test leads, and user manual as typically included in the package.
- 1 x RICHMETERS RM098 Digital Multimeter
- 1 x Pereche de cabluri de testare (roșu și negru)
- 1 x Manual de utilizare în limba engleză
- 1 x Geantă de transport
10. Garanție și asistență
Pentru informații despre garanție sau asistență tehnică, vă rugăm să consultați documentația furnizată în momentul achiziției sau să contactați distribuitorul. Păstrați bonul fiscal ca dovadă a achiziției.