
1. Introducere
Thank you for choosing the CREATE SILKAIR CONNECT 3-in-1 Mobile Air Conditioner. This versatile appliance is designed to provide cooling, dehumidification, and fan functions for your living space. With its Wi-Fi connectivity, you can conveniently control the unit via a mobile application. Please read this manual thoroughly before operation to ensure safe and efficient use.
Model: 64274_145198
Marca: CREA
2. Informații de siguranță
Respectați întotdeauna măsurile de siguranță de bază atunci când utilizați aparate electrice pentru a reduce riscul de incendiu, electrocutare și vătămare corporală.
- Asigurați-vă că sursa de alimentare corespunde volumuluitage specificat pe eticheta de rating.
- Nu utilizați unitatea cu un cablu sau un ștecher deteriorat.
- Păstrați unitatea departe de sursele de căldură și de lumina directă a soarelui.
- Nu blocați intrările sau ieșirile de aer.
- Deconectați întotdeauna unitatea de la priză înainte de curățare sau întreținere.
- Acest aparat folosește agent frigorific R290. Nu perforați circuitul de agent frigorific.
- Supravegheați copiii și asigurați-vă că nu se joacă cu aparatul.
3. Conținutul pachetului
Carefully unpack your air conditioner and check that all items are present and in good condition.
- CREATE SILKAIR CONNECT Mobile Air Conditioner Unit
- Furtun de evacuare
- Window Sealing Kit (Adjustable window slider, hose adapter)
- Telecomanda
- Manual de utilizare

Figure 1: The CREATE SILKAIR CONNECT Mobile Air Conditioner unit shown alongside a smartphone displaying its control application interface.
4. Produs terminatview
4.1 Panoul de control

Figure 2: Close-up of the top-mounted control panel, featuring an LED display and touch-sensitive buttons for various functions such as power, mode selection, fan speed, and timer.
4.2 Componente și dimensiuni
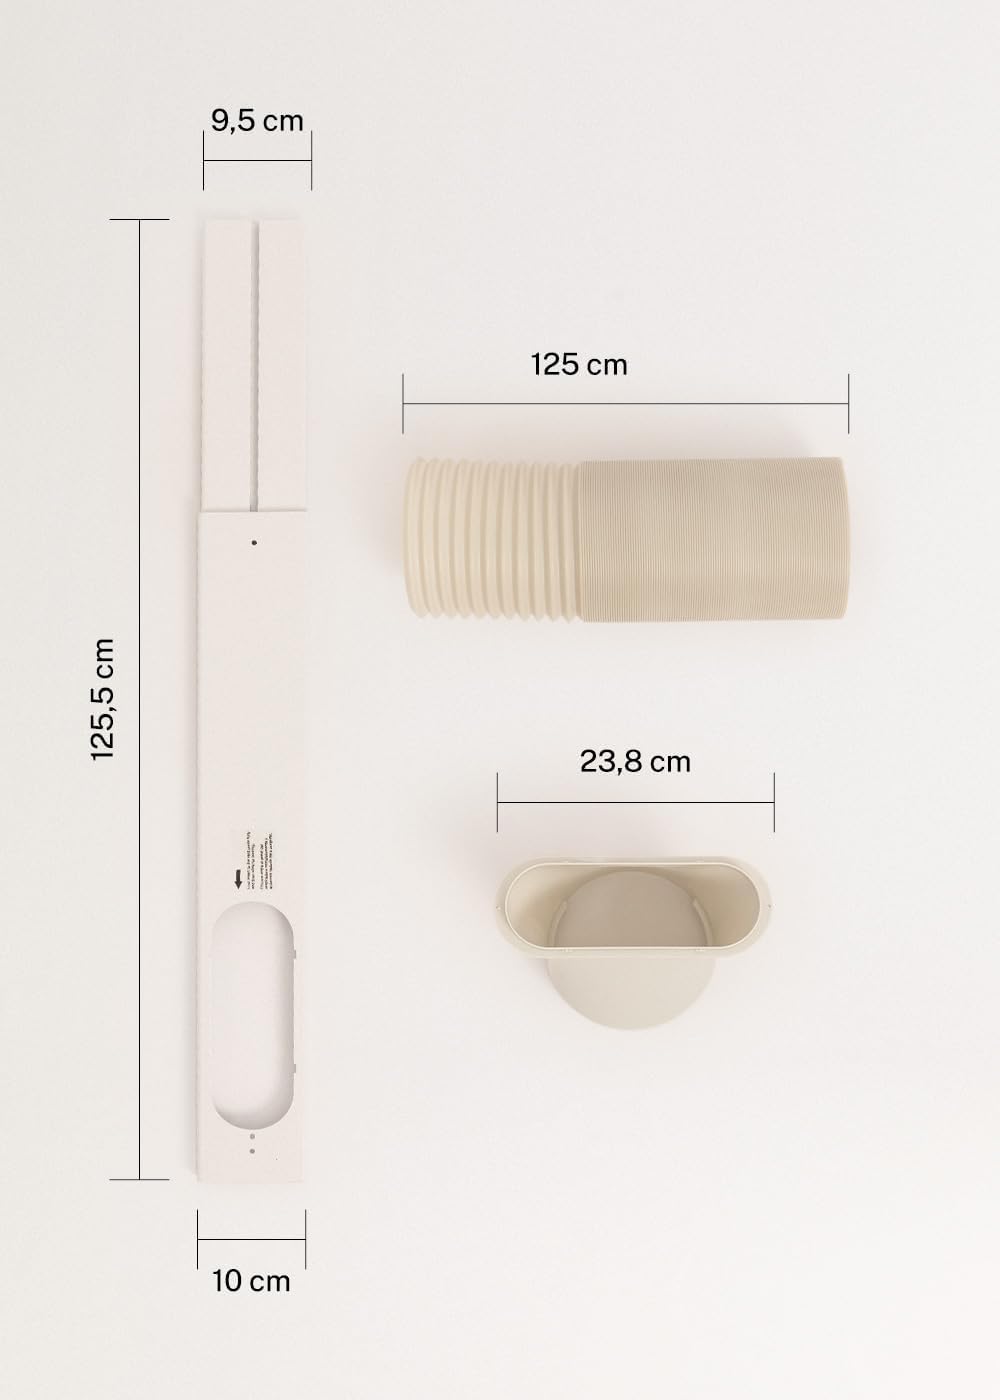
Figure 3: Detailed diagram illustrating the dimensions of the window sealing plate (125.5 cm length, 10 cm width, 9.5 cm adjustable width) and the exhaust hose (125 cm length) with its adapter (23.8 cm diameter).
5. Configurare și instalare
Proper installation is crucial for the efficient operation of your mobile air conditioner.
5.1 Poziționarea unității
- Așezați unitatea pe o suprafață plană și stabilă.
- Ensure there is at least 30 cm of space around the unit for proper airflow.
- Poziționați unitatea lângă o fereastră sau o deschidere pentru furtunul de evacuare.
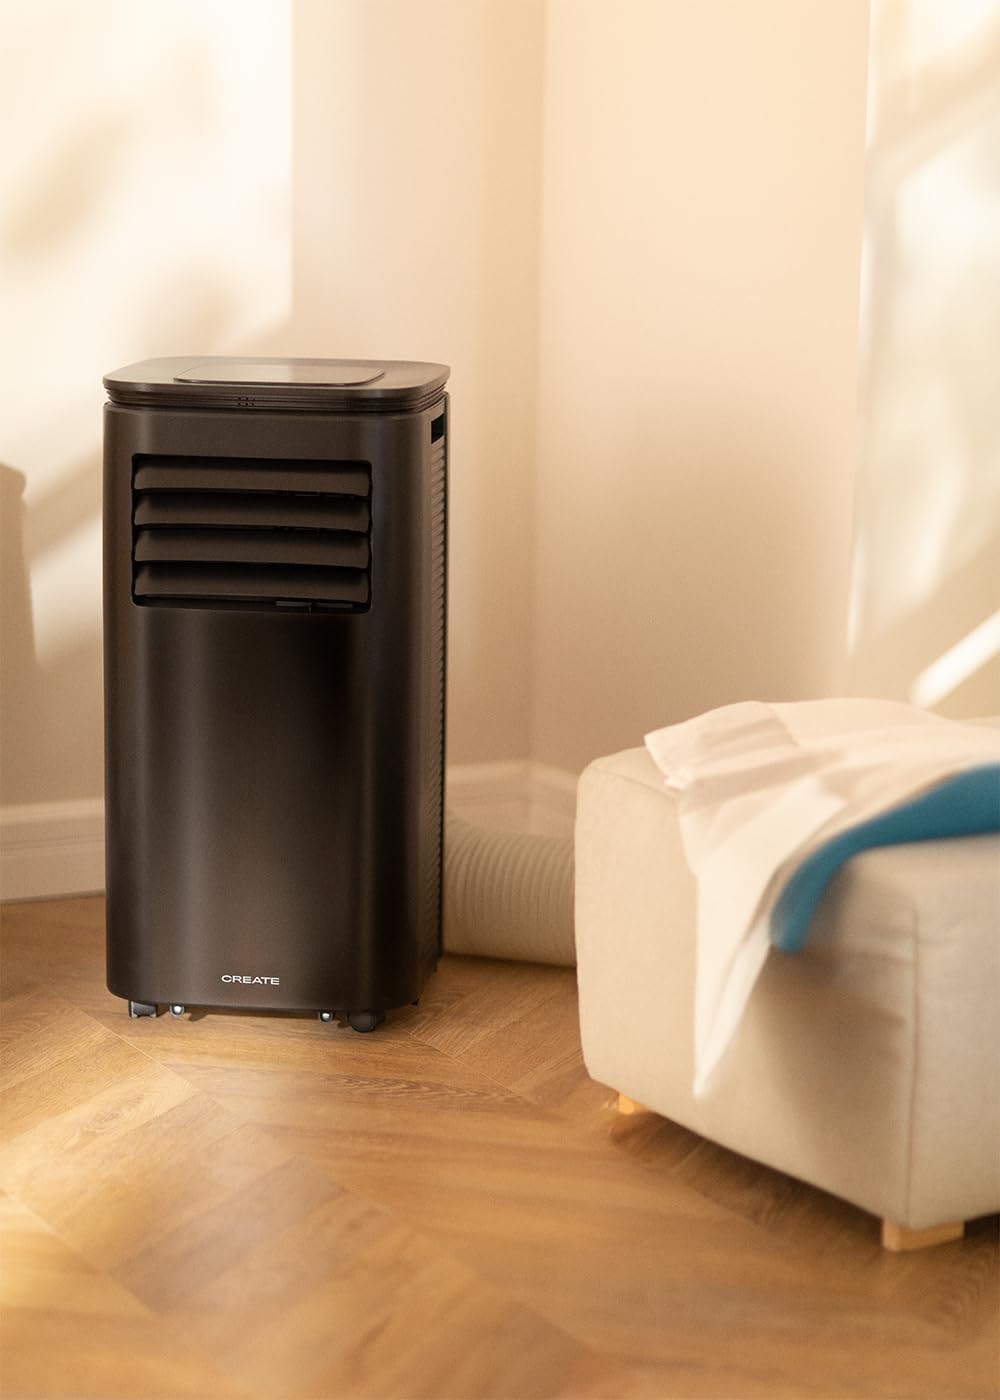
Figure 4: The air conditioner unit positioned in a room, demonstrating the typical setup with the exhaust hose directed towards a window for heat expulsion.
5.2 Installing the Exhaust Hose and Window Kit
- Atașați adaptorul furtunului la un capăt al furtunului de evacuare.
- Conectați celălalt capăt al furtunului de evacuare la orificiul de evacuare a aerului din spatele unității.
- Install the adjustable window sealing kit in your window opening. Extend it to fit the window frame.
- Insert the hose adapter into the opening of the window sealing kit.

Figure 5: Illustrates the secure connection of the flexible exhaust hose to the designated port at the rear of the air conditioning unit.
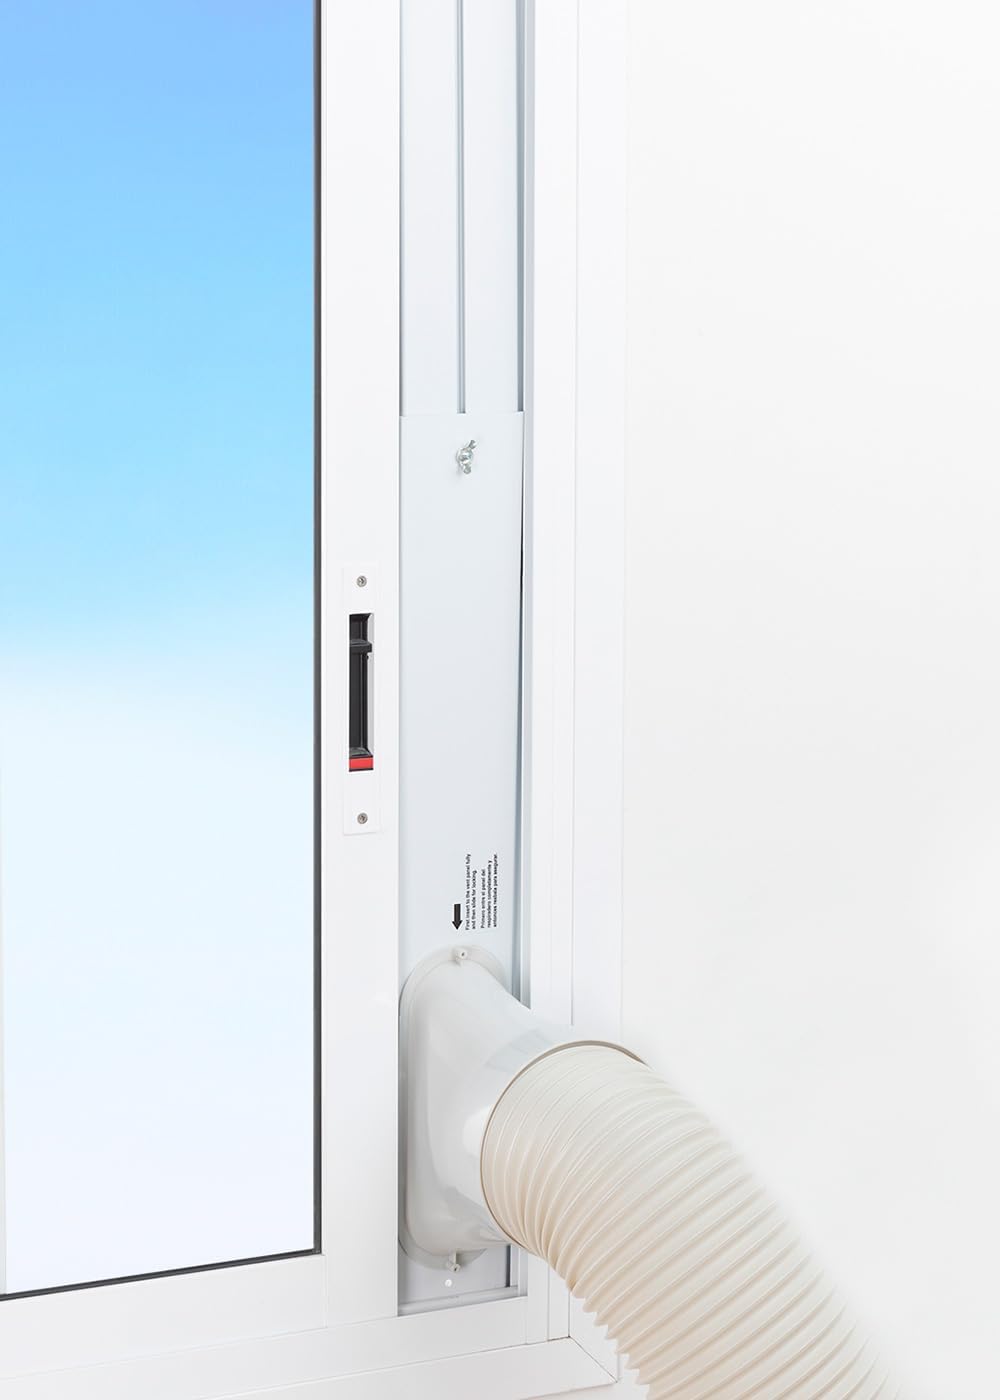
Figure 6: The window sealing kit is shown properly installed in a window frame, with the exhaust hose securely fitted into the kit's opening to vent hot air outside.
6. Instrucțiuni de utilizare
6.1 Utilizarea panoului de control
The control panel on top of the unit allows direct operation.
- Buton de alimentare: Apăsați pentru a porni sau opri unitatea.
- Butonul de mod: Comutați între modurile Răcire, Ventilator și Dezumidificator.
- Buton pentru viteza ventilatorului: Adjust fan speed (Low, High).
- Butoane de temperatură (+/-): Adjust desired temperature in Cooling mode.
- Buton cronometru: Set the auto-on or auto-off timer (up to 24 hours).
- Buton pentru modul de repaus: Activează un mod de funcționare mai silențios pentru utilizarea pe timp de noapte.
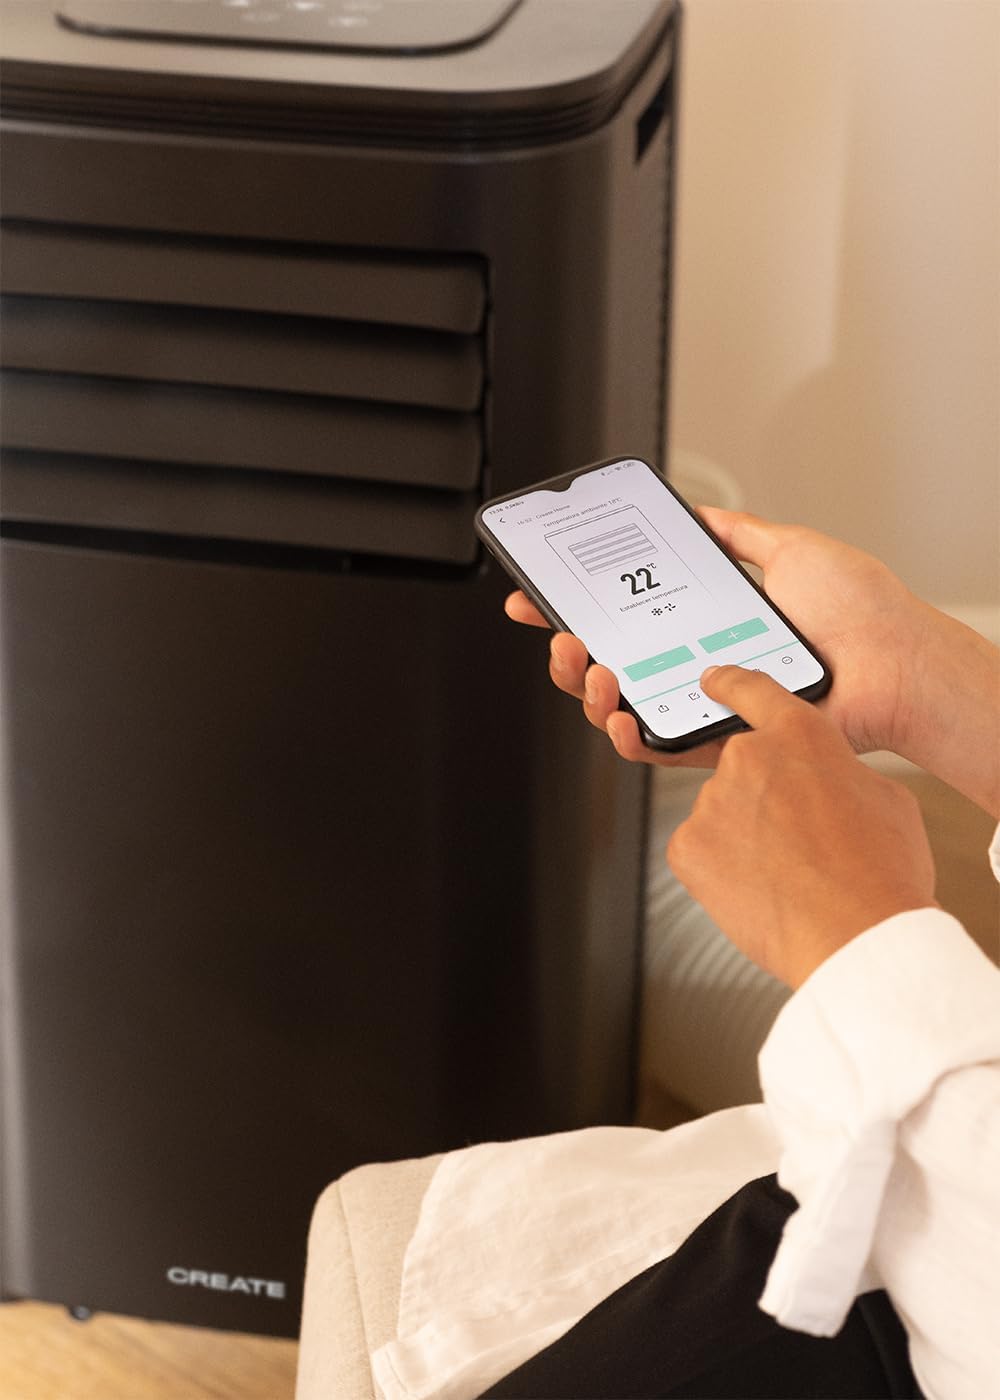
Figure 7: A user's hand interacting with the touch-sensitive control panel located on the top surface of the air conditioner, demonstrating direct manual operation.
6.2 Utilizarea telecomenzii
The remote control provides convenient operation from a distance.

Figure 8: A hand holding the dedicated remote control for the air conditioner, illustrating its use for convenient operation from a distance.
6.3 Control prin Wi-Fi și aplicații
Download the CREATE Home app from your smartphone's app store. Follow the in-app instructions to connect your air conditioner to your home Wi-Fi network. Once connected, you can control all functions of the unit from your smartphone, including mode selection, temperature adjustment, fan speed, and timer settings.
Figure 9: A user interacting with the mobile application on a smartphone to remotely control the air conditioner, showcasing the Wi-Fi connectivity feature.
7. Întreținere
Întreținerea regulată asigură performanțe optime și prelungește durata de viață a unității dumneavoastră.
7.1 Curăţarea filtrului de aer
Filtrul de aer trebuie curățat la fiecare două săptămâni sau mai des, în funcție de utilizare și de calitatea aerului.
- Opriți unitatea și deconectați-o de la priza de alimentare.
- Locate the air filter panel on the back of the unit.
- Scoateți ușor filtrul.
- Clean the filter with warm, soapy water or a vacuum cleaner. Rinse thoroughly and allow it to air dry completely before reinserting.

Figure 10: Demonstrates the process of removing the air filter from the rear of the air conditioner unit for cleaning or replacement.
7.2 Evacuarea apei
In Dehumidifier mode or high humidity conditions, the internal water tank may fill up. The unit will stop operating when the tank is full. Drain the water from the drainage port at the bottom rear of the unit.
8. Depanare
| Problemă | Cauza posibila | Soluţie |
|---|---|---|
| Unitatea nu pornește | No power; Power cord not plugged in; Water tank full. | Verificați priza; Conectați cablul de alimentare; Goliți rezervorul de apă. |
| Unitatea nu răcește eficient | Filtru de aer murdar; Furtun de evacuare neinstalat corect; Cameră prea mare; Uși/ferestre deschise. | Clean air filter; Ensure hose is sealed; Use in recommended room size (14-25 m²); Close doors/windows. |
| Zgomot puternic | Unitatea nu este pe o suprafață plană; Obstrucție în ventilator. | Place on flat surface; Check for obstructions. |
| Probleme de conexiune Wi-Fi | Parolă Wi-Fi incorectă; Router prea departe; Probleme cu aplicația. | Verificați parola; Mutați unitatea mai aproape de router; Reporniți aplicația/unitatea. |
9. Specificații
| Caracteristică | Caietul de sarcini |
|---|---|
| Numărul de model | 64274_145198 |
| Capacitatea de racire | 9000 BTU / 2270 Watt |
| Capacitate de dezumidificare | 24 litri/zi |
| Flux de aer | Până la 350 m³/h |
| Dimensiunea recomandată a camerei | 14-25 m² |
| Nivel de zgomot | 65 dB |
| Agent frigorific | R290 (ECO-friendly) |
| Voltage | 240 volți |
| Wattage | 2600 Watt |
| Dimensiuni (L x l x H) | 35.5 x 36.5 x 71.3 cm |
| Material | ABS |
| Clasa de eficienta energetica | A |

Figure 11: The energy efficiency label for the CREATE SILKAIR CONNECT, indicating an A-class energy rating, 2.6 kW cooling capacity, and a noise level of 65 dB. More details can be found at eprel.ec.europa.eu/qr/1580267.
10. Garanție și asistență
For warranty information and technical support, please refer to the warranty card included with your product or visit the official CREATE webPăstrați bonul fiscal ca dovadă a achiziției.
Producător: CREA
Contact: Refer to CREATE's official support channels.