
1. Introducere
This manual provides detailed instructions for the setup, operation, and maintenance of your BMW Multi-Function Clock, Alarm, and Weather Station. This device combines a digital clock, an alarm with a snooze function, and a weather station that displays temperature. Please read this manual carefully before use to ensure proper functionality and to maximize your experience with the product.
2. Conținutul pachetului
Vă rugăm să verificați conținutul pachetului la despachetare. Dacă lipsesc sau sunt deteriorate articolele, contactați distribuitorul.
- BMW Multi-Function Clock, Alarm, and Weather Station Unit
- Manual de utilizare (acest document)
3. Configurare
3.1. Instalarea bateriei
Dispozitivul necesită 2 baterii AAA (not included) for operation. Follow these steps to install the batteries:
- Localizați capacul compartimentului bateriilor din spatele unității.
- Glisați sau ridicați ușor capacul pentru a deschide compartimentul.
- Introduceți două baterii AAA, asigurându-vă de polaritatea corectă (+ și -) așa cum este indicată în interiorul compartimentului.
- Puneți bine capacul compartimentului bateriei.
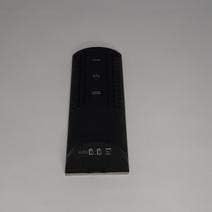
Figura 3.1: Spate view of the device, illustrating the battery compartment and control buttons for setup.
3.2. Pornirea inițială
After battery installation, the device display will illuminate, and it will typically show a default time or begin searching for a signal (if applicable for weather functions). Proceed to the operating instructions to set the time and other functions.
4. Instrucțiuni de utilizare
4.1. Setarea orei și datei
Pentru a seta ora și data curente:
- Țineți apăsat butonul MOD button (usually located on the back or side) for a few seconds until the time display starts flashing.
- Utilizați UP or JOS buttons (often labeled '+' or '-') to adjust the hour.
- Presa MOD again to confirm the hour and move to the minutes.
- Ajustați minutele folosind UP or JOS butoane.
- Continuați să apăsați MOD and adjusting with SUS/JOS for year, month, and day settings.
- Presa MOD o ultimă dată pentru a ieși din modul de setare.
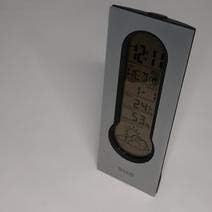
Figura 4.1: Front display of the device, showing the digital clock, temperature, and weather forecast icons.
4.2. Setarea alarmei
Pentru a seta ora alarmei:
- În modul normal de afișare a orei, apăsați tasta ALARMA butonul (sau MOD repeatedly until 'AL' or an alarm icon appears).
- Țineți apăsat butonul ALARMA apăsați butonul până când ora alarmei începe să clipească.
- Utilizați UP or JOS butoane pentru a seta ora dorită a alarmei.
- Presa ALARMA again to confirm the hour and move to the minutes.
- Ajustați minutele folosind UP or JOS butoane.
- Presa ALARMA one last time to save the alarm setting. An alarm icon will typically appear on the display to indicate the alarm is active.
4.3. Using Snooze Function
Când alarma sună, apăsați tasta PUI DE SOMN button (usually a large button on the top of the unit) to temporarily silence the alarm. The alarm will sound again after a few minutes (typically 5-10 minutes, depending on the model). To turn off the alarm completely, press any other button or let it ring until it automatically stops.

Figura 4.2: Top view of the device, highlighting the prominent SNOOZE button.
4.4. Afișarea temperaturii
The device continuously displays the ambient temperature. The temperature unit (Celsius or Fahrenheit) can usually be switched by pressing a dedicated button (e.g., 'C/F' or 'TEMP') or by holding down one of the adjustment buttons during time setting.
4.5. Weather Station Function
The integrated weather station provides a basic weather forecast using graphical icons (e.g., sun, clouds, rain). This forecast is based on internal barometric pressure changes and is an estimation for the local area. It is not connected to external weather services.
5. Întreținere
5.1. Curatenie
To clean the device, use a soft, dry cloth. Do not use abrasive cleaners, solvents, or chemical sprays, as these can damage the surface and electronic components. Avoid getting moisture into the device.
5.2. Înlocuirea bateriei
When the display dims or functions become erratic, it is time to replace the batteries. Follow the battery installation steps in Section 3.1. Always replace both batteries at the same time with new AAA batteries.
6. Depanare
Dacă întâmpinați probleme cu dispozitivul dvs., vă rugăm să consultați următoarele probleme și soluții frecvente:
- Afișajul este gol sau slab iluminat:
Check if batteries are installed correctly. Replace with fresh AAA batteries. - Ora sau data este incorectă:
Refer to Section 4.1 to reset the time and date. Ensure you confirm each setting step. - Alarma nu sună:
Verify that the alarm is set and activated (look for an alarm icon on the display). Ensure the volume is not set to zero if adjustable. - Temperatura citită pare inexactă:
Ensure the device is not placed in direct sunlight, near heat sources, or in drafts, which can affect readings. Allow some time for the sensor to stabilize after placement. - Weather forecast icons are not changing:
The weather forecast is based on local barometric pressure changes and may take time to update. It provides a general trend, not a precise forecast.
7. Specificații
| Caracteristică | Detaliu |
|---|---|
| Marca | BMW |
| Numărul de model | 06017443015007 |
| Caracteristici speciale | Alarm, Snooze, Temperature Display |
| Sursa de alimentare | Baterie |
| Tip baterie | 2 x baterii AAA (nu sunt incluse) |
| ASIN | B089QGJ9VR |
8. Garanție și asistență
This product is covered by a standard manufacturer's warranty. For specific warranty terms and conditions, please refer to the documentation provided at the time of purchase or contact your retailer. For technical support or service inquiries, please reach out to the point of purchase or the manufacturer's customer service department.