
POOLEX PC-SLP200N
Manual de utilizare pentru pompa de căldură POOLEX POOLSTAR Silverline Inverter 210
Model: PC-SLP200N
Marcă: POOLEX
1. Introducere
Thank you for choosing the POOLEX POOLSTAR Silverline Inverter 210 Heat Pump. This manual provides essential information for the safe and efficient installation, operation, and maintenance of your new pool heat pump. Designed for pools up to 110 m³, this unit features a multi-frequency compressor and variable fan for optimal performance and quiet operation, along with Wi-Fi connectivity for convenient control.
2. Informații de siguranță
WARNING: Read all safety warnings and instructions carefully before installing or operating this appliance. Failure to follow these instructions may result in electric shock, fire, serious injury, or death.
- Ensure the heat pump is installed by a qualified technician in accordance with local electrical and plumbing codes.
- Deconectați întotdeauna alimentarea unității înainte de a efectua orice operațiune de întreținere sau service.
- Do not operate the heat pump if any part is damaged or if the power cord is frayed.
- Țineți copiii și animalele de companie departe de unitate în timpul funcționării.
- Asigurați o ventilație adecvată în jurul unității pentru a preveni supraîncălzirea.
- Nu blocați orificiile de admisie sau de evacuare a aerului.
- This appliance is designed for heating pool water only. Do not use for other purposes.
3. Conținutul pachetului
Verificați dacă toate articolele enumerate mai jos sunt incluse în pachetul dumneavoastră:
- POOLEX POOLSTAR Silverline Inverter 210 Heat Pump Unit
- Anti-vibration Support Kit (4 pieces)
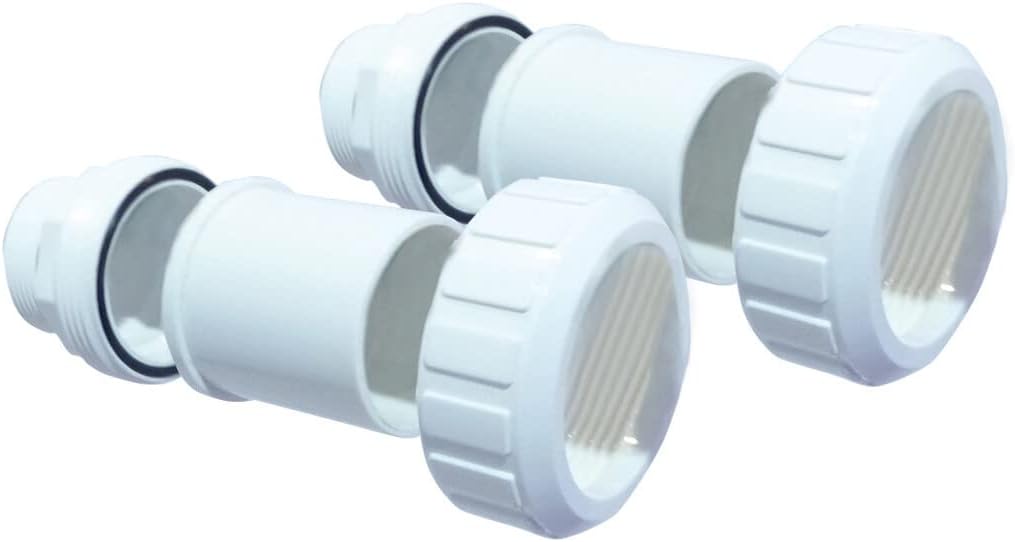
- PVC Connectors (Ø 50mm 1" ½)
- Furtun de evacuare a condensului
- Wired Control Extension Cable (10m)
- User Manual and Documentation Folder
- Protective Cover (for storage/protection)

POOLEX Silverline Inverter 210 Heat Pump

Anti-vibration Supports

Conectori PVC

Furtun de evacuare a condensului
Wired Control Extension Cable

Husa de protectie

User Manual Folder
4. Configurare
4.1. Plasare
- Choose a well-ventilated outdoor location, away from direct sunlight and heat sources.
- Ensure sufficient clearance around the unit for proper airflow (refer to specific distances in the detailed manual).
- Place the unit on a solid, level surface. Use the provided anti-vibration supports to minimize noise and vibration.
4.2. Conexiuni de apă
- Connect the heat pump to your pool's filtration system using the supplied PVC connectors (Ø 50mm 1" ½).
- Asigurați-vă că toate conexiunile sunt etanșe pentru a preveni scurgerile.
- Install the condensate drain hose to direct condensed water away from the unit's base.
4.3. Conexiuni electrice
- Electrical installation must be performed by a certified electrician.
- Ensure the power supply matches the specifications of the heat pump (refer to the rating label on the unit).
- Connect the wired control extension cable if you wish to relocate the LED control panel up to 10 meters away from the main unit.
5. Instrucțiuni de utilizare
5.1. Pornirea inițială
- Asigurați-vă că pompa piscinei funcționează și că apa curge prin pompa de căldură.
- Conectați alimentarea cu energie a pompei de căldură.
- Unitatea va efectua o autoverificare.
5.2. Setarea temperaturii
- Use the LED control panel to set your desired pool water temperature.
- The heat pump will automatically adjust its operation to reach and maintain the set temperature.
5.3. Conectivitate Wi-Fi
- Download the dedicated POOLEX application on your smartphone.
- Urmați instrucțiunile din aplicație pentru a conecta pompa de căldură la rețeaua Wi-Fi de acasă.
- Once connected, you can monitor and control your heat pump remotely from your smartphone.
6. Întreținere
6.1. Curățare regulată
- Curățați periodic exteriorul unității cu o lavetă moale șiamp pânză.
- Ensure the air intake and exhaust grilles are free from debris (leaves, dirt, etc.).
6.2. Water Flow Check
- Regularly check the pool filter and pump to ensure adequate water flow to the heat pump. Reduced flow can impact performance.
6.3. Pregătire pentru iarnă
- Before freezing temperatures, drain all water from the heat pump and plumbing lines to prevent damage.
- Deconectați sursa de alimentare.
- Cover the unit with the provided protective cover for off-season storage.
7. Depanare
If you encounter issues, refer to the table below for common problems and solutions. For complex issues, contact customer support.
| Problemă | Cauza posibila | Soluţie |
|---|---|---|
| Pompa de căldură nu pornește | Fără alimentare cu energie electrică; Întrerupătorul de circuit s-a declanșat | Verificați conexiunea la rețea; Resetați întrerupătorul de circuit |
| Low heating performance | Insufficient water flow; Dirty coils; Ambient temperature too low | Check pool pump and filter; Clean unit coils; Operate within recommended temperature range |
| Zgomot neobișnuit | Loose components; Debris in fan; Unit not level | Inspect for loose parts; Clear debris; Ensure unit is level and anti-vibration supports are used |
| Probleme de conexiune Wi-Fi | Incorrect password; Router too far; App issues | Verify Wi-Fi password; Move router closer or use extender; Reinstall app |
8. Specificații
| Caracteristică | Caietul de sarcini |
|---|---|
| Numărul de model | PC-SLP200N |
| Dimensiuni (L x l x H) | 110.4 x 33.4 x 75.6 cm |
| Greutate | 25 kg |
| Volumul recomandat al piscinei | 80 - 110 m³ |
| Tip compresor | Multi-frequency (Mitsubishi) |
| Schimbător de căldură | Twisted Tech (Titanium coil) |
| Conectivitate | Wi-Fi, Wired Control Panel (10m extension) |
| COP (26°C/26°C) | Până la 16 |
9. Garanție și asistență
POOLEX is committed to your satisfaction. For warranty information, please refer to the documentation included with your product or visit the official POOLEX website. In case of technical issues or questions, please contact POOLEX customer service.
Please note that information regarding spare parts availability is not readily available. For any spare parts inquiries, please contact POOLEX customer support directly.
Pentru asistență suplimentară, vă rugăm să vizitați: www.poolex.fr
Ask a question about this manual
Ask about setup, troubleshooting, compatibility, parts, safety, or missing instructions. Manuals+ will review the question and use this page’s manual context to help answer it.