
1. Introducere
This manual provides essential information for the proper setup, operation, and maintenance of your VIOTEK GNV34DB 34-inch Ultrawide Gaming Monitor. Please read this manual thoroughly before using the product to ensure optimal performance and longevity. Keep this manual for future reference.

Image: The VIOTEK GNV34DB monitor from a front-right angle, showcasing its curved display.
2. Conținutul pachetului
Verify that all items listed below are present and in good condition upon opening the package. If any items are missing or damaged, please contact customer support.
- VIOTEK GNV34DB 34-Inch Ultrawide Gaming Monitor
- Adaptor AC
- Cablu HDMI
- Cablu DisplayPort
- Manual de utilizare (acest document)
3. Configurare
3.1 Asamblarea suportului
- Scoateți cu grijă monitorul și componentele suportului din ambalaj.
- Atașați baza suportului la gâtul suportului folosind șuruburile furnizate.
- Secure the assembled stand to the back of the monitor. Ensure all connections are firm.
3.2 Montare VESA
The monitor supports VESA mounting (75x75mm) for alternative mounting solutions. Remove the stand before attaching a VESA-compatible mount.
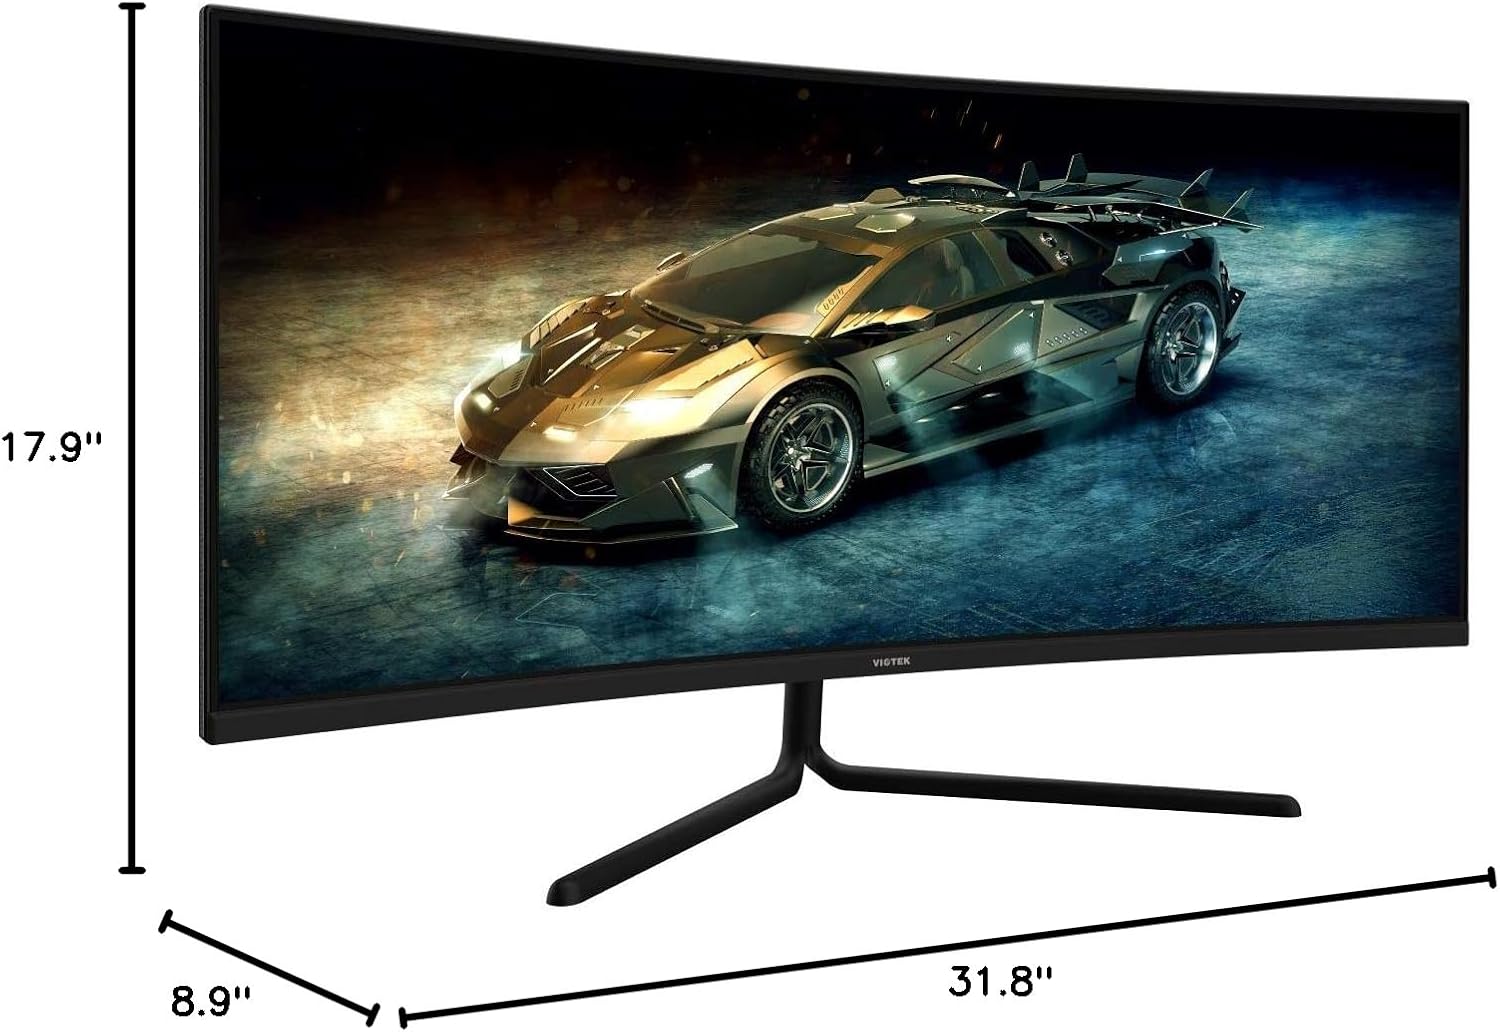
Image: Monitor dimensions are shown as 31.8 inches wide, 17.9 inches high, and 8.9 inches deep, indicating the physical size for placement and VESA compatibility.
3.3 Conectarea la un dispozitiv
Connect your computer or other devices to the monitor using the appropriate ports. Ensure the monitor is powered off before making connections.
- DisplayPort (DP 1.2): For optimal performance, use the included DisplayPort cable to connect to your graphics card.
- HDMI (HDMI 1.4 / HDMI 2.0): Use an HDMI cable to connect to devices supporting HDMI output.
- Ieșire audio de 3.5 mm: Conectați difuzoare externe sau căști la acest port pentru ieșire audio.

Imagine: Partea din spate view of the monitor highlighting the available input ports: DisplayPort 1.2, 3.5mm Audio Out, two HDMI 1.4 ports, and one HDMI 2.0 port.
4. Instrucțiuni de utilizare
4.1 Pornire/Oprire
Apăsați butonul de alimentare situat pe monitor pentru a-l porni sau opri. Indicatorul luminos de alimentare se va aprinde atunci când monitorul este activ.
4.2 Meniul de afișare pe ecran (OSD).
The OSD menu allows you to adjust various monitor settings. Use the control buttons (typically located on the back or bottom of the monitor) to navigate the menu.
- Luminozitate/Contrast: Adjust display luminance and contrast levels.
- Setări de culoare: Modificați temperatura culorii, gama și valorile RGB individuale.
- Sursa de intrare: Manually select the active input (DP, HDMI 1, HDMI 2, HDMI 3).
- Mod imagine: Select from preset display modes optimized for different content types (e.g., Standard, Movie, Game).
- Overdrive: Adjust response time for reduced motion blur.
4.3 Caracteristici cheie
- AMD FreeSync: This technology synchronizes the monitor's refresh rate with your graphics card's frame rate to eliminate screen tearing and stuttering during gaming. Enable FreeSync in the OSD menu and in your graphics card's control panel.

Image: A visual comparison demonstrating the effect of AMD FreeSync, showing a distorted image when FreeSync is off and a smooth image when FreeSync is on.
- GAMEPLUS: Activate on-screen crosshairs for enhanced aiming accuracy in games.

Image: A gaming scene on the monitor with three different GAMEPLUS crosshair options displayed at the bottom, indicating enhanced aiming features.
- FPS/RTS Optimization: Specific display modes designed to enhance visibility in First-Person Shooter (FPS) and Real-Time Strategy (RTS) games, often by adjusting gamma and contrast in dark areas.
- Curbură 1500R: The monitor's 1500R curve provides a more immersive viewing experience by matching the natural curvature of the human eye, reducing eye strain and expanding the perceived field of view.

Imagine: O imagine de sus view of the curved monitor on a desk, illustrating the 1500R curvature and its benefit of providing full field of view acoperire.
- UWQHD (3440x1440) Resolution & 21:9 Aspect Ratio: Offers a wide workspace and immersive cinematic experience.

Image: The monitor displaying a vibrant game scene, with an overlay highlighting its 34-inch size, 21:9 aspect ratio, and 3440x1440p UWQHD resolution.
5. Specificații
| Caracteristică | Caietul de sarcini |
|---|---|
| Dimensiunea afișajului | 34 inchi |
| Tip panou | Panoul VA |
| Curbură | 1500R |
| Rezoluţie | 3440x1440p (UWQHD) |
| Raportul de aspect | 21:9 |
| Rata de reîmprospătare | 100 Hz |
| Timp de răspuns | 6ms GTG (5ms Overdrive) |
| Viewunghiul ing | H178° / V178° |
| Culori afișate | 16.7 milioane |
| Gama de culori | sRGB: 99%, NTSC: 85% |
| Raport de contrast | 3000:1 (Static), 1M:1 (Dynamic) |
| Luminozitate | 300 cd/m² |
| Compatibilitate VESA | 75x75mm |
| Porturi | 1x DP 1.2, 2x HDMI 1.4, 1x HDMI 2.0, 1x 3.5mm Audio Out |
| Ajustare înclinare | -5° ~ 15° |
| Dimensiuni (cu suport) | 31.8 x 17.9 x 8.9 inchi (808.65 x 454.19 x 225.58 mm) |
| Greutate | 15.5 lbs (7.02 kg) |
6. Depanare
Dacă întâmpinați probleme cu monitorul, consultați următoarele probleme și soluții frecvente:
- Fără putere:
- Asigurați-vă că cablul de alimentare este conectat corect la monitor și la o priză funcțională.
- Verificați dacă adaptorul de alimentare funcționează corect.
- Nici un semnal:
- Check that the video cable (DP or HDMI) is firmly connected to both the monitor and your computer.
- Selectați sursa de intrare corectă prin intermediul meniului OSD.
- Ensure your computer's graphics card is properly installed and drivers are up to date.
- Ecran pâlpâitor:
- Asigurați-vă că cablul video nu este deteriorat și este conectat corect.
- Ajustați rata de reîmprospătare în setările de afișare ale computerului.
- Disable or enable FreeSync in the OSD menu and graphics card settings to see if it resolves the issue.
- Pixeli morți:
- Refer to the warranty section for information on Viotek's Zero-Tolerance Dead Pixel Policy.
7. Întreținere
Follow these guidelines to maintain your monitor's performance and appearance:
- Curățarea ecranului: Ștergeți ușor ecranul cu o lavetă moale, fără scame. Pentru petele persistente, utilizați o soluție de curățare specifică monitorului, aplicată pe lavetă, nu direct pe ecran.
- Curățarea C-uluiasing: Folosiți o cârpă moale și uscată pentru a curăța partea monitorului.asing. Evitați utilizarea de produse de curățare sau solvenți abrazivi.
- Ventilare: Asigurați-vă că orificiile de ventilație ale monitorului nu sunt blocate pentru a preveni supraîncălzirea.
- Depozitare: Când nu este utilizat pentru perioade lungi de timp, depozitați monitorul într-un loc răcoros și uscat, de preferință în ambalajul original.
8. Garanție și asistență
Your VIOTEK GNV34DB monitor is covered by a Garanție limitată de 3 ani. This warranty includes Viotek's Politica de toleranță zero privind pixelii morți, ensuring that your display is free from dead pixels upon purchase.

Image: A graphic highlighting the 3-year warranty and Zero Dead Pixel policy for parts and labor.
For warranty claims, technical support, or any inquiries, please contact Viotek customer service. Details can typically be found on the official Viotek website sau prin documentația achiziției.


