
1. Introducere
This manual provides detailed instructions for the installation, operation, and maintenance of your Lapetus 8-Channel 1080N Hybrid 5-in-1 AHD Digital Video Recorder (DVR). This DVR supports multiple video input types, including Analog, AHD, HD-TVI, CVI, and 1080P NVR, offering a versatile solution for your surveillance needs. Please read this manual thoroughly before using the device to ensure proper setup and functionality.
2. Conținutul pachetului
Verificați dacă toate articolele enumerate mai jos sunt incluse în pachetul dumneavoastră:
- 1 x Lapetus 8CH Digital Video Recorder (Model LT-6708NH)
- 1 x sursă de alimentare 12V/2000mA pentru DVR
- 1 x mouse USB
- 1 x Ghid de utilizare
Note: Hard Disk Drive (HDD) and cameras are not included and must be purchased separately for recording functionality.
3. Produs terminatview
3.1 Panoul frontal

Imagine: față view of the Lapetus 8CH DVR, showing the brand logo, status indicators, and navigation buttons.
The front panel features status indicators and control buttons:
- IR: Infrared receiver for remote control (if applicable).
- Putere: Indicates the DVR is powered on.
- HDD: Indicates Hard Disk Drive activity.
- Alarma: Indicates an active alarm event.
- Butoane de navigare: Used to navigate menus and settings on a connected display.
3.2 Panoul din spate
Imagine: Spate view of the Lapetus 8CH DVR, displaying various input and output ports for video, audio, network, and power.
Panoul din spate oferă toate porturile de conectare necesare:
- VIDEO IN (1-8): BNC connectors for connecting up to 8 surveillance cameras.
- AUDIO IN (4CH): RCA connectors for audio input from microphones.
- AUDIO OUT (1CH): RCA connector for audio output to a speaker or ampmai în viață.
- HDMI: High-Definition Multimedia Interface output for connecting to a monitor or TV.
- VGA: Ieșire Video Graphics Array pentru conectarea la un monitor.
- USB: USB ports for connecting the included mouse, USB flash drives for backup, or external storage.
- NET (RJ-45): Port Ethernet pentru conexiune la rețea.
- DC 12 V: Intrare de alimentare pentru DVR.
- Control PTZ: RS485 port for controlling Pan-Tilt-Zoom cameras.
- Intrare/Ieșire alarmă: Ports for connecting external alarm sensors and output devices.
3.3 Hybrid Compatibility

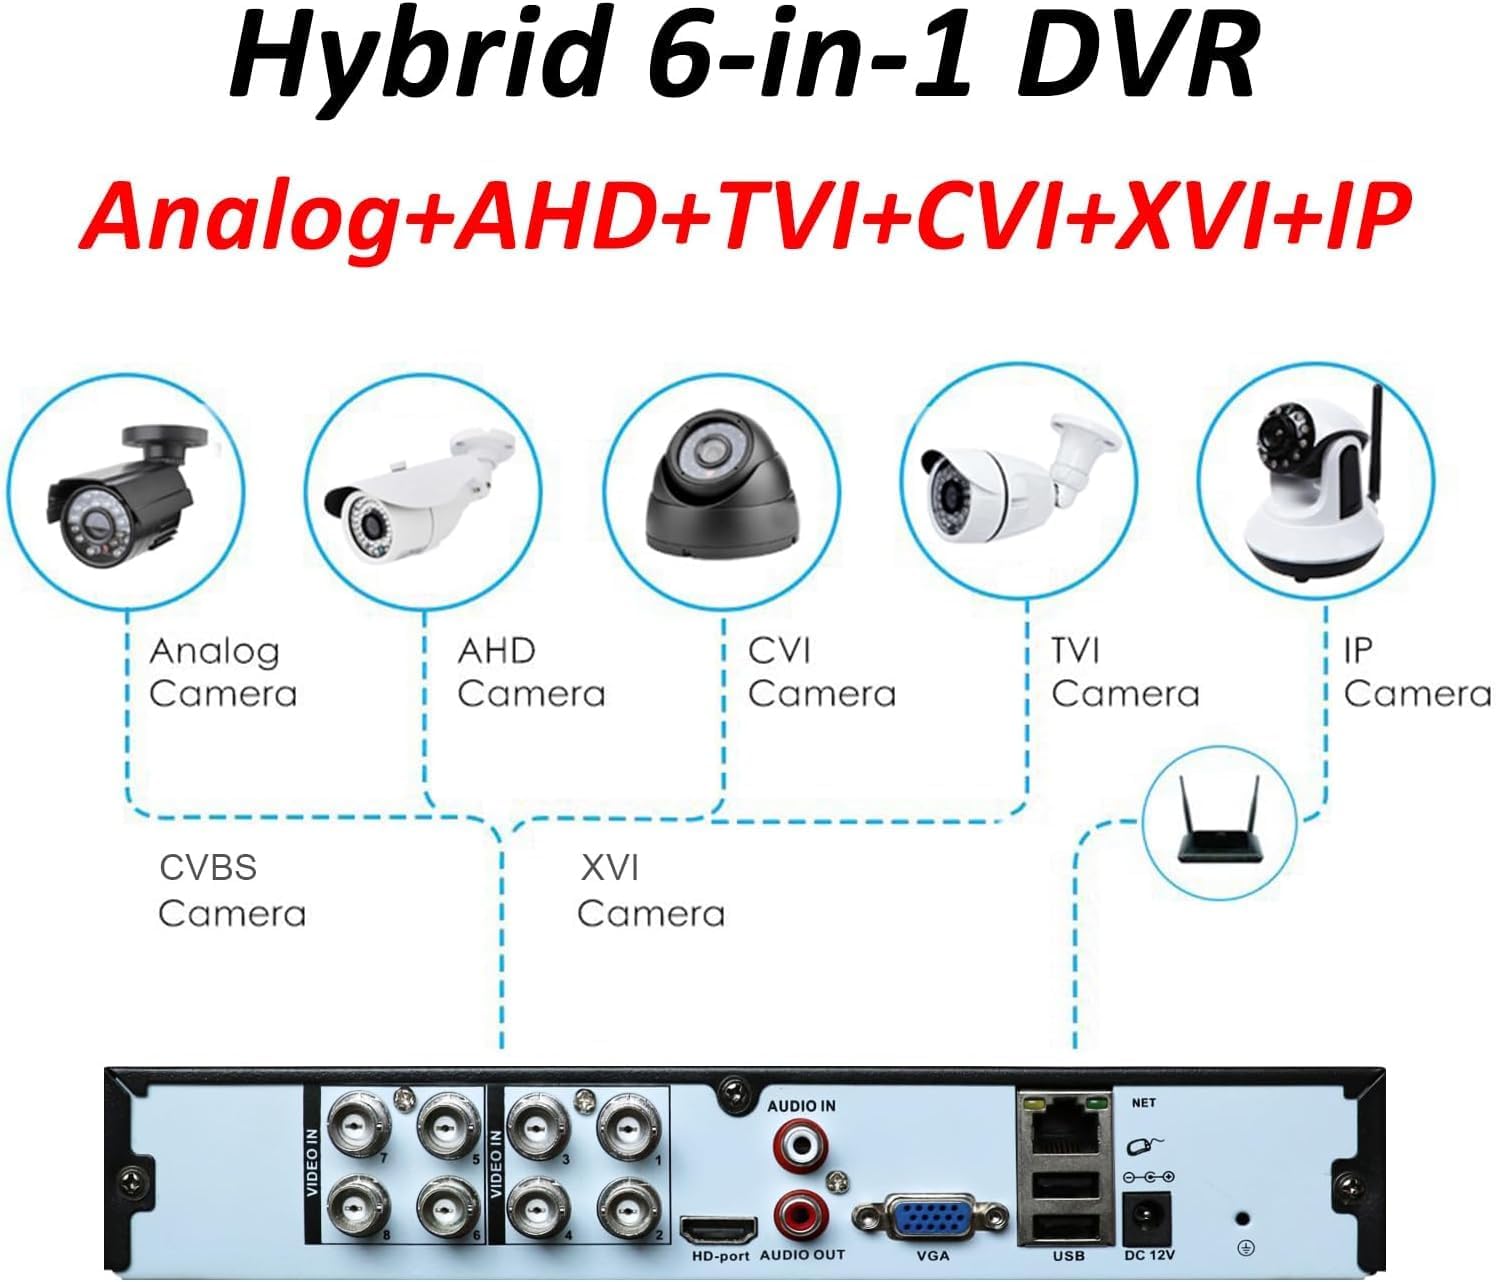
Image: Diagram illustrating the 5-in-1 hybrid compatibility of the DVR, showing connections for Analog, AHD, CVI, TVI, and IP cameras.
The Lapetus DVR is a 5-in-1 hybrid system, supporting the following camera types:
- Analog Cameras: Traditional CCTV cameras.
- AHD Cameras: Analog High Definition cameras.
- HD-TVI Cameras: High Definition Transport Video Interface cameras.
- CVI Cameras: Composite Video Interface cameras.
- Camere IP: Internet Protocol cameras (via NVR mode).
4. Configurare
4.1 Instalare hardware
- Instalarea unității de hard disk (HDD):
- Unscrew the top cover of the DVR.
- Conectați cablul de date SATA și cablul de alimentare de la DVR la HDD.
- Fixați HDD-ul pe carcasa DVR-ului folosind șuruburile furnizate.
- Înlocuiți capacul superior.
- Conectați camerele: Connect your surveillance cameras to the BNC "VIDEO IN" ports on the rear panel. Ensure cameras are powered separately.
- Conectați afișajul: Connect a monitor or TV to the DVR using either the HDMI or VGA port.
- Conectați mouse-ul: Plug the USB mouse into one of the USB ports on the rear panel.
- Conectare rețea (opțional): Pentru telecomandă viewing and network features, connect an Ethernet cable from your router to the "NET" (RJ-45) port.
- Pornire: Connect the 12V/2000mA power adapter to the "DC 12V" port and plug it into a power outlet. The DVR will power on automatically.
4.2 Configurare inițială
Upon first boot, the DVR may guide you through an initial setup wizard. Follow the on-screen prompts to set the language, date/time, network settings, and format the installed HDD. Formatting the HDD is crucial for recording.
4.3 Mobile App Setup (XMEye)

Image: Step-by-step guide for downloading and connecting to the DVR using the XMEye mobile application.
To access your DVR remotely via a smartphone, download and configure the XMEye app:
- Descărcați aplicația: Scan the QR code displayed on the DVR's interface or download directly:
- Pentru Android: http://xmeye.net/android/xmeye.apk
- Pentru iOS: https://itunes.apple.com/en/app/id884006786
- Înregistrare și autentificare: Open the XMEye app, register a new user account, and log in.
- Adăugați dispozitiv: Tap the "+" icon or select "Add Device". You can add the device manually by entering its serial number (found in the DVR's system information) or by scanning a QR code if available.
- Connect and Preview: Once the device is added, you should be able to connect and view live video feeds from your cameras.
5. Operare
5.1 Moduri de înregistrare
DVR-ul acceptă diverse moduri de înregistrare:
- Manual: Porniți și opriți înregistrarea manual.
- Programat: Setați ore specifice pentru înregistrarea continuă.
- Detectarea mișcării: Înregistrarea începe automat când se detectează mișcare în zona camerei. view.
- Alarma: Recording triggered by external alarm inputs.
You can configure recording intervals from 1 to 120 minutes per segment.
5.2 Redare
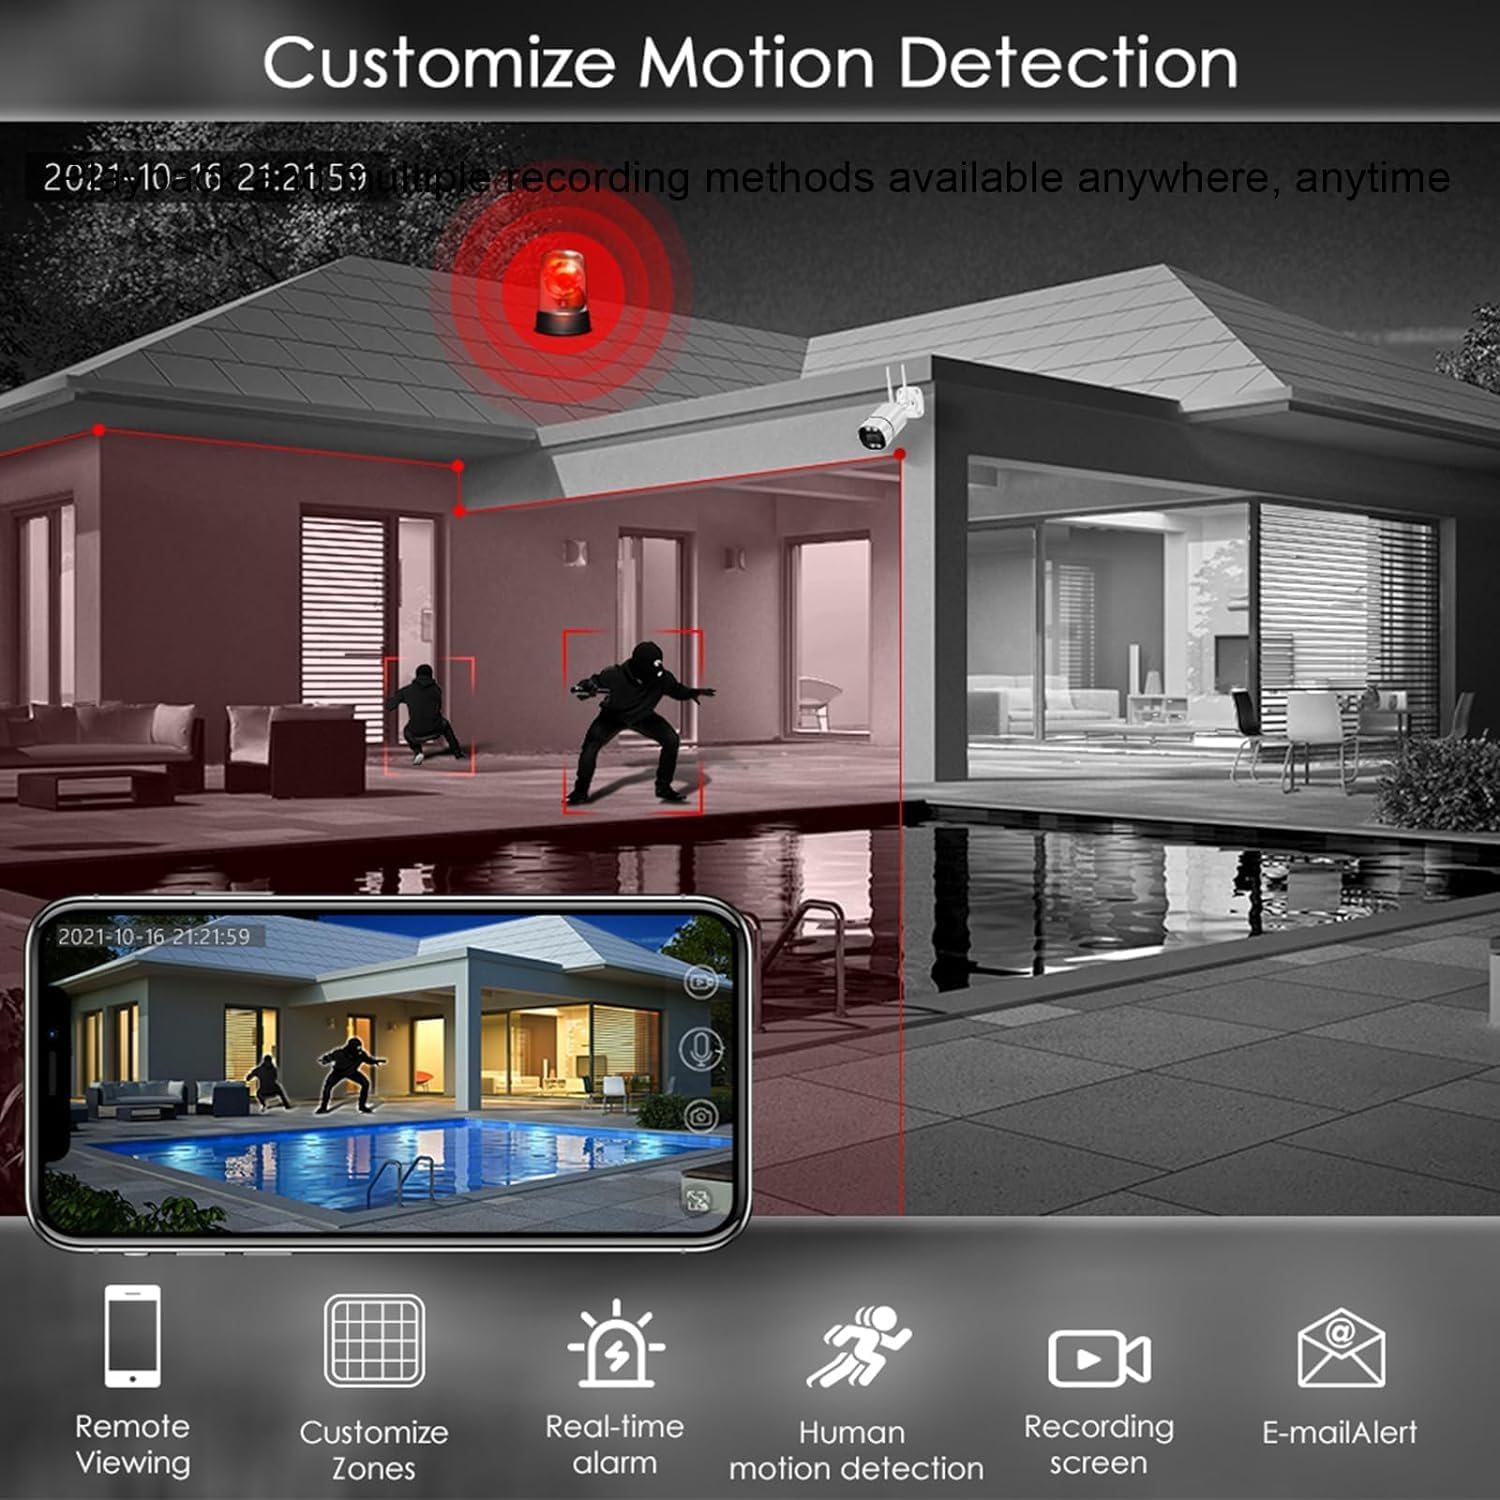
Image: Graphical representation of the DVR's playback interface, showing timeline navigation, fast forward, fast retreat, and single-frame play options.
Pentru a review inregistrat footage:
- Access the playback menu from the main interface.
- Select the desired date and time using the on-screen calendar and timeline.
- Use the control buttons (fast forward, fast retreat, pause, single-frame play) to navigate through the footage.
5.3 Detectarea mișcării

Image: Screenshot showing the motion detection customization interface, allowing users to define detection zones and set up alerts.
Configure motion detection to optimize recording and receive alerts:
- Navigate to the "Alarm" or "Motion Detection" settings in the DVR menu.
- Selectați canalul camerei pe care doriți să îl configurați.
- Definiți zone de detectare specifice în raza de acțiune a camerei view to minimize false alarms.
- Set up actions upon motion detection, such as recording, email notification, mobile push alerts, or buzzer activation.
5.4 Telecomandă Viewing
Once the mobile app (XMEye) is configured and the DVR is connected to the internet, you can view transmisiuni live și redare înregistrări footage from your smartphone or tablet anytime, anywhere, provided you have an internet connection.
Compresie video 5.5 (H.265+)

Image: Comparison illustrating the efficiency of H.265+ video compression, showing significantly reduced file sizes compared to H.264 for the same video content.
The DVR utilizes H.265+ video compression technology. This advanced format provides more efficient video storage, reducing file sizes compared to the older H.264 standard, while maintaining video quality. This allows for longer recording times on the same hard disk capacity.
6. Specificații
| Caracteristică | Caietul de sarcini |
|---|---|
| Sistem de operare | Embedded Linux |
| Resurse de sistem | Pentaplex function: live, recording, playback, backup & remote access |
| Encode & Decode Capacity | 8x 1080N@30fps |
| Intrări video | 8CH (Analog, AHD, HD-TVI, CVI, IP) |
| Ieșiri video | 1CH HDMI, 1CH VGA, 1CH CVBS |
| Intrări / ieșiri audio | 4 canale / 1 canale |
| Intrări/Ieșiri de alarmă | 4 canale / 1 canale |
| Interfață net | Ethernet RJ-45 |
| Control PTZ | Support (RS485) |
| Suport pentru hard disk | 1 SATA HDD, up to 6TB (HDD not included) |
| Porturi USB | Multiplu (pentru mouse, backup) |
| Alimentare electrică | DC 12V |
| Numărul de model al articolului | LT-6708NH |
| Greutatea articolului | 2.57 lire sterline |
| Dimensiuni pachet | 13.66 x 10.91 x 3.15 inci |
7. Depanare
Această secțiune abordează problemele frecvente pe care le puteți întâmpina cu DVR-ul dumneavoastră.
- Fără ieșire video pe monitor:
- Asigurați-vă că monitorul este pornit și setat la sursa de intrare corectă (HDMI/VGA).
- Check that the HDMI/VGA cable is securely connected to both the DVR and the monitor.
- Try connecting to a different display or using an alternative video output port (e.g., switch from HDMI to VGA).
- No Camera Image / Black and White Image:
- Verify that cameras are powered on and their cables are securely connected to the DVR's "VIDEO IN" ports.
- Ensure camera type (Analog, AHD, TVI, CVI, IP) is compatible with the DVR and correctly configured in the DVR's camera settings.
- Check cable integrity; damaged cables can cause signal loss or color issues.
- For black and white images, ensure sufficient lighting for color cameras or check camera settings for day/night mode.
- Fără înregistrare:
- Confirm that a Hard Disk Drive (HDD) is installed and properly connected inside the DVR.
- Access the DVR menu and ensure the HDD has been formatted.
- Check recording schedules and motion detection settings to ensure they are correctly configured and active.
- Verify that the HDD is not full. If it is, enable overwrite mode or replace the HDD.
- DVR Keeps Rebooting:
- Ensure the power adapter is the correct voltage și amperage (12V/2000mA) and is functioning properly.
- Disconnect the HDD temporarily to see if the issue persists; a faulty HDD can cause reboots.
- Ensure adequate ventilation around the DVR to prevent overheating.
- Mobile App Connection Issues:
- Verify the DVR is connected to the internet via the RJ-45 port and has a stable network connection.
- Ensure your smartphone has an active internet connection (Wi-Fi or mobile data).
- Double-check the device ID or serial number entered in the XMEye app.
- Ensure the DVR's network settings (e.g., DHCP, DNS) are correctly configured.
- Vederea de noapte nu funcționează:
- Confirm that your cameras are equipped with infrared (IR) night vision capabilities.
- Ensure there are no obstructions blocking the camera's IR LEDs.
- Check camera settings for IR control or day/night mode.
8. Întreținere
- curatenie: Regularly clean the DVR's exterior with a soft, dry cloth. Avoid using liquid cleaners directly on the device. Ensure ventilation openings are free from dust and debris.
- Ventilare: Place the DVR in a well-ventilated area, away from direct sunlight, heat sources, and excessive dust. Do not block any ventilation holes.
- Actualizări firmware: Verificați periodic producătorul website for firmware updates. Updating firmware can improve performance, add features, and fix bugs. Follow update instructions carefully.
- Backup de date: Faceți în mod regulat copii de rezervă ale înregistrărilor importantetage pe o unitate USB externă sau pe un spațiu de stocare în rețea pentru a preveni pierderea datelor.
- Ciclu de alimentare: If the DVR experiences minor glitches, try power cycling it (unplug, wait 30 seconds, then plug back in).
9. Garanție și asistență
For warranty information, please refer to the documentation provided at the time of purchase or contact your retailer. For technical support, please reach out to the manufacturer, Lapetus, through their official support channels.